Have you just got the message in Google AdSense to “Manage Tax Info” and no idea whatsoever to how to fill and submit the W-8BEN Form? You’re in the right place.
In this tutorial, I will guide you step-by-step on how to fill the “Manage Tax Info” and get approved your W-8BEN Form in AdSense.
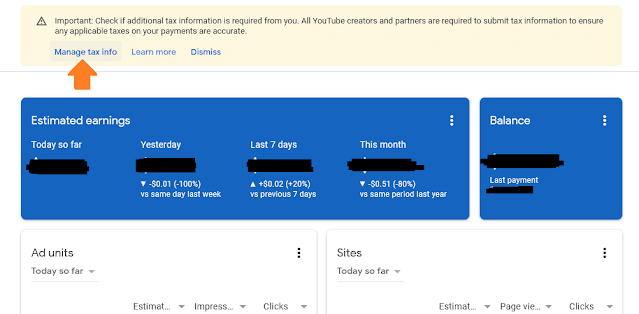
Google AdSense shows you the following message on your Dashboard:
Important: Check if additional tax information is required from you. All YouTube creators and partners are required to submit tax information to ensure any applicable taxes on your payments are accurate
It is mandatory for everyone (U.S Citizen or Non-US Citizen) to submit the tax document involving in any business, investment or receiving payments from United States. That’s why affiliate programs based in United States such as Amazon, Impact Radius, LinkShare, CJ Affiliate, Upwork, Fiverr, Google AdSense, etc, ask you to submit your Tax Info.
Form W-8BEN is required to submit by Non-US citizens i.e investors, freelancers, affiliate marketers etc, who receive certain types of income/payments from United States. Once you submit W-8BEN form AdSense will not deduct any tax from your earnings.
If you don’t submit this form AdSense might deduct or withhold 30% of your earnings. A withholding rate is the percentage of income held from your payments and sent to the IRS as tax. The IRS is the revenue service of the United States federal government responsible for the collection of taxes.
The “Manage Tax Info” involves 6 steps:
- Tax Identity
- Address
- Tax Treaty
- Document Preview
- Certification
- Activities and Services Performed In US and Affidavit
How to Fill Manage Tax Info in Google AdSense
Follow the steps to Fill Manage Tax Info In Google AdSense:
- Open your Google AdSense account.
- If you are getting the notification on your Dashboard, click on the “Manage tax info” there. Otherwise open “Manage tax info” from Payments => Settings => Manage tax info.
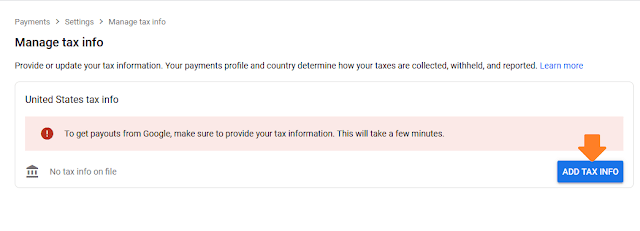
- Click on the ADD TAX INFO.
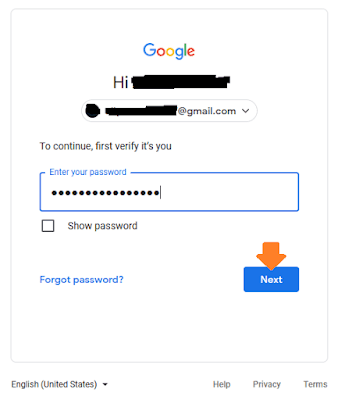
- It will ask you to enter your Gmail password again. Enter your password and click on the Next button.
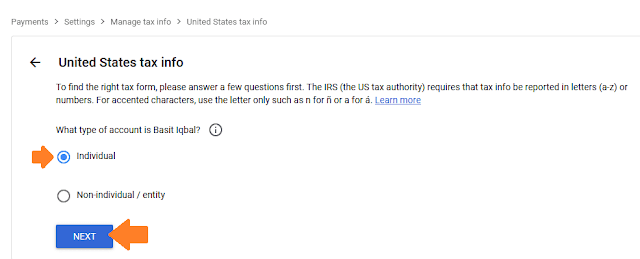
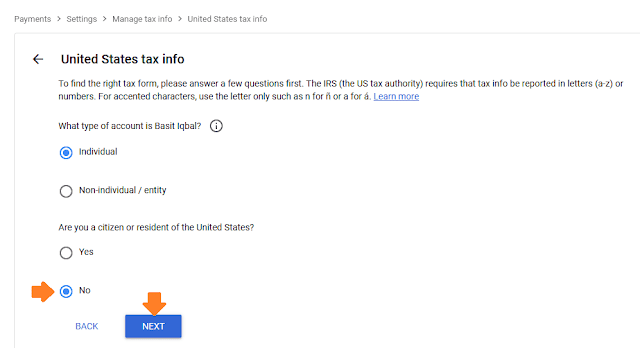
- Choose your Account Type whether you are an individual or a company. Since most of the people are individuals, so I have chosen Individual.
- Click on the NEXT button.
- In “Are you a citizen or resident of the United States” choose “No“.
- Click on the NEXT button.
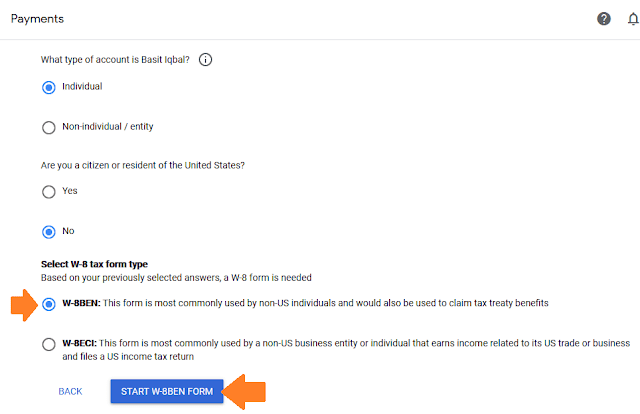
- In W-8 tax form type choose W-8BEN. Only choose “W-8ECI” if you are a company.
- Click on the START W-8BEN FORM.
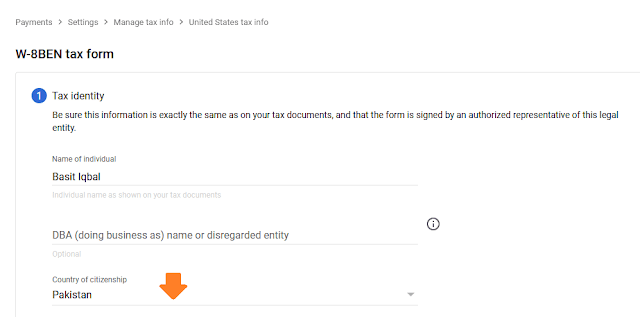
- In the “Country of citizenship” choose your country. Here I have chosen Pakistan.
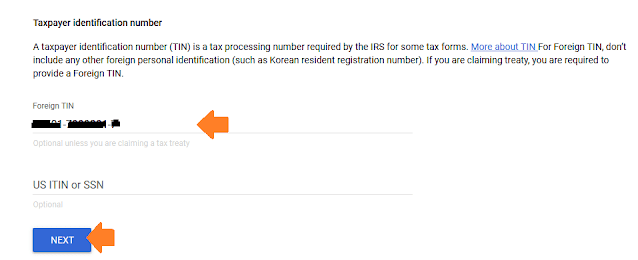
TIN is the SSN (Social Security Number or EIN(Employer Identification Number). A Social Security number (SSN) is a 9-digit number assigned to U.S. citizens(both permanent & temporary residents) to track individuals
For Non-US residents “Foreign TIN” is their National Identity Card number, a number provided to you by government, which makes you the citizen of your country. In Pakistan it is “CNIC”. In Bangladesh it is NID Card. In India it is Aadhaar (Identity Card).
- Enter your National Identity Card number in the same format written in your card.
- Click on the NEXT button.
The first step “Tax Identity” is completed. Now complete the second step “Address”.
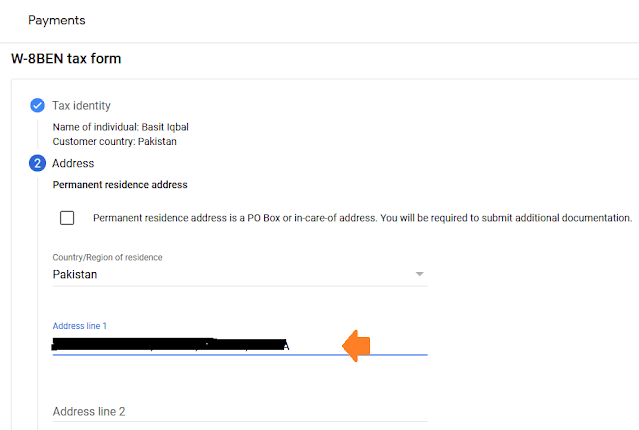
- Don’t tick the “Permanent residence address is a PO Box or in-care of address…..“.
- In the Address line 1 enter your permanent address.
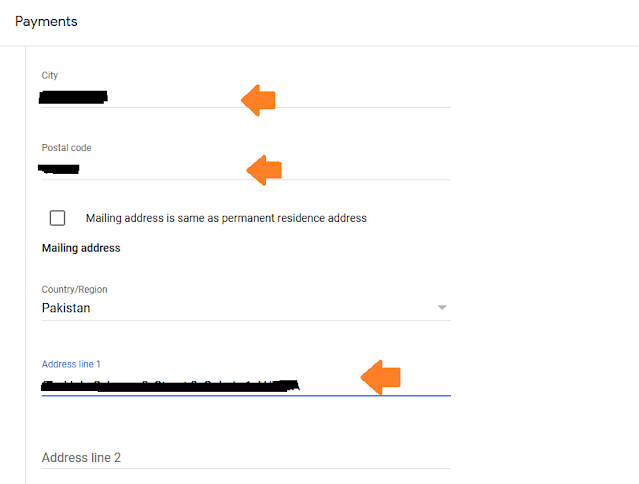
- In the City enter your city name.
- In the Postal Code enter the postal code of your city.
- In the Mailing address copy the same information if your Mailing address is same as Permanent address.
- Click on the NEXT button.
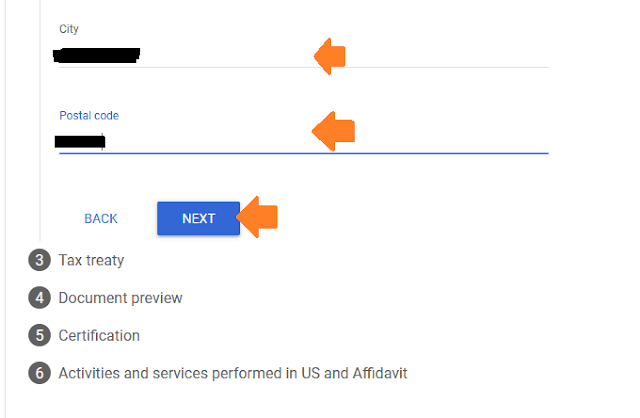
The step 2 “Address” is completed. Now complete the “Tax treaty”.
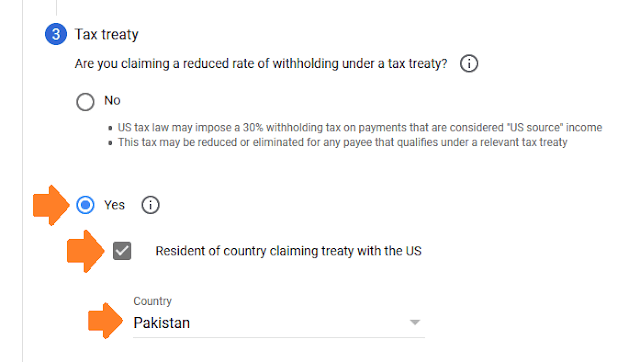
- In “Are you claiming a reduced rate of withholding under a tax treaty?” Choose “Yes” and Tick “Resident of country claiming treaty with the US” if your country is in the list of “United States Income Tax Treaties”. Here I have chosen “Yes” because Pakistan is in the list.
- The countries listed in the “United States Income Tax Treaties” are taxed at a reduced rate or are exempt from U.S. income taxes on certain income, profit or gain from sources within the United States.
- Tick the services here. I have only ticked “Service(AdSense)”.
- In “Article and paragraph” choose the available option, here it was “Article 3 and paragraph 2”. You can read “Article 3 and paragraph 2” on Pakistan – Tax Treaty Document.
- In the Withholding rate there are two options i.e. 30% (reduced rate) and 0% (reduced rate). Choose 0% (reduced rate). It means AdSense will not deduct any tax from your earnings.
- Also Tick the “Reason Your_Name meets the term of the treaty article:“.
- Click on the NEXT button.
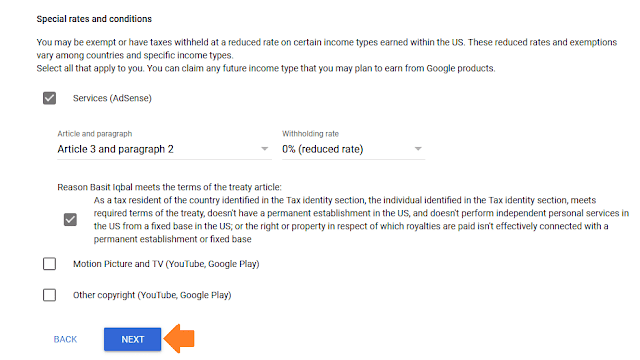
The step 3 “Tax treaty” is completed. Now complete the step 4 “Document Preview”.
- Tick the “I confirm that I have reviewed the generated tax documents to the best of my knowledge..”.
- Click on the NEXT button.
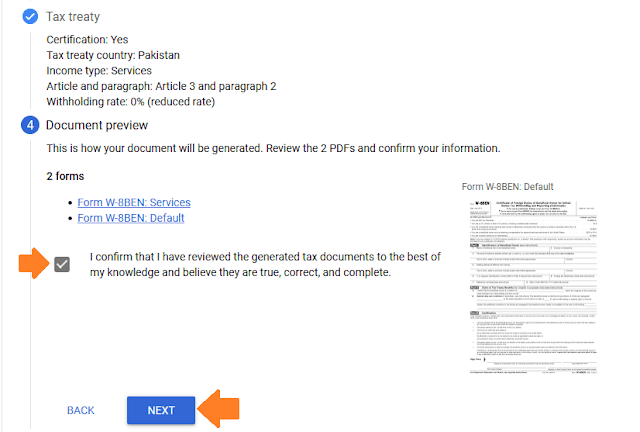
The step 4 “Document Preview” is completed. Now complete the step 5 “Certification”.
- In the “Full Legal Name” enter your name.
- In the “Are you the person listed in the signature section” Choose “Yes” if you are filling this form.
- Click on the NEXT button.
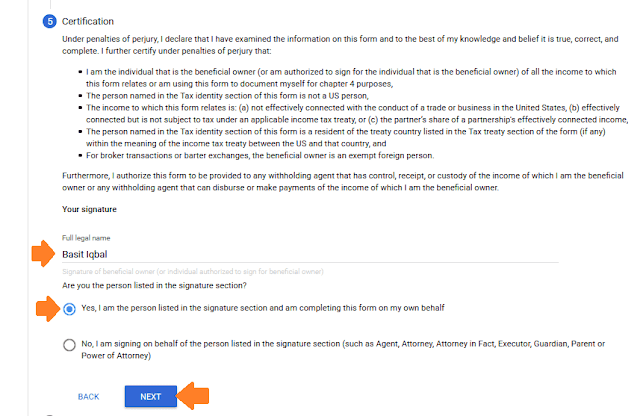
The step 5 “Certification” is completed. Now complete the step 6 “Activities and services performed in US and Affidavit”.
- In “Has the individual or entity identified in the Tax identity section performed any activities and services for Google within US?“ Choose No and Tick the “I certify the services provided to Google or its affiliates will be performed solely outside the US…….”.
- In “Are you providing tax info for a new or existing payments profile that hasn’t received payments, or an existing payments profile that has previously received payments” Choose Option 1 if you haven’t received any payments from AdSense yet. Choose Option 2 if you have previously received AdSense payments.
- Tick “Under penalties of perjury, I declared that the information and certification contained…..”.
- Click on the “SUBMIT” button.
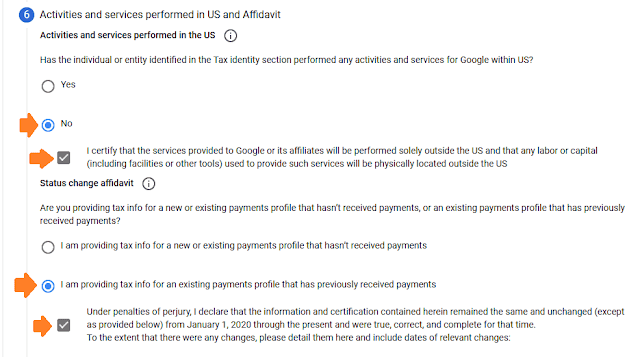

The sixth and the final step “Activities and services performed in US and Affidavit” is completed.
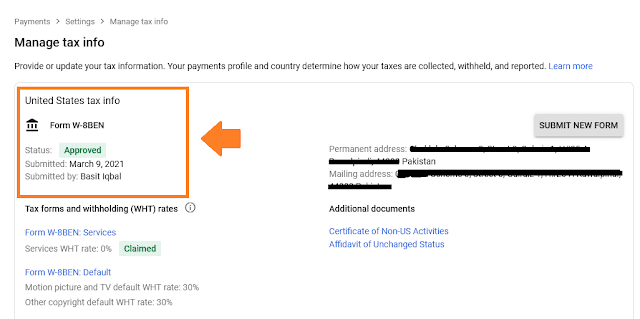
- You can see here that the W-8BEN Form has been approved successfully.
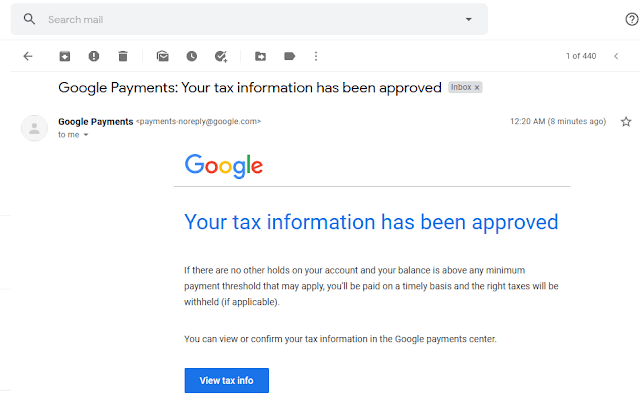
- You can check you Gmail as well. It also sends approval email, “Your tax information has been approved“.
So it was all about filling “Manage tax info” in AdSense. Hope my step-by-step guidance will have helped you. If you like this post then don’t forget to share with other people. Share your feedback in the comments section below.

Also Read
- How To Connect AdSense With WordPress & Display Google Ads | Site Kit WordPress Plugin
- How To Increase Google AdSense Revenue – 8 Tips | Understand RPM, CTR & CPC
- Affiliate Marketing Vs Google AdSense: Which One Is Best & Profitable?
- How To SignUp & Use Free Google Keyword Planner | Google Keyword Research
- How to Create Ads.txt for WordPress & Add AdSense Code
- How to Add Redirect for Ads.txt in WordPress




Leave a Reply