Is your Ads.txt Status is Not found in the Google AdSense account? or Are you getting the warning, “Earnings at Risk – You need to fix some ads.txt file issues to avoid severe impact to your revenue“? You’re in the right place.
In this tutorial, I will guide you step-by-step on how to fix Ads.txt Not Found status, and remove “Earnings at Risk” warning/alert by adding a redirect for Ads.txt in your WordPress site using the free plugin Advanced 301 and 302 Redirect.
To know more about Ads.txt, why it is needed, and how to create Ads.txt for WordPress and add Google AdSense code, read this tutorial:
Following topics will be covered in this post:
- What is the Cause of “Earnings at Risk” Warning?
- How to Install Advanced 301 and 302 Redirect Plugin
- How to Add Redirect for Ads.txt in WordPress
- Check the Status of Ads.txt in Google AdSense
01. What is the Cause of “Earnings at Risk” Warning?
You create Ads.txt and put the right Google AdSense code in it, but still get “Earnings at Risk” warning in the AdSense account. Do you know why? There are two reasons (1) You haven’t set the right redirection for your Ads.txt (2) You have not excluded Ads.txt from caching.
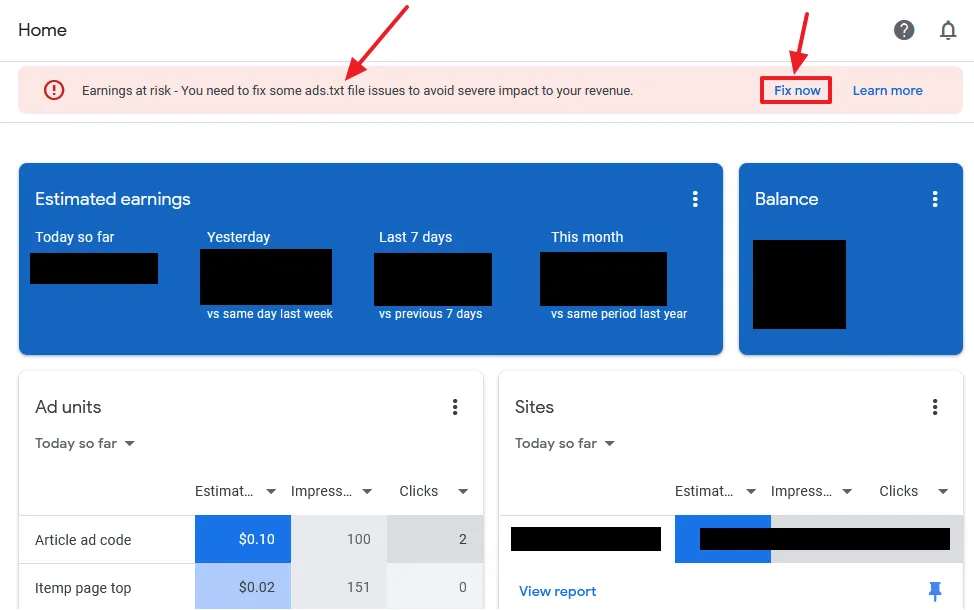
- This is how the Earnings at Risk warning appears in Google AdSense.
- Click on the Fix now button to check its status.
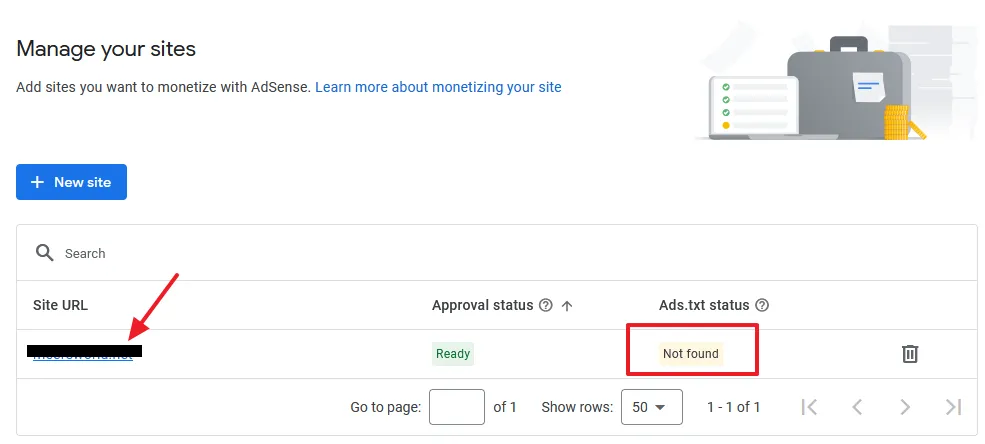
- You can see under the Ads.txt status that it is Not found, though you have created/uploaded.
01. What is a Right Redirection for Ads.txt?
The Ads.txt can be accessed/browsed like this: site_name/ads.txt, for example, abc.com/ads.txt.
If your site redirects to https://site_name (without www) your ads.txt should be redirected to https://site_name/ads.txt (without www).
If you site redirects to https://www.site_name (with www) your ads.txt should be redirected to https://www.site_name/ads.txt (with www).
For example, your site redirects to https://www.site_name (with www) and you browse your Ads.txt without www like this: https://site_name/ads.txt. Now if the URL redirects to https://www.site_name/ads.txt, it is fine, you have set the right redirection. If it doesn’t redirect and continues to open with https://site_name/ads.txt, you haven’t set the right redirection.
02. You haven’t Excluded Ads.txt from Caching
Cache plugins and CDN are used to optimize the performance of WordPress sites. With posts and pages of your WordPress site they may cache your ads.txt file, that can cause issues for AdSense crawlers to read or authenticate your ads.txt file.
Both cache plugins and CDNs offer you the option to exclude specific URLs, pages, files, classes, etc, from caching.
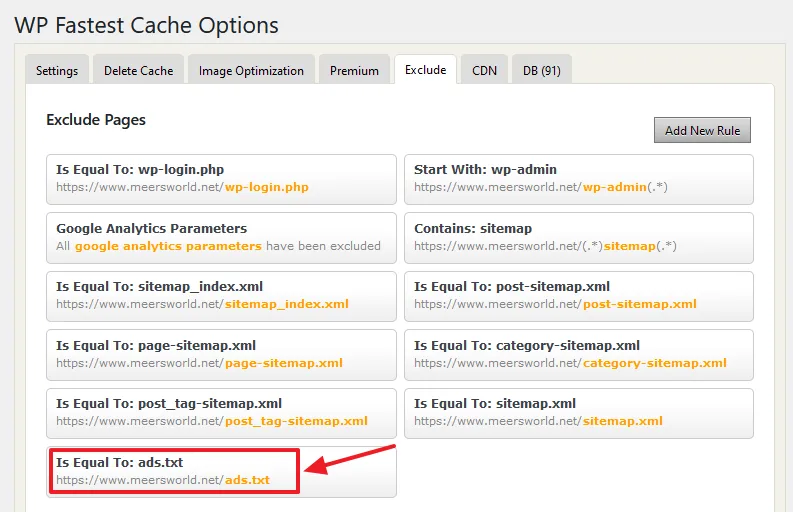
- Here you can see that I have excluded the ads.txt file from being cached on WP Fastest Cache plugin.
02. How to Install Advanced 301 and 302 Redirect Plugin
In this section, I will guide you on how to install Advanced 301 and 302 Redirect plugin in your WordPress site so that you will be able to add redirect for your ads.txt.
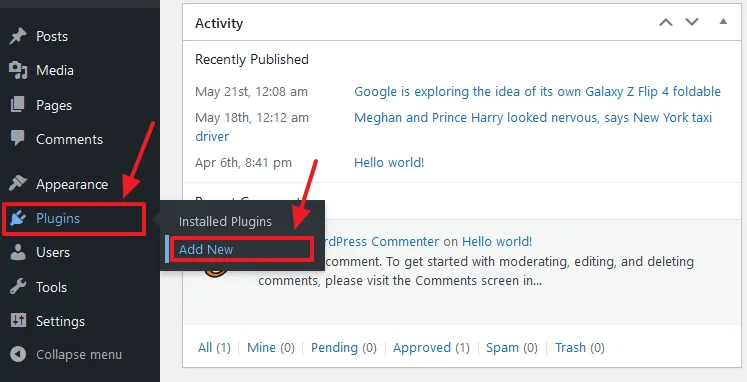
- Go to Plugins from the sidebar.
- Click on the Add New.
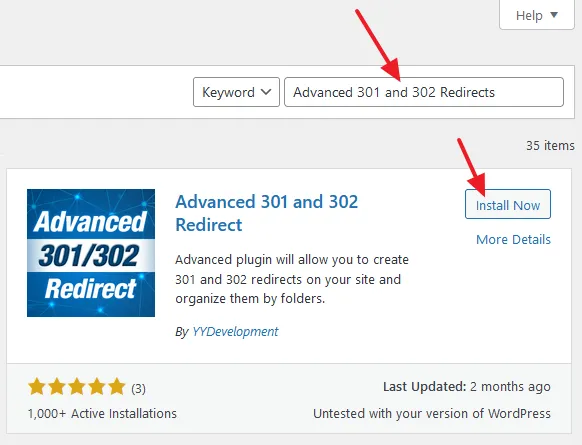
- Enter Advanced 301 and 302 Redirects in the plugins search bar.
- The plugin will be listed in the plugin search results. You can also identify it by logo. Click on the Install Now button.
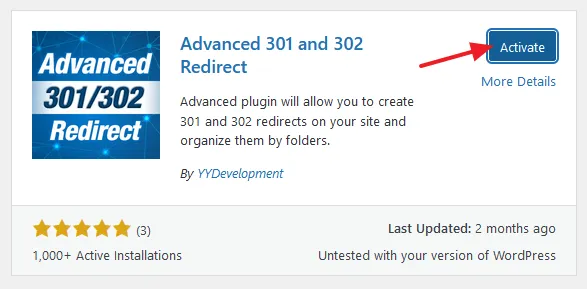
- Click on the Activate button.
04. How to Add Redirect for Ads.txt in WordPress
In this section, I will guide you on how to add redirect for Ads.txt in WordPress using the Advanced 301/302 Redirect plugin.
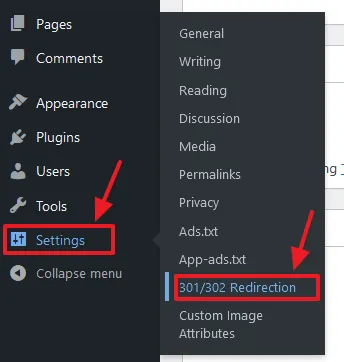
- Go to Settings from the sidebar.
- Click on the 301/302 Redirection.
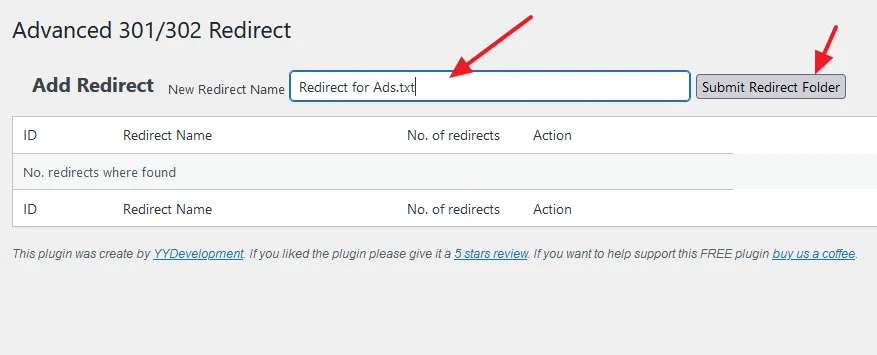
- Enter a New Redirect Name, something like “Redirect for Ads.txt”.
- Click on the Submit Redirect Folder.
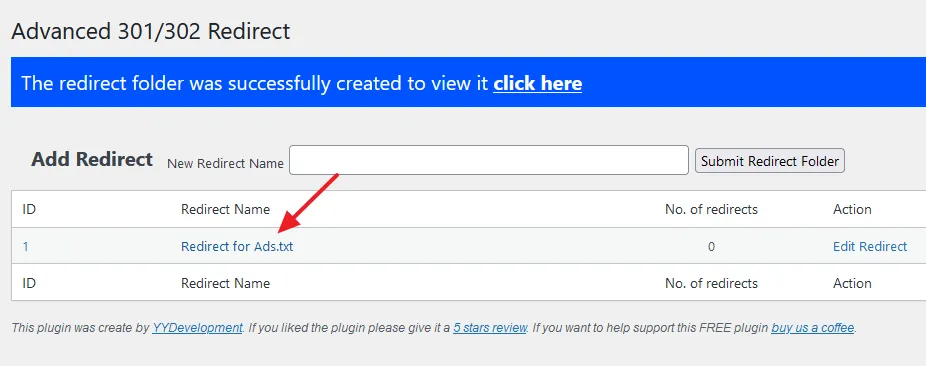
- The redirect folder is successfully created. Click on the Redirect for Ads.txt link or Edit Redirect link to add redirects for Ads.txt.
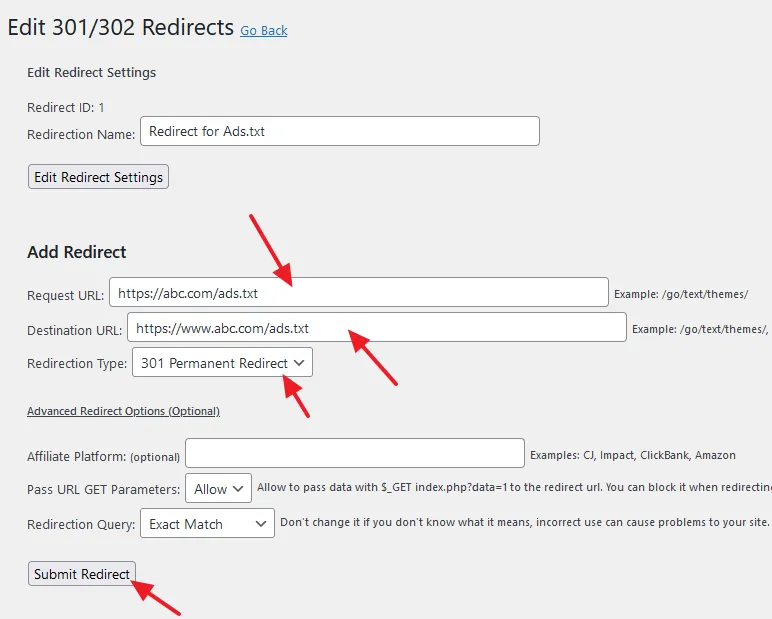
For Domain/Site that Redirects to WWW
If your site redirects to https://www, then add this redirect, otherwise go to next section. Whenever Ads.txt is crawled/accessed by https://site_name/ads.txt, it will be redirected to https://www.site_name/ads.txt.
- Request URL: https://your_sitename/ads.txt, for example, https://abc.com/ads.txt
- Destination URL: https://www.your_sitename/ads.txt, for example, https://www.abc.com/ads.txt
- Redirection Type: 301 Permanent Redirect.
- Click on the Submit Redirect button.
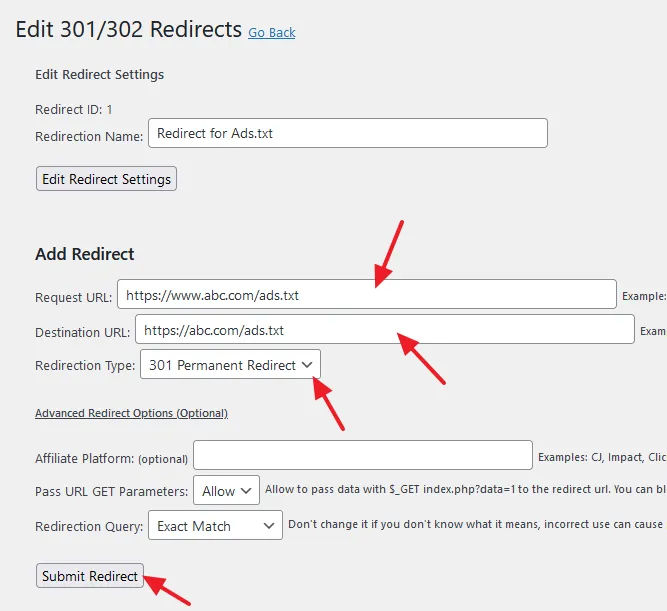
For Domain/Site that Doesn’t Redirect to WWW
If your site doesn’t redirect to https://www (non-www), then add this redirect. Whenever Ads.txt is crawled/accessed by https://www.site_name/ads.txt, it will be redirected to https://site_name/ads.txt.
- Request URL: https://www.your_sitename/ads.txt, for example, https://www.abc.com/ads.txt
- Destination URL: https://your_sitename/ads.txt, for example, https://abc.com/ads.txt
- Redirection Type: 301 Permanent Redirect.
- Click on the Submit Redirect button.
04. Check the Status of Ads.txt on Google AdSense
After adding the redirect for Ads.txt, go to your Google AdSense account and check the status, whether the warning, “Earnings at Risk – You need to fix some ads.txt file issues to avoid severe impact to your revenue” is disappeared or not, and Ads.txt status is Authorized or not.
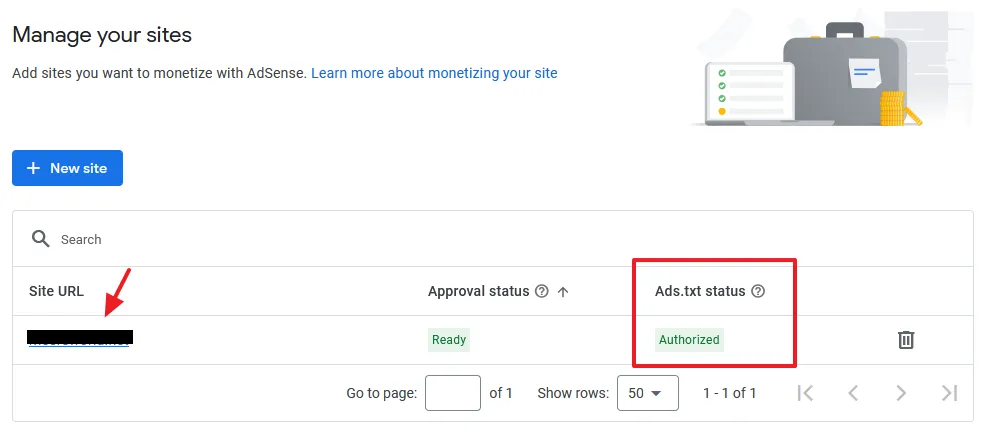
- Click on the Sites tab from the sidebar.
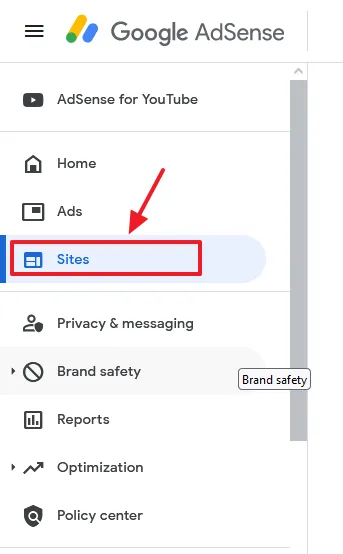
- Under the Ads.txt status, you can see the Authorized, that tells you that Ads.txt on your site is error free and has been crawled/found by Google AdSense.
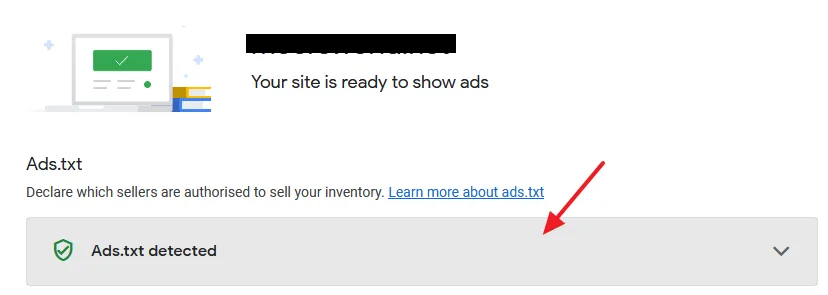
- Click on your domain link, under the Site URL.
- You can see here that it is showing Ads.txt detected. To view/copy the Ads.txt code click on the Ads.txt detected.
Note: It may take a few hours or can take up to 2 to 3 days for your Ads.txt to be crawled again. Once the changes are reflected in AdSense your Ads.txt will be Authorized and “Earnings at Risk” alert will be removed from Google AdSense account. So be patient and keep visiting your Google AdSense account.
If you like this post then don’t forget to share with other people. Share your feedback in the comments section below.

Also Read
- How to Remove Lazy Loading on Featured Image in WordPress
- How to Claim WordPress Website on Pinterest | 3 Methods
- How to Download & Restore Website Backup in cPanel
- How to Migrate Hosting & Domain to Namecheap
- How to Link Google Analytics 4 to AdSense & Show Data
- How to Fix AdSense Ads Break Page Layout on Block Theme


Leave a Reply