Do you want to install and setup XAMPP on Windows to run your PHP projects/websites locally? You’re in the right place. In this tutorial, first I will guide you step-by-step on How to install & set up XAMPP on Windows, How to run a PHP project/file on XAMPP, and then How to open phpMyAdmin on XAMPP.
XAMPP is a free and open-source cross-platform localhost web server developed by Apache Friends. It creates localhost environment for scripts written in the PHP and Perl programming languages. XAMPP consists mainly of the Apache HTTP Server, MariaDB database, and interpreters for PHP and Perl.
Following topics will be covered in this post:
- How to Install & Set Up XAMPP on Windows
- How to Run XAMPP and Create PHP Project on XAMPP
- How to Open phpMyAdmin on XAMPP
RELATED
- How to Start a WordPress Blog and Make Passive Income
- How to Migrate Domain & Hosting to Namecheap
- How to Install WordPress on XAMPP | Beginner’s Guide
- How to Install Joomla on XAMPP | Beginner’s Guide
- How to Install Drupal on XAMPP in Windows
01. How to Install & Set Up XAMPP on Windows
In this section, I will guide you on how to download, install, and set up XAMPP on Windows.
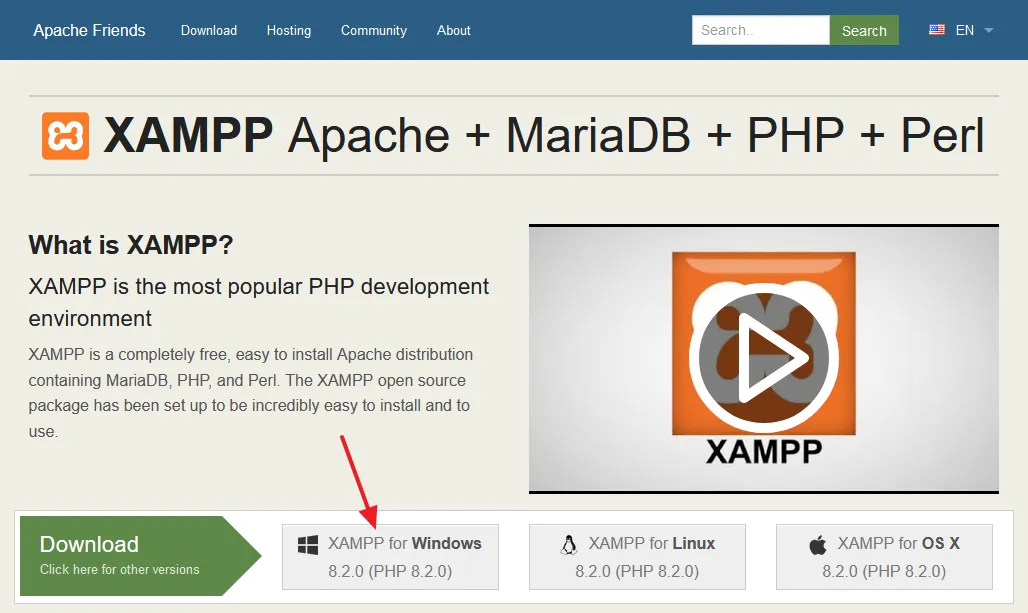
- Go to XAMPP Official Website.
- Click on the XAMPP for Windows.
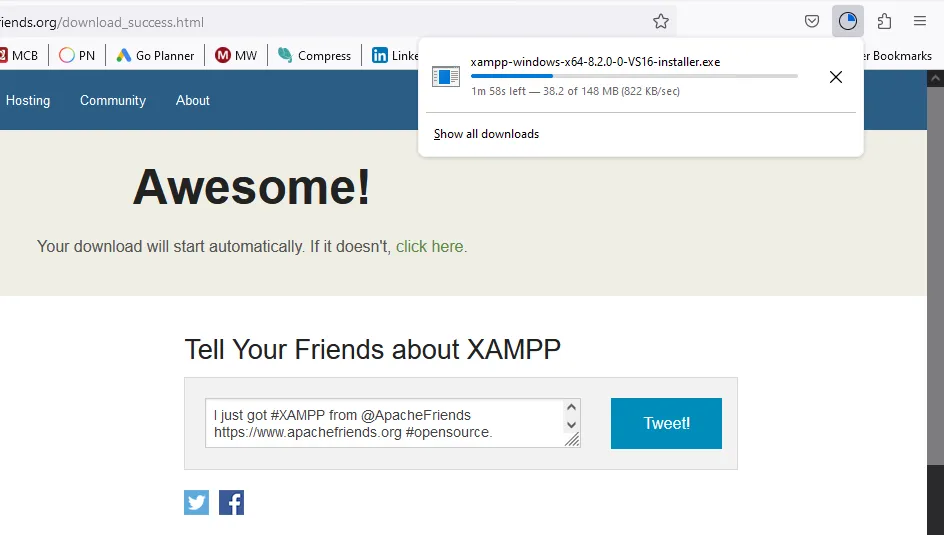
- The XAMPP setup will be automatically started to download to your computer.
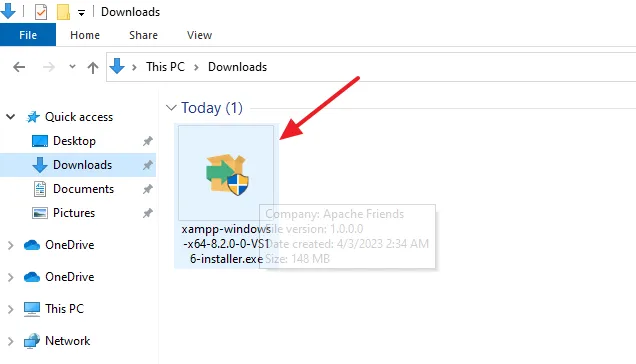
- Go to Download folder on your computer and run the XAMPP setup.
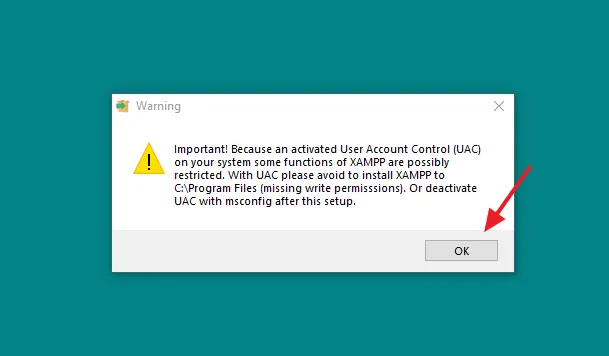
- It may show you a warning suggesting not to install the XAMPP on C:\Program Files.
- Click on the OK button.
- Click on the Next button.
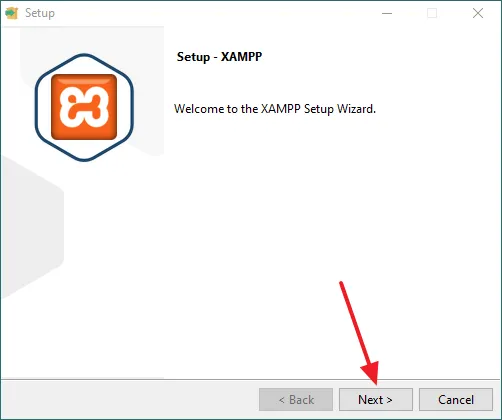
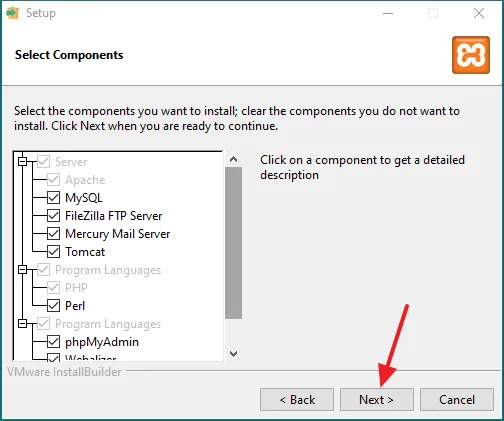
- Select the components that you want to install. If you’re not a tech-savvy leave them as it is.
- Click on the Next button.
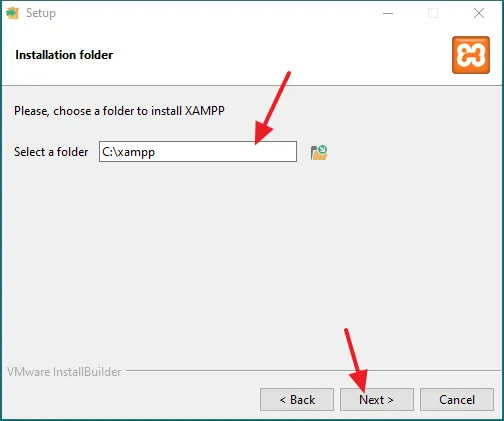
- Select a Drive and Folder where XAMPP will be installed. XAMPP suggests you to install the XAMPP on C:\xampp. You can install XAMPP on any drive of your computer.
- Click on the Next button.
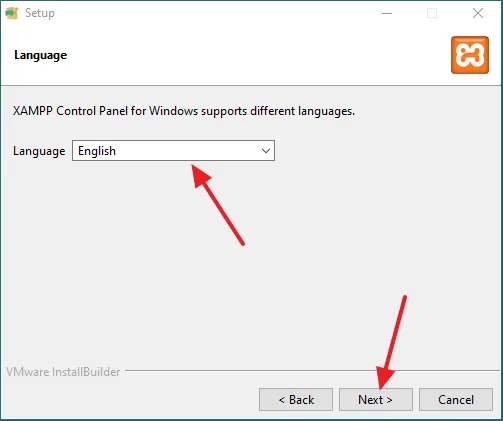
- Choose the Language.
- Click on the Next button.
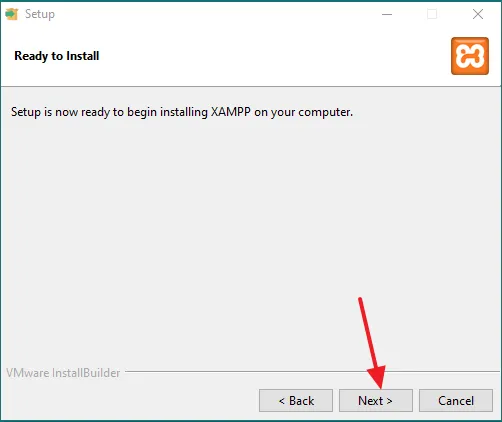
- Your XAMPP setup is ready to install.
- Click on the Next button.
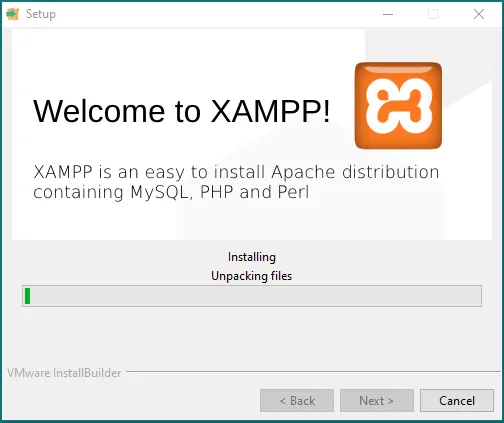
- The XAMPP is being installed. It will take few minutes to install, so be patient.
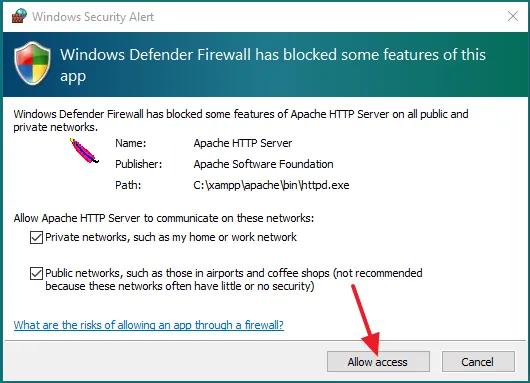
- If your Windows Defender Firewall is enabled on your computer, it may show an alert, “Windows Defender Firewall has blocked some features of Apache HTTP Server on all public and private networks“.
- Click on the Allow access button.
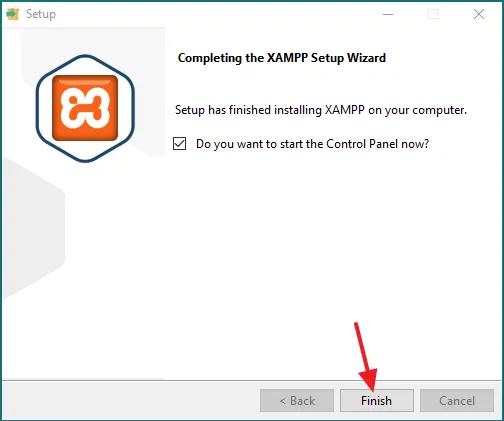
- Tick the checkbox, “Do you want to start the Control Panel now?“.
- Click on the Finish button.
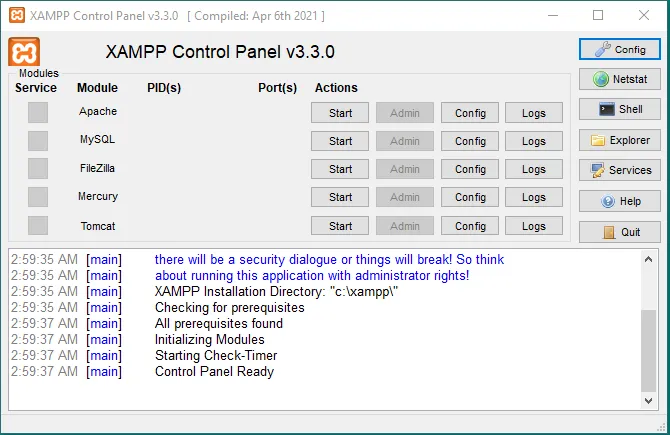
- This is how the XAMPP Control Panel looks like.
Follow the next section to learn about How to run XAMPP on Windows and How to create and run a PHP project on XAMPP.
02. How to Run XAMPP & Create a PHP Project on XAMPP
In the above section you have learnt about How to install & set up XAMPP on Windows. Now, in this section, I will guide you on how to Run XAMPP and how to create and run a PHP project on XAMPP to test its working.
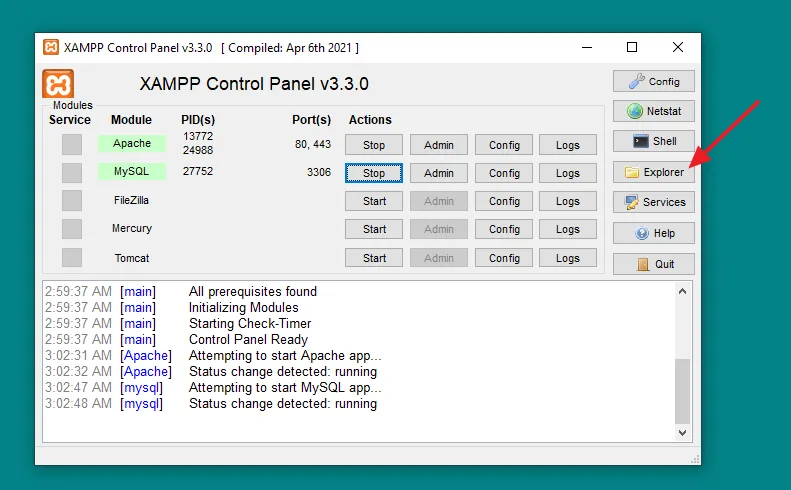
- On XAMPP Control Panel click on the Start buttons of Apache and MySQL one by one. If there are issues or errors you may see them on the lower section of XAMPP Control Panel in red color. If it shows Port No Error, read these tutorials: How To Change The XAMPP Server Port | XAMPP: Port 80 in Use by “Unable to open process” with PID 4!.
- Below you can see that Apache and MySQL are started successfully.
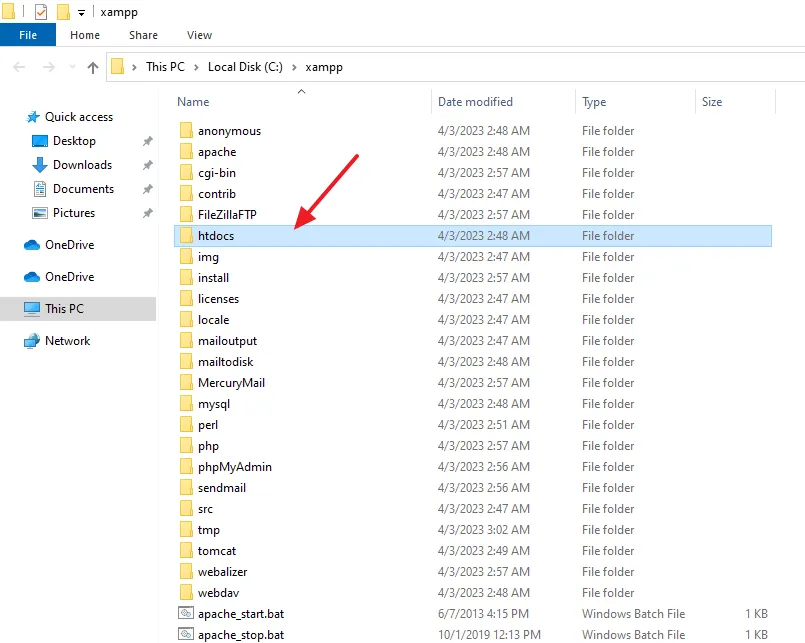
- Click on the Explorer button to create a PHP project on XAMPP. It opens the XAMPP installation folder.
- Open the htdocs folder. The htdocs is the root directory of XAMPP server where you create/place and run projects.
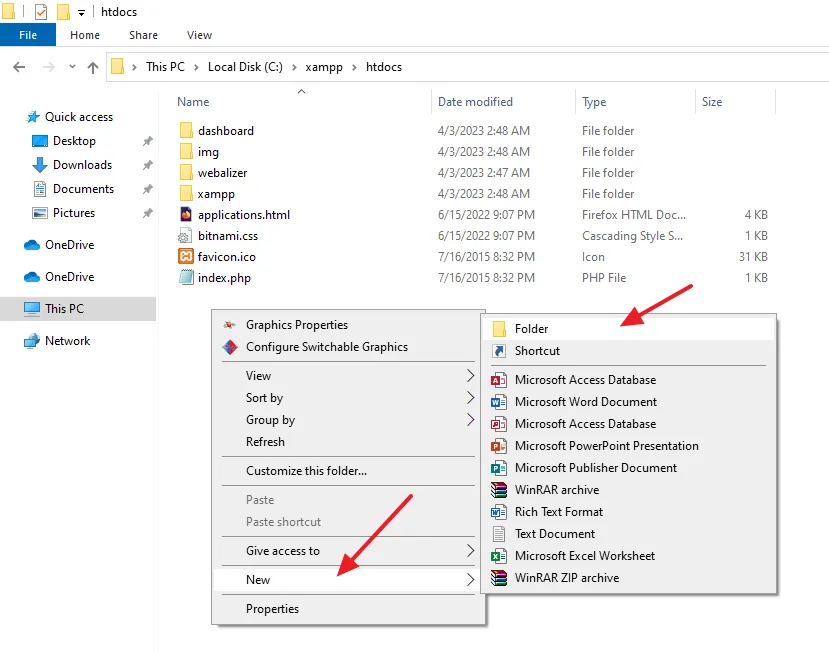
- Right-click on the empty space. Go to New and click on the Folder.
- Rename your new folder to MyProjects.
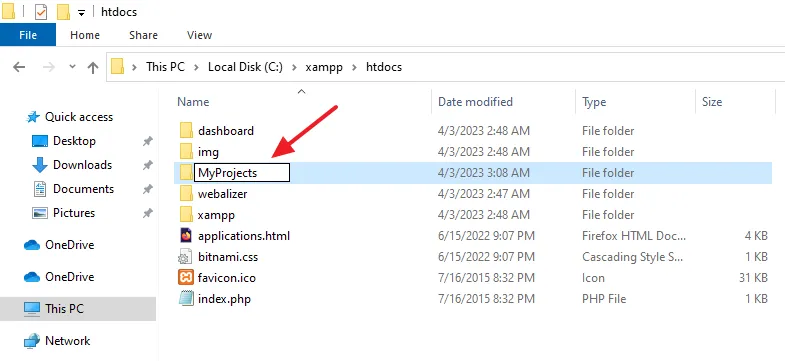
- Rename your new folder to test.
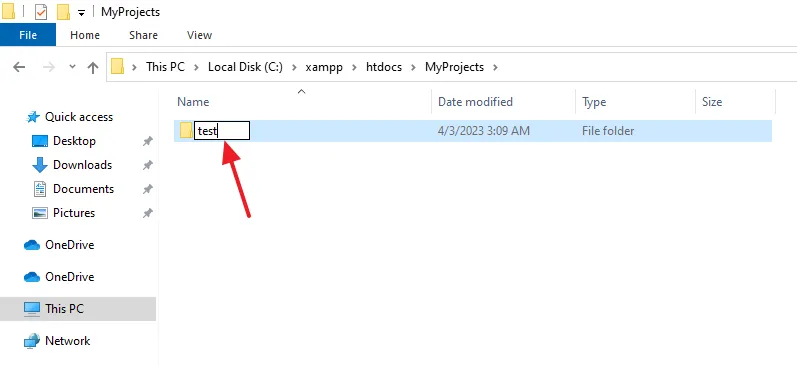
- Right-click on the empty space. Go to New and click on the Text Document.
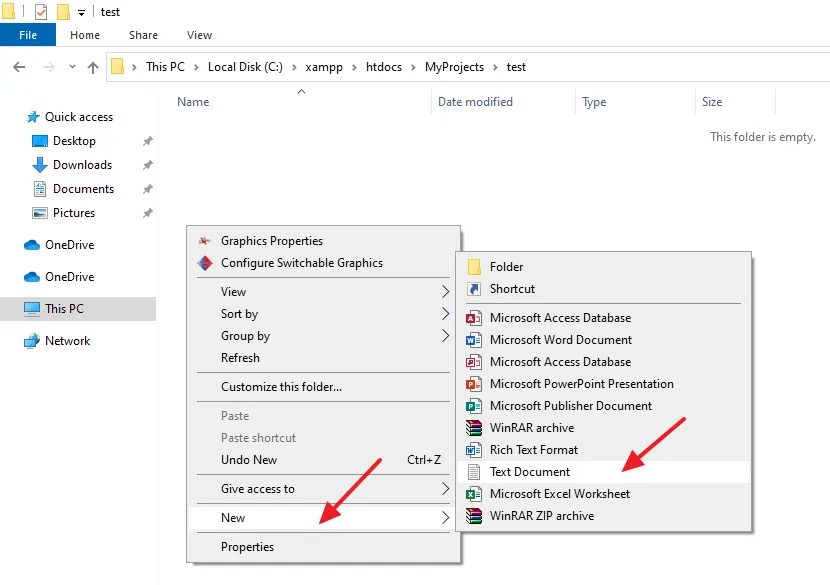
- A text file with the name New Text Document.txt will be created.
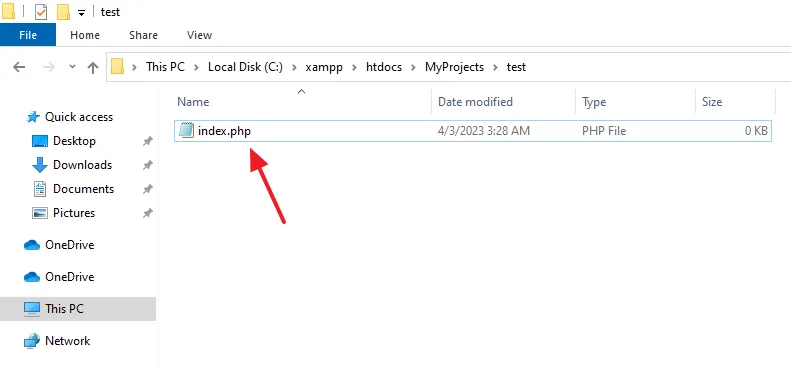
- Rename the file to index.php.
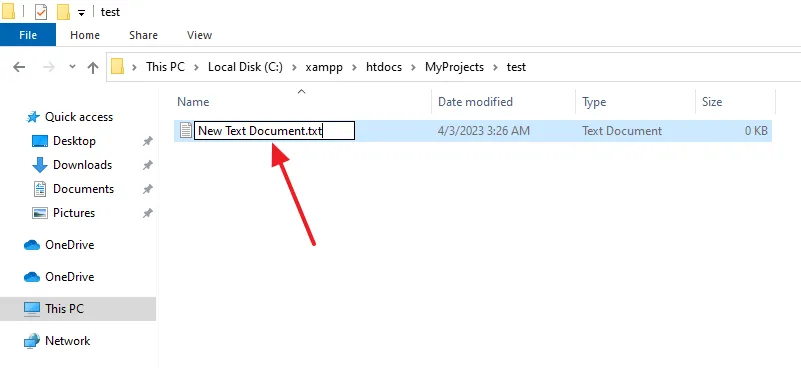
- You can see that the text file is renamed to index and its type is changed to .php.
- Now open this file on Notepad or your PHP Editor.
- Copy and Paste this HTML/PHP code to index.php file.
- After you Paste the code, Save the index.php file.
<html>
<head>
<title>PHP Test</title>
</head>
<body>
<?php echo "<h2>Thanks Meer's World for helping me to set up XAMPP on Windows </h2>"; ?>
</body>
</html>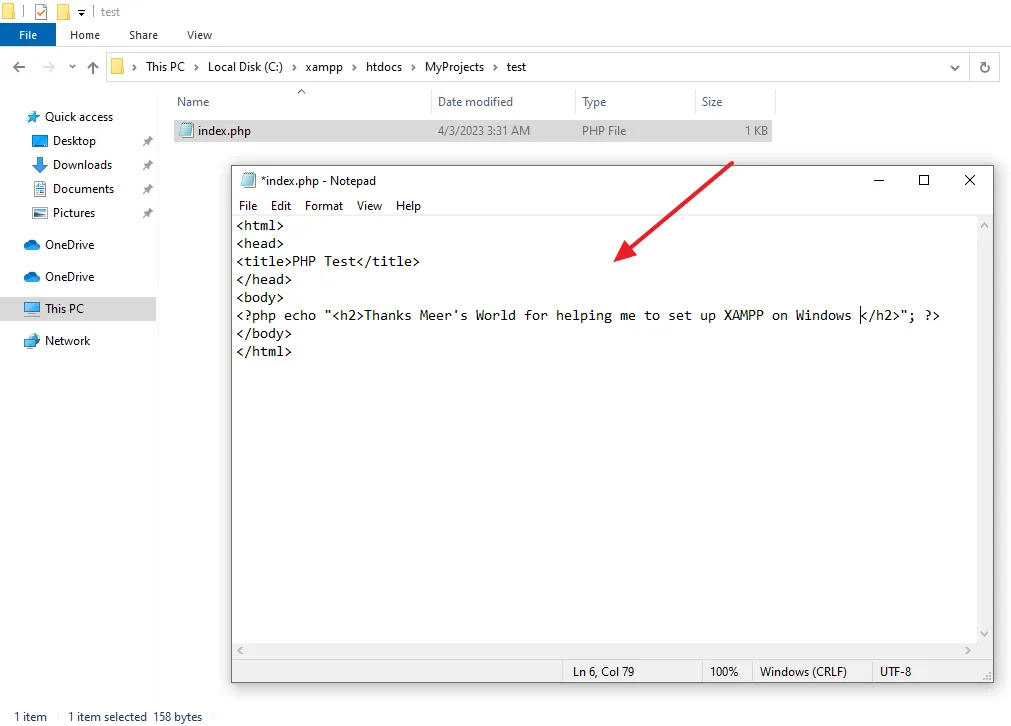
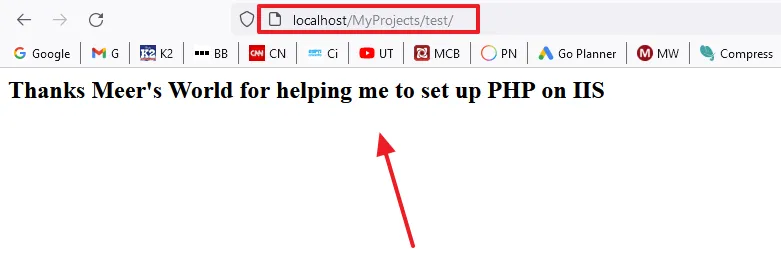
- Go to your browser’s URL bar and type http://localhost/MyProjects/test/.
- You can see that the test project has been run successfully. It means that there is no issue on XAMPP and it is working perfectly.
03. How to Open phpMyAdmin on XAMPP
In this section, I will guide you on how to open phpMyAdmin on XAMPP.
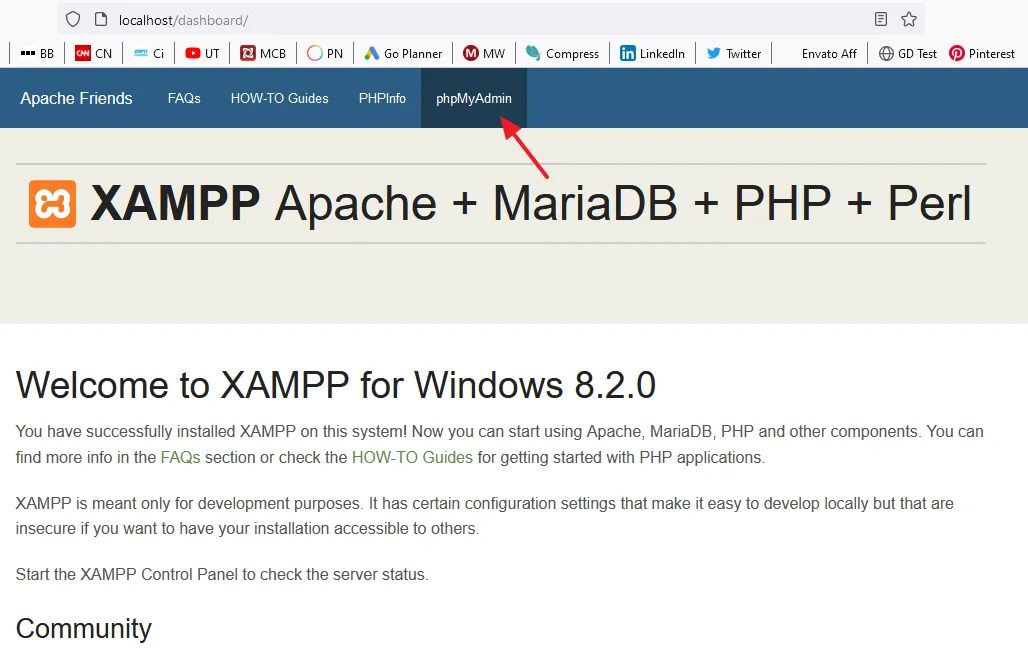
- Open http://localhost on you browser. It will open the Dashboard of XAMPP.
- Click on the phpMyadmin tab (link).
- You can directly open the phpMyAdmin via this URL: http://localhost/phpmyadmin/.
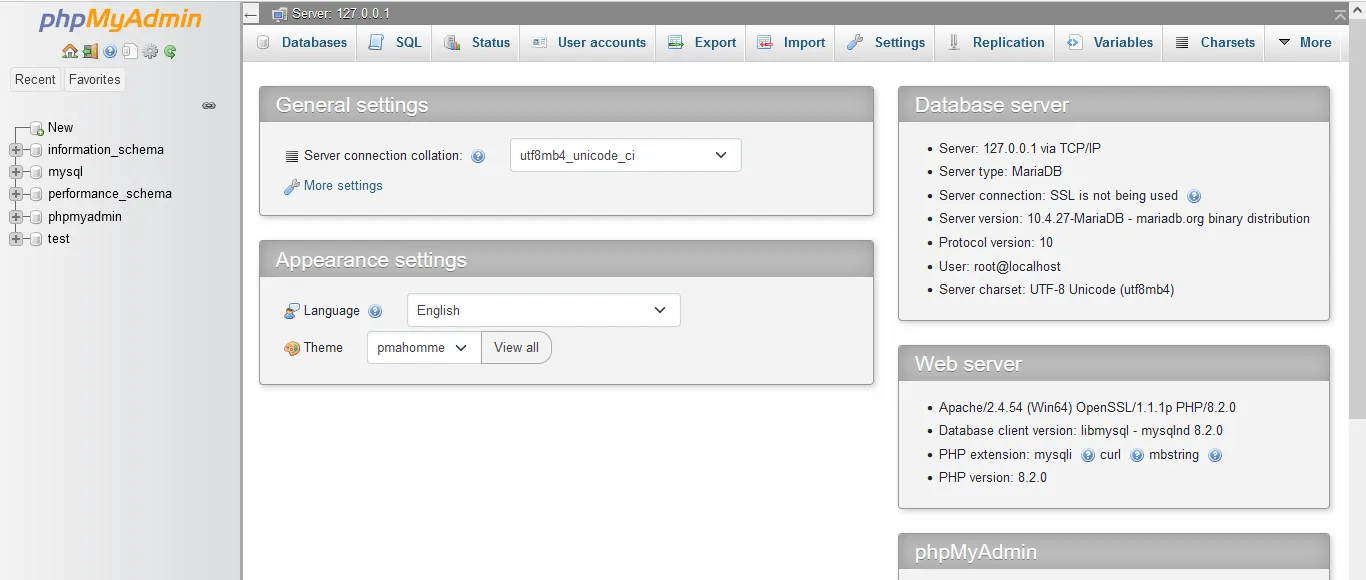
- This is the homepage (dashboard) of phpMyAdmin. XAMPP doesn’t set password on phpMyAdmin. In order to set root password on phpMyAdmin, read this tutorial: How To Set Root Password In phpMyAdmin On XAMPP Server.
If you like this post then don’t forget to share with other people. Share your feedback in the comments section below.
Also Read
- How to Download & Install WampServer on Windows
- How to Install ExpressionEngine on XAMPP in Windows
- How to Install OpenCart on XAMPP in Windows
- How to Install Typo3 CMS on XAMPP in Windows
- How to Install ProcessWire CMS on XAMPP in Windows
- How to Install Dropback CMS on XAMPP in Windows
- How to Install CMS Made Simple on XAMPP in Windows
- How to Install Composr CMS on XAMPP in Windows
- How to Install Concrete CMS on XAMPP in Windows


Leave a Reply