Do you want to Install Joomla on XAMPP to create and run a new Joomla website/application locally on your computer? You’re in the right place.
In this tutorial, I will guide you step-by-step on How to download and extract Joomla to XAMPP htdocs directory, and How to install Joomla on XAMPP.
Joomla is an advanced, powerful, easy-to-use PHP-powered CMS (Content Management System) to build websites and online applications.
If you have not already installed XAMPP on Windows, read this tutorial:
If you have not set root password on phpMyAdmin, read this tutorial:
Following topics will be covered in this tutorial:
- How to Download & Extract Joomla to XAMPP
- How to Install Joomla on XAMPP
01. How to Download & Extract Joomla to XAMPP
In this section, I will guide you on how to download and extract Joomla to XAMPP.
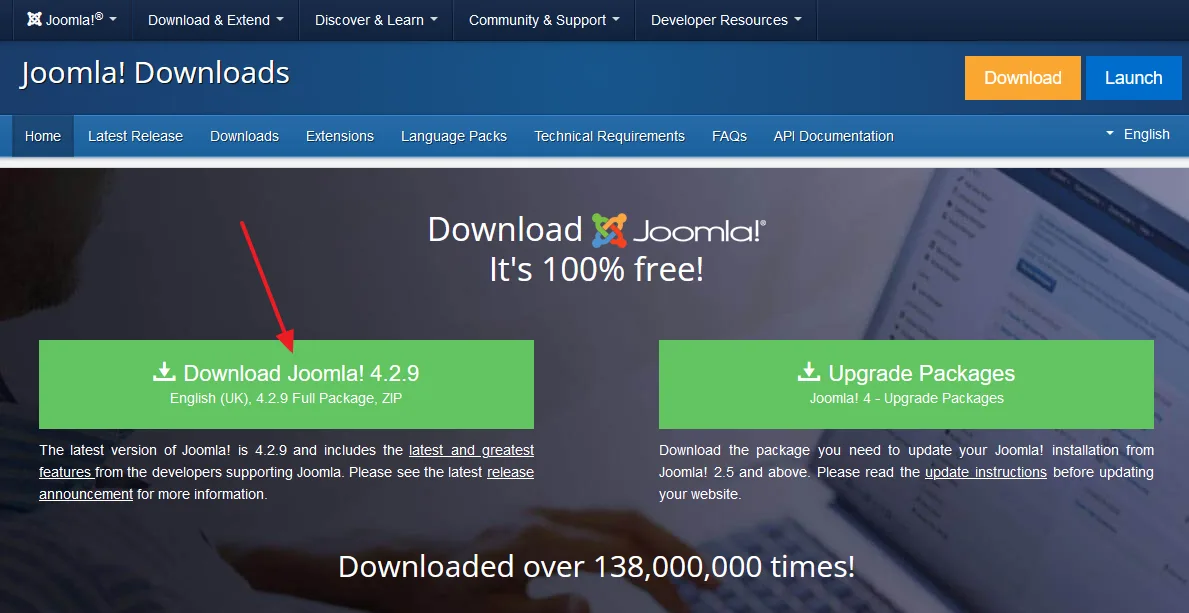
- Go to Joomla Download Page.
- Click on the Download Joomla! button. The versions of Joomla change from time to time. Here it is 4.2.9.
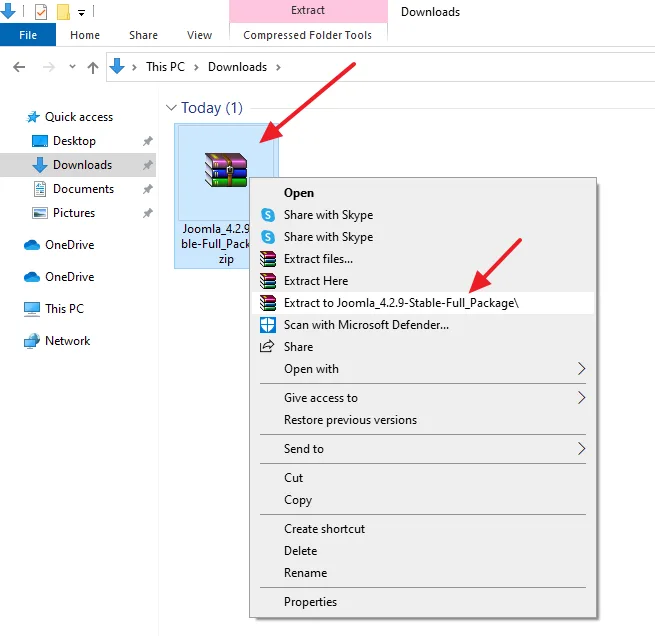
- Right-click on the Joomla ZIP file that you have downloaded.
- Click on the Extract to Joomla.
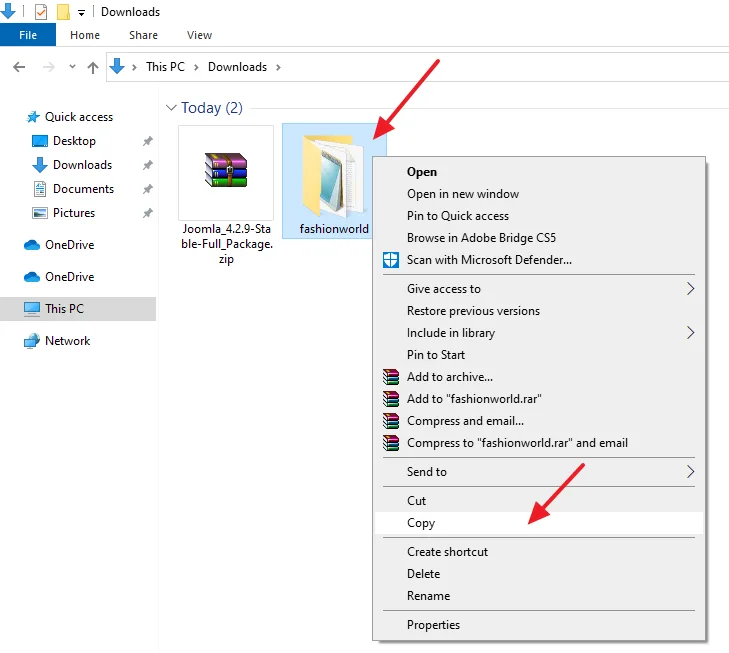
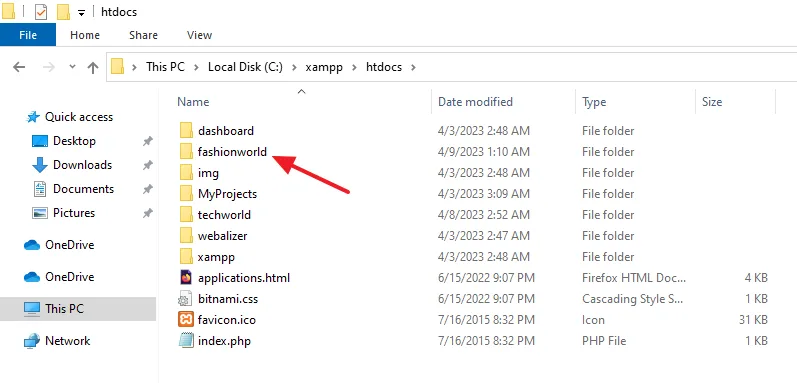
- Rename the Extracted folder with your site name. Here I have renamed it to fashionworld.
- After renaming the extracted folder, right-click on it and click on the Copy or Cut.
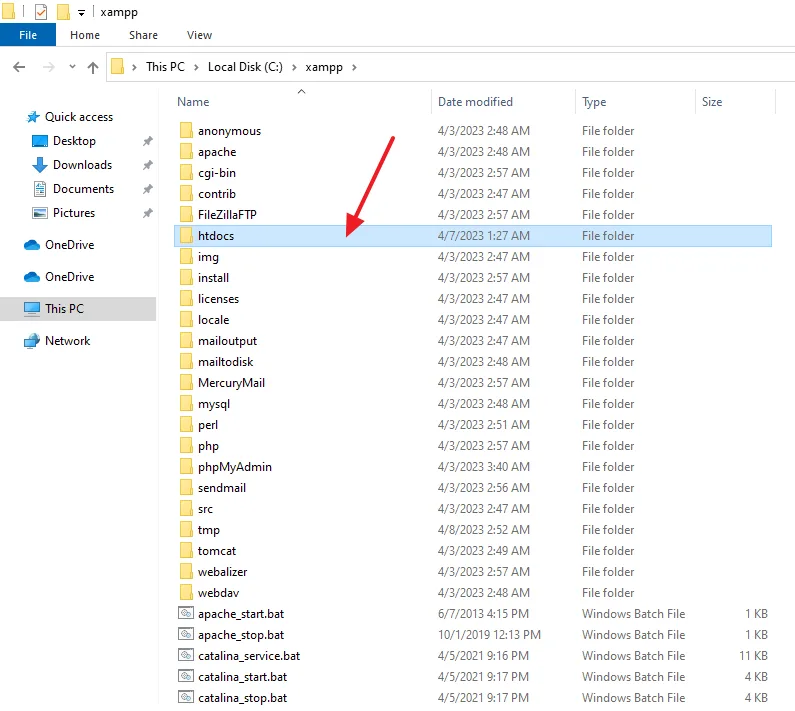
- Go to XAMPP folder.
- Open the htdocs folder. The htdocs is the root directory of XAMPP where you create and place your projects/websites.
- Right-click on the white space and click on the Paste to copy the Joomla folder. Here you can see that fashionworld is copied to htdocs directory.
02. How to Install Joomla on XAMPP
The latest version of Joomla is downloaded and extracted to XAMPP. Now in this section, I will guide you step-by-step on how to install Joomla on XAMPP.
- Browse your Joomla site (folder) that you have copied in the XAMPP htdocs like this: http://localhost/site_name/, for example, http://localhost/fashionworld/.
- Select your Language.
- Enter the Name of your Joomla site, for example, Fashion World.
- Click on the Setup Login Data > button.
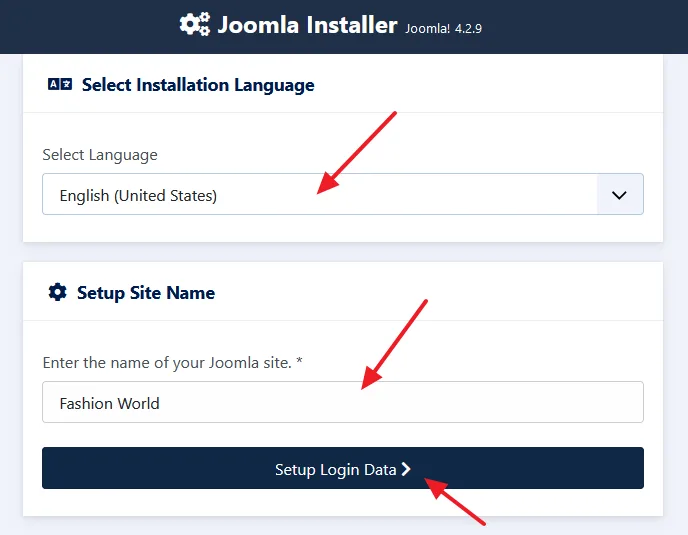
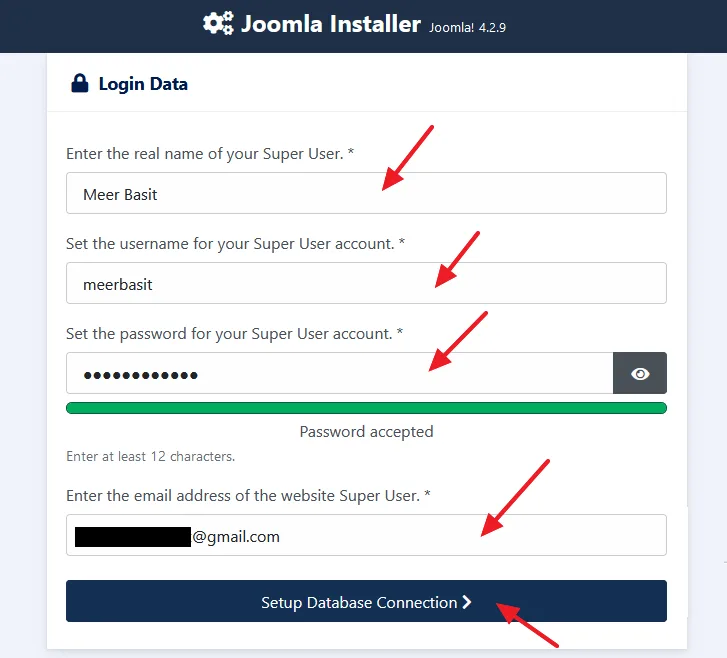
- Enter the Name of your Super User (Administrator).
- Enter the Username for your Super User account that you will use to login to your Joomla Admin section.
- Enter a Password for your Super User account.
- Enter your Email Address for Super User account.
- Click on the Setup Database Connection > button.
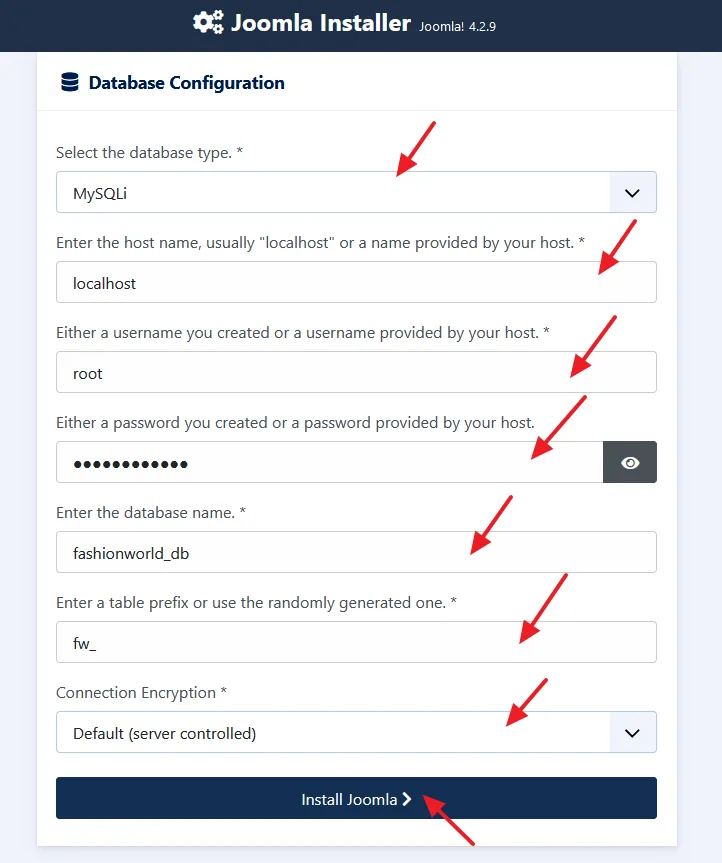
- Select the database type. There are two options MySQLi and MySQL (PDO). MySQLi is specifically made for MySQL databases such as phpMyadmin, SQLBuddy, etc, whereas PDO is more generic that allows you to interact with different types of databases, not just MySQL. Here I have chosen MySQLi.
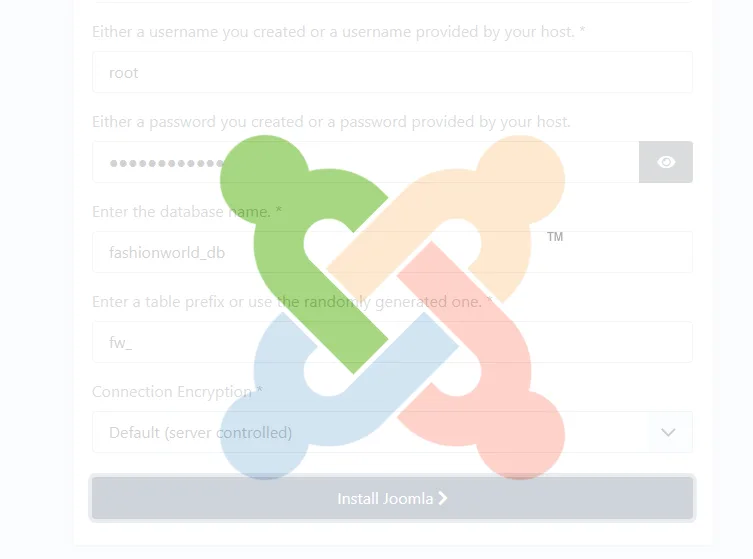
- In the host name enter localhost.
- In the username, enter the username of phpMyAdmin. By default it is root, if you haven’t changed.
- In the password, enter the password of phpMyAdmin username.
- Enter a relevant database name for your Joomla site, for example, fashionworld_db. The database will be created automatically on phpMyAdmin.
- Enter a Table Prefix like fw_. I have taken f from Fashion and w from World. Similarly you can make Table Prefix from your site name. Table Prefix is added in the beginning of your database tables like fw_users, fw_content, fw_comments, etc.
- Select the Connection Encryption. I have selected the Default (server controlled) option for localhost. There are two more options i.e. One Way Authentication, Two way Authentication.
- Click on the Install Joomla > button.
- The Joomla installation begins…
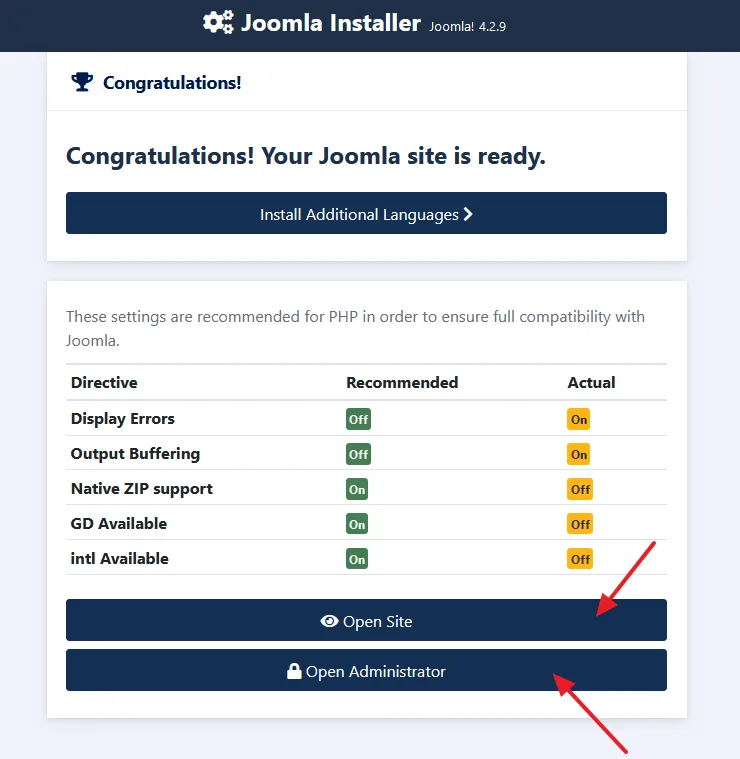
- You will see a congratulation message if Joomla is installed successfully.
- There are two buttons at the bottom (1) Open Site (Front-end of your site) (2) Open Administrator (Joomla Admin).
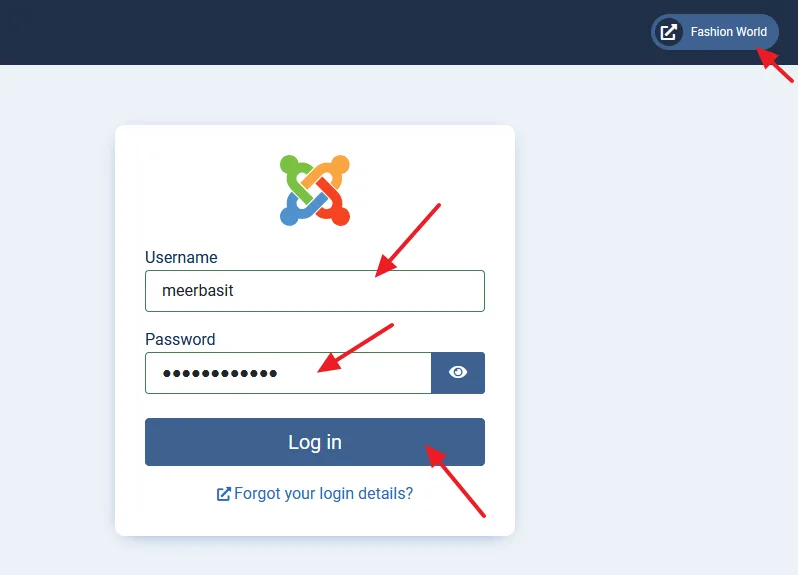
- URL to access your Joomla Admin section on XAMPP localhost is: http://localhost/site_name/administrator/, for example, http://localhost/fashionworld/administrator/.
- Enter your Username and Password.
- Click on the Log in button.
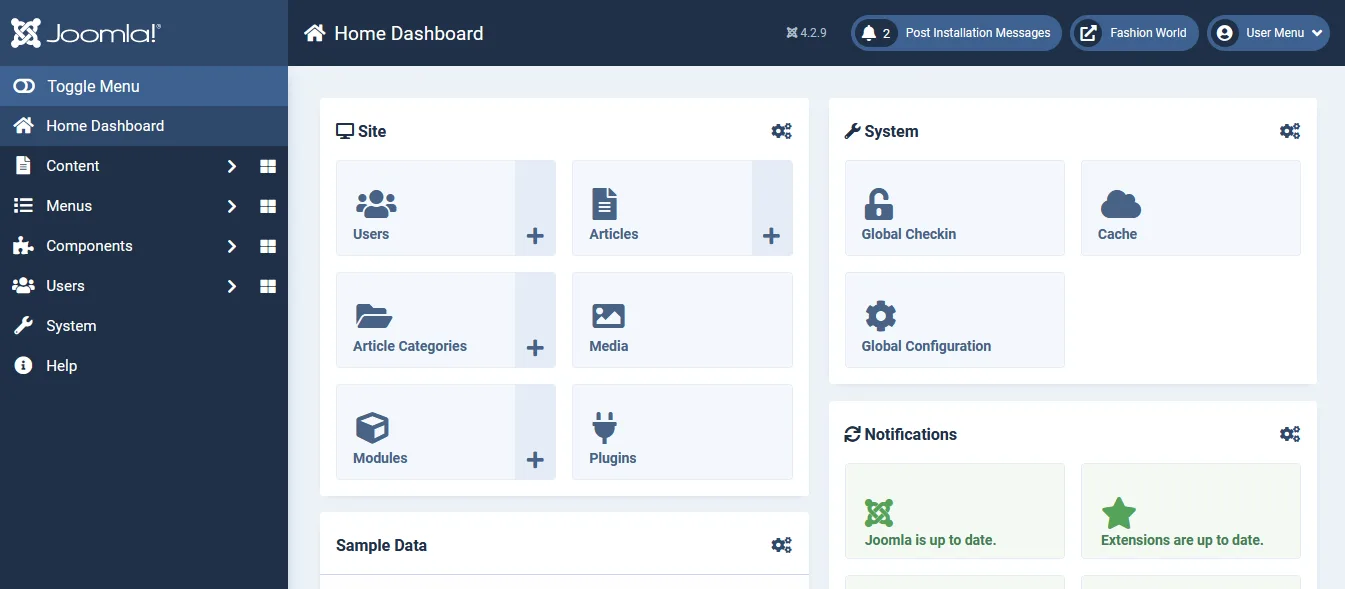
- This is how the Joomla Admin section looks like.
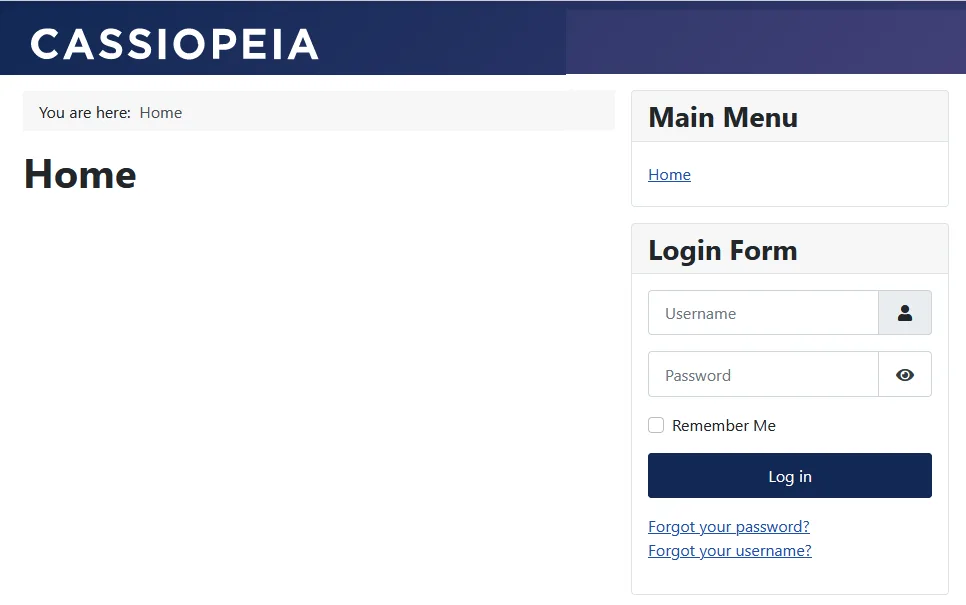
- This is the front-end of Joomla site. Since there are no posts and content, it looks empty. The front-end of Joomla on XAMPP localhost can be accessed via http://localhost/site_name/, for example, http://localhost/fashionworld/.
If you like this post then don’t forget to share with other people. Share your feedback in the comments section below.

Also Read
- How to Buy Domain & Hosting Step-by-Step
- How to Install Typo3 CMS on XAMPP in Windows
- How To Install WordPress On MAMP Server on Windows
- How to Install Drupal on XAMPP in Windows
- How to Install ExpressionEngine on XAMPP in Windows
- How to Install OpenCart on XAMPP in Windows
- How to Install ProcessWire CMS on XAMPP in Windows
- How to Install Dropback CMS on XAMPP in Windows


Leave a Reply