Do you want to know how to download & install WampServer on Windows? You’re in the right place. In this tutorial, I will guide you step-by-step on how to download, install, and run WampServer on Windows.
The WampServer creates Windows web-development environment (localhost) on your local machine (computer). You can create and execute PHP projects/applications with Apache2, PHP, and MySQL database.
WampServer is primarily used for the two purposes (1) By web developers to develop, edit, and test the PHP-powered websites before they upload them on web-hosting server (1) To run a web-based application that needs to be run locally on you computer, like web-based attendance system.
Following topics will be covered in this post:
- Prerequisites
- How to Download and Install WampServer on Windows
- How to Run WampServer on Windows
- How to Run a PHP Project on WampServer
- How to Open phpMyAdmin on WampServer
01. Prerequisites
Following are some of the prerequisites that you must fulfill before you begin the WampServer installation.
- Turn-off the Skype
- Disable the IIS (Internet Information Service) on Windows.
- Do not install Wampserver over an existing version. Install a new version of Wampserver. If you install Wampserver over an existing version, not only it will not work, but you risk losing your existing databases.
- Make sure the Visual C++ Redistributable Packages VC9, VC10, VC11, VC13 , VC15, VC16, and VC17 are installed on your Windows. VC stands for Visual C++. VC9 means (Visual C++ 2008 SP1) and VC17 means (Visual C++ 2015-2022). The redistribution packages provide standard libraries which allow applications developed with Visual C++ to function on a computer that does not have Visual C++ installed.
To verify that all VC ++ Packages are installed and with the latest versions, you can use the tool Check VC Redistribution. The check_vcredist.exe will be downloaded on your computer. Install and run it.
Download all the Visual C++ Redistributable Packages on wampserver.aviatechno.net. Scroll-down to Visual C++ Redistributable Packages section and download the packages according to your Windows version. If your Windows is 32 bit download the Microsoft VC++ Packages x86 (32 bits), and if your Windows is 64 bit download the Microsoft VC++ Packages x64 (64bits).
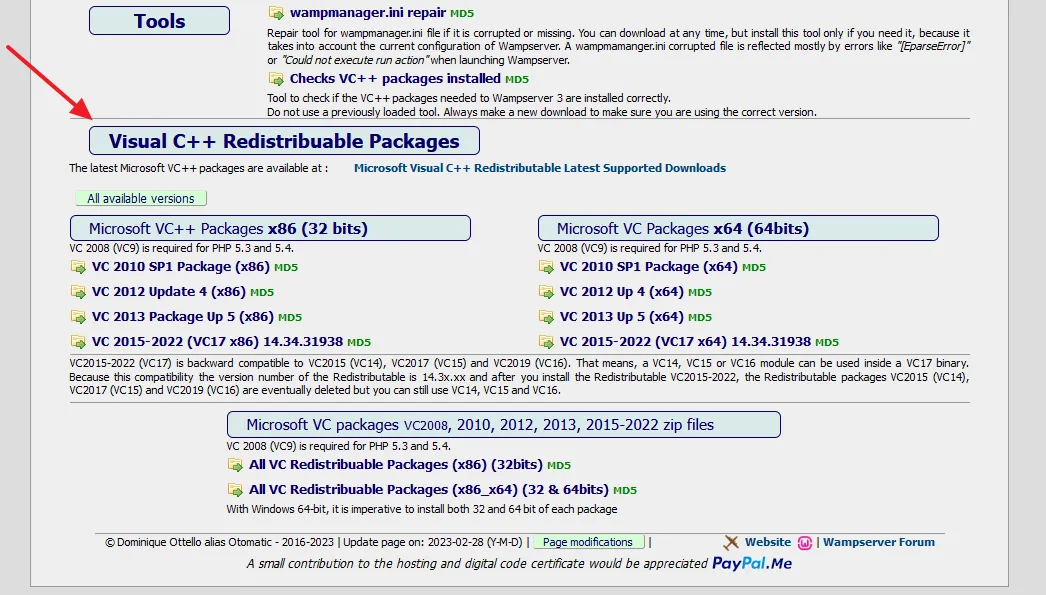
After downloading the packages to your computer install each package as Run as Administrator. Right-click on the exe file and then Run as Administrator.
02. How to Download & Install WampServer on Windows
In this section, I will guide you step-by-step on how to download and install WampServer on Windows.
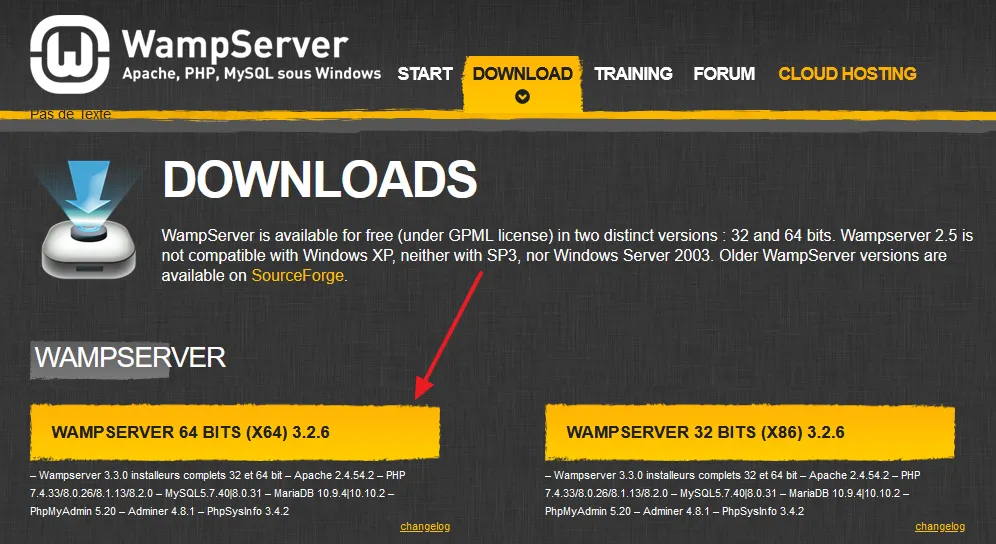
- Go to WampServer.com to download the latest version of WampServer.
- Click on the version of WampServer that you want to download. If your Windows is 64 bit-operating system choose WampServer 64 bits, and if your Windows is 32 bit-operating system choose WampServer 32 bits (x86).
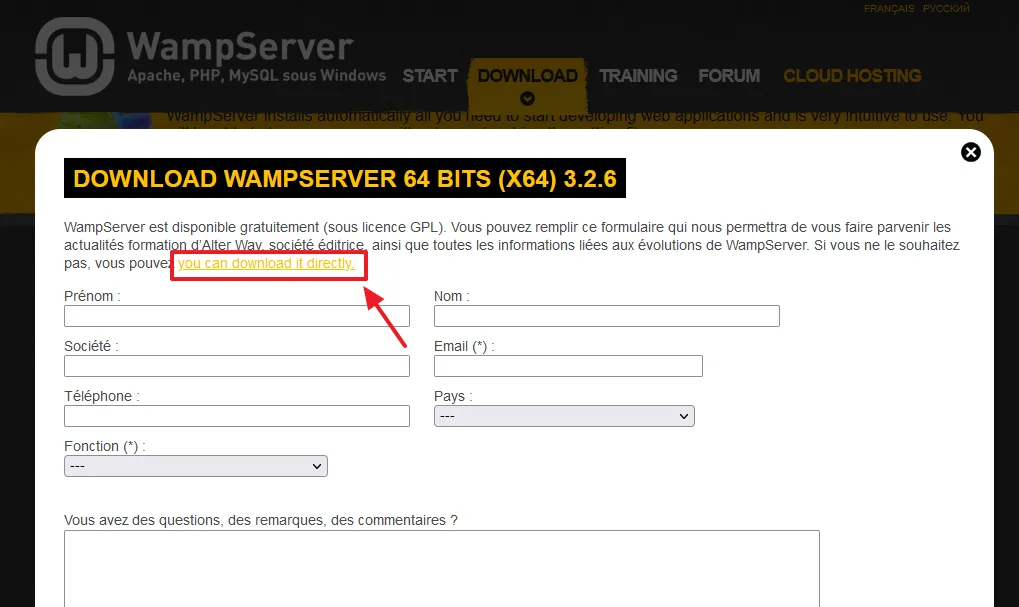
- You have two options to download the WampServer setup (1) Via direct link (2) By filling the form. Click on the you can download it directly link.
- WampServer setup will be downloaded from the SourceForge, a complete open-source and business software platform.
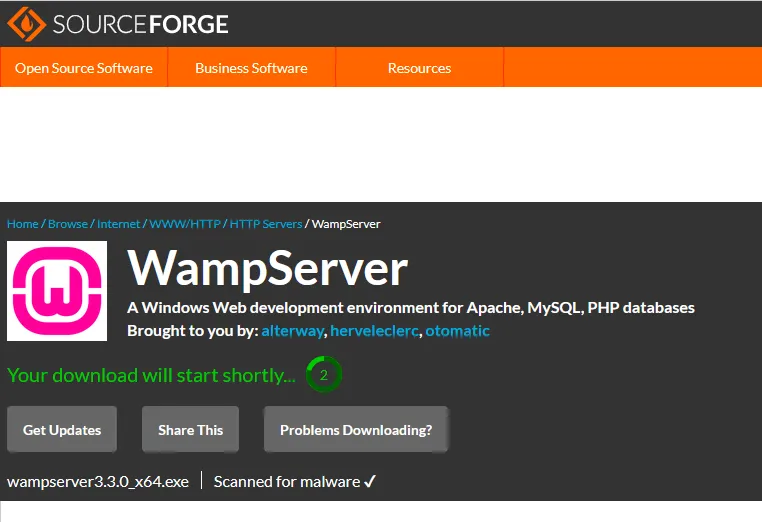
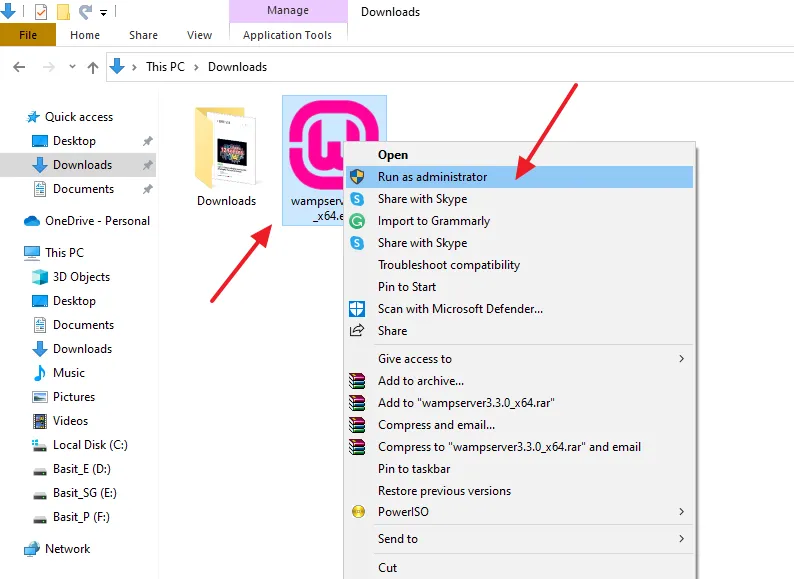
- Right-click on the WampServer setup and Run as administrator.
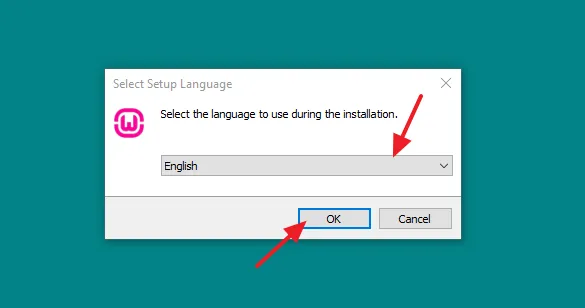
- Choose the setup Language.
- Click OK.
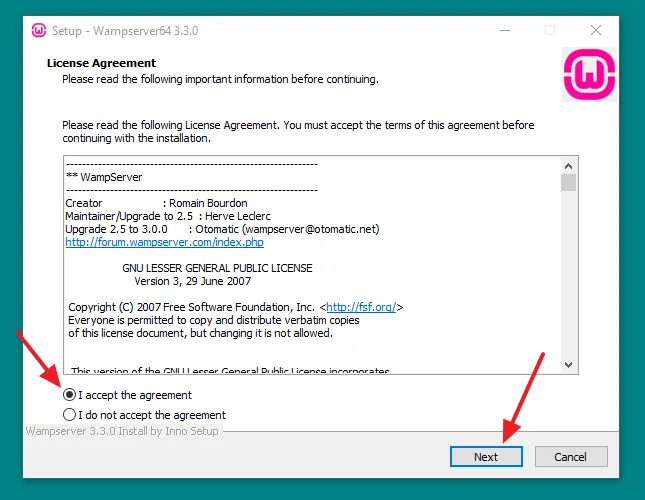
- Select, “I accept the agreement” and click on the Next button.
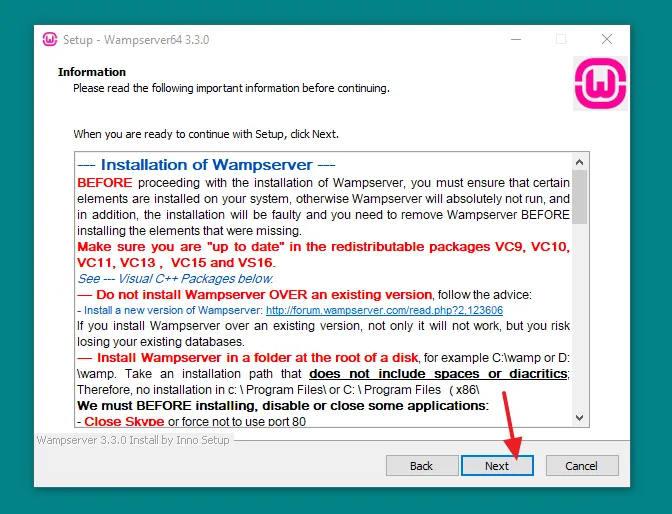
- Click on the Next button. This information is already discussed in the Prerequisites section above.
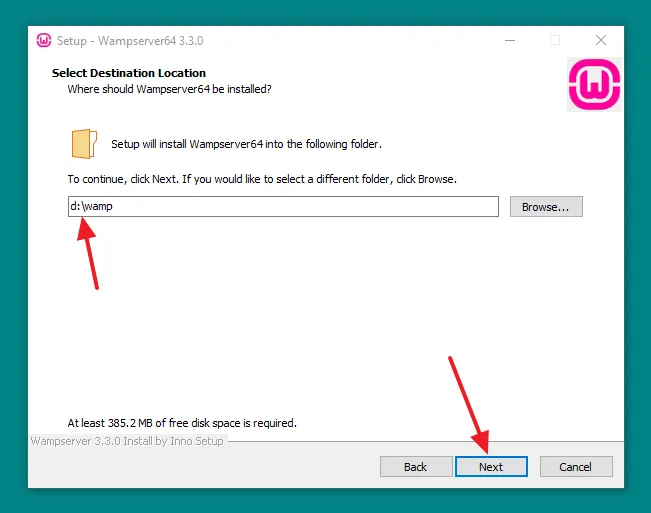
- Select the installation location for WampServer. Install Wampserver in a folder at the root of a disk like, c:\wamp, d:\wamp, e:\wamp, etc. It should not be installed inside a folder like c:\program files\wamp.
- Click on the Next button.
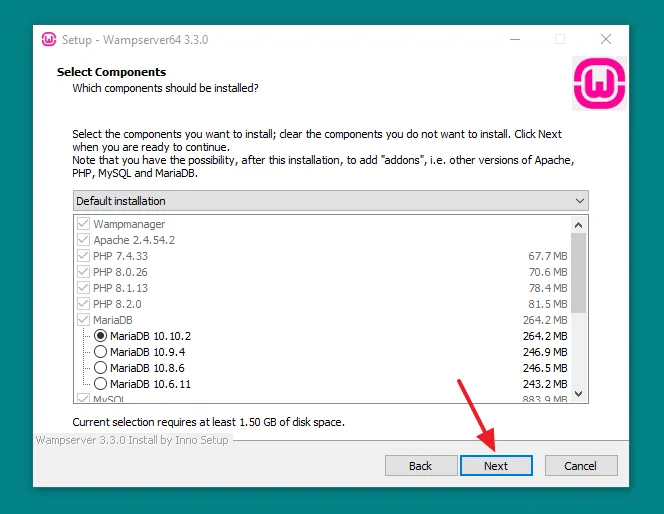
- Select the components of WampServer that you want to install. There are two options (1) Default Installation (2) Custom Installation. If you are not an expert choose Default installation and click on the Next button.
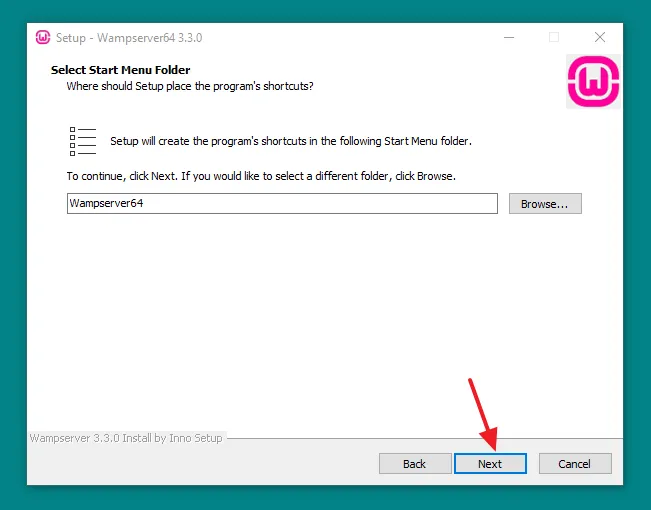
- Select the Start Menu Folder where setup will place the WampServer’s shortcuts. After WampServer is installed you can see this folder on Windows Start Menu under the label W.
- If you want to select a different folder, click on the Browse button, otherwise click on the Next button.
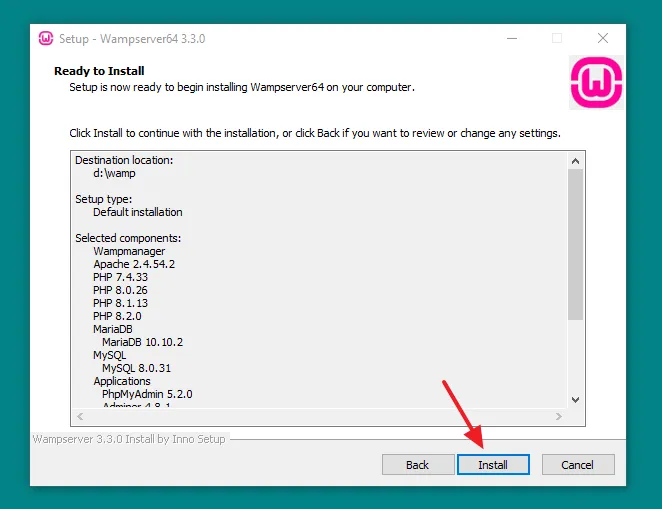
- Your setup is now ready to install the WampServer on your computer. Click on the Install button to begin the installation.
- It will take some time for the setup to finish the installation of WampServer on Windows, so be patient till the installation is completed.
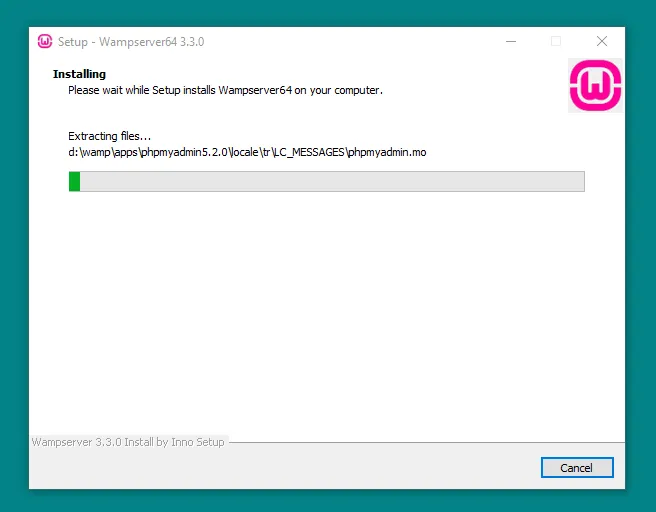
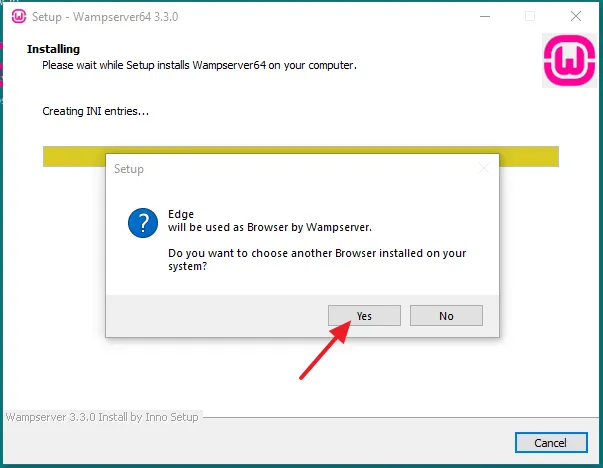
- WampServer uses Microsoft Edge as its default browser. If you want to change the browser, click on the Yes button. If you want to continue with the Microsoft Edge then click on the No button.
- Here I have chosen Yes.
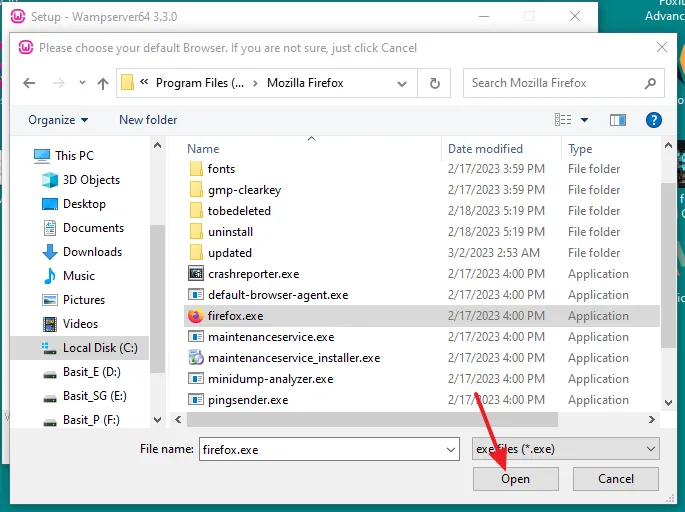
- Select the main .exe file of your browser and click on the Open button.
Below I have chosen the firefox.exe. If you want Chrome as default browser for WampServer choose the chrome.exe. Browsers are installed on Program Files. You can find Chrome on Program Files\Google\Chrome\Application\chrome.exe.
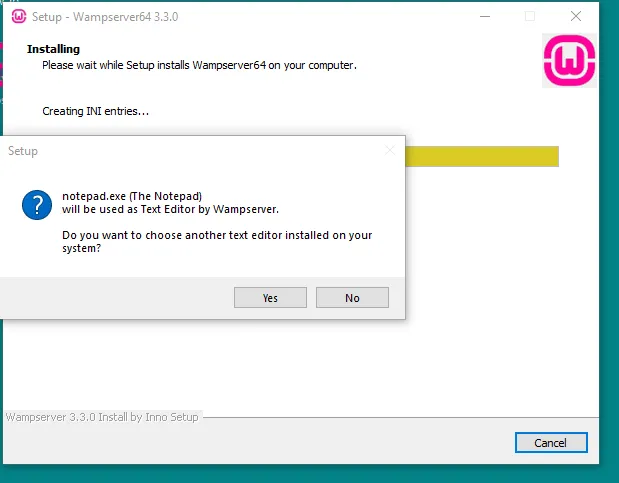
- Click Yes, if you want to set the Notepad as default text editor.
- If you have a web development tool installed on your computer such as Dreamweaver, PHPStorm, Netbeans, Sublime Text, etc, click on the No button and add its .exe file, the way you added the .exe file of browser, above.
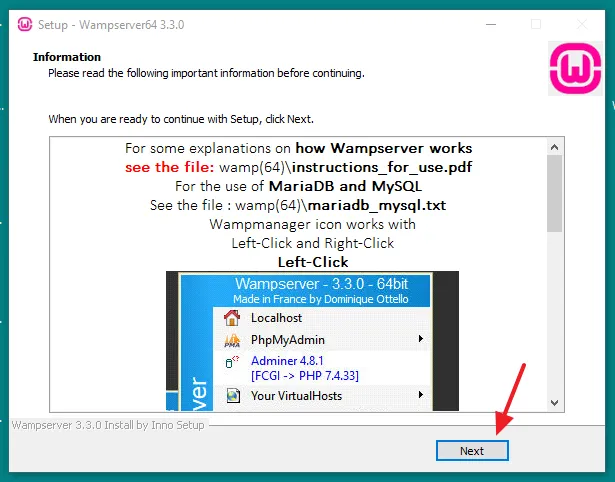
- It will show you some important information to read like, how WampServer works on Windows.
- Click on the Next button.
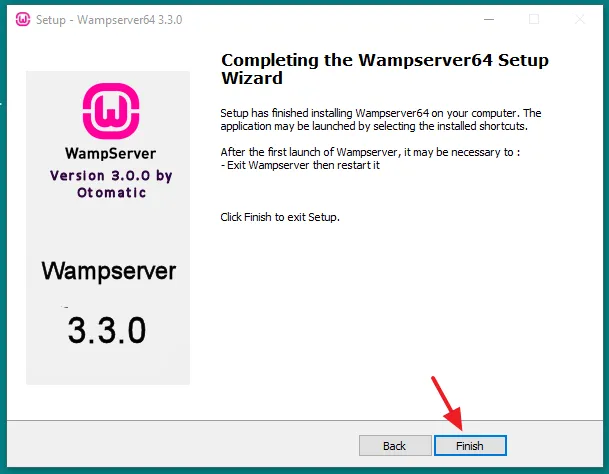
- Click on the Finish button. Your WampServer setup is completed successfully. Follow the next section to learn about how to run the WampServer on Windows 10.
03. How to Run WampServer on Windows
In this section, I will guide you step-by-step on how to run WampServer on Windows.
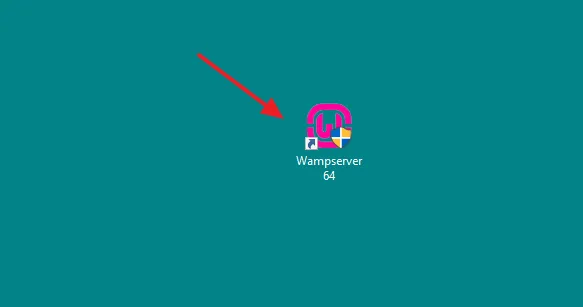
- Click on the WampServer icon. You can also open it from Windows Start Menu.
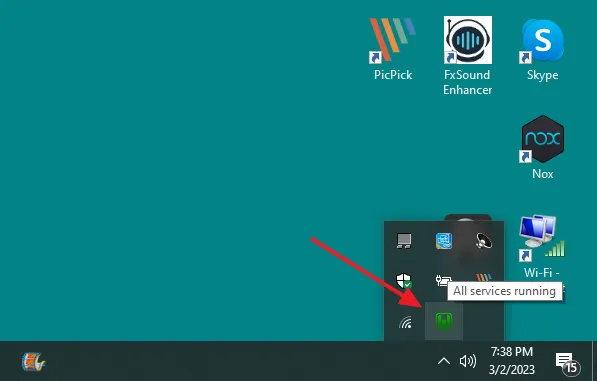
- WampServer will take some time to start all its services, so be patient. You can see the WampServer icon at bottom-right corner of your Windows Desktop.
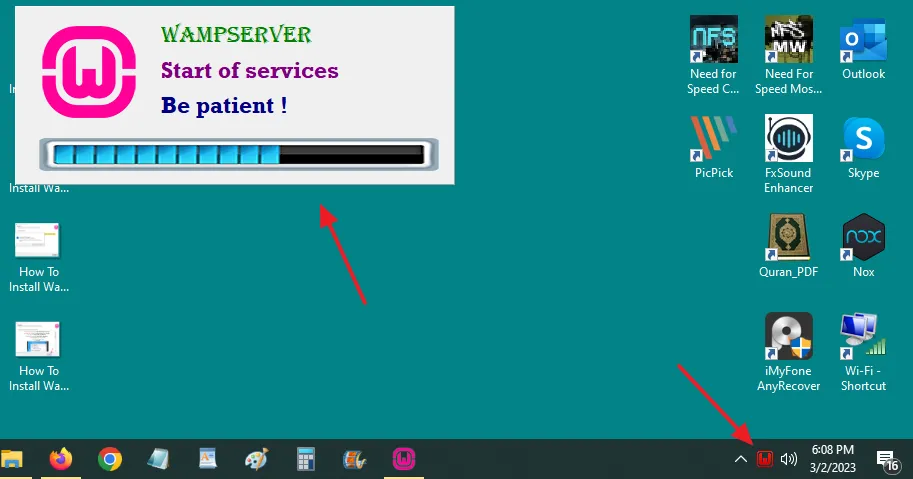
If all services of WampServer run smoothly you will see a Green WampServer icon, and if there are issues and warnings the WampServer icon will turn Orange or Red. If you see this warning, Warning! C:/wamp or PHP in PATH on WampServer, read this tutorial: How to Fix, Warning! Wamp or PHP in PATH.
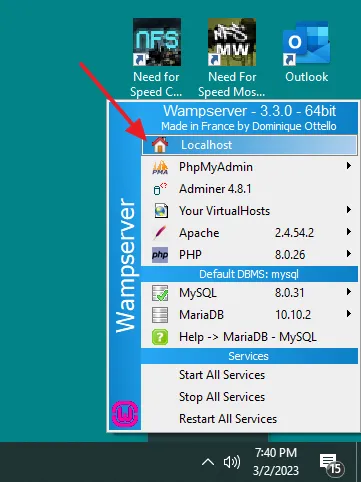
- Click on the WampServer icon.
- Click on the Localhost.
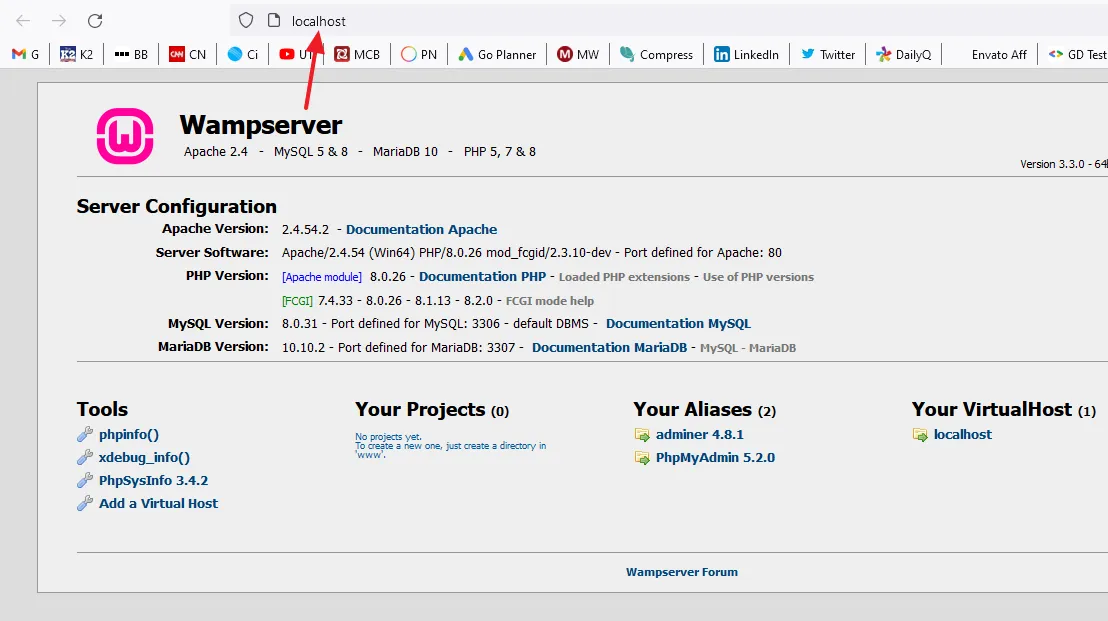
You can see that the Localhost’s homepage is loaded on the browser. The Server Configuration shows you the Apache Version, Server Software, PHP Version, MySQL Version, and MariaDB Version.
It also shows you Tools (phpinfo(), xdebug_info, Add a virtual host, PhpSysInfo), Your Projects, Your Aliases (adminer, PhpMyAdmin), and VirtualHost.
Follow the next section to learn about how to run a PHP project on WampServer.
04. How to Run a PHP Project on WampServer
In this section, I will guide you step-by-step on how to run a PHP project on WampServer.
- Open the Wamp installation folder on your computer.
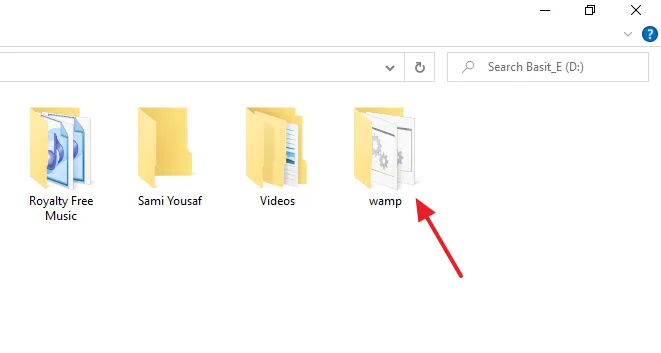
- Open the www folder. The www is the root directory where you place/create your PHP projects. The scripts on Localhost are executed from www.
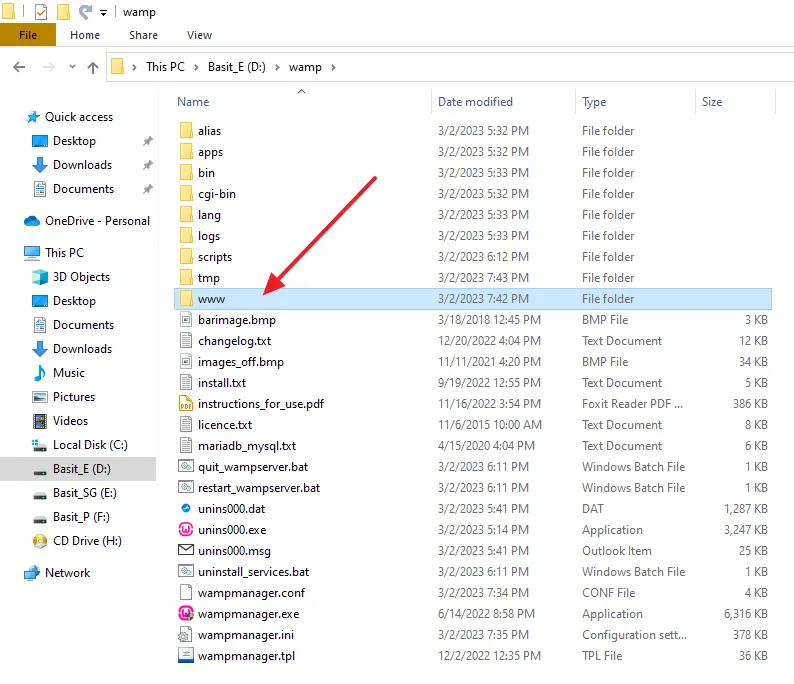
- Create a folder inside the www directory where you will place/create the files and folders of your project. I have created a folder meersworld.
- I have also created a file index.php inside the folder meersworld. The index.php is the main access point of a website or a web-based project. It is the first file which is executed when a site is opened on the browser.
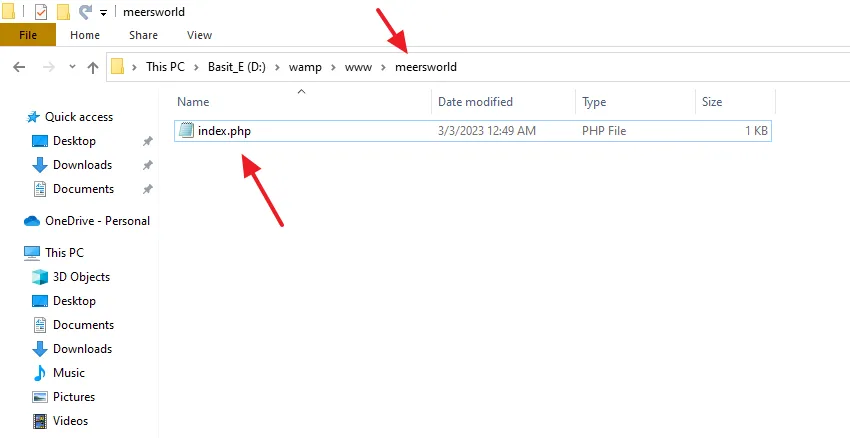
- I have added the below code in the index.php file.
<html>
<head>
<title>WampServer Test</title>
</head>
<body>
<?php echo 'Hey, I have Successfully installed WampServer'; ?>
<h2>Thank You Meer's World</h2>
</body>
</html>
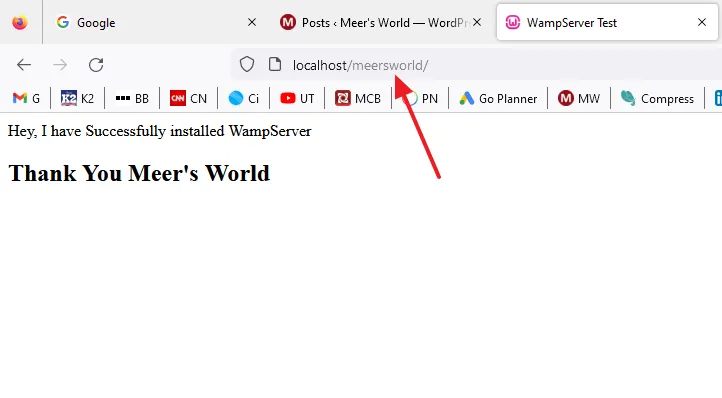
Run your project on your browser like this: localhost/your_project_folder_name. Below you can see that I have run my project like this: localhost/meersworld. The index.php is automatically executed.
05. How to Open phpMyAdmin on WampServer
In this section, I will guide you step-by-step on how to open phpMyAdmin on WampServer, and how to create a database and table on MySQL database.
The phpMyAdmin is a PHP-written free and open source administration tool for MySQL and MariaDB.
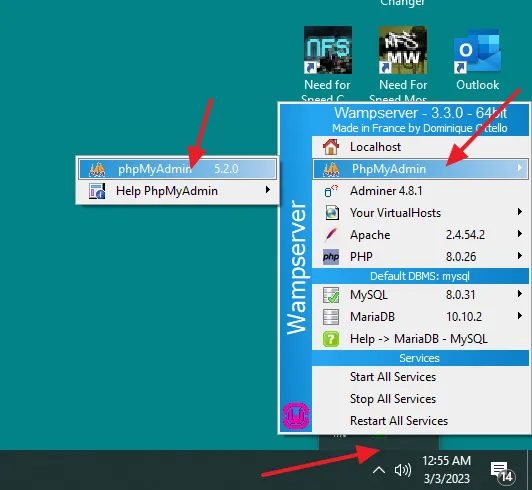
- Click on the WampServer icon, located at the bottom-right corner of your Windows Desktop.
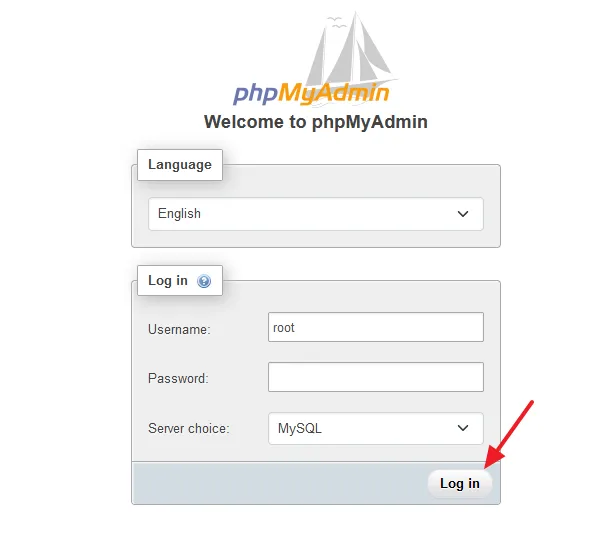
- Go to PhpMyAdmin and click on the phpMyAdmin version. You can also open the phpMyAdmin on browser like this: localhost/phpmyadmin.
- Enter the Username and Password. The default Username is root and Password is also root. You can change from phpMyAdmin settings.
- Click on the Log In button.
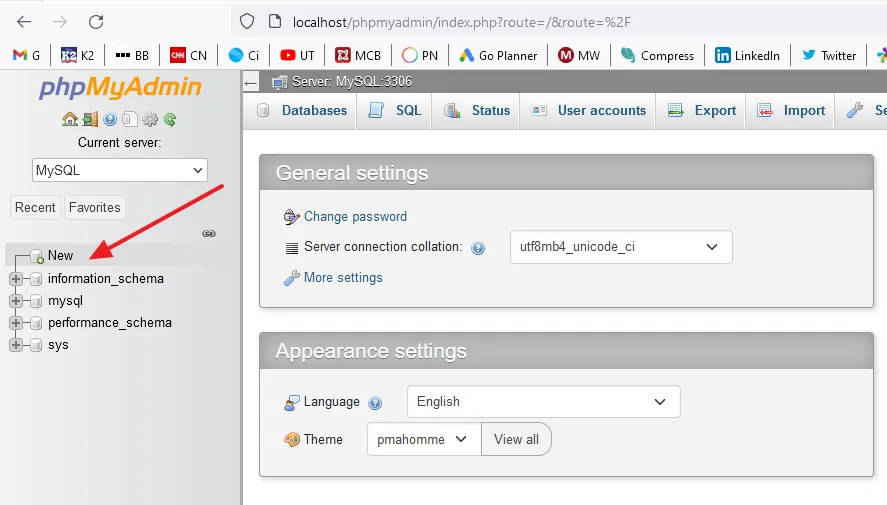
- Click on the New located in the sidebar to create a new database.
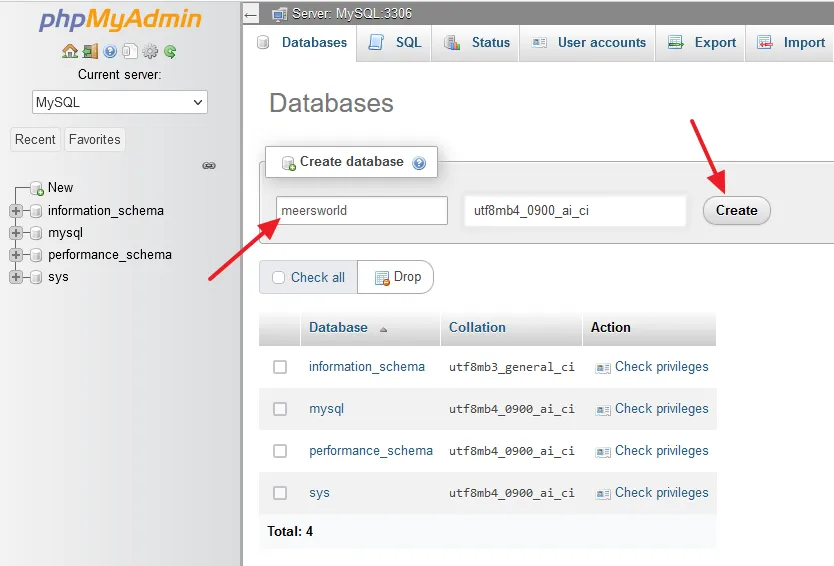
- Enter the Database Name and click on the Create button. Once the database is created it will appear in the sidebar.
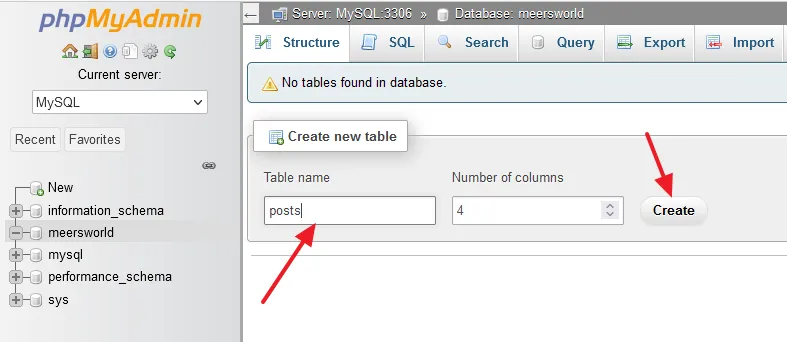
- Select your database from the sidebar.
- In the Table name enter your table name, and in the Number of columns enter the number of columns for your table.
- Click on the Create button.
So it was all about downloading, installing, and running of WampServer on Windows. If you like this post then don’t forget to share with people. Share your feedback in the comments section below.
Also Read
- How To Install & Configure XAMPP On Windows 10 – Step By Step | For Beginners
- How To Change The XAMPP Server Port In Windows 10 | XAMPP Apache Server Port | Fix Apache Port Error
- How to Install WordPress on XAMPP | Beginner’s Guide
- How To Install MAMP On Windows 10 Step By Step | How To Change The MAMP Server Ports
- How To Install WordPress On MAMP Server In Windows 10 – Step By Step | Install WordPress On Localhost
- How to Set Up PHP on IIS in Windows | Install PHP with IIS



Leave a Reply