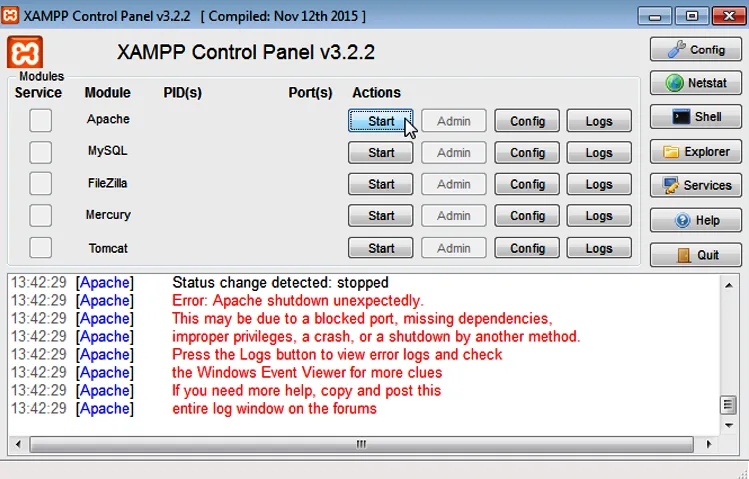
Has the port 80 already been assigned to some other application on Windows and your Apache module is not being started on XAMPP and showing the error, “Error: Apache shutdown unexpectedly. This may be due to a blocked port, missing dependencies, improper privileges, a crash, or a shutdown by another method“? You’re in the right place.
In this tutorial, I will guide you step-by-step on how to change the XAMPP server port on Windows and fix the port error.
Below you can see the port error on XAMPP Control Panel. The localhost’s default port is 80. It can only be used by one application. When it is used by some other installed application like IIS, WampServer, MAMP, or Skype, can’t be used for XAMPP.
How to Change the XAMPP Server Port
Follow the steps to change the XAMPP Server port on Windows.
- Open XAMPP Control Panel.
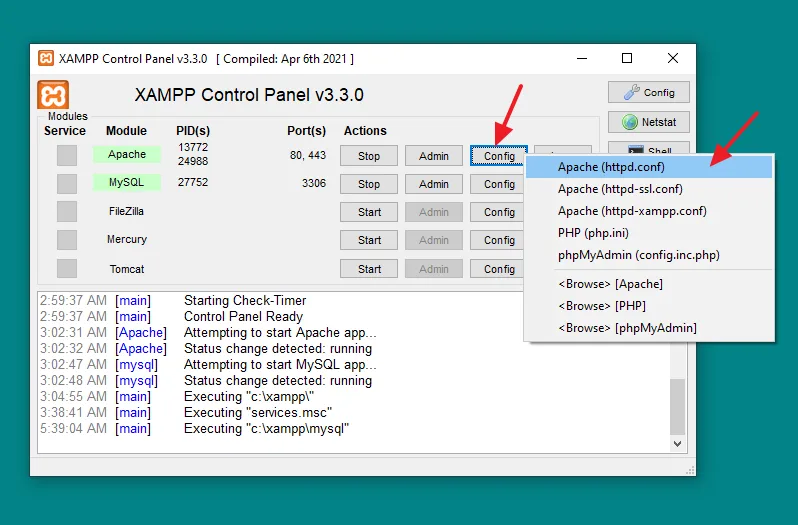
- Click on the Config button of Apache Module.
- Click on the Apache (httpd.conf) option.
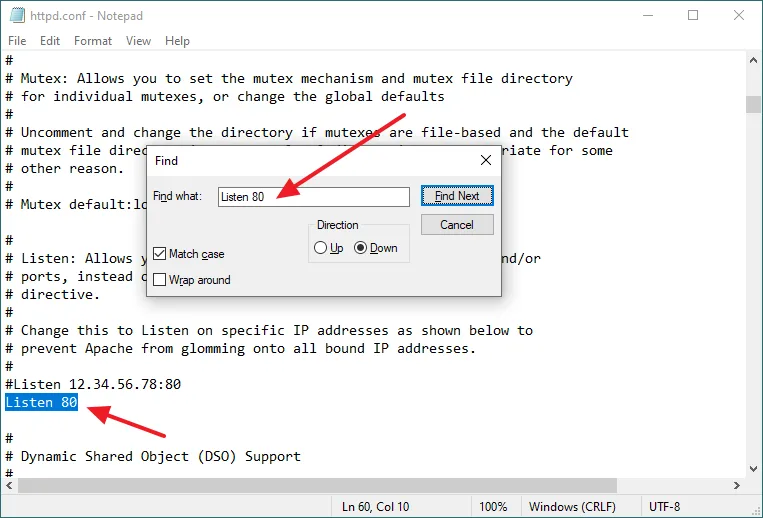
- Press Ctrl + F to open the Search on Notepad. Find Listen 80 and replace 80 with 8080 like this: Listen 8080.
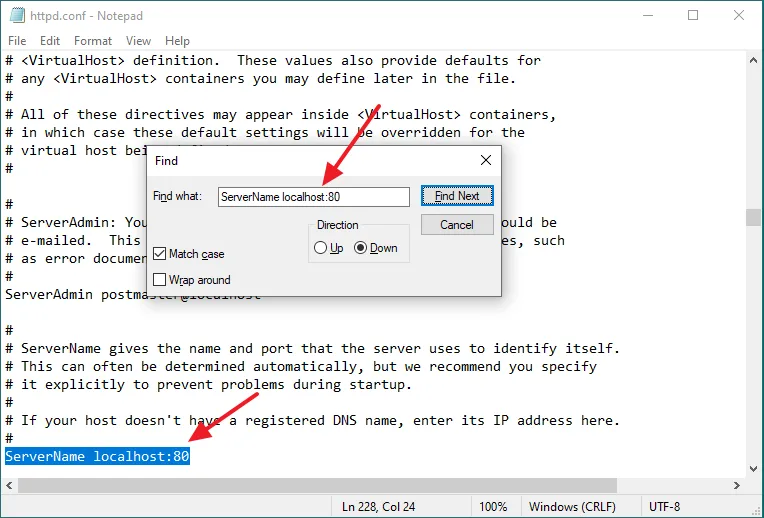
- Find ServerName localhost:80 and replace it with ServerName localhost:8080.
- Save the file.
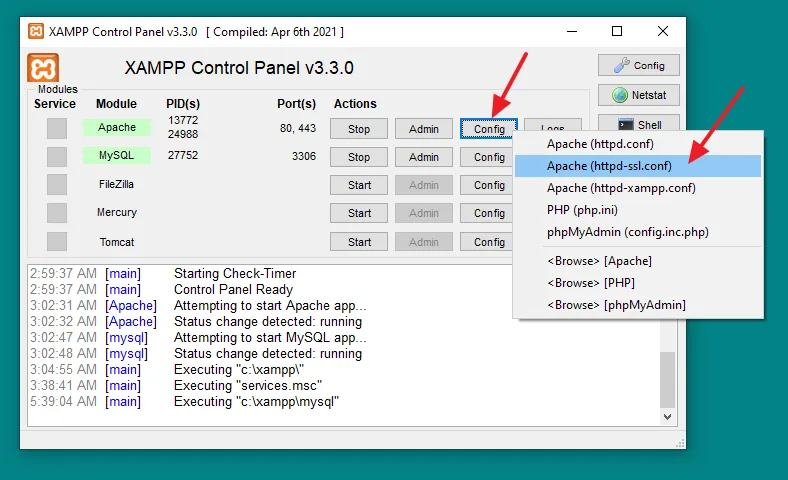
- Click on the Config button of Apache Module again.
- Click on the Apache (httpd-ssl.conf) option.
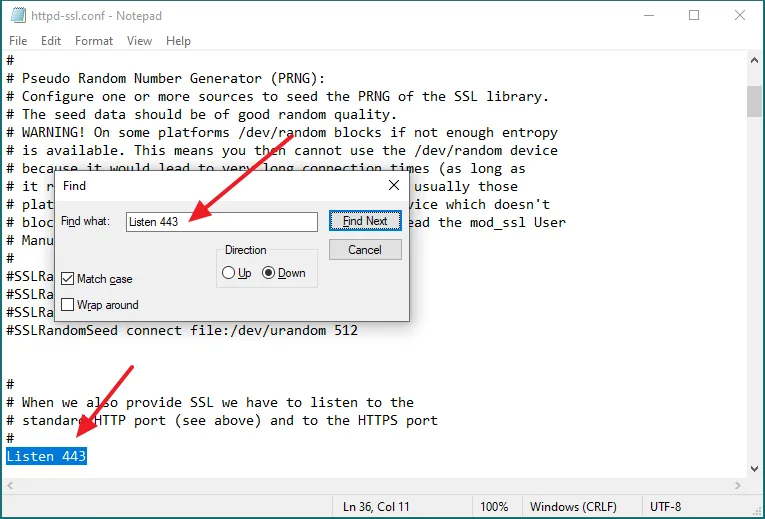
- Press Ctrl + F to find Listen 443 and replace 443 with 4433 like this: Listen 4433.
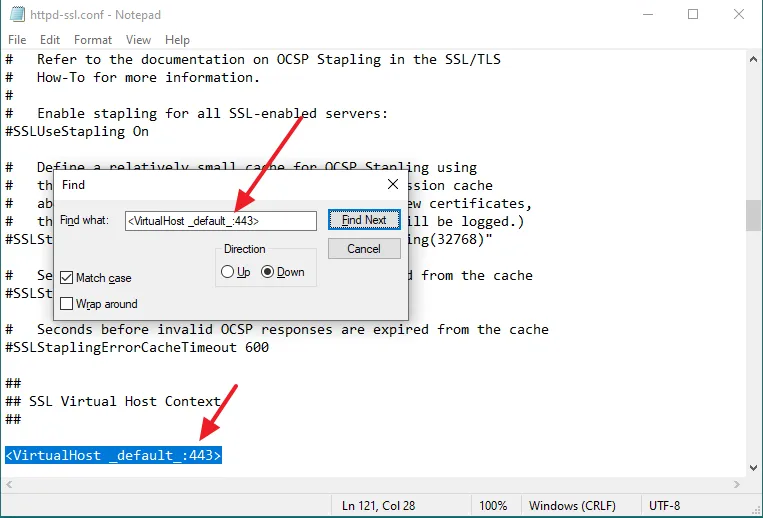
Find <VirtualHost _default_:443> and replace it with <VirtualHost _default_:4443>. - Save the file.
- Click on the Config button of Control Panel to open the Configuration of Control Panel.
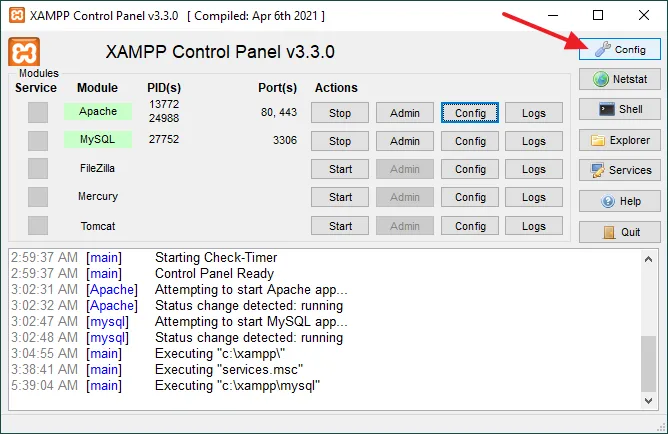
- Click on the Service and Port Settings button.
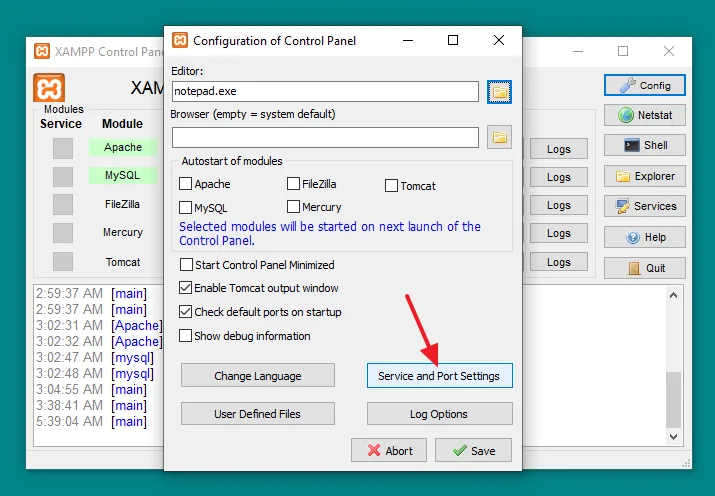
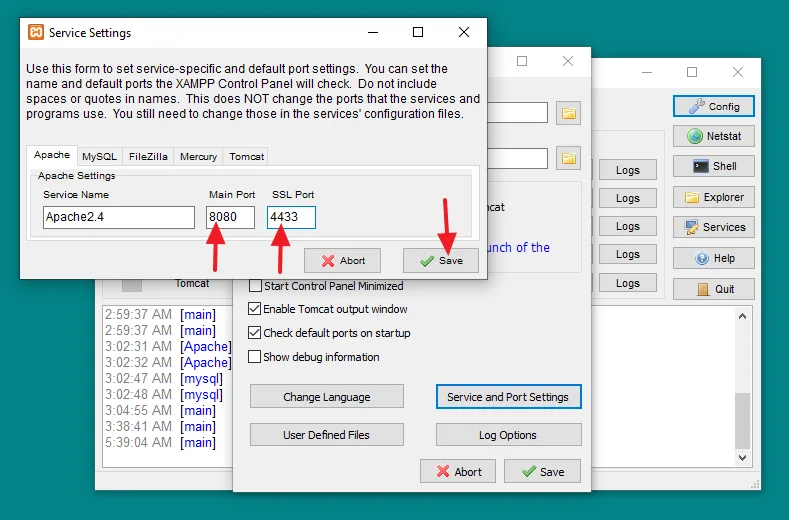
- In the Main Port field, type 8080.
- In the SSL Port field, type 4433.
- Click on the Save button.
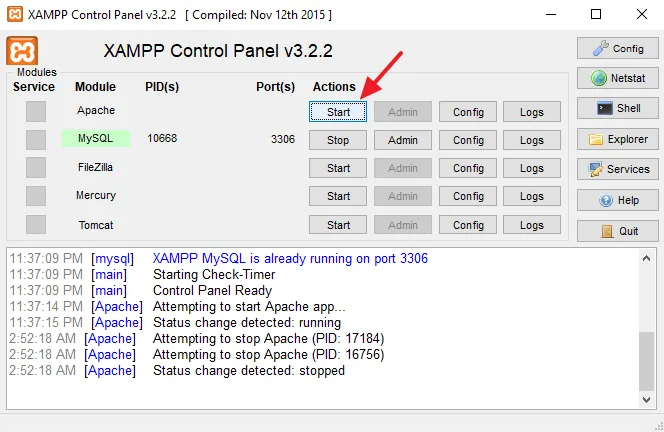
- Now Start the Apache Module from XAMPP cPanel.
- To open the XAMPP localhost type this URL: http://localhost:8080/.
- To open your project, add the folder name like this: http://localhost:8080/Your_Project_Name.
If you like this post then don’t forget to share with other people. Share your feedback in the comments section below.
Also Read
- How to Install Joomla on XAMPP | Beginner’s Guide
- How to Download & Install WampServer on Windows
- How to Set Up PHP on IIS in Windows | Install PHP with IIS
- How To Install MAMP On Windows 10 Step By Step | How To Change The MAMP Server Ports
- How to Install WordPress on XAMPP | Beginner’s Guide
- How To Install EasyPHP Devserver On Windows 10 – Step By Step | Show Databases On phpMyAdmin In EasyPHP


Leave a Reply