Do you want to claim your Blogger blog/website on Pinterest? You’re in the right place. In this tutorial, I will guide step-by-step on how to claim your Blogger blog/website on Pinterest and verify your ownership.
Claiming your website on Pinterest is a method through which Pinterest verifies the ownership of a website. It authenticates that you are the real owner of the website.
There are many benefits of claiming your website on Pinterest like (1) You can use Pinterest Analytics (2) The profile picture of your Pinterest account will be shown with all your Pins that come from your website (3) A small Globe Icon having a Tick over it will appear next to your website URL on Pinterest.
RELATED
- How to Set Up Blogger Settings A to Z
- How to Install Custom Theme in Blogger
- How to Claim WordPress Website on Pinterest | 3 Methods
- How to Optimize Images For Pinterest SEO
How to Claim Blogger on Pinterest
Follow the steps to claim your Blogger blog/website on Pinterest.
- Click the Downward Arrow located at top-right corner.
- Under the More options section click the Settings.
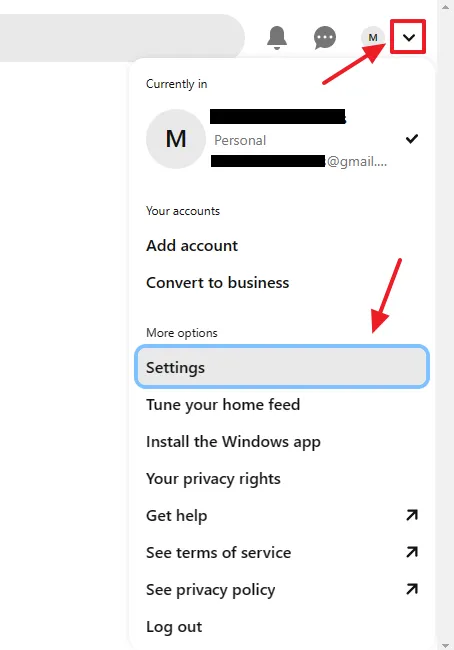
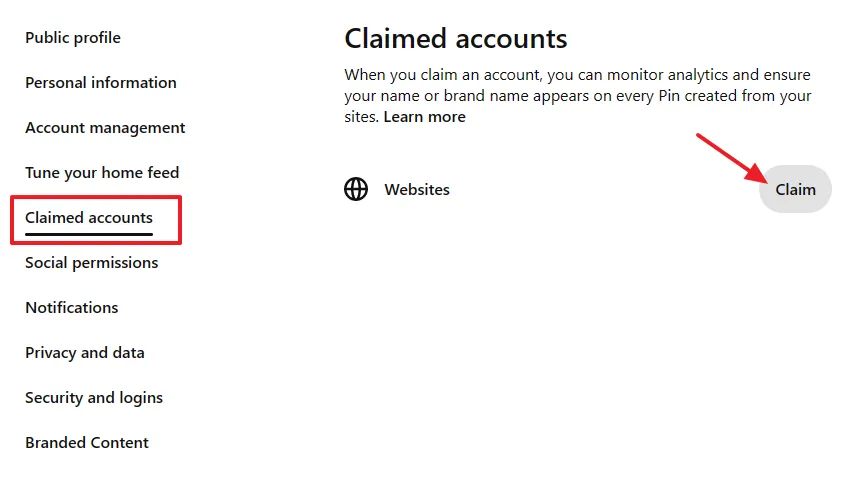
- Go to Claimed accounts from the Sidebar.
- Click the Claim button corresponding to Websites.
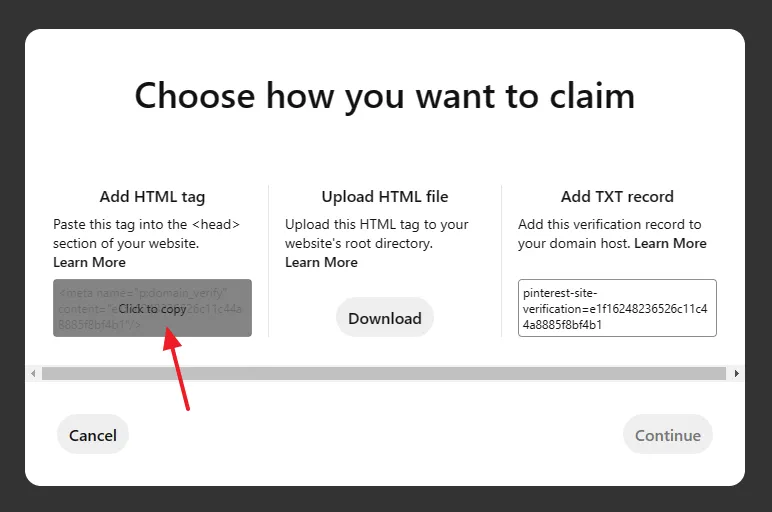
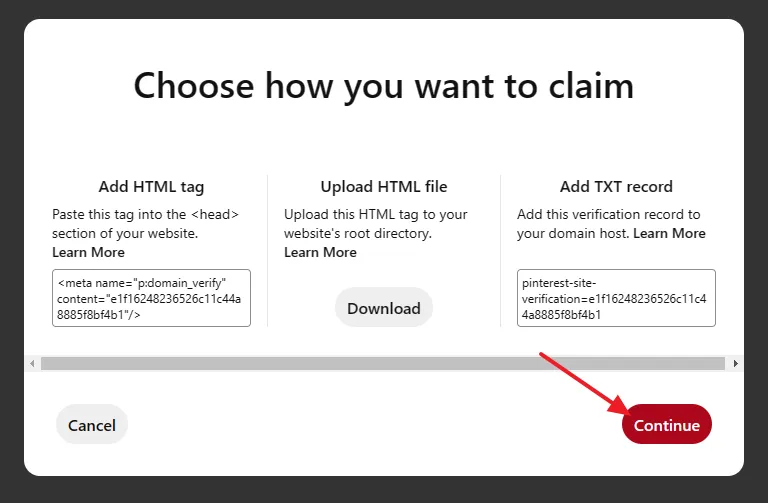
Pinterest offers 3 methods to claim your website (1) Add HTML tag (2) Upload HTML file (3) Add TXT record. With Blogger website/blog you can claim only with the first method i.e. Add HTML tag. The other two methods are not applicable for Blogger because it doesn’t allow access to root directory and domain DNS settings. If you have a self-hosted WordPress or WIX site you can claim it with any of the three methods.
Follow the steps to claim your Blogger blog on Pinterest via Add HTML tag method.
- Go to Add HTML tag section and click the Click to copy to copy the HTML tag.
- You have to Paste this copied HTML tag between the <head> </head> tags in your Blogger theme, as I have shown in the below steps.
Note: Do not close this window, as you have to comeback here again after adding the HTML tag in your Blogger theme.
- Go to Theme from your Blogger sidebar.
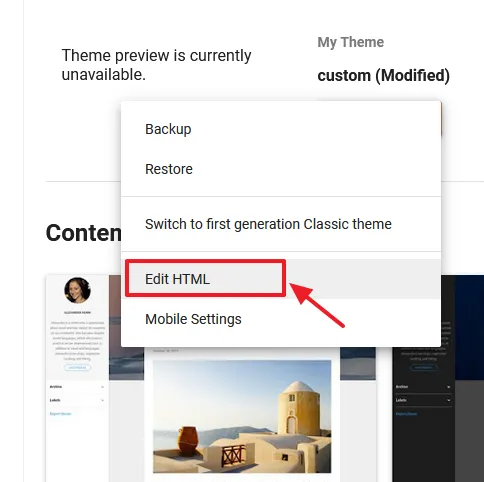
- Click the Downward Arrow attached next to CUSTOMIZE button.
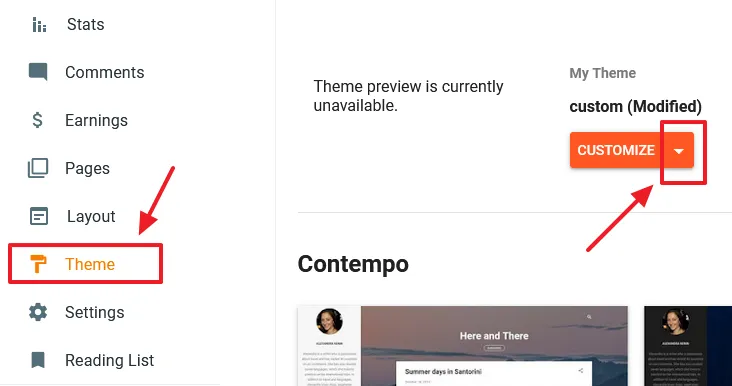
- Click the Edit HTML option.
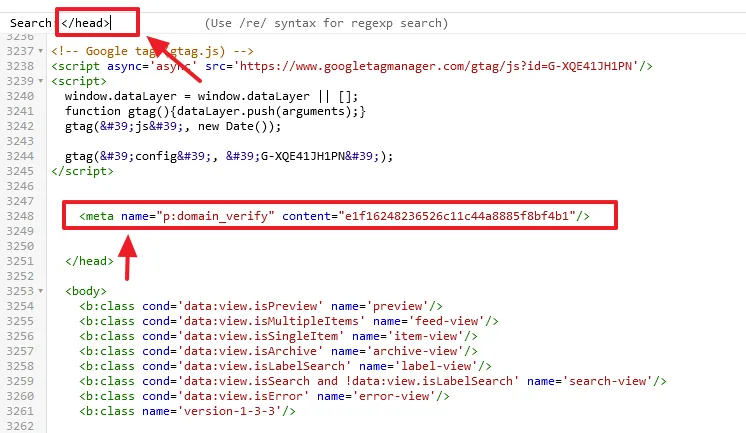
- On your Blogger HTML Editor press Ctrl + F to open its Search Bar. Enter the </head> tag in the search bar.
- Just above the </head> tag in the Blogger theme Paste the HTML tag that you have copied on Pinterest, as I have shown below.
- Click the Save icon to update your Blogger theme. Now go back to Pinterest page “Choose how you want to claim” and follow the next steps.
- Click the Continue button on Pinterest page.
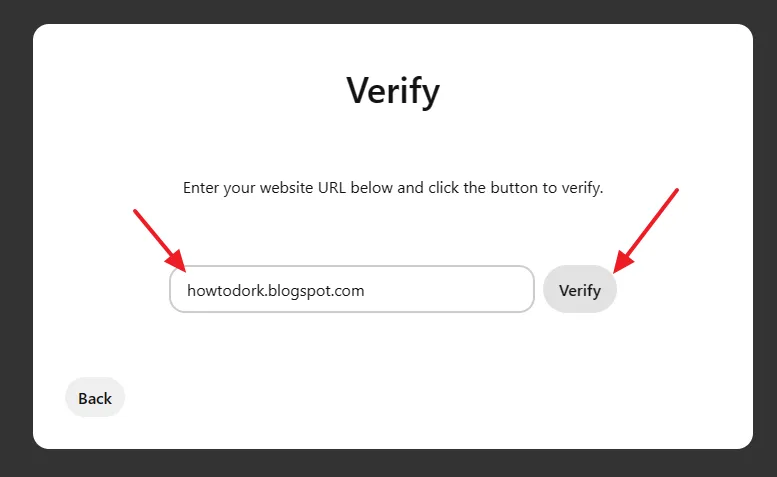
- On the Verify window enter your Blogger domain like “example.blogspot.com”.
- Click the Verify button.
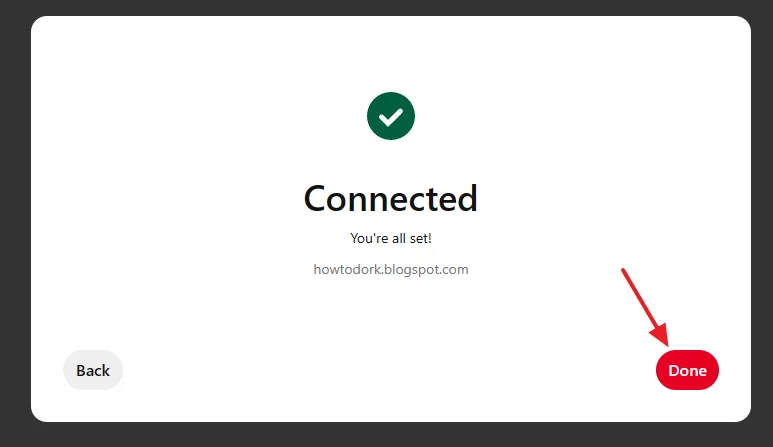
- You can see that the Blogger domain is Connected. It means your Blogger blog has been verified.
- Click the Done.
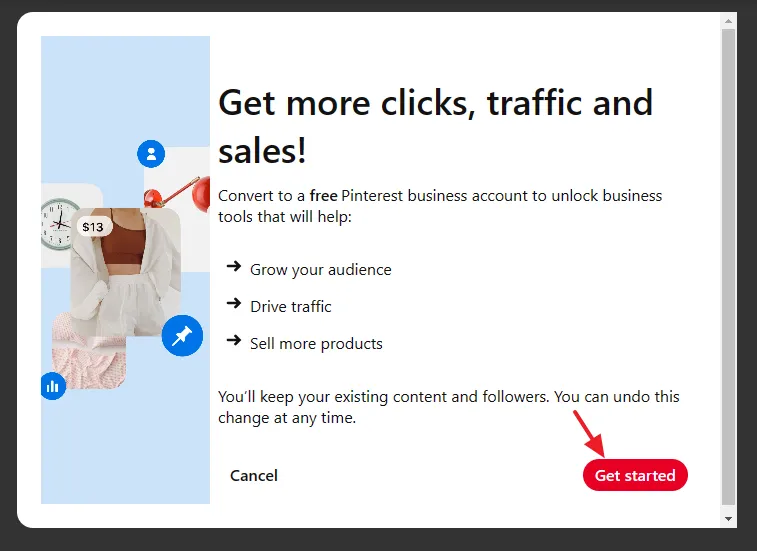
- Click the Get Started button.
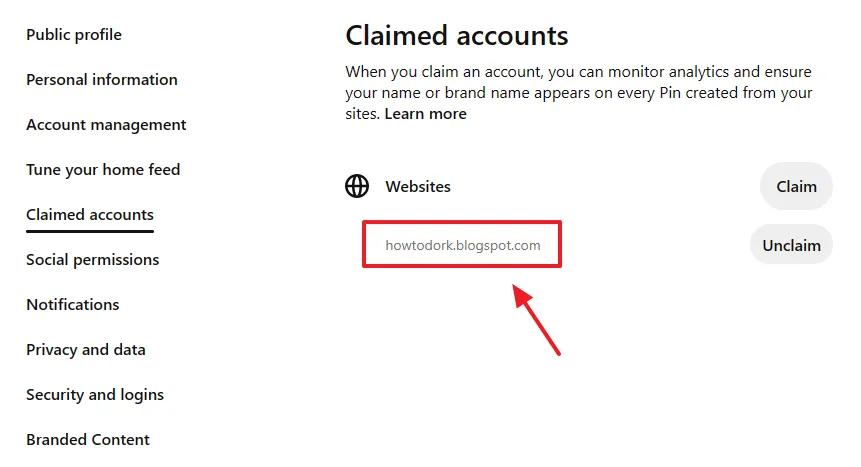
- You can see on the Claimed accounts that the Blogger domain is claimed. You can click the corresponding Unclaim button to unclaim the website.
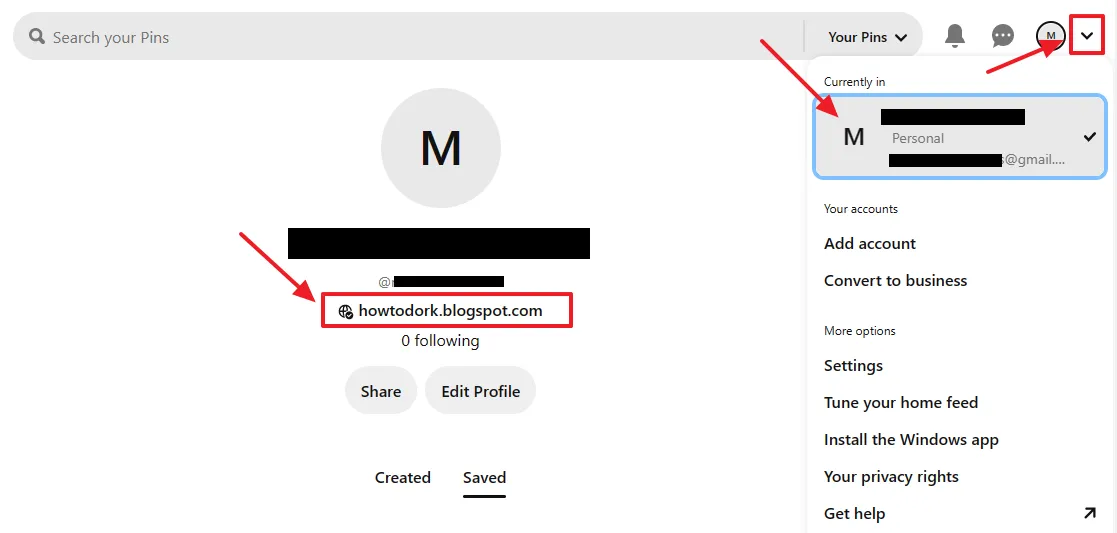
- Click the Downward Arrow located to top-right corner.
- Click on your Account Name/User under the Currently in section to open the profile page.
- You will see a Tick over a Globe icon which is placed next to your Blogger domain URL. It shows that this website is verified and belongs to you.
If you like this post then don’t forget to share with other people. Share your feedback in the comments section below.

Also Read
- 25 Best Niche Ideas For Pinterest 2020 & Beyond | Profitable Niche Ideas
- 5 Simplest Ways To Make Money With Pinterest | Earn Money Online
- Pinterest: How To Add/Create Or Upgrade To A Free Business Account – Step By Step
- How To Create Boards & Pins On Pinterest | Learn How To Use Pinterest
- Complete Blogger/Blogspot Tutorials – Step By Step | Widgets, SEO, Monetization, Conditional Tags


Leave a Reply