Do you want to claim your WordPress website/blog on Pinterest? You’re in the right place.
In this tutorial, I will guide you step-by-step on how to claim your WordPress website on Pinterest using 3 different methods (1) Add HTML Tag (2) Upload HTML File (3) Add TXT Record.
Pinterest uses a mechanism called Claim to verify the ownership of a website. When you claim a website on Pinterest you can monitor analytics and ensure your name, profile picture, or brand name appears on every Pin created from your website. A Globe having a Checkmark over it, appears next to your website URL on your Pinterest profile.

If you’re a Verified Merchant, you’ll see a Blue Checkmark on your Pinterest profile. A blue checkmark on your Pinterest profile and Pins confirms that you’ve been vetted. As a verified merchant, your Pins may appear organically to people in the Pinterest search results against the search queries related to products and shopping.
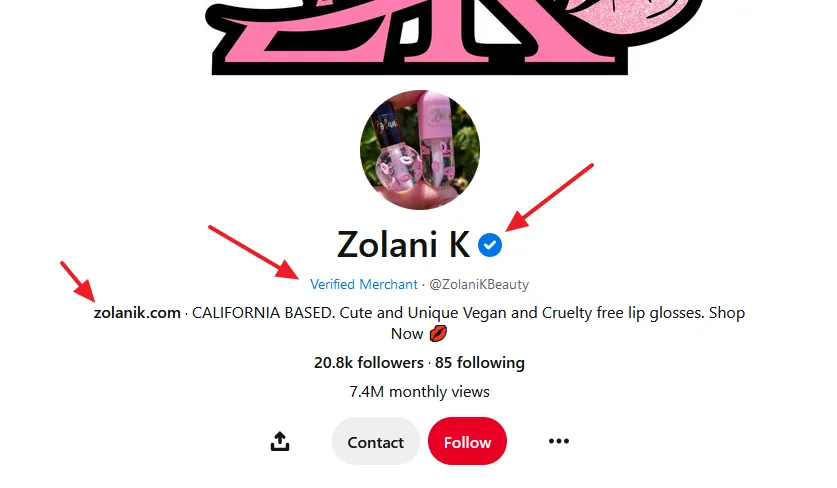
If you’re a Verified Account or Creator, you’ll see a Red Checkmark on your Pinterest profile. The purpose of Verified Account or Creator on Pinterest is to distinguish the notable accounts from others. It is mostly given to brands, celebrities, and media.

Though you can claim your WordPress website using any of the below methods, but I will recommend you to use the Method 3 i.e. Add TXT Record.
Following topics will be covered in this tutorial:
- How to Claim Website Using Add HTML Tag on Pinterest
- How to Claim Website Using Upload HTML File on Pinterest
- How to Claim Website Using Add TXT Record on Pinterest
RELATED
- How to Convert Pinterest Personal Account to Business Account
- How to Create a Pin, Idea Pin, & Board on Pinterest
- How to Migrate Hosting & Transfer Domain to Namecheap
- How to Optimize Images For Pinterest SEO
01. How to Claim Website Using Add HTML Tag on Pinterest
In this section, I will guide you step-by-step on how to claim your WordPress website using the Add HTML Tag on Pinterest.
- Login to your Pinterest account.
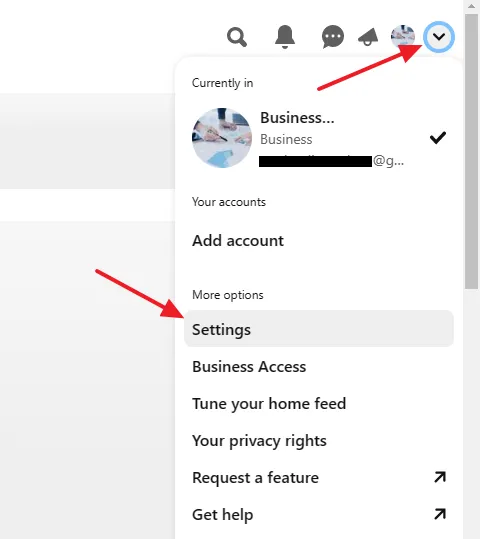
- Click on the Downward Arrow located at the top-right corner.
- Under the More options section, click on the Settings.
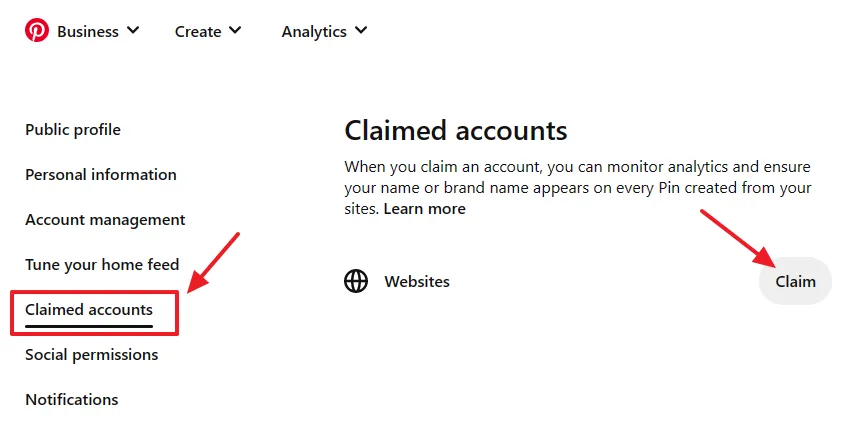
- Click on the Claim accounts tab from the sidebar.
- Click on the Claim button opposite to Websites.
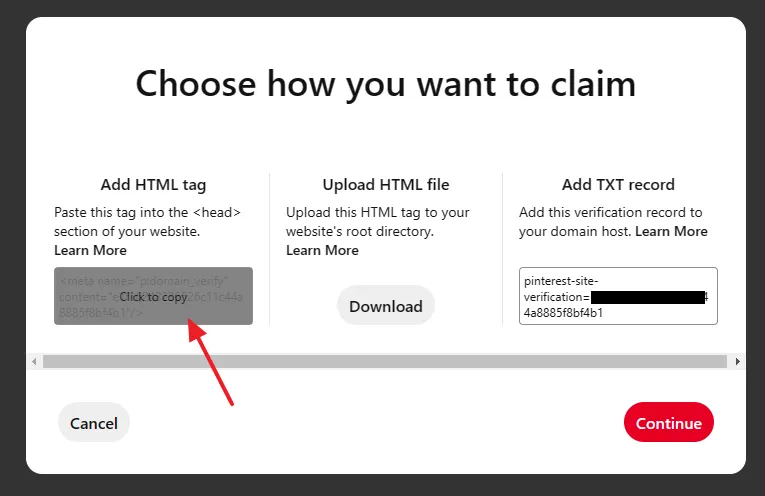
- Go to Add HTML tag section and click on the tag to copy it.
- After copying the tag paste it in the Header section of your WordPress theme, as shown in the next steps.
DON’T CLOSE this window, as you have to return back here after pasting the tag in the theme.
You can directly add the HTML tag in the WordPress theme but it is not recommended, instead you can use a plugin called WPCode.
- Go to Plugins from your WordPress sidebar and click on the Add New.

- In the Plugins Searchbar enter Code Snippets or WPCode.
- The plugin will appear on the search results. Click on the Install button. Once it is installed, click on the Activate button.
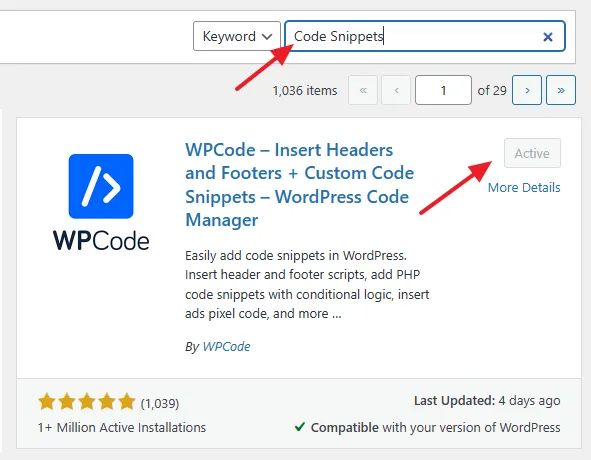
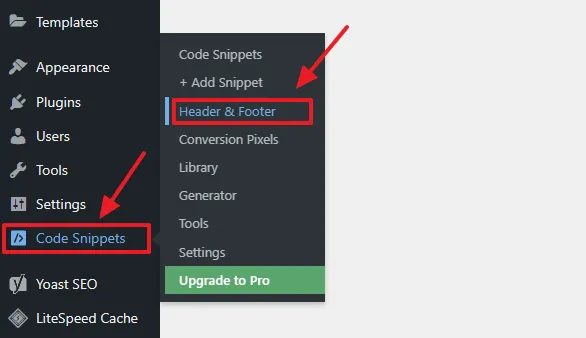
- The WPCode plugin will appear in your WordPress sidebar with the name Code Snippets.
- Click on the Header & Footer.
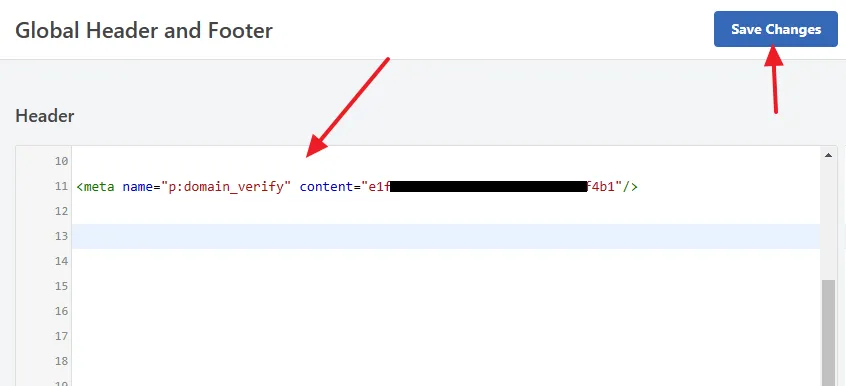
- Paste the HTML Tag that you have copied on Pinterest in the Header section.
- Click on the Save Changes button.
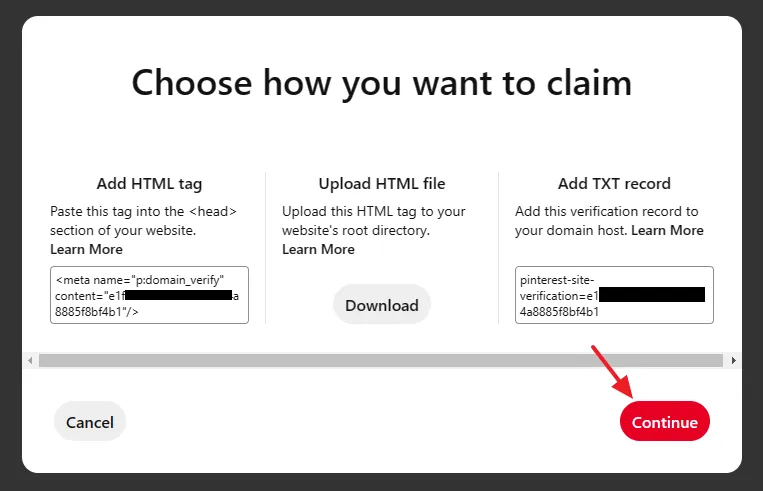
- Go to Pinterest (Choose how you want to claim) and click on the Continue button.
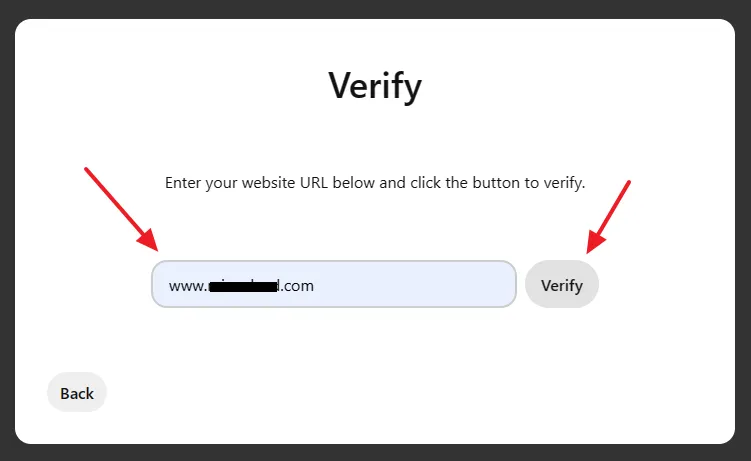
- Enter your website URL like, www.example.com and click on the Verify button.
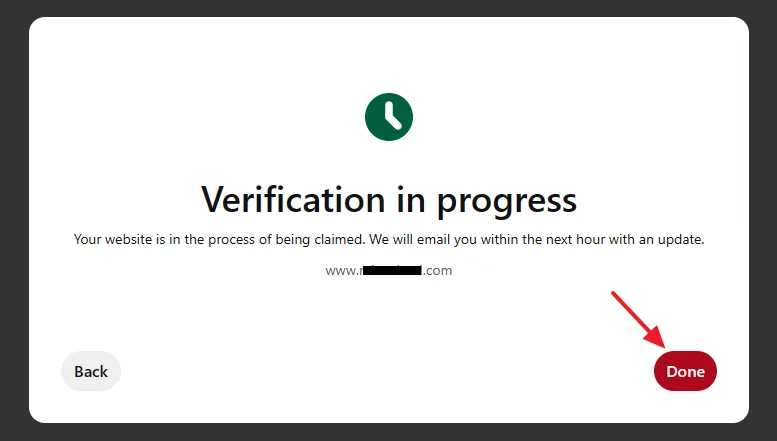
- Pinterest may show you a message, “Verification in progress. Your website is in the process of being claimed. We will email you withing the next hour with an update“.
- Click on the Done button.
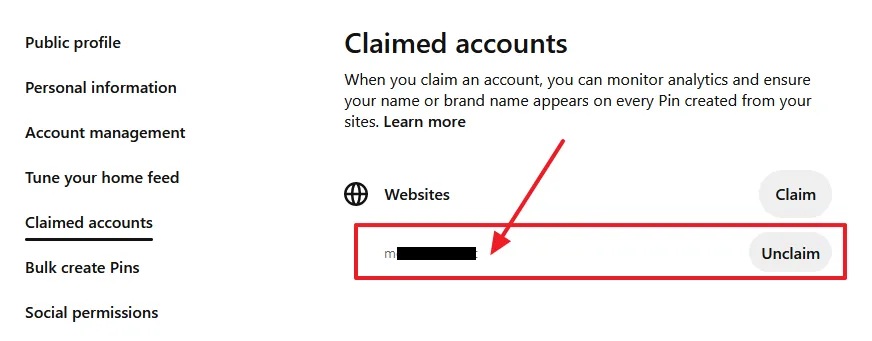
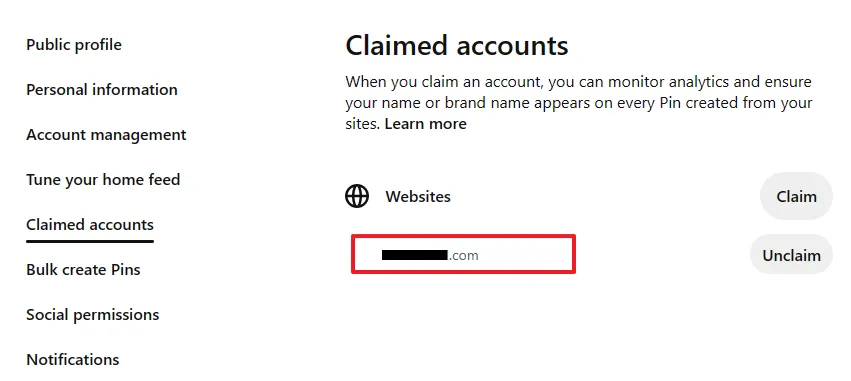
- Once your website is verified (claimed) it will be listed on the Claimed Accounts. If you want to remove the website, click on the Unclaim button.
02. How to Claim Website Using Upload HTML File
In this section, I will guide you step-by-step on how to claim your WordPress website on Pinterest using the Upload HTML File method.
- Login to your Pinterest account.
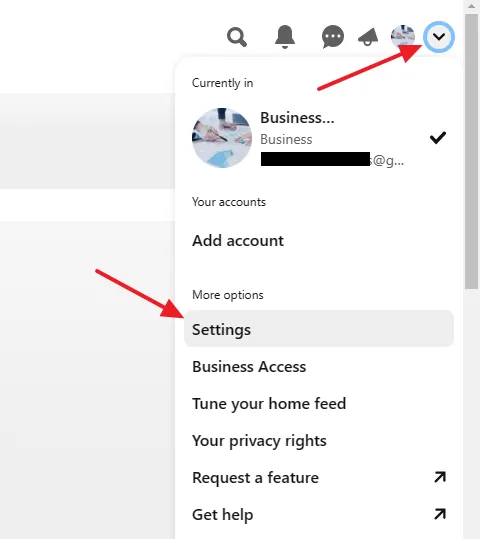
- Click on the Downward Arrow located at the top-right corner.
- Under the More options section, click on the Settings.
- Click on the Claimed accounts tab from the sidebar.
- Click on the Claim button opposite to Websites.
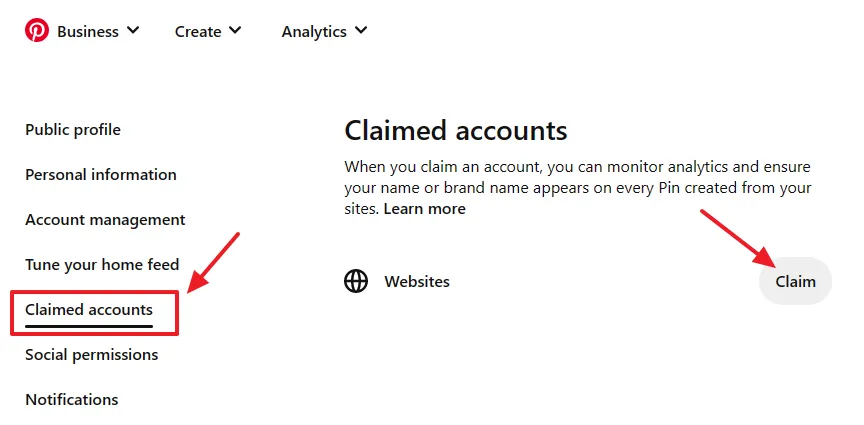
- Go to Upload HTML file section and click on the Download button. The file will be saved in your computer.
DON’T CLOSE this window as you have to return back here after uploading the HTML File to your website’s root directory.
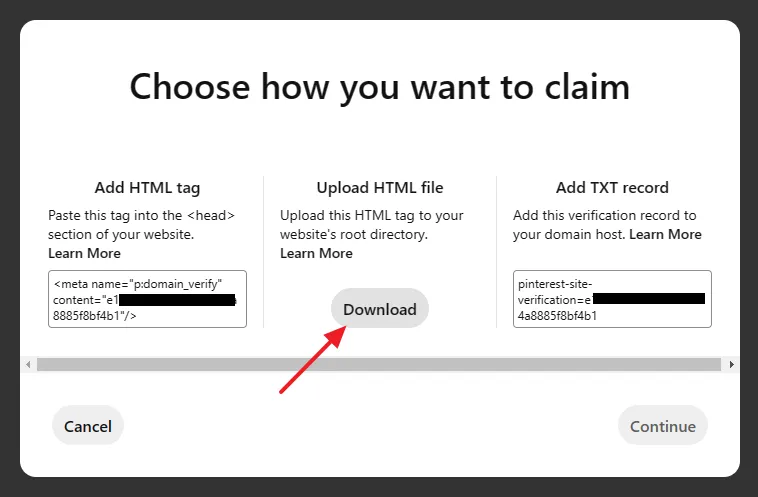
- Locate the downloaded file in your computer. Most browsers download this file to your Downloads folder. You have to upload this file to your website’s root directory, as I have shown in the next steps below.
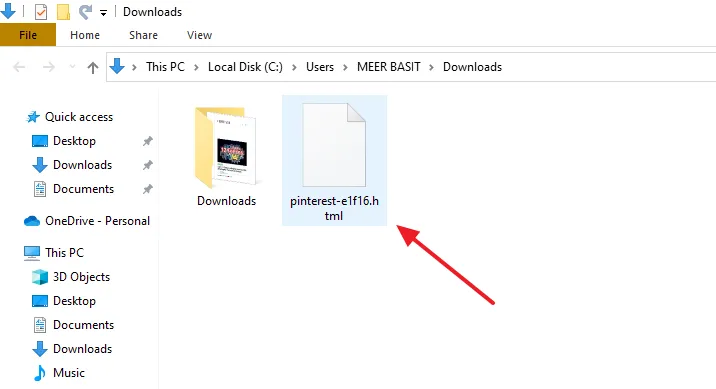
- Login to your cPanel account where your website is hosted.
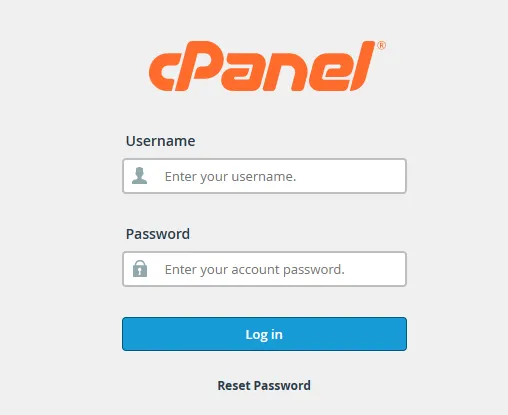
- Go to FILES section, click on the File Manager.
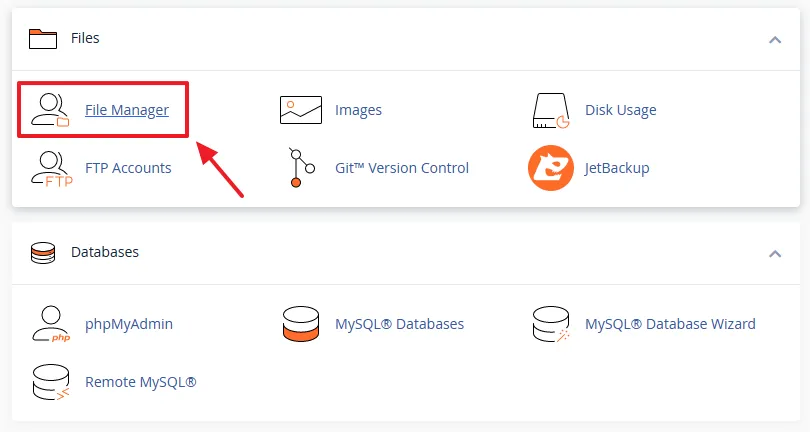
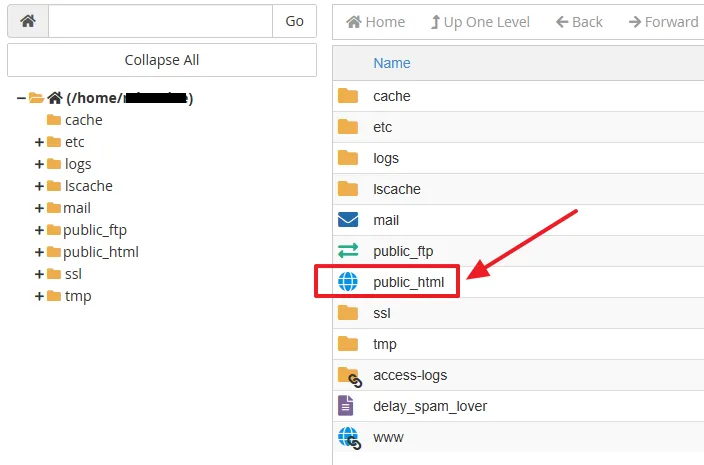
- Click on the public_html directory. The public_html directory is the root folder of your website where all the files and folders of your website are stored.
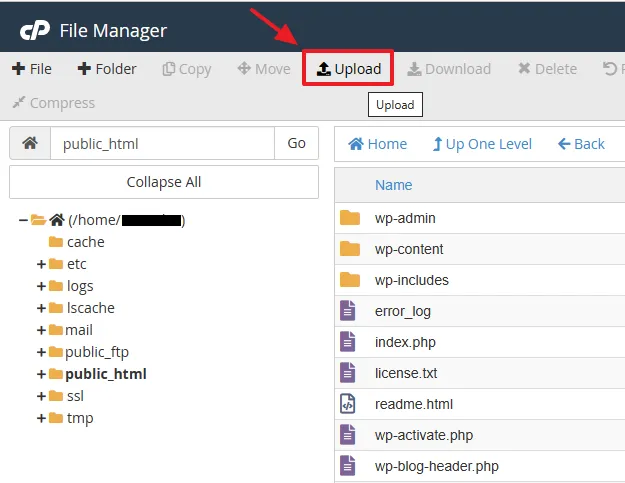
- Click on the Upload tab.
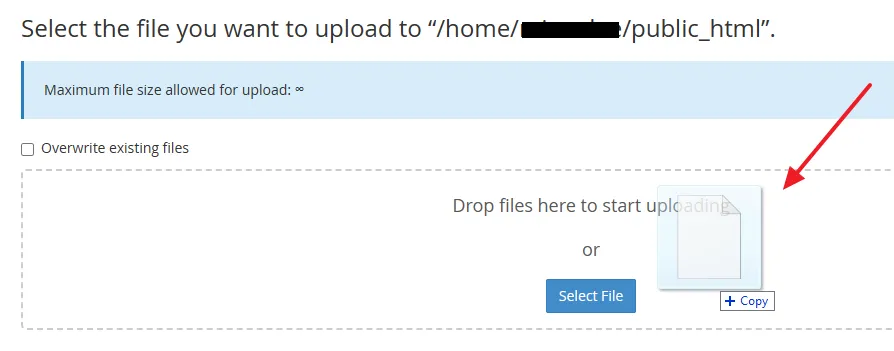
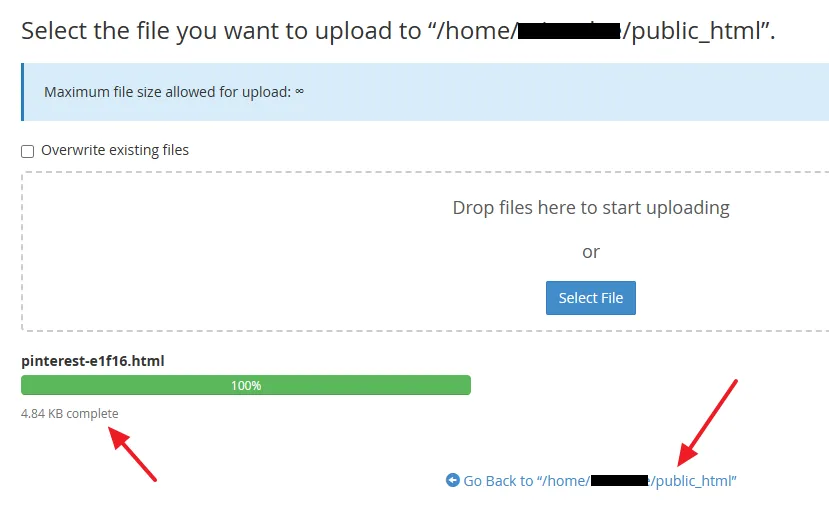
- Click on the Select File button to browse and upload the file that you have downloaded from Pinterest or Drag and Drop that file in the given area, as I have shown.
- The Pinterest file has been uploaded successfully. Go back to public_html directory.
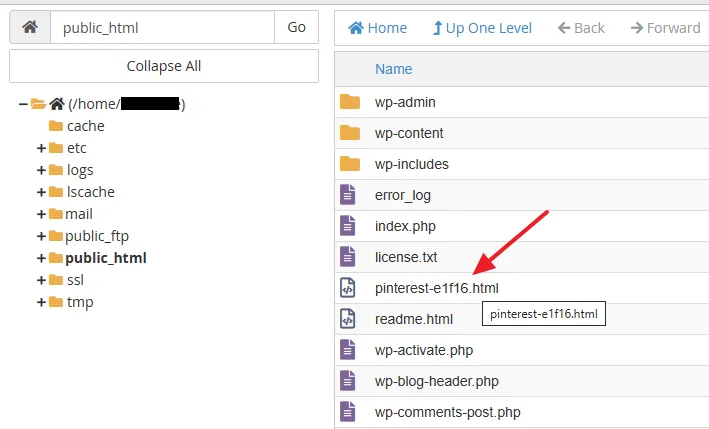
- You can see in the public_html directory that the Pinterest file is listed.
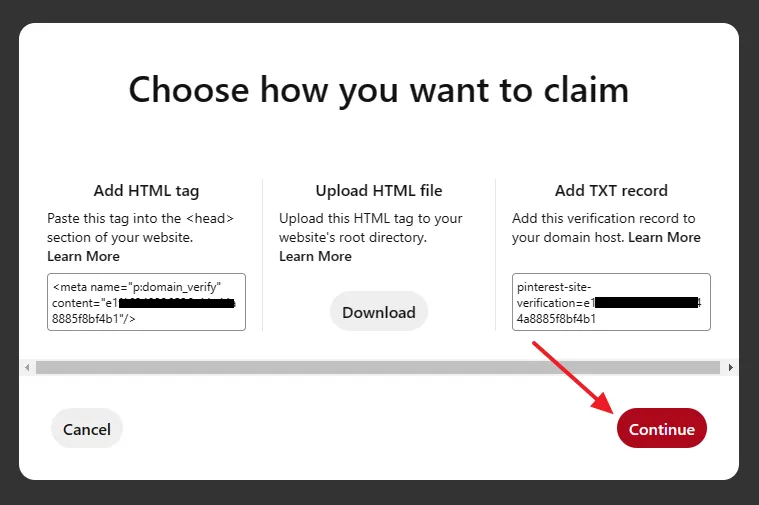
- Go back to Pinterest (Choose how you want to claim) and click on the Continue button.
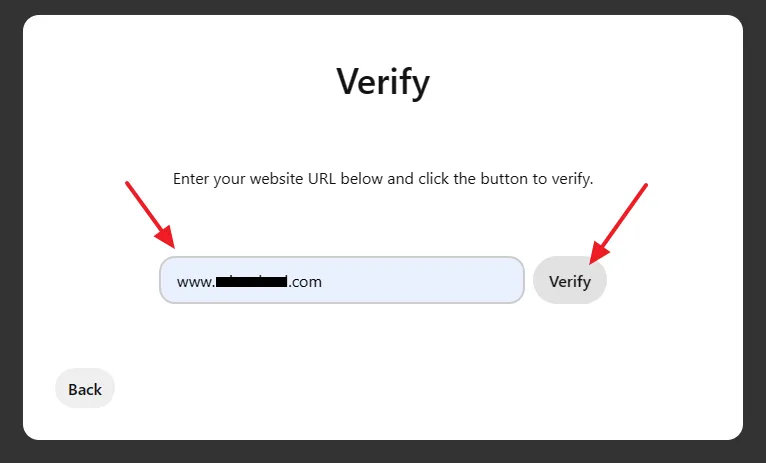
- Enter your website URL like, www.example.com, and click on the Verify button.
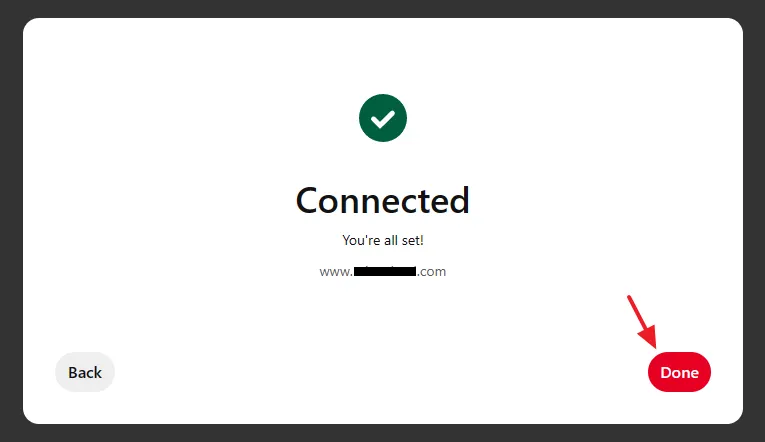
- If your website is verified, you will see a message, “Connected. You’re all set!“.
- Click on the Done button.
You can also remove the Pinterest file from the “public_html” directory once your website is successfully claimed on Pinterest.
After a website is claimed, it is listed on the Claimed accounts. If you want to remove your website click on the Unclaim button.

03. How to Claim Website Using Add TXT Record
In this section, I will guide you step-by-step on how to claim your WordPress website on Pinterest using the Add TXT Record method. The TXT Record is also called Text Record that provides text information to sources outside your domain.
- Login to your Pinterest account.
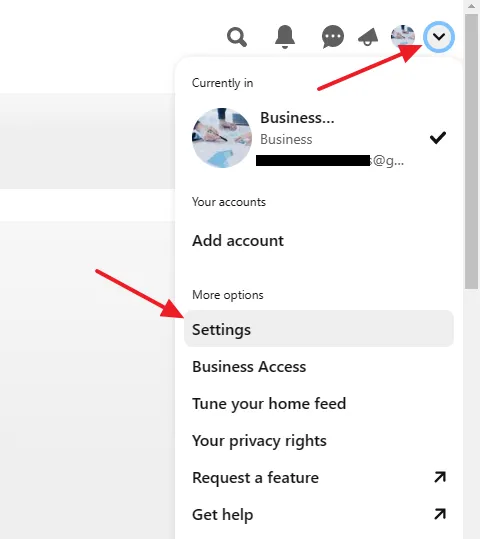
- Click on the Downward Arrow located at the top-right corner.
- Under the More options section, click on the Settings.
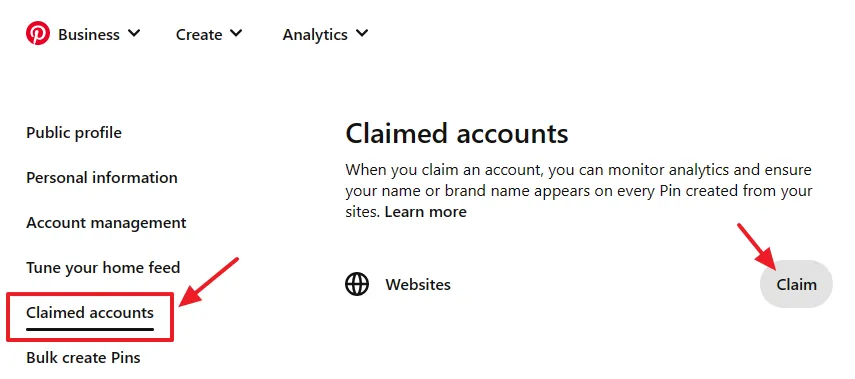
- Click on the Claimed accounts tab from the sidebar.
- Click on the Claim button opposite to Websites.
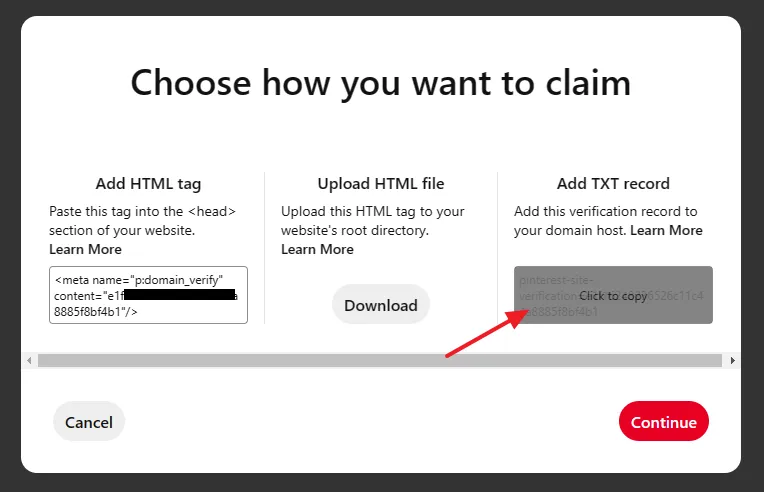
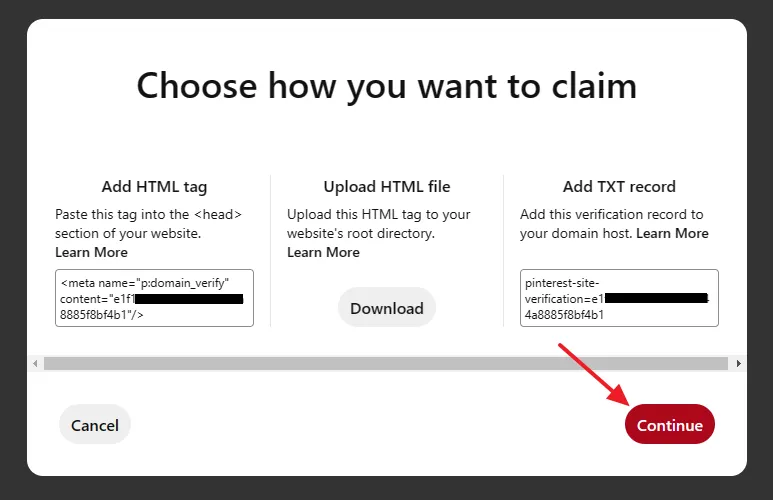
- Go to Add TXT record section and click on the verification record to copy it.
DON’T CLOSE this window, as you have to return back here after adding the TXT Record to your domain’s DNS record section.
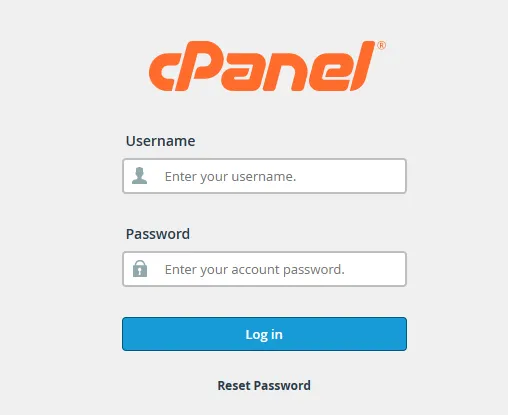
- Login to your cPanel account where your website and domain are hosted.
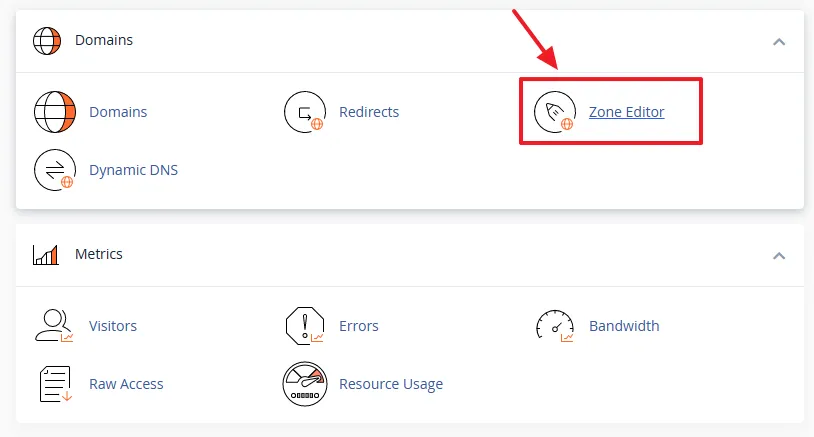
- Go to Domains section and click on the Zone Editor.
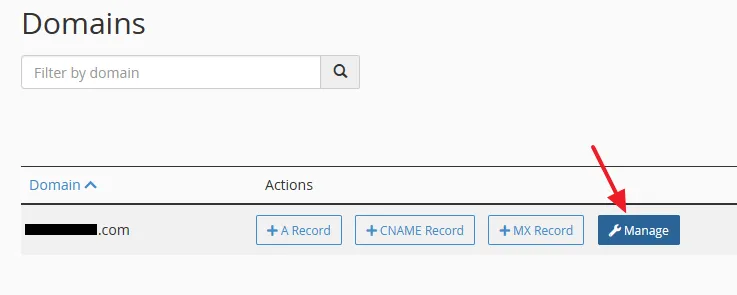
- Click on the Manage button related to your domain.
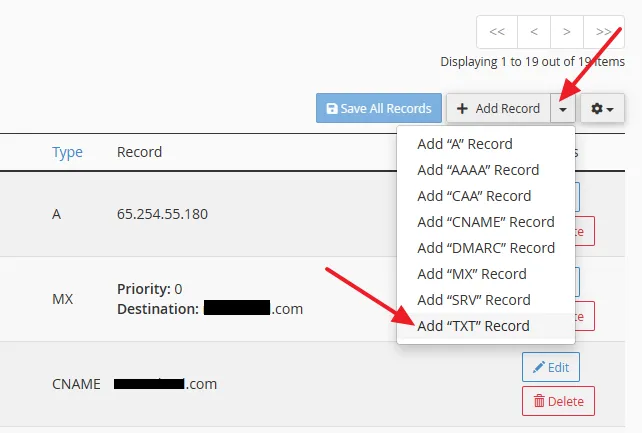
- Click on the + Add Record dropdown list.
- Select Add “TXT” Record.
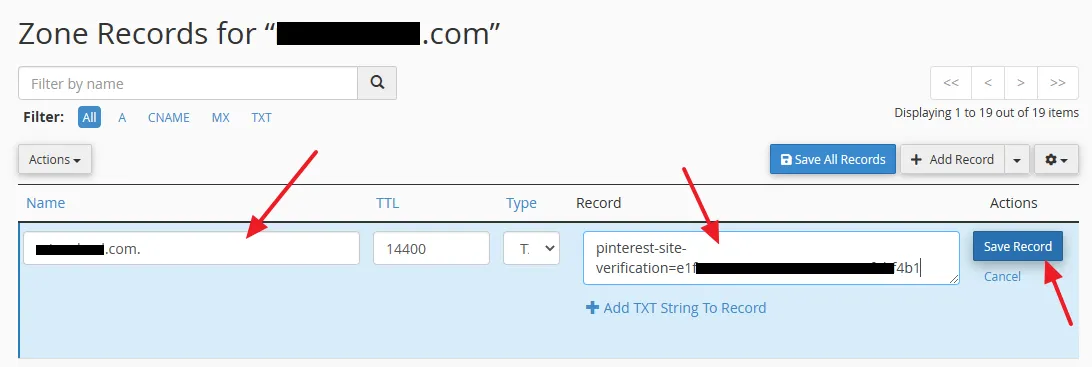
- Paste the verification code that you have copied on Pinterest in the Record field.
- In the Name (valid zone name) enter your domain name like, example.com. If there is Host field instead of Name field enter the @ symbol that also means root site like, example.com. Leave TTL and Type as it is.
- Click on the Save Record button. If it is added successfully you will see a message, “TXT record is added successfully“.
- Now go back to Pinterest (Choose how you want to claim) and click on the Continue button.
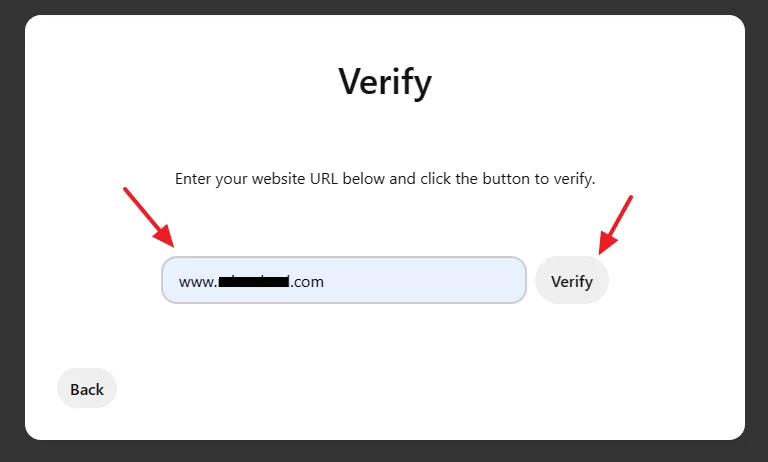
- Enter your Website URL like, “www.example.com” and click on the Verify button.
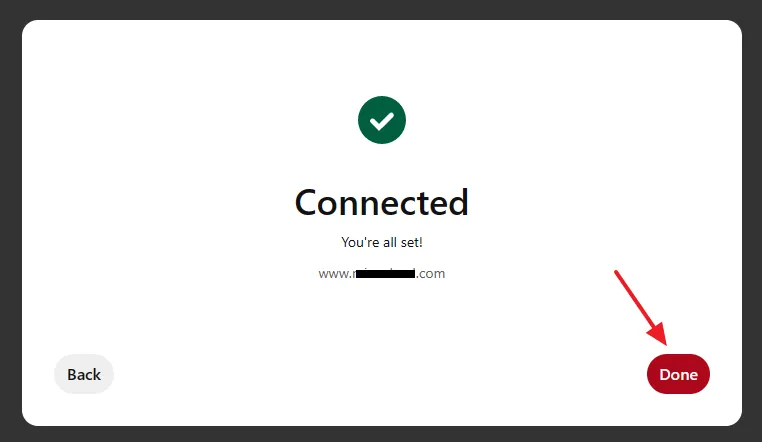
- If it is verified successfully, Pinterest will show you a message, “Connected. You’re all set!“.
- Click on the Done button.
- After a website is claimed it is listed on the Claimed accounts. If you want to remove your website click on the Unclaim button.
So it was all about claiming a WordPress website/blog on Pinterest using three different methods. Hope this tutorial would have helped you. If you like this post then don’t forget to share with other people. Share your feedback in the comments section below.
Also Read


Leave a Reply