Do you want to know what are Pin, Idea Pin, and Board on Pinterest and how to create them? You’re in the right place.
In this tutorial, first of all I will explain to you what are Pin, Idea Pin, and Board, and then I will guide you step-by-step on how to create a Pin, Idea Pin, and Board on Pinterest.
Following topics will be covered in this post:
- Difference Between Pin & Idea Pin on Pinterest
- What is a Board on Pinterest?
- How to Create a Pin & Board on Pinterest
- How to Create an Idea Pin on Pinterest
RELATED
- How to Create a Pinterest Account & Set Up Its Settings
- How to Claim a Blogger Website/Blog On Pinterest
- How to Claim WordPress Website on Pinterest | 3 Methods
- How to Optimize Images For Pinterest SEO
01. Difference Between a Pin & Idea Pin
In this section, you will learn about what are Pin and Idea Pin on Pinterest, and the difference between them.
Regular Pin
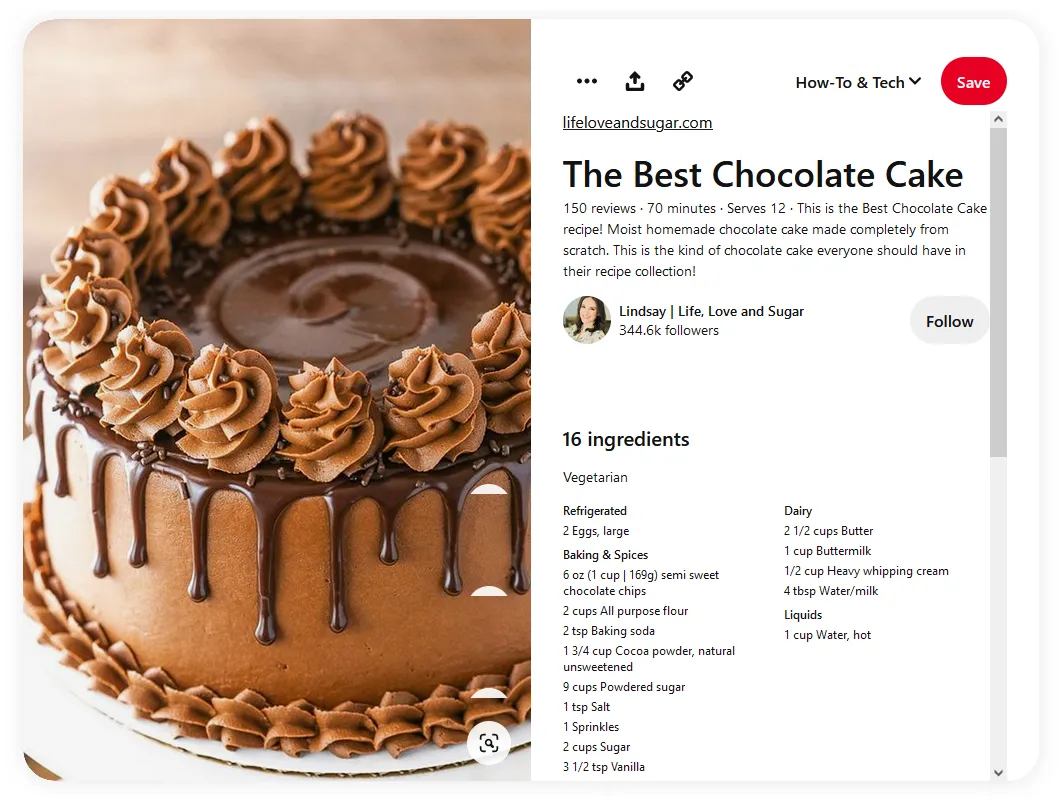
A Pin is also called a Regular Pin, that contains an image/GIF/video, title, description, and a destination URL (optional) of a page or website. If you add the destination URL the Pin and URL are merged together. When that Pin is clicked it redirects you to the page/website of the destination URL.
There are different types of Pins on Pinterest, i.e. image pins, video pins, and product pins. The product Pins lead you to shopping stores and product detail pages.
Example of a Pin on Pinterest.
Idea Pin
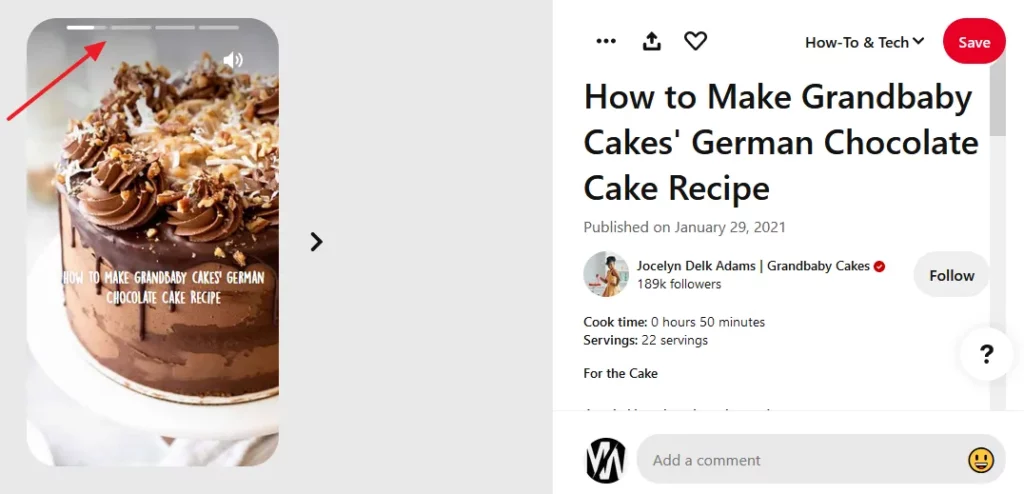
An Idea Pin, also known as Story Pin, is a high quality, long lasting, and savable content directly on Pinterest. The Idea Pin shows ideas in a little series of images and videos that remain Pins on Pinterest.
It allows Pinterest content creators to share long lasting ideas, and not just stories. Idea Pin on Pinterest does not disappear after 24 hours, like Instagram stories, Facebook stories, and WhatsApp stories. Once an Idea Pin is published it stays on your Pinterest account and can even rank in the Pinterest search results.
You can link a page, post, or a website to a Regular Pin, but there are no links on Idea Pins. You cannot click on the Pin that leads to a website or a page, but you can add tags in them. You can only add a single image, video, or a GIF on a Regular Pin, whereas you can add more than one image, video, or GIF on a single Idea Pin.
When to Create an Idea Pin?
Create an Idea Pin when you want to share positive, inspirational, and educational ideas with your community. For example, step-by-step tutorials, guides, recipe instructions, etc.
Example of a Idea Pin on Pinterest.
02. What is a Board On Pinterest?
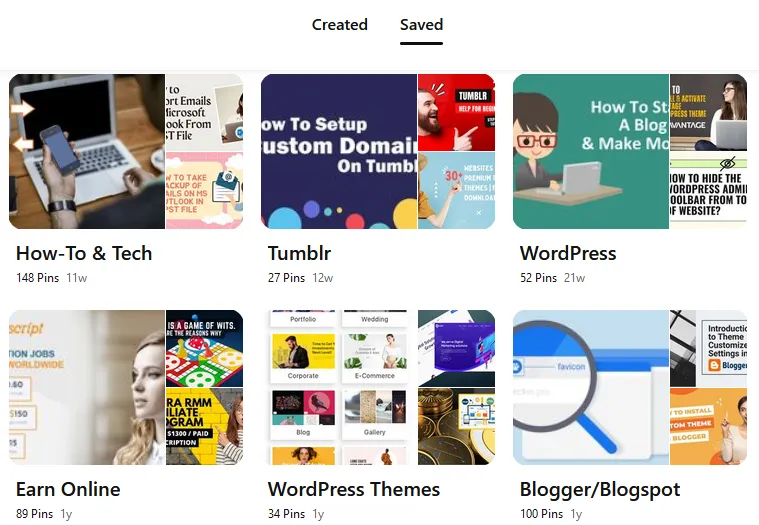
Board is a container or folder where you add Pins & Idea Pins. Boards help you to arrange your items in a structured way, so that you can easily manage your Pins & Idea Pins. It is also easier for visitors to follow their desired Board and find the relevant Pins & Idea Pins on your Pinterest account.
You can create a Board on Pinterest while creating a Pin, as I have shown in the Section 3 below.
Examples of Boards on a Pinterest account.
03. How to Create a Pin & Board on Pinterest
In this section, I will guide you step-by-step on how to create your first Pin and Board on Pinterest.
- Login to your Pinterest account and go to top of the page.
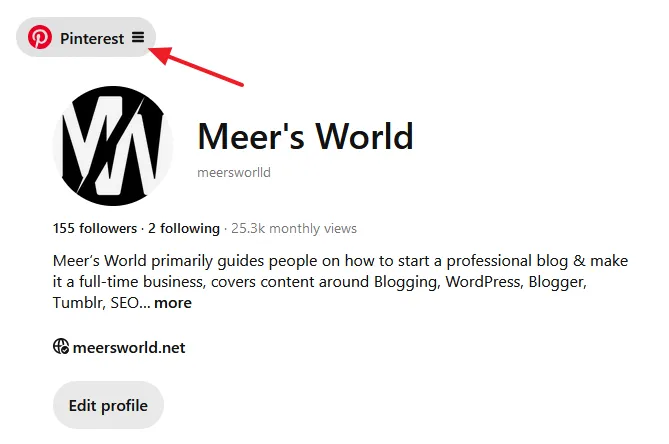
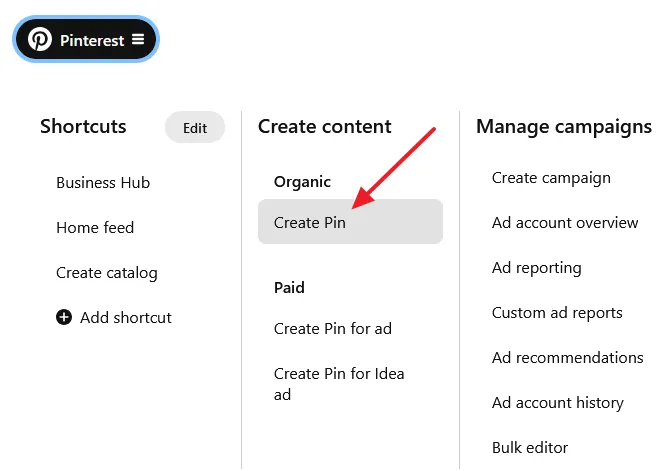
- Click on the Pinterest Hamburger Icon.
- Click on the Create dropdown list to expand the options.
- Click on the Create Pin.
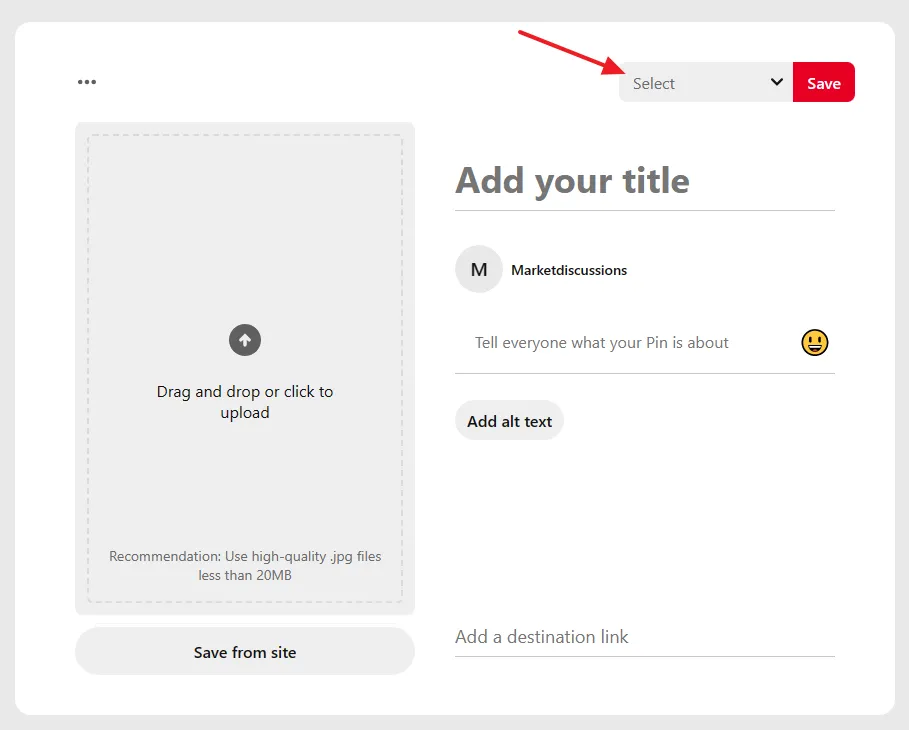
- First of all select a Board for your Pin.
- Click on the Select dropdown list, located at top of the Pin Builder.
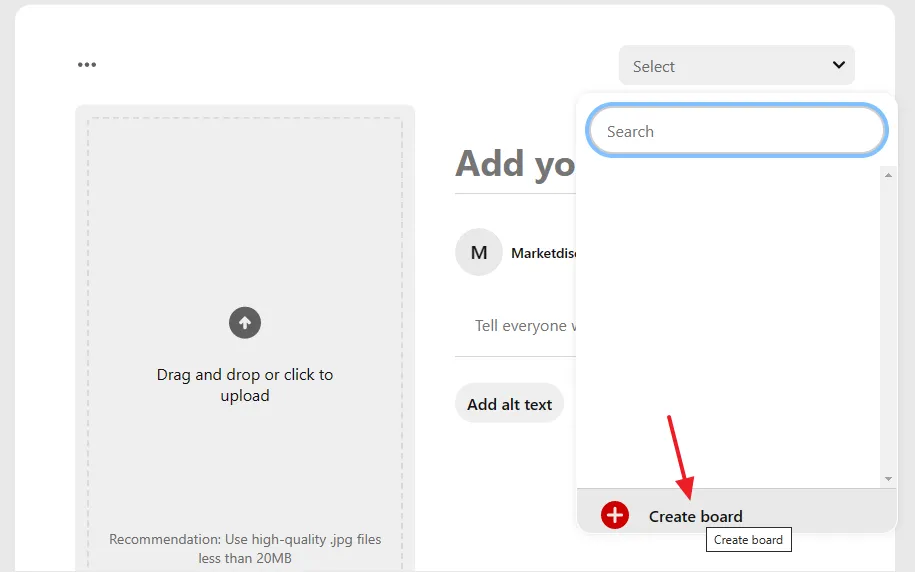
- If you have created Boards previously they will appear in the list. You can select a Board from the list.
- To create a new Board, click on the + Create board.
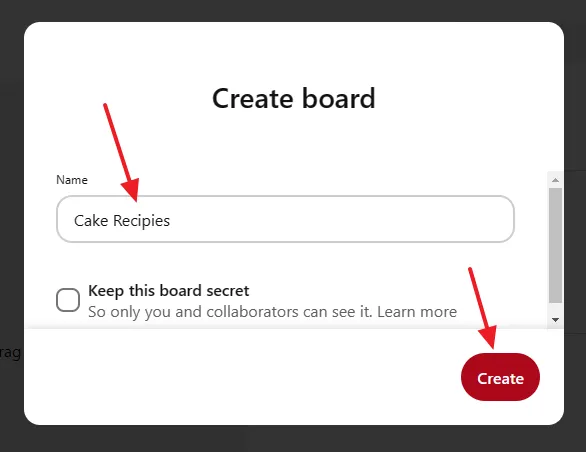
- In the Name, enter the name of your Board relevant to a Pin.
- If you want to hide the Board from others except the Collaborators, tick the Keep this Board secret. The Collaborators are Pinterest users who you allow to add/move/delete Pins on the Board.
- Click on the Create button.
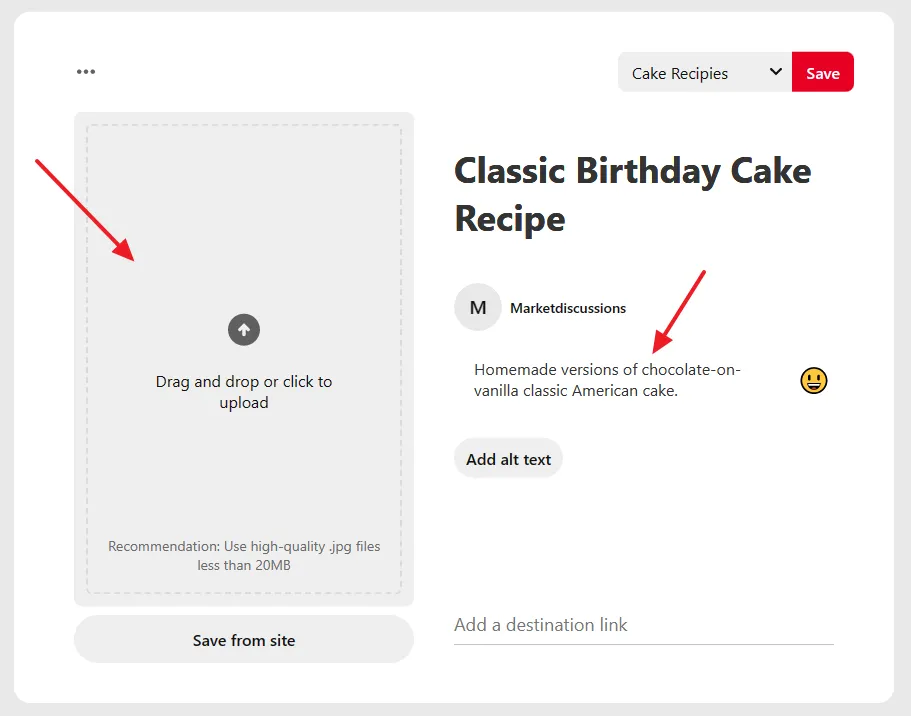
- Enter the Description of your Pin.
- Drag & Drop your image/video on the image-upload space from your computer or click on the Drag and drop or click to upload space to browse and upload the image/video from your computer.
Note: If you want to add image from a website page, click on the Save from site. Pinterest will extract/import all the images from that page, you can choose the one which can best represents the Pin. The Page URL will be automatically added in the Add a destination link.
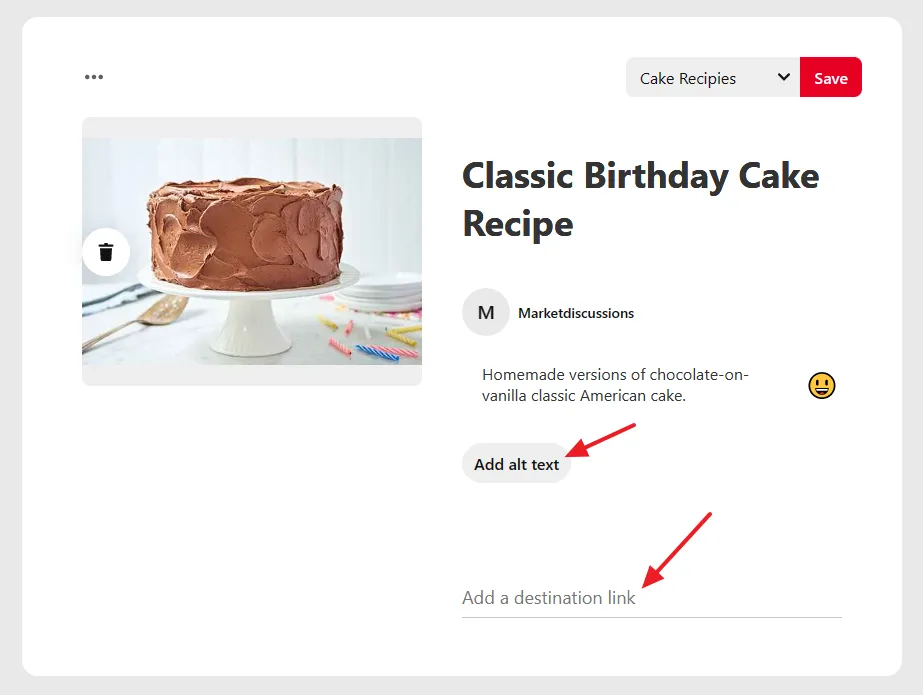
- The image is uploaded. Click on the Add Alt text to add the Alt text for the image. ALT stands for Alternate Text that describes the appearance or purpose of the image on a page. For the image below, the ALT text would be, “Classic American birthday chocolate cake“. Do not leave ALT text empty, as it is very important. Read more about the ALT Text.
- If you want to link your Pin to a website page, add the URL (link) of the page in the Add a destination link. It is optional.
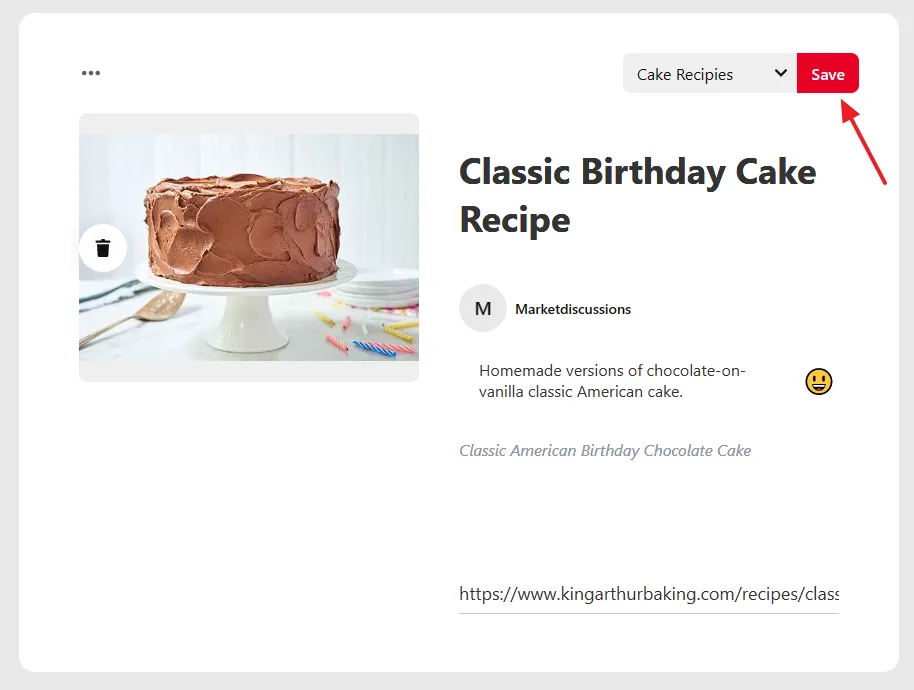
- Click on the Save button to create and publish your Pin.
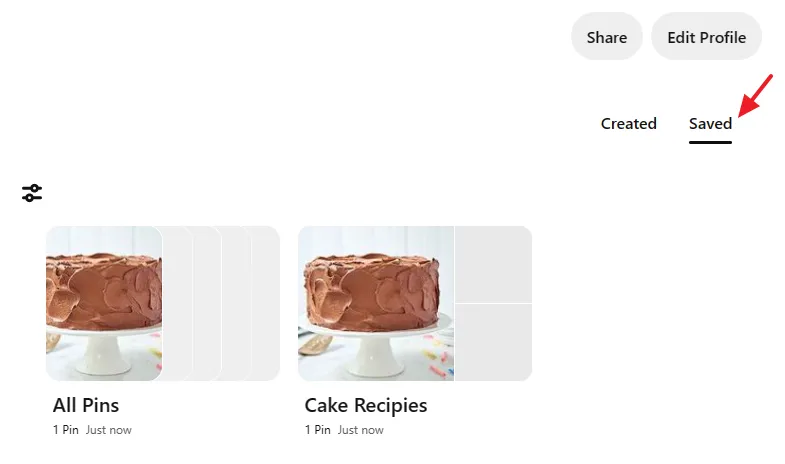
- Now go to your Pinterest Profile and click on the Saved tab to view the Board and Pin.
- You can see below, the Cake Recipes Board. Click on the Board that you have created.
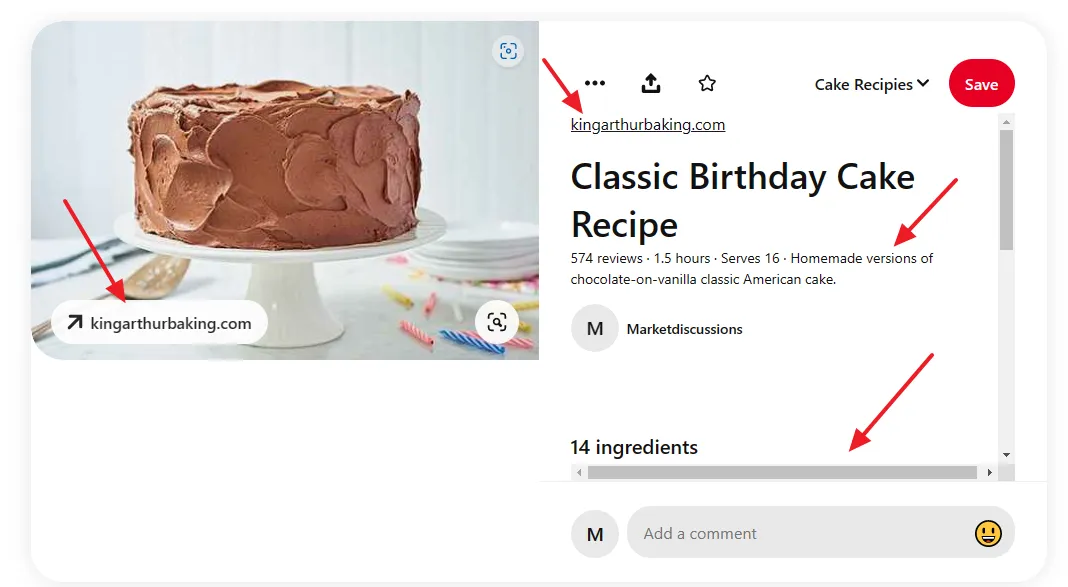
- Here you can see that I have opened the Pin that I had created. In addition to the destination URL of the page Pinterest has also added the website link of the page, above the Pin title. It has also imported some information automatically from the linked page, like reviews, time, ingredients, etc.
- You can also save a Pin to your other Boards.
How to Edit or Delete a Pin on Pinterest
You have successfully created your first Pin, now in this section I will guide you on how to edit or delete a Pin on Pinterest.
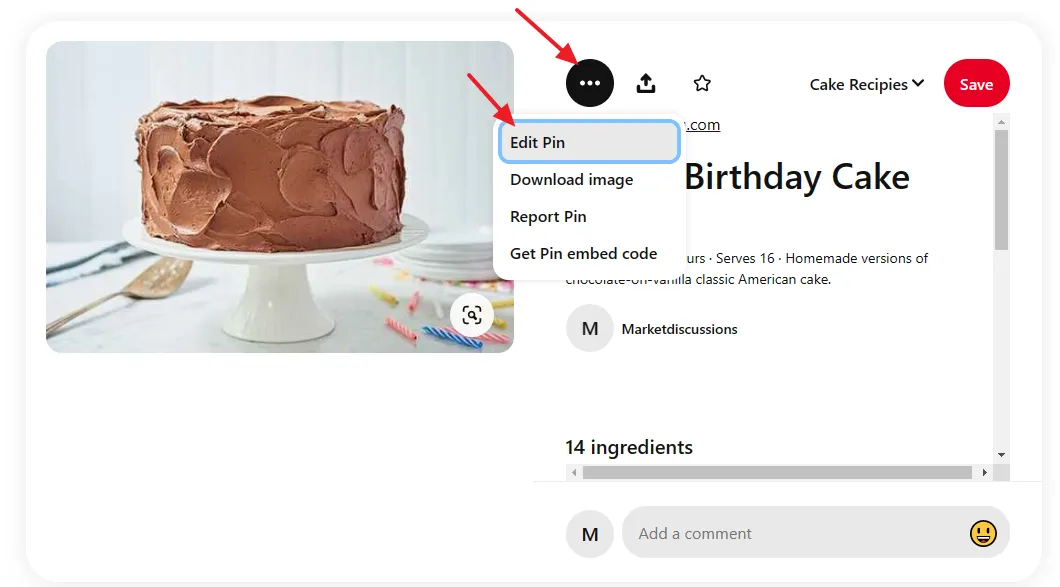
- Open your Pin and click on the Three horizontal Dots icon.
- Click on the Edit Pin.
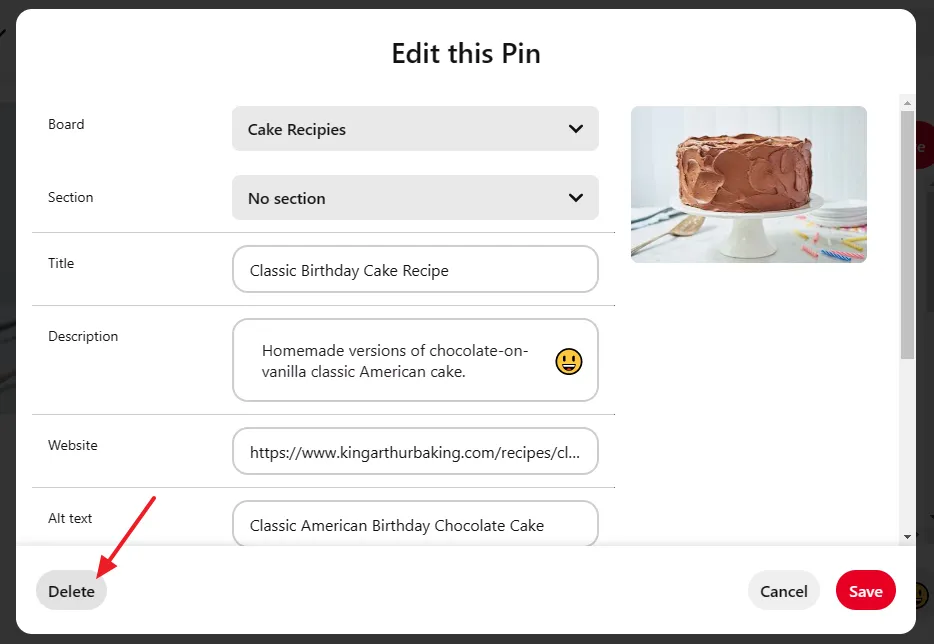
- After you edit the Pin, click on the Save button.
- To delete the Pin, click on the Delete button.
04. How to Create an Idea Pin on Pinterest
In this section, I will guide you step-by-step on how to create your first Idea Pin on Pinterest.
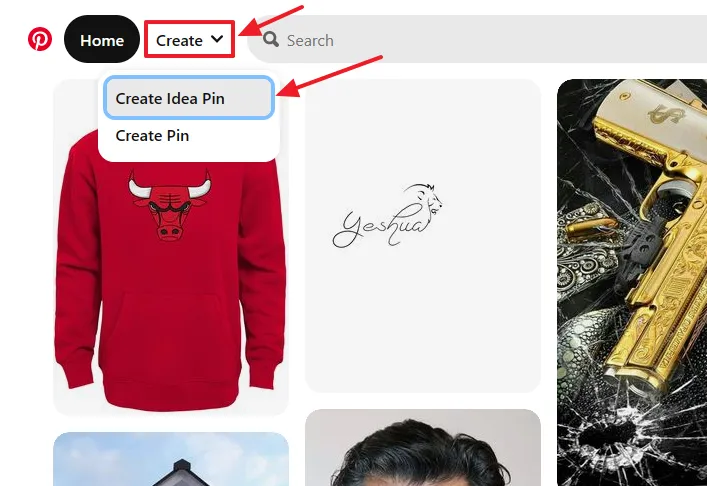
- Login to your Pinterest account and go to top of the page and click on the Create dropdown list.
- Click on the Create Idea Pin.
- Upload all the content of your Idea Pin that can be images, videos, and GIFs.
- You can Drag & Drop as well as browse from a location.
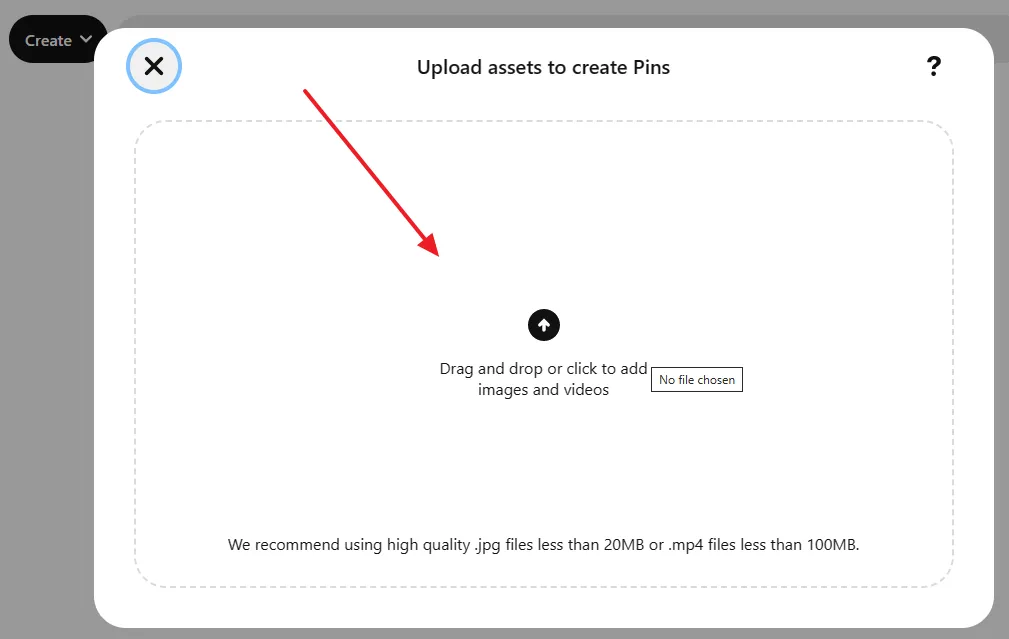
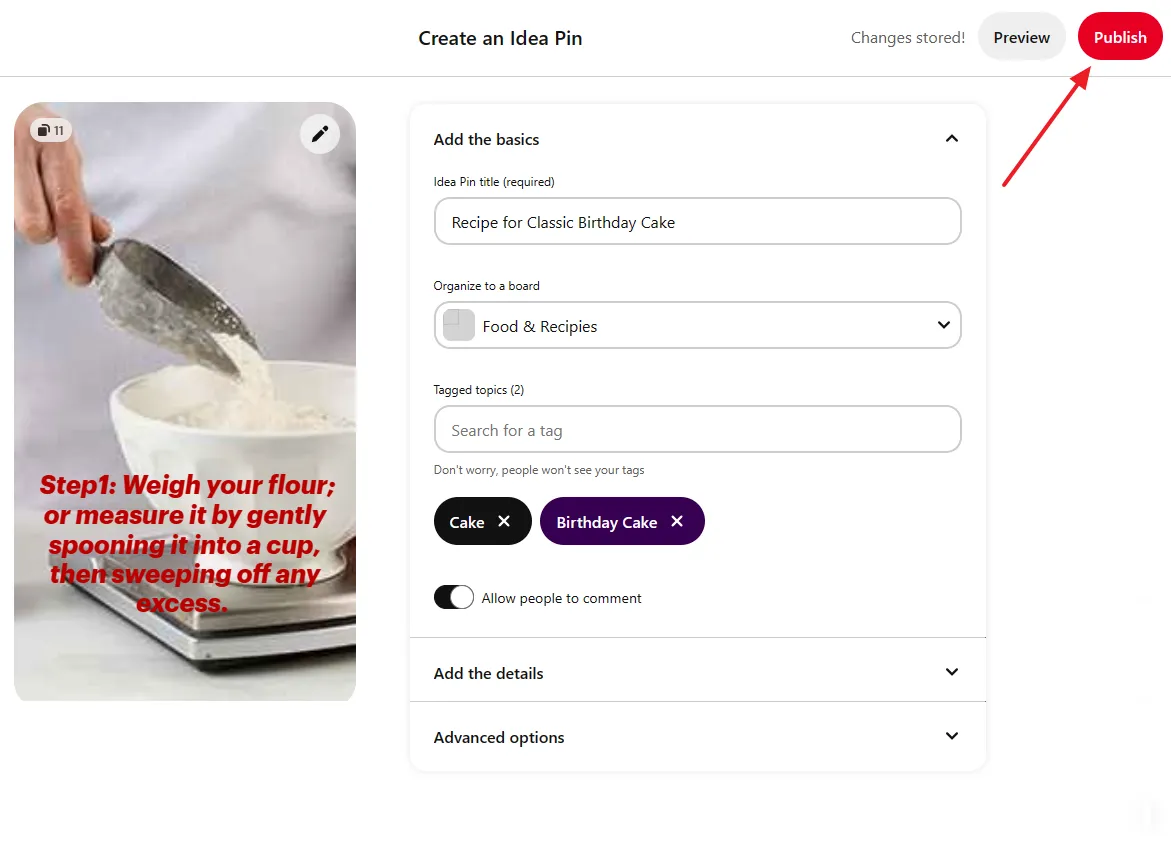
You can see that I have uploaded 11 images on my Idea Pin. Before you edit individual images/videos of the Idea Pin, fill out the main details of the Idea Pin.
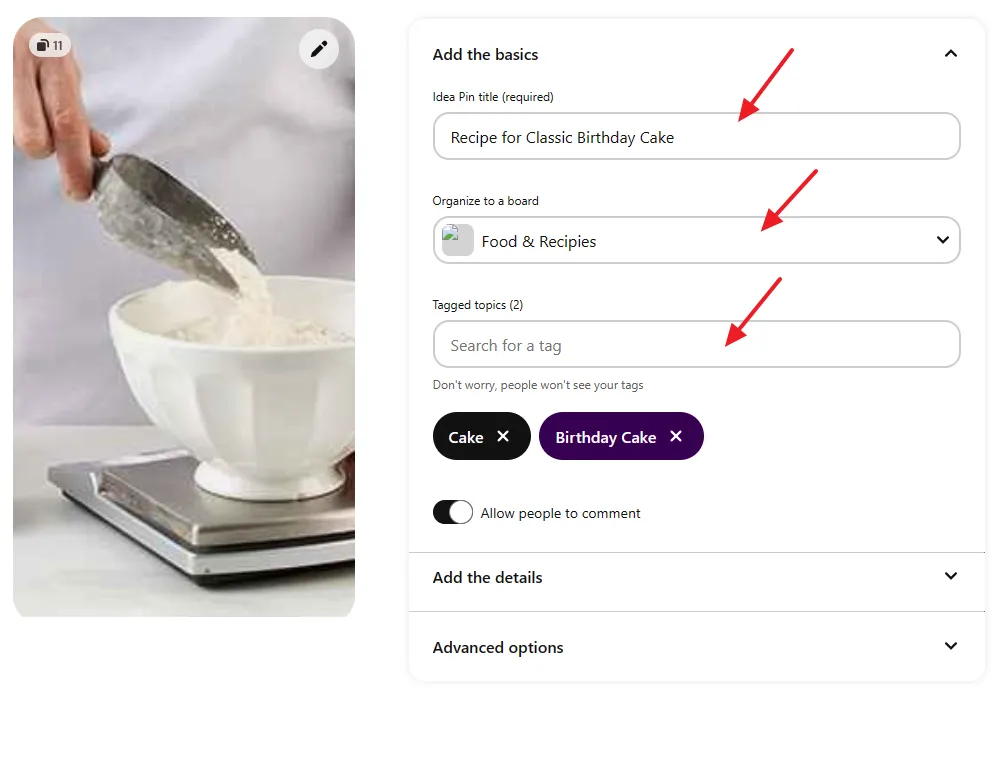
First of all fill the Add the basics.
- Enter the Idea Pin title, here it is, “Recipe for Classic Birthday Cake”.
- On Organize to a board select a Board from the dropdown list. If you want to create a new Board for your Idea Pin, expand the dropdown list and click on the + Create Board, as I have shown in the Section 3.
- On Tagged topics add some relevant tags to your Idea Pin. For example, I have added Cake, and Birthday Cake.
- If you want to allow people to comment on your Idea Pin, turn on the Allow people to comment.
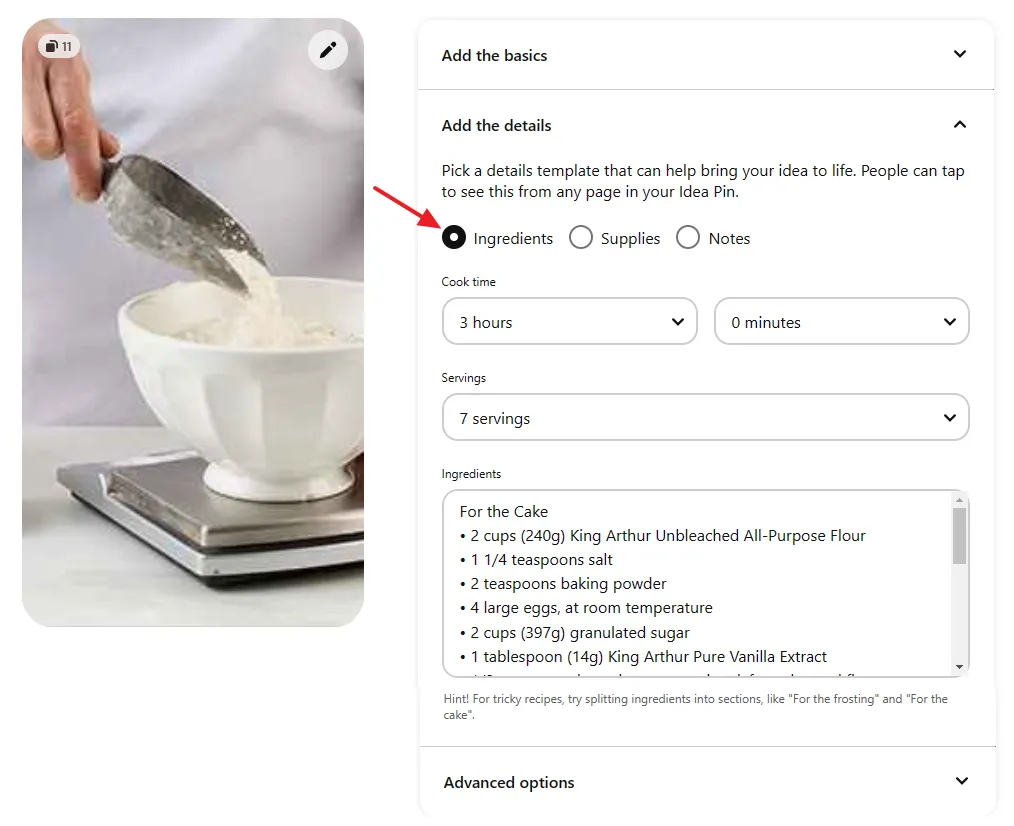
Now fill out Add the details.
- If your Idea Pin is related to a recipe you can provide info in the Ingredients and Supplies, and if it is not related to recipe or cooking, then select Notes and add some notes that you think are important.
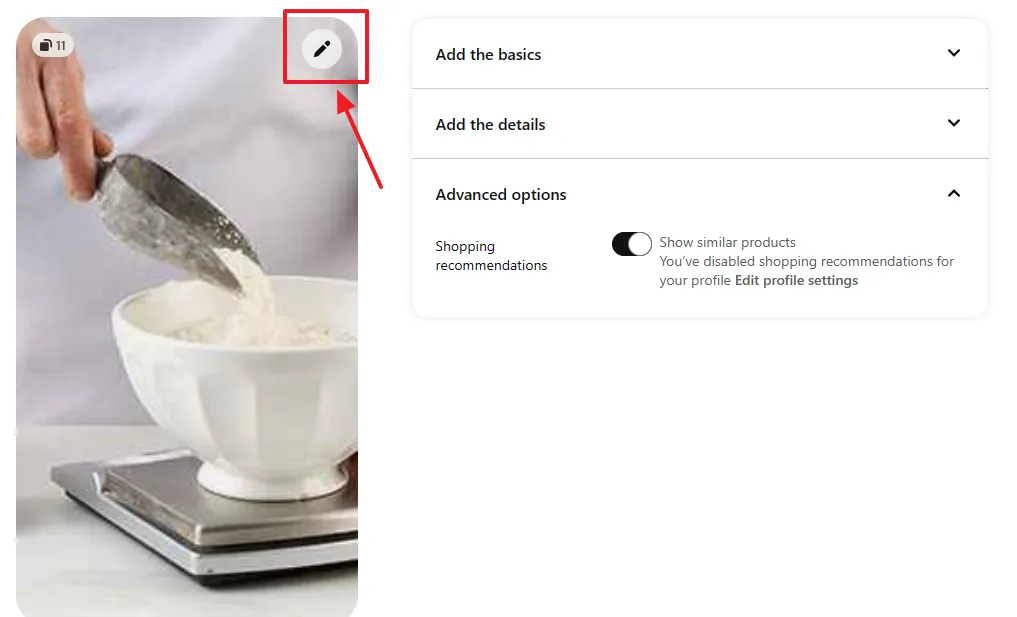
- The Advanced options section shows you Shopping recommendations. If you enable this option Pinterest will show similar products to your Idea Pin.
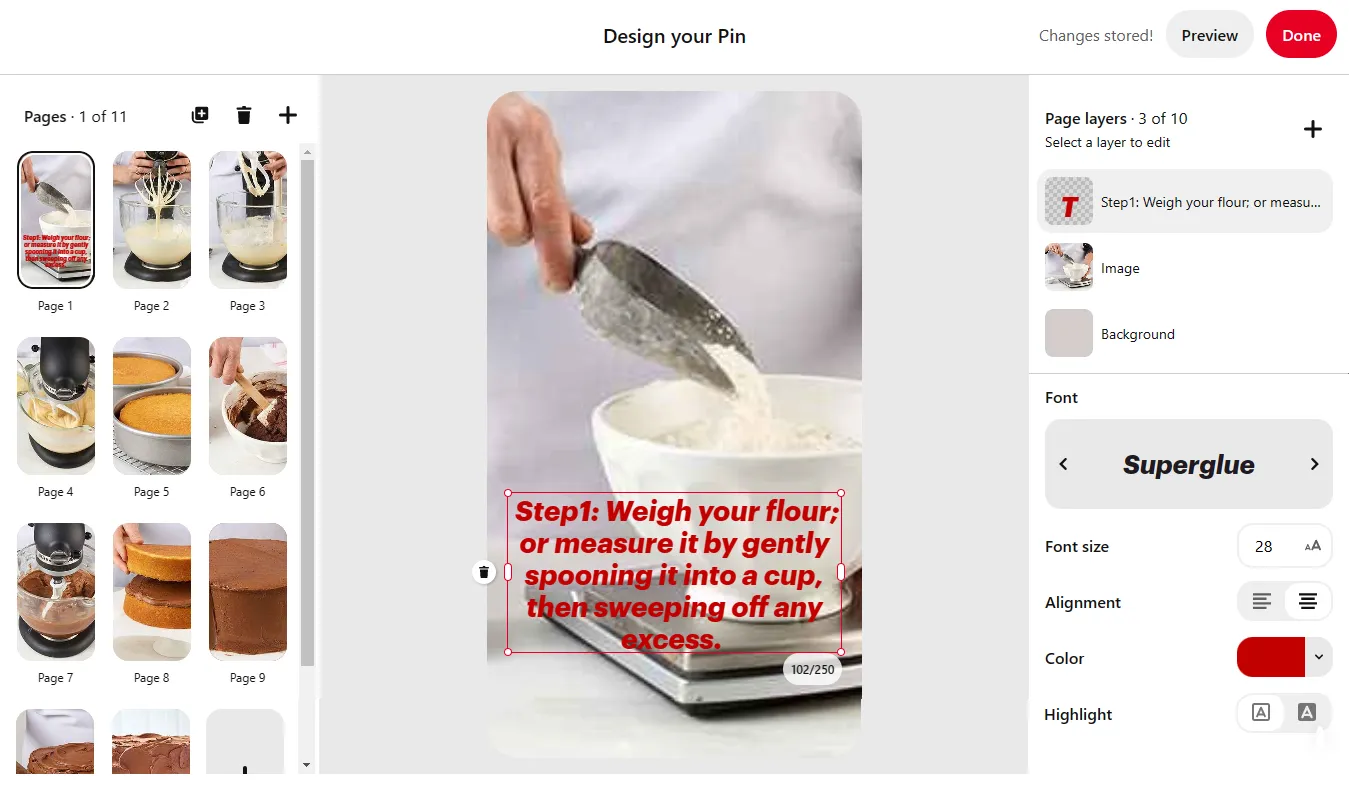
- Click on the Edit icon located on top of the image to edit the Pins/Pages of your Idea Pin.
- Select the image or video from the Left Side (Pages) to edit or customize. You can add the text on top of the image/video, you can change the Background Color, Font, Font-size, Alignment, and Color. The Highlight option adds background color to the text.
- The Image layer allows you to flip an image horizontally and vertically.
- If the Text layer doesn’t appear on the Page layers section, click on the + icon to add the Text layer.
- On Pages section, at your left, you can Duplicate a Page, Delete a Page, and create a New Page. Page means an image or video.
- Click on the Done button, once you’re done with the editing.
- Click on the Publish button to create/publish your Idea Pin.
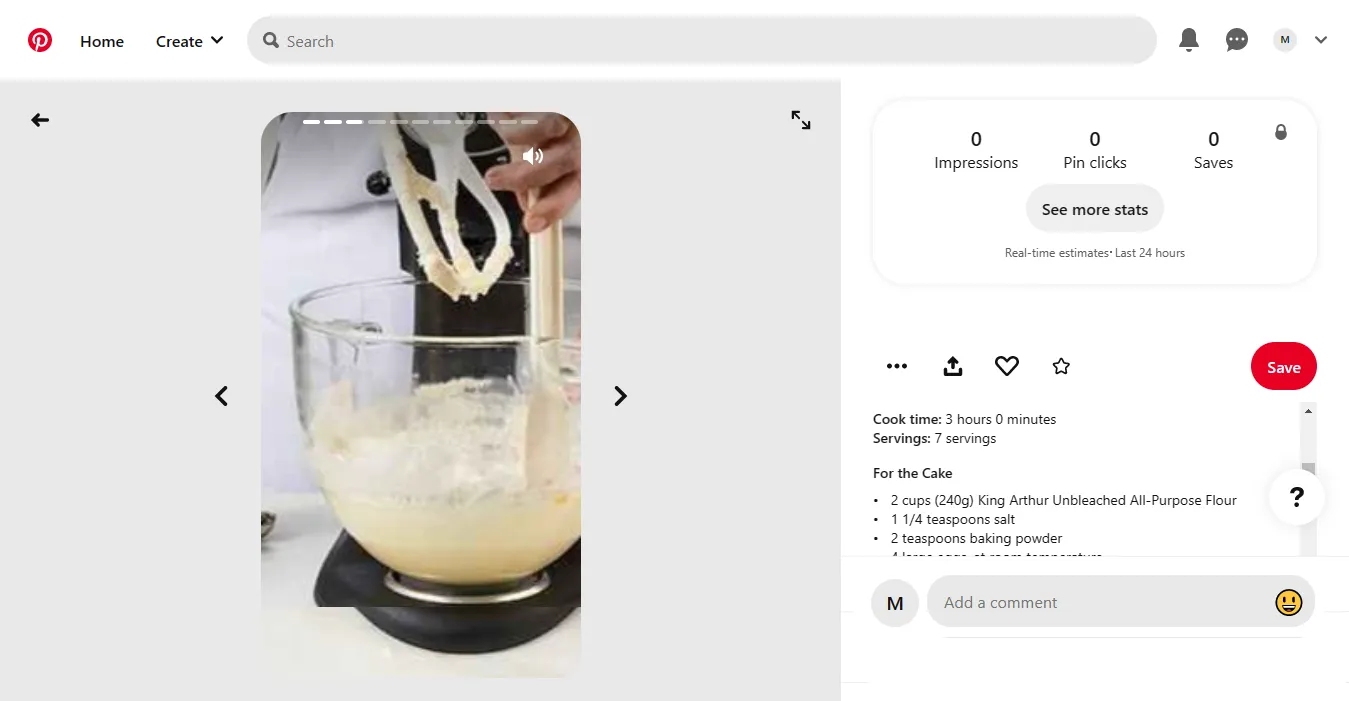
- This is how an Idea Pin looks like after it is published. All its pages (pins) are played one by one.
So it was all about creating a Pin, Idea Pin, and Board on Pinterest. Hope this guide will have helped you. If you like this post then don’t forget to share with other people. Share your feedback in the comments section below.

Also Read



Leave a Reply