Have you got a new Tumblr theme in HTML file and don’t know how to install in Tumblr? Don’t panic! You’re in the right place. In this tutorial we will guide you step-by-step to how to install a new Tumblr theme from an HTML file.
To use/install/change a builtin Tumblr theme is pretty simple and quick, you just need few clicks, but to install a third-party Tumblr theme that you have downloaded from Themeforest or bought from somewhere else needs some manual work.
When you buy or download a new Tumblr theme you get it in a zip file. The zip file contains HTML file of the theme with some other files like JS files, CSS Files, etc.
You cannot directly upload and install the theme from ZIP file in Tumblr, instead you have to copy the code from theme’s HTML file and Paste into your Edit theme section, as we will guide you in this tutorial.
If you want to learn how to change default or existing Tumblr theme and use another one, read this: How To Change Your Default Tumblr Theme.
RELATED
- How To Link Tumblr with Google Analytics 4
- How To Setup Custom Domain On Tumblr | Beginners
- How To Setup & Activate Post+ in Tumblr | Make Money
- Tumblr SEO Settings & On-Page SEO Guide | Increase Traffic
- 30+ Websites to Buy Premium Tumblr Themes | Free Download
Follow the steps to install a new Tumblr theme from HTML file:
Step1: Copy Theme’s HTML Code
First of all you have to copy the theme’s code from HTML file.
- If your theme is zipped, extract it.
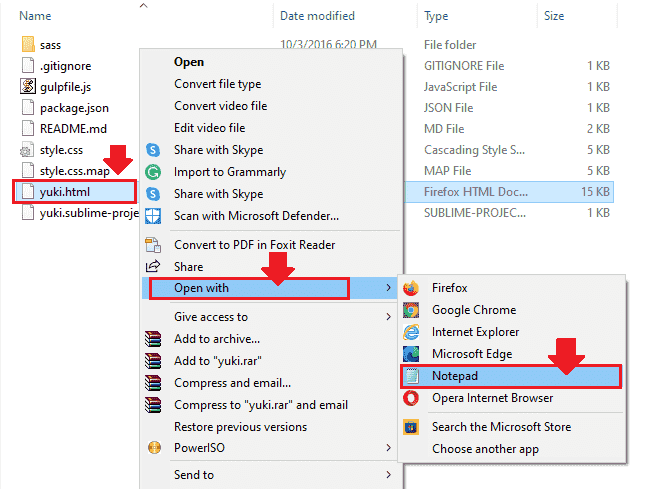
- Look for the file with “.html” extension like “example.html”.
- Right-click on the “.html” file and go to “Open with“.
- Click “Notepad“. It will open your theme’s code in the Notepad Editor, as shown in the next step.
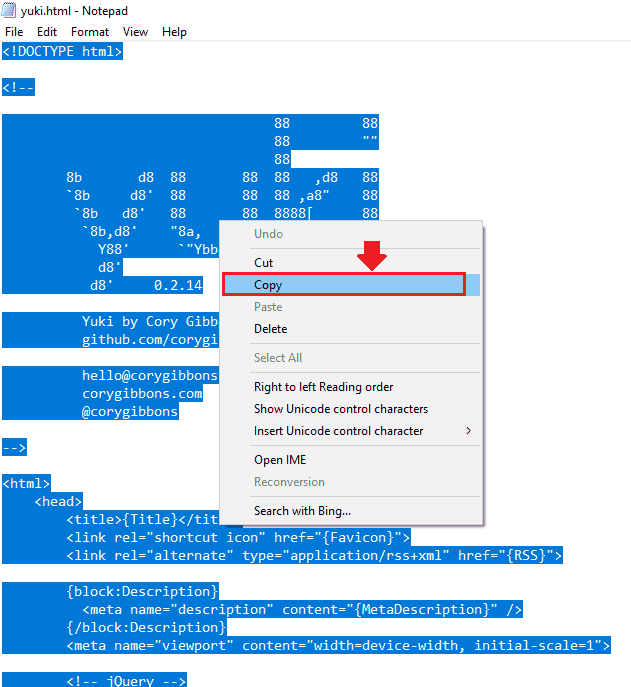
- Press “Ctrl + A” to copy the code completely.
- Right-Click on the selected code and click “Copy“.
Step 2: Paste The Code In Tumblr’s Edit HTML
- Login to your Tumblr account.
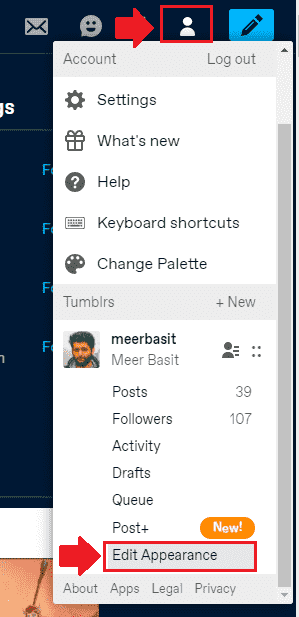
- Click the “Profile Icon” located at your Dashboard’s top-right corner.
- Go to the bottom and click “Edit Appearance“.
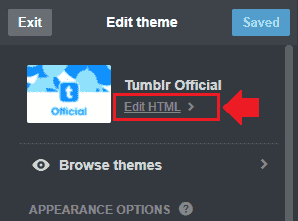
- In the Website Theme section click “Edit theme“.

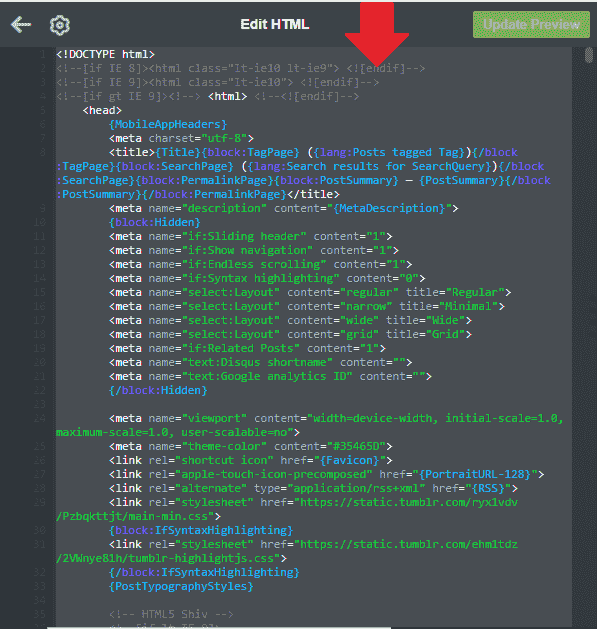
- Click “Edit HTML” link to open the code of your existing Tumblr theme.
- Select all the code in Edit HTML by pressing “Ctrl + A“.
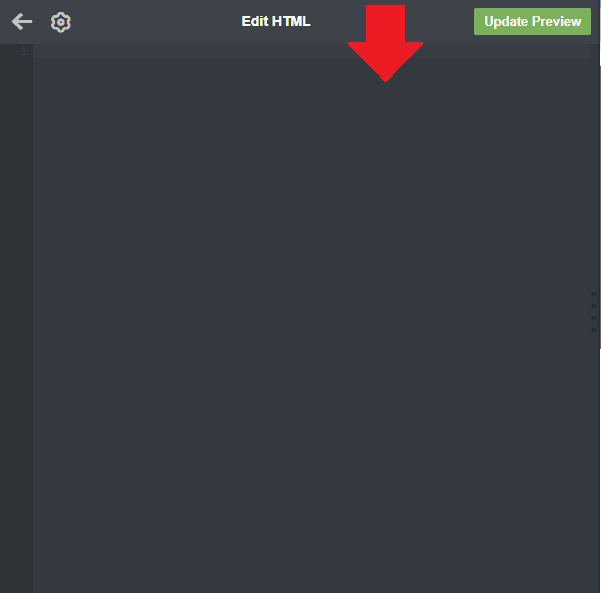
- Press “Delete” button to completely remove the code.
- Here you can see that the HTML code of existing Tumblr theme has been completely removed.
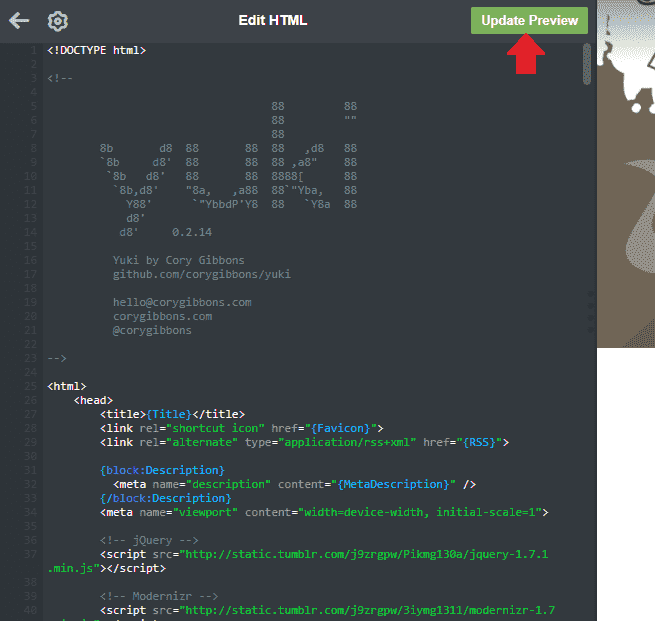
- Now Paste the HTML code of your new Tumblr theme here, which you had Copied in the Step 1.
- Once you Paste the HTML code of your new Tumblr Theme click “Update Preview” button to see how your new Tumblr theme looks like. The Preview appears in the right side.
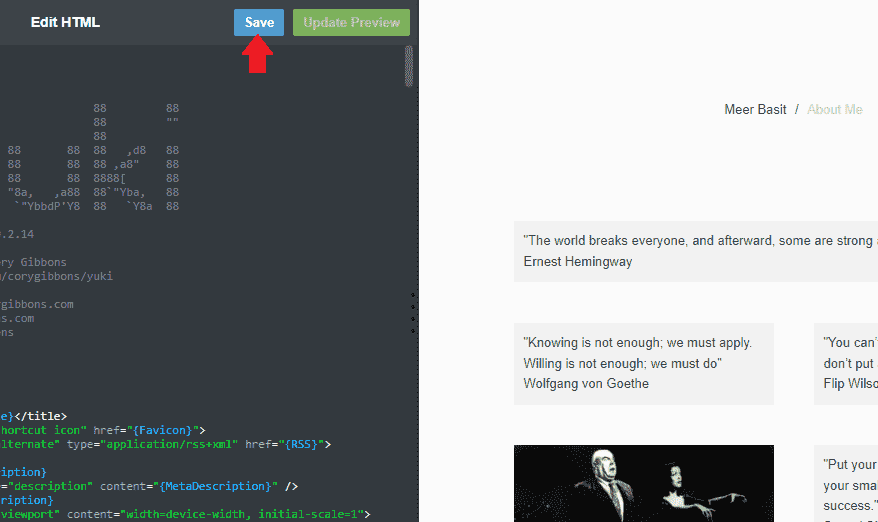
- Click the “Save” button to save your theme settings.
- Open your Tumblr blog to see how your blog looks like with the new theme.
So it was all about installing a new Tumblr theme from an HTML file. Hope you will have enjoyed this tutorial. If you like this post then don’t forget to share with the other people. Share your feedback in the comments section below.


Leave a Reply