Have you installed AMP plugin in your WordPress website and worried about Google Ads not showing on AMP pages? Don’t panic! You’re in the right place.
In this tutorial, I will guide you step-by-step on how to show Google Ads on your AMP pages with great ease.
AMP stands for Accelerated Mobile Pages. The basic purpose of introducing AMP was to quickly load webpages on slow mobile devices. It applies best optimizations and practices automatically on you site to provide best user-experience to website visitors.
A general opinion about AMP is that it reduces your AdSense revenue by limiting ads on AMP pages, but recently Google AdSense itself recommended to install the WordPress plugin “AMP for WordPress” in AdSense Publisher-Account’s Opportunity section.
According to Google AdSense the plugin “AMP for WordPress” increases your AdSense Mobile Revenue up to 17% by increasing your traffic. Now instead of HTML Google Ads you can run AMPHTML Google Ads on your website.
On Google AdSense Account you can generate AMP Ads in two ways (1) AMP Auto Ads (2) Manual AMP Ad Units.
Following topics will be covered:
- Install “Insert Headers and Footers” Plugin
- Enable AMP Auto Ads in AdSense Account
- Connect AdSense With WordPress & Show AMP Auto Ads
- Generate Manual AMP Ad Units In AdSense Account
01. Install “Insert Headers and Footers” Plugin
The “Insert Headers and Footers” is a very useful plugin. It is used to insert codes, CSS, scripts, etc, directly into your WordPress theme’s Head, Body, or Footer, without manually editing/modifying it.
Why I am suggesting you to install this plugin because Google AdSense asks you to add 2 pieces of code for AMP Ads into your WordPress Theme (1) In between <head></head> tags (2) In between <body></body> tags.
If you don’t use this plugin you have to open your Theme and insert code manually, which is not a good practice and could be risky as well.
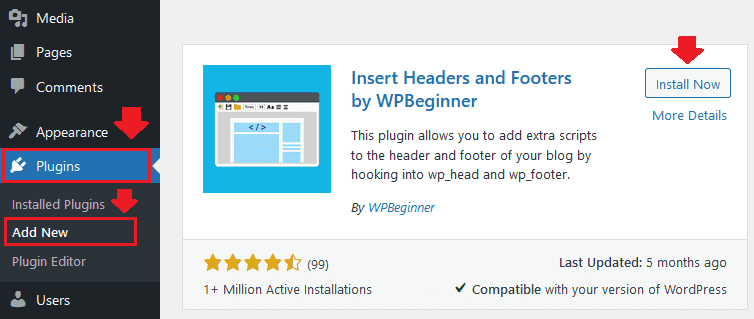
- Go to Plugins, and click on the Add New.
- In the plugin’s Search Bar type “Insert Headers and Footers“. It will display the plugin in the search results.
- Click on the Install Now button and Activate it.
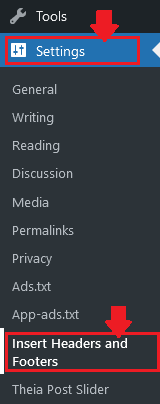
- To access this plugin go to “Settings” and click on the “Insert Headers and Footers“.
- You will learn its use in the next Section.
02. Enable AMP Auto Ads In AdSense
Follow the steps to learn about how to enable AMP Auto Ads in AdSense.
- Login to your Google AdSense Account.
- Go to Ads.
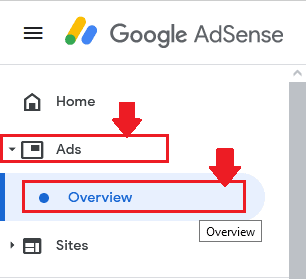
- Click on the “AMP is off” button located at your right-side.

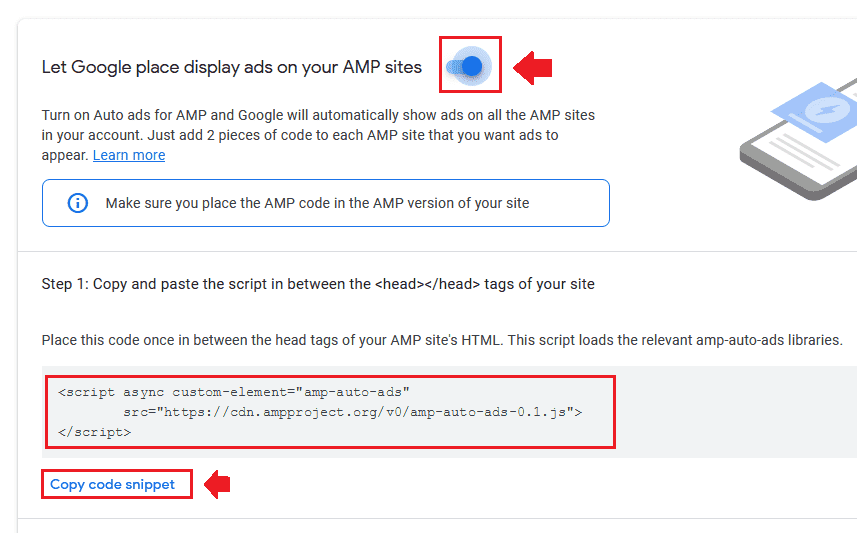
- You’re in the “AdSense code for AMP site” page. First of all Turn-On the “Let Google place display ads on your AMP sites” by dragging it to right.
- In the Step 1 you have to Copy the script and Paste in the <head></head> tags of your website.
The script in Step 1 loads the required “amp-auto-ads” libraries.
- Click on the “Copy code snippet” to copy this script.
Now go to your WordPress Admin and open “Insert Headers and Footers” Settings, as we shown in the above section, and follow the next step.
- You’re now in “Insert Headers and Footers” Settings.
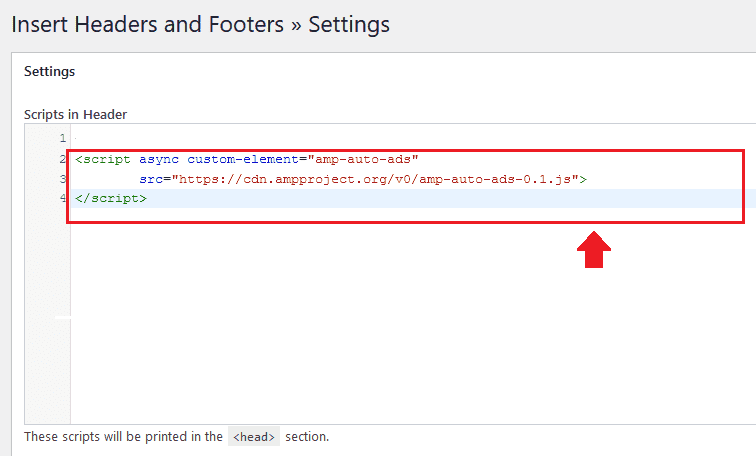
- In “Scripts in Header” Paste the script that you have copied.
Once you Paste the script go back to “AdSense code for AMP site” and Copy the code of Step 2, as shown in the next step.
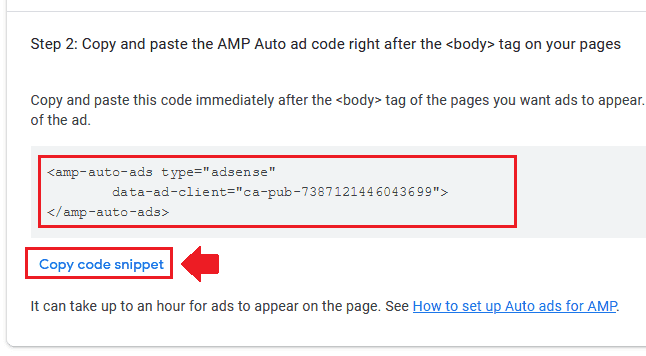
- Copy the code of Step 2. It is the AMP Auto Ad code which you have to insert after <body> tag.
- Click on the “Copy code snippet“.
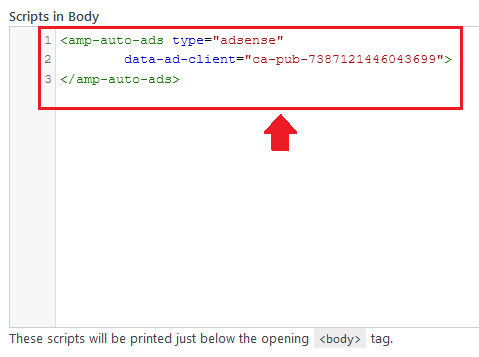
- Now again go back to “Insert Headers and Footers” Settings.
- Paste the code in “Scripts in Body” section of “Insert Headers and Footers” Settings.
- Once you Paste the code click “Save” at bottom of the page.
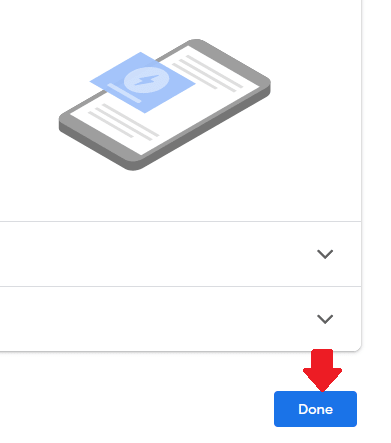
Now again, go back to “AdSense code for AMP site” and click “Done”, as shown in the next step.
- Click on the “Done” button at bottom of the page, just below the Step 2.
Do remember that changes/updates may take up to an hour before they are visible on your website, so be patient.
03. Connect AdSense With WordPress
WordPress does not offer you a builtin feature to directly connect your AdSense account, instead you can use third-party plugins.
Site Kit By Google is the official plugin from Google for WordPress publishers/users, that allows you to connect your AdSense account to your WordPress site and display AMP Auto Google Ads. It works for both AMP & Non-AMP Pages.
Besides AdSense you can also connect Google Search Console and Google Analytics.
I have created a separate tutorial that guides you step-by-step on how to connect AdSense with Site Kit by Google and display Google Auto Ads:
04. Generate Manual AMP Ad Units
You must have learnt how to show AMP Auto Google Ads on your WordPress website, now it is time to learn how you can generate AMP Ad units to display them on different positions of your website such as Header, Footer, Sidebars, etc.
- Login to your Google AdSense Account.
- Expand “Ads“.
- Click on “By ad unit” tab.
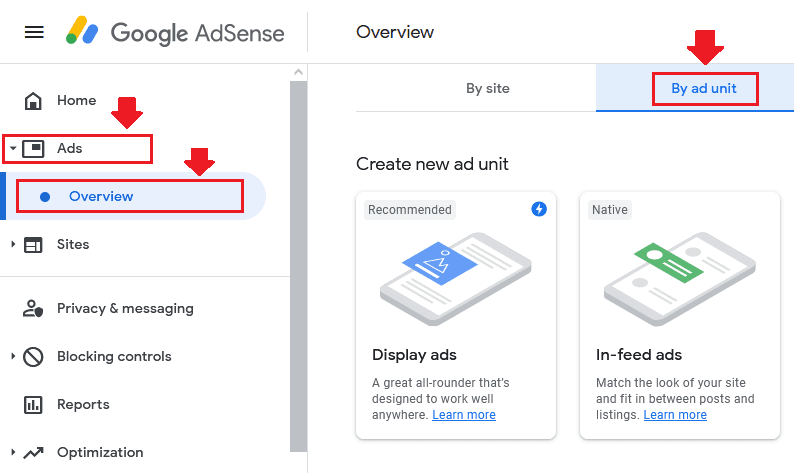
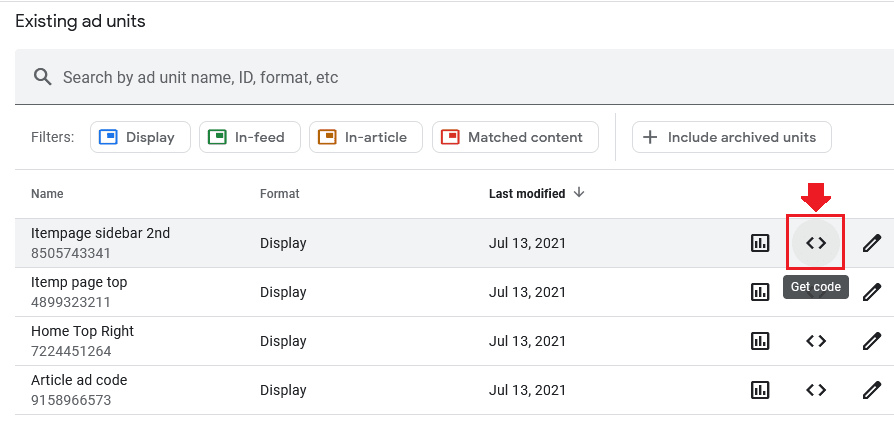
- Scroll down to “Existing ad Units“. These are the AdSense Ad Units which you would have already placed in your website.
- Go to your desired Ad Unit and click its Get code icon(<>).
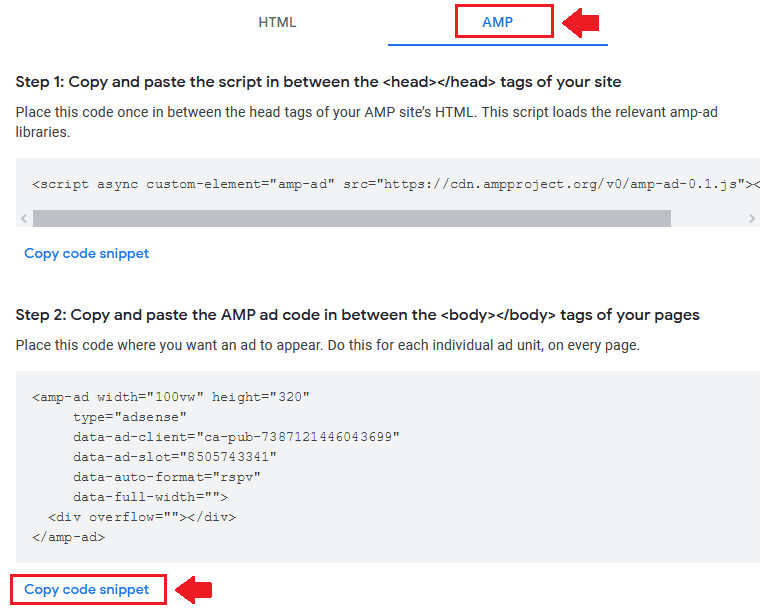
- Click on the “AMP” tab.
- You don’t need to copy the code of Step 1, as you have already added this into the <head></head> section in “Insert Headers and Footers” Settings.
- The code in Step 2 is your AMP Ad code. Click on the “Copy code snippet” and Paste in your desired location.
If you want to show AMP Ads on your Sidebar then Go to “Appearance” => “Widgets” and create “Custom HTML” widget and Paste code there.
So it was all about showing Google Ads on your AMP pages in different ways. If you like this post then don’t forget to share with other people. Share your feedback in the comments section below.

Also Read
- How To Stop Full Screen Google Ads On Your Blog
- How To Increase Google AdSense Revenue – 8 Tips | RPM, CTR & CPC
- Affiliate Marketing Vs Google AdSense: Which One Is Best & Profitable?
- How To Completely Disable AMP In WordPress
- How to Create Ads.txt for WordPress & Add AdSense Code
- How to Add Redirect for Ads.txt in WordPress




Leave a Reply