Do you want to enable Subtitles/Closed Captions (CC) on YouTube videos and save YouTube video Transcript to your computer? You’re in the right place. In this tutorial, I will guide you step-by-step on how to do.
There are two types of captions on YouTube (1) Captions/Subtitles that a video creator manually creates and uploads (2) Auto-generated captions that YouTube automatically generates for you by detecting the language of video. YouTube claims that the auto-generated captions have 95% accuracy rate. The audio quality should be good and accents should be clear.
Following topics will be covered in this post:
- How to Enable Subtitles/Closed Captions (CC), and Auto-Generated Captions on YouTube
- How to Save the Transcript of YouTube Video to Your Computer
RELATED
- How To View/Download Full Size YouTube Profile Picture
- How to Start a Professional Blog and Make Money Online
- How to Free Download YouTube Videos on Computer | Downloader
01. How to Enable Subtitles/Closed Captions (CC), & Auto-Generated Captions on YouTube
In this section, I will guide you on how to enable Subtitles/Closed Captions (CC), and Auto-generated Captions on YouTube videos.
- First of all Sign In to YouTube with your Gmail ID.
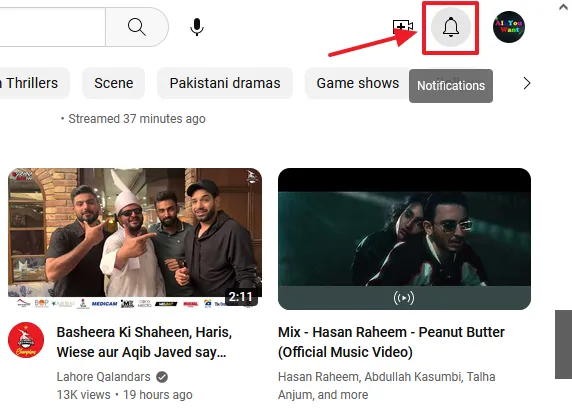
- Click on the Notifications (Bell icon) located at the top-right corner.
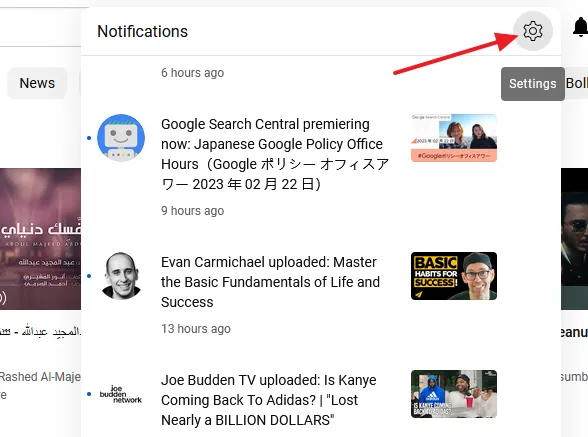
- Click on the Settings icon.
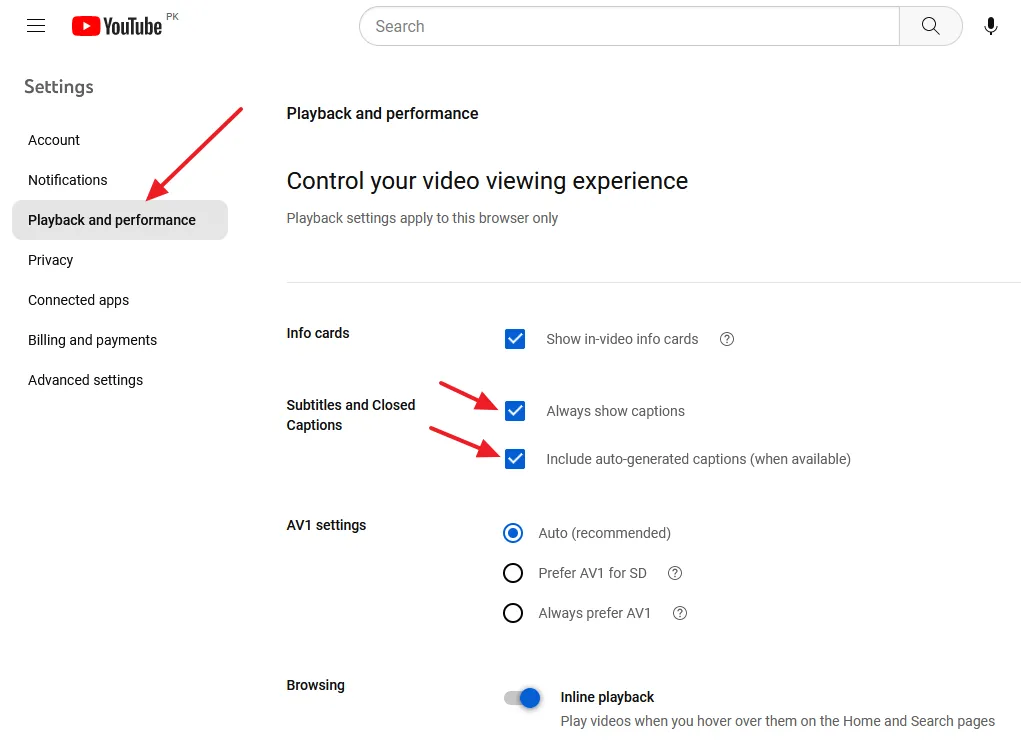
- Click on the Playback and performance tab.
- Go to “Subtitles and Closed Captions” and tick the options Always show captions and Include auto-generated captions (when available).
- Now open a video on YouTube and click on the CC Icon to make the subtitles/captions visible, as shown below.

02. How to Save the Transcript of YouTube Video to Your Computer
In this section, I will guide you step-by-step on how to save the Transcript of YouTube video to your computer.
- To open the Transcript of a YouTube video click on the Three Horizontal Dots located just below the Title.
- Click on the Show transcript.

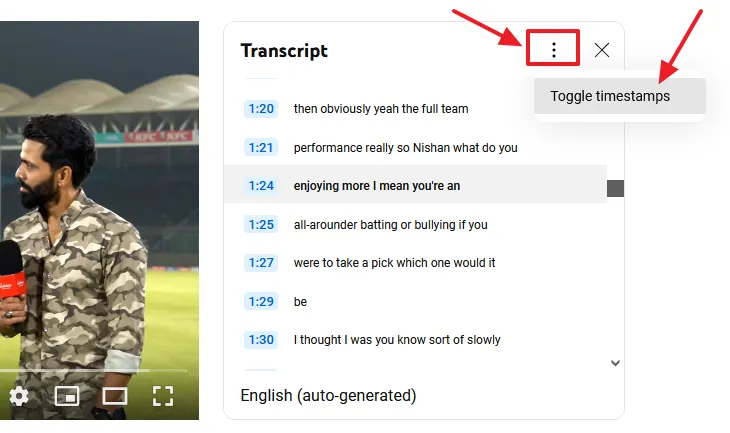
- You can see the Transcript of video with timestamps.
- To remove the timestamps click on the Three Vertical Dots.
- Click the Toggle Timestamps.
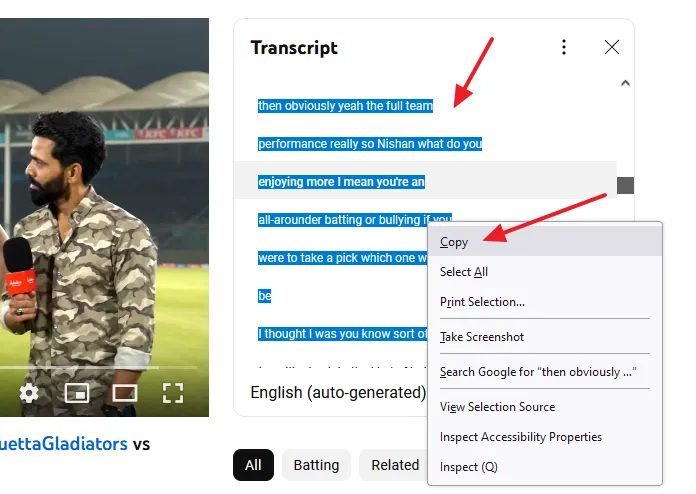
- Select the text of the Transcript using your mouse.
- Right click on the selected text & click on the Copy.
- Paste the Transcript text on Transcription Editor, MS Word, Notepad or WordPad.
If you like this post then don’t forget to share with other people. Share your feedback in the comments section below.
Also Read




Leave a Reply