Do you want to take the backup of your website in cPanel or want to learn How to restore a website backup? You’re in the right place.
In this tutorial, I will guide you step-by-step on how to download & restore website backup in cPanel with JetBackup and without JetBackup.
A JetBackup is a website backup software for downloading & restoring backups. This software is not available in all cPanel accounts. If your cPanel account supports JetBackup then follow the JetBackup’s guide.
Why Website Backup is Important?
Taking website backup is an action of copying your website data (files, database, theme) to another location like your computer hard drive, cloud, remote server, etc. A backup is used to restore your website’s destroyed, corrupt, hacked, deleted, or overwritten files. If you don’t take regular website backups you may not be able to restore your precious data in case of a bad event.
Following topics will be covered in this post:
- How to Download & Restore Backup in cPanel
- How to Download & Restore Backup in cPanel With JetBackup
Login to your cPanel account and follow the below sections. The cPanel URL, Username, and Password are provided to you by your webhosting company via email when you buy hosting.
- Enter your Username & Password.
- Click Login.
01. How to Download & Restore Backup in cPanel
In this section I will guide you on how to download a website backup in three different ways from cPanel and how to restore a website backup through Partial Backups.
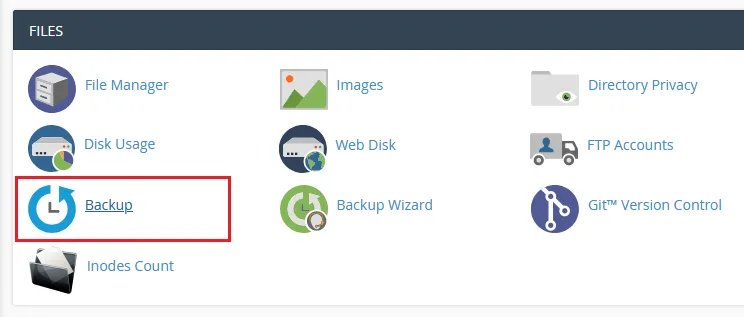
- Once you’re logged in to your cPanel account, go to FILES section.
- Click the Backup link/icon.
Download Website Backup
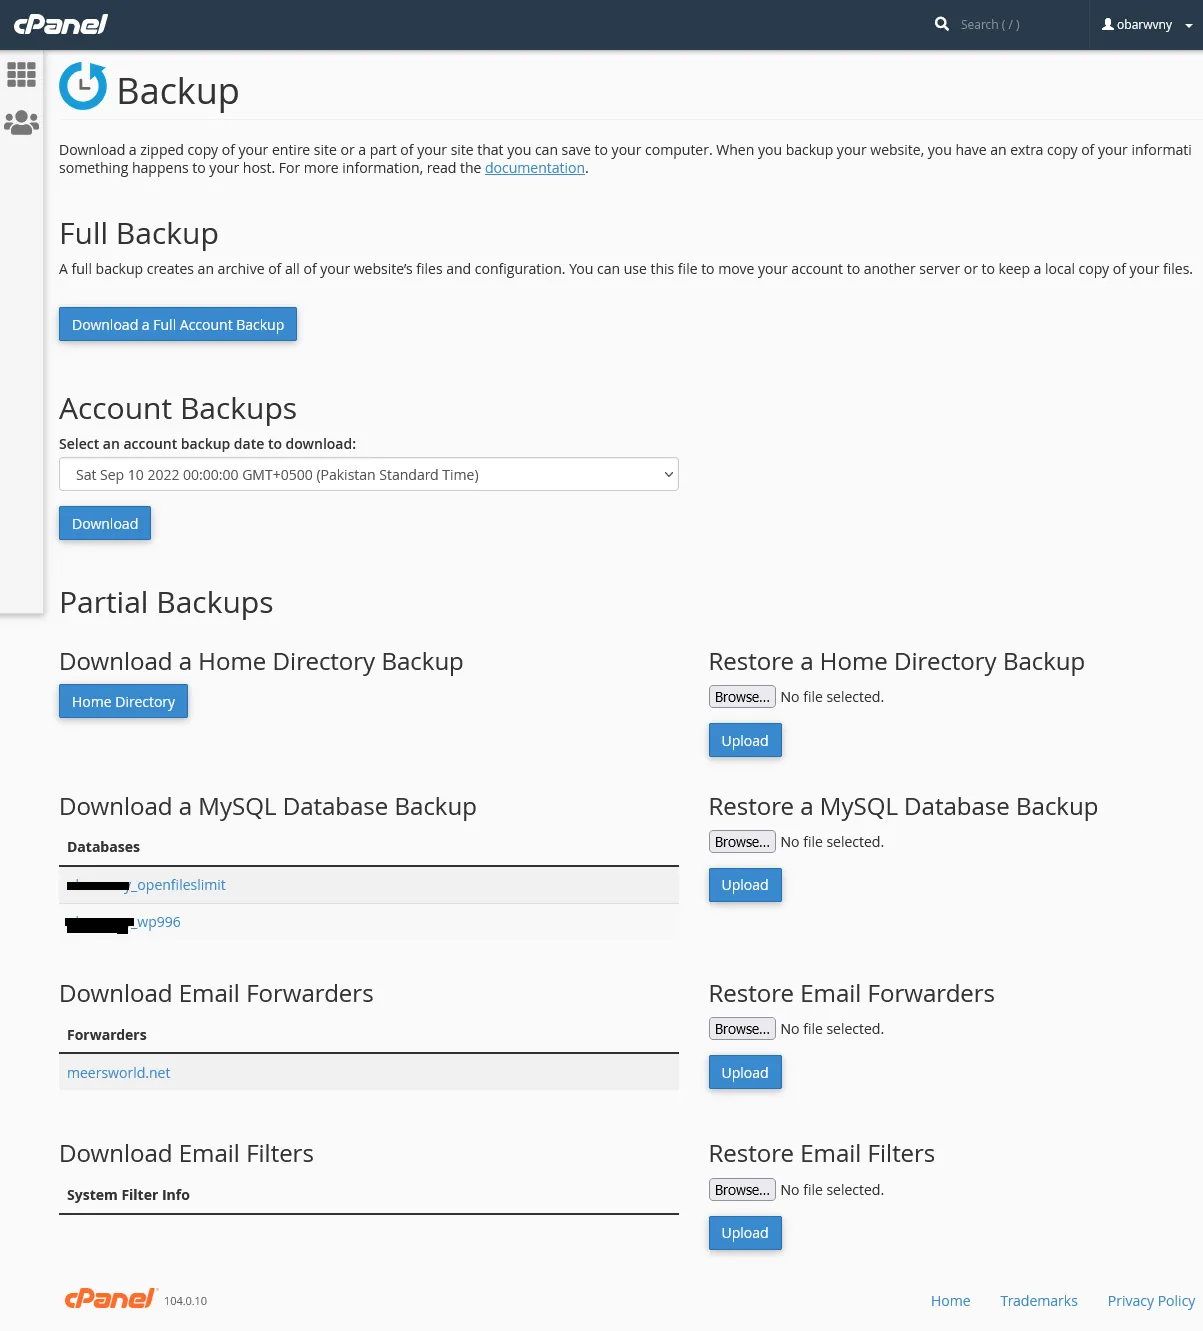
This is the main page of Backup in cPanel. The cPanel offers 3 different ways to take website backup, and one option to restore it i.e Partial Backups.
- The Full Backup option allows you to take the complete backup (copy) of your website in the zip format that you can store on your web server’s Home Directory or some Remote Server using FTP. The next step guides you on generating a full backup.
- The Account Backups option allows you to save the Full Backup of your website to your computer in the zip format. To download the full-backup into your computer choose the Date of backup and click the Download button.
- The cPanel Backup interface doesn’t support Full Backup to restore your website. It only supports Partial Backups. In Partial Backups you have to take the backup of your Home Directory and Database separately. Follow the step “Download Partial Backups” below to learn more about it.
Generate Full Backup:
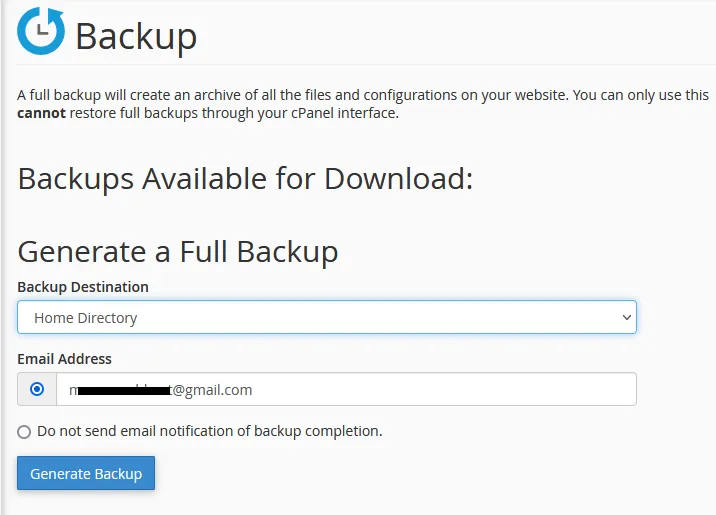
When you click the first option Download a Full Account Backup button, the following settings will appear:
- Choose Backup Destination. There are 4 options (1) Home Directory (2) Remote FTP Server (3) Remote FTP Server (passive mode transfer) (4) Secure Copy (SCP).
- Provide an email address so that you will be notified when backup is completed.
- Click the Generate Backup button to begin the process.
The “Home Directory” is a location that contains your website files, and folders. A website is stored in the “public_html” folder. You can access the Home Directory in cPanel from FILES section => File Manager.
To send the backup to a Remove Server you need (1) Remote Server (FTP domain name like ftp.example.com) (2) Remote User (FTP Username) (3) Remote Password (FTP Password) (4) Port (FTP Port) (5) Remote Directory like /home/username/backupfolder/.
Download Partial Backups:
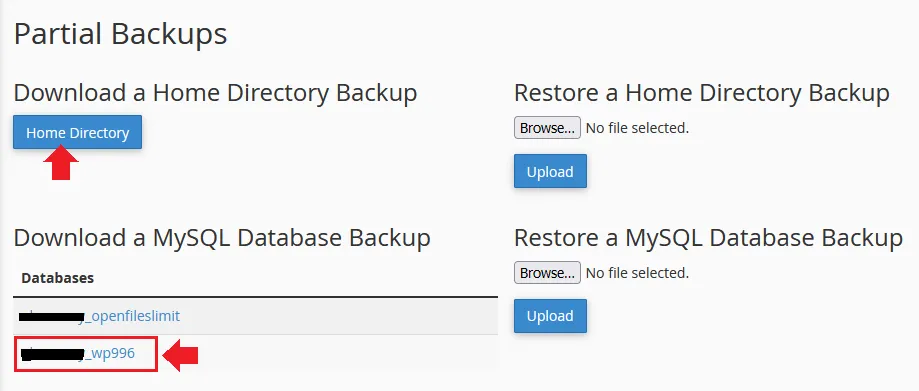
- Click the Home Directory button to download the complete backup of your website files and folders to your computer.
- Click the Database file to download the backup of your MySQL database to your computer. There are two files (1) username_openfileslimit (2) username_xyz. The second file is your MySQL database file.
Restore Website Backup
In this section, I will guide you on restoring a website in cPanel. The cPanel interface doesn’t support Full Backup to restore your website, it only supports Partial Backups.
- Go to Partial Backups section in the Backup page.
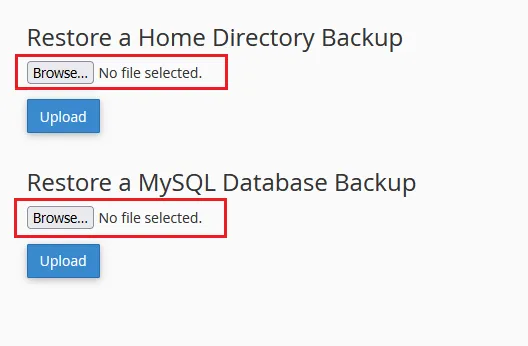
- In Restore a Home Directory Backup click the Browse… button to select the Home Directory backup file from your computer. Click Upload to start the restore process.
- In Restore a MySQL Database Backup click the Browse… button to select the MySQL Database backup file from your computer. Click Upload to start the restore process.

02. How to Download & Restore Backup in cPanel with JetBackup
In this section, I will guide you on how to download and restore website backup in cPanel with JetBackup.
Download Backup with JetBackup
The JetBackup allows you to download Full Account Backups, Partial Backups (File Backups, Database Backups), Email Backups, DNS Zone Backups, and Cron Job Backups.
Here I am guiding you only on taking the Full Account Backups. To know more, go to JetBackup cPanel Documentation.
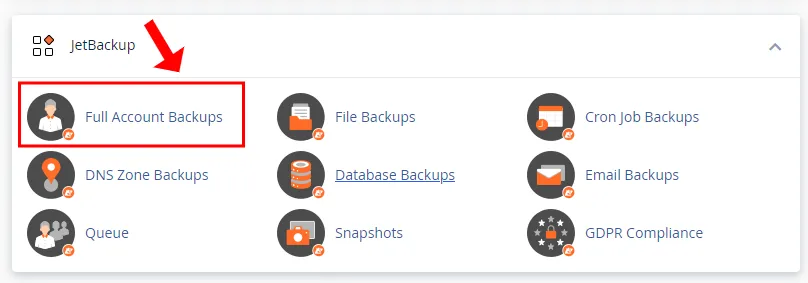
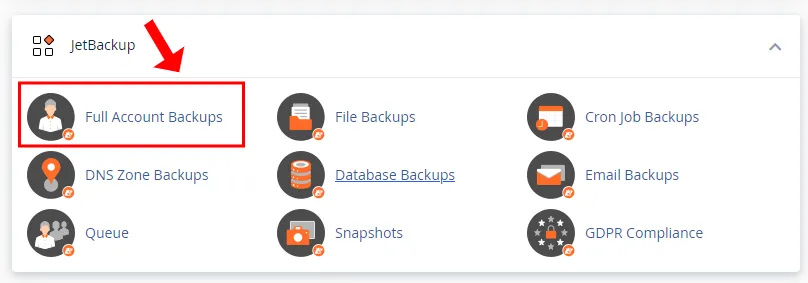
- Go to JetBackup section in cPanel.
- Click the Full Account Backups link.
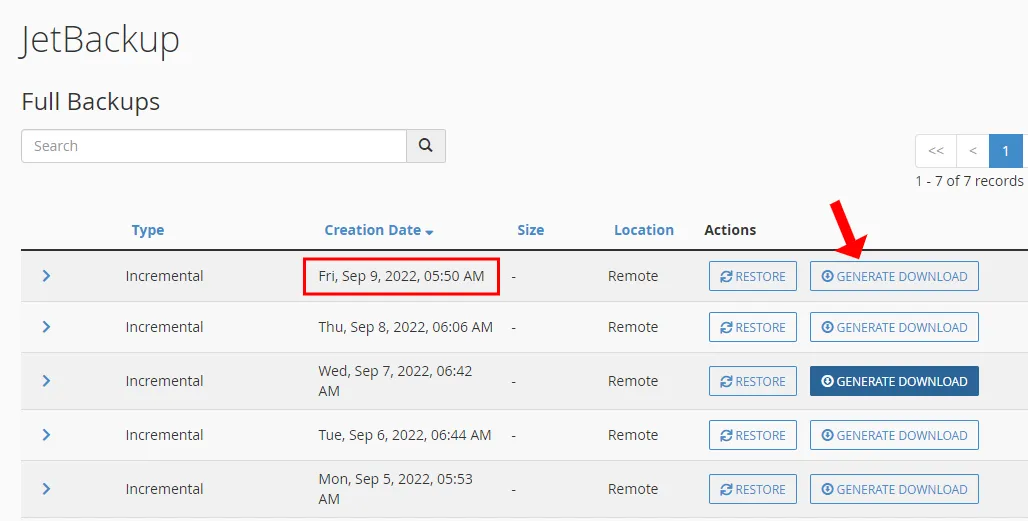
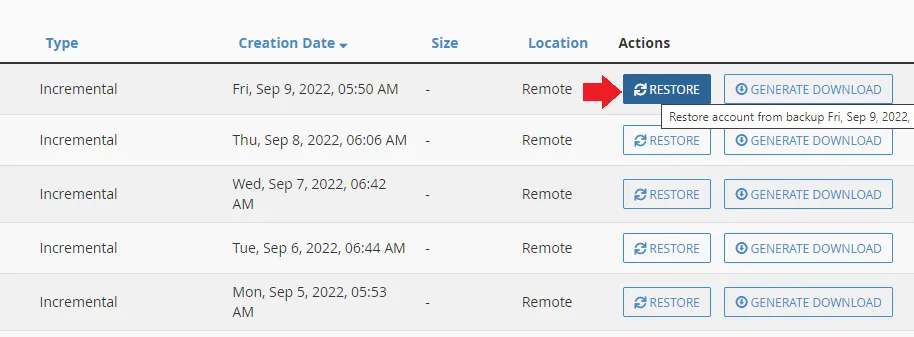
- This page will list you all the latest Full Backups of your website generated automatically by JetBackup. The backup type is Incremental. It is a type of backup that stores only those changes which are made since the last full-backup.
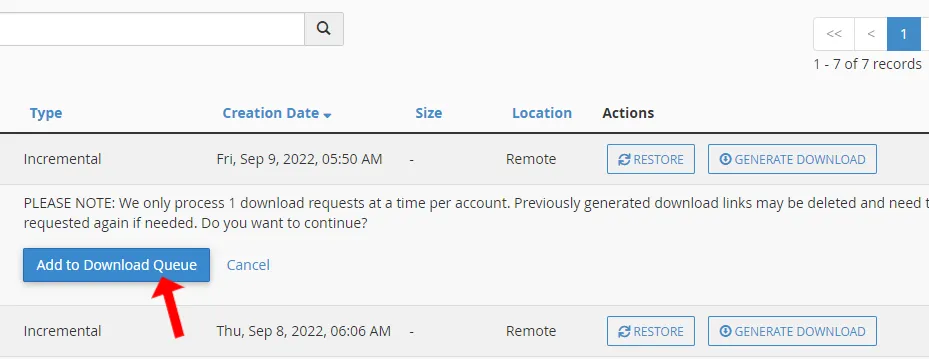
- Click the GENERATE DOWNLOAD button of your desired backup.
- Click the Add to Download Queue button.
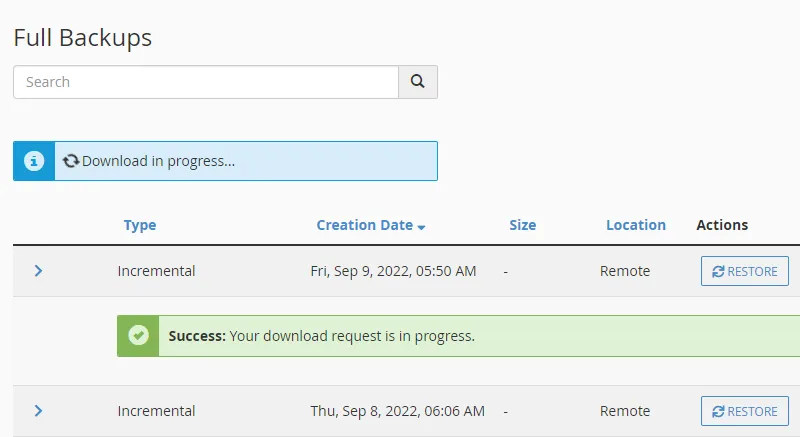
- It will show you the notice “Download in progress…“. After sometime, it will create the Download link, as shown in the next step.
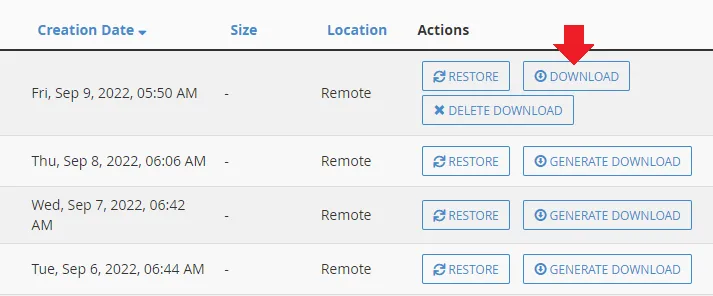
- Click the DOWNLOAD link to save the website backup to your computer. Once the Download is completed you can delete the backup by clicking on the DELETE DOWNLOAD.
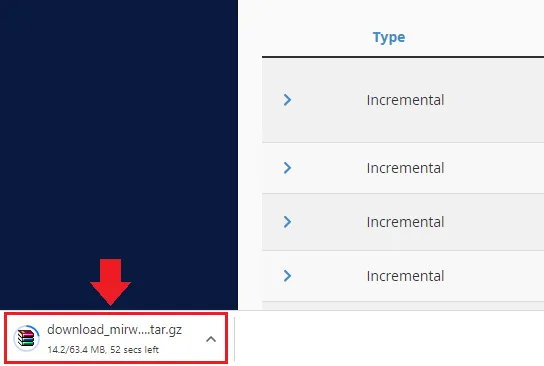
- Here you can see that the backup is downloading to computer.
Restore Backup with JetBackup
In this section, I will guide you on how to restore a Full Account Backup in cPanel with JetBackup.
- Go to JetBackup section and click the Full Account Backups link.
- Click the RESTORE link of your desired backup date. All data created after the backup restore point will be permanently lost. For example, if you select restore point of 5th Sep, 2022, you will loss the updates that you made after the 5th Sep, 2022.
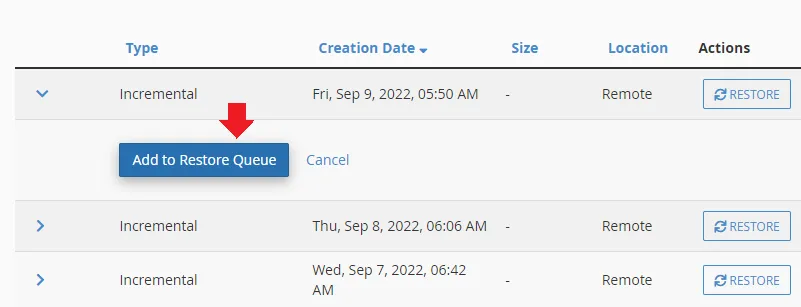
- Click the Add to Restore Queue button.
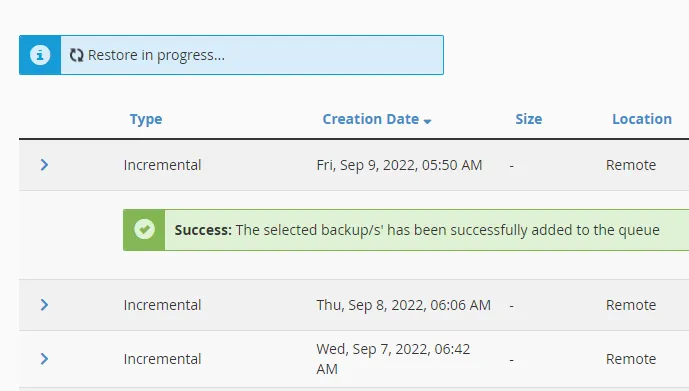
- You will see a notice, “Restore in progress…“.
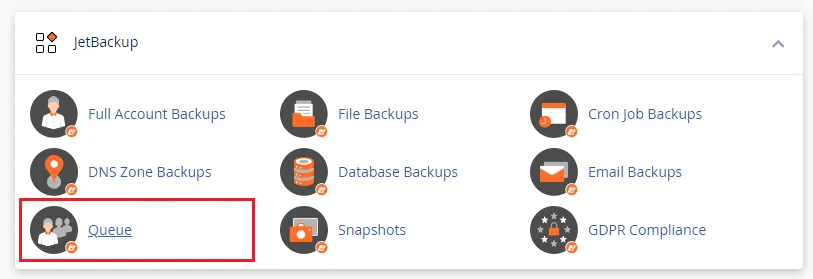
- Go to JetBackup section again and click the Queue to check the status of your backup Restore.
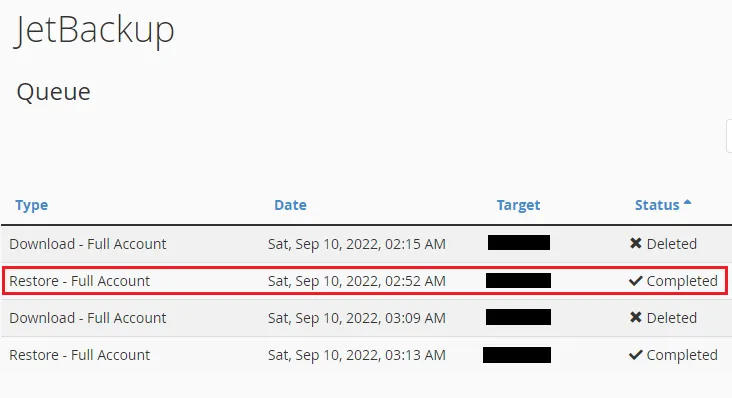
- You can see that the Restore is completed.
So it was all about downloading and restoring website backup with JetBackup and without JetBackup in cPanel. Website backup is critical for the safety of your precious content. At least once in a month take a website backup.
If you like this post then don’t forget to share with other people. Share your feedback in the comments section below.
Also Read



Leave a Reply