Do you want to merge the partitions of your hard disk in Windows 10? You are in the right place. In this tutorial, I will guide you step-by-step on how to merge the partitions/drives of your hard disk in Windows 10 using the Disk Management.
The disk partition-merging in Windows is used to increase the storage capacity of a drive by combining another drive or unallocated space with it. You can create unallocated space either by Shrinking a drive or by Deleting a drive. Deleting a drive means completely deleting one drive and combine its unallocated storage with the other drive.
The Disk Management is a builtin Windows utility tool that allows you to manage and perform advanced storage tasks.
How to Merge Partitions in Windows 10
Follow the steps to merge the partitions in Windows 10.
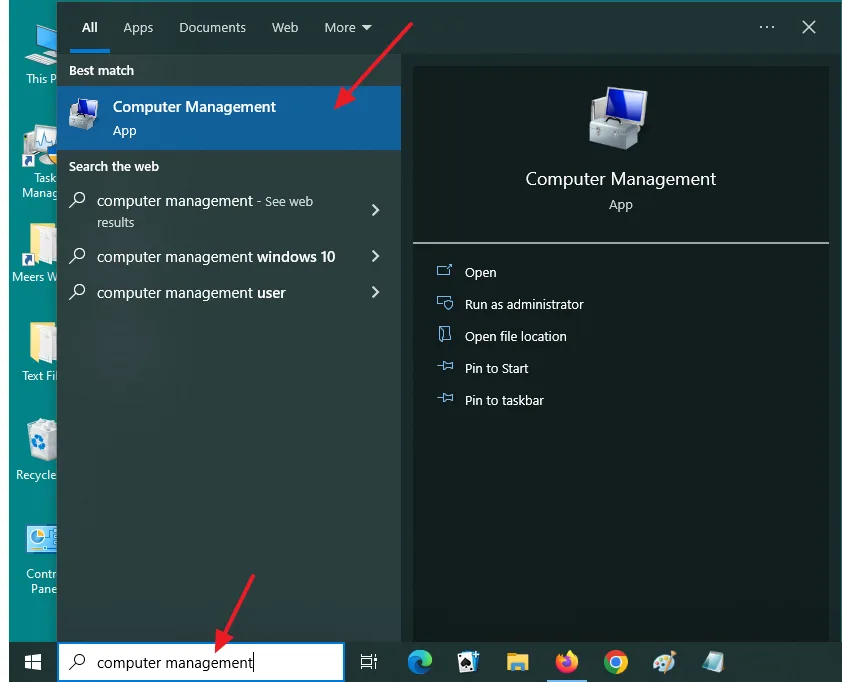
- Click on the Windows Search Bar located at the bottom right-corner.
- Type Computer Management in the Search Bar.
- Click on the Computer Management.
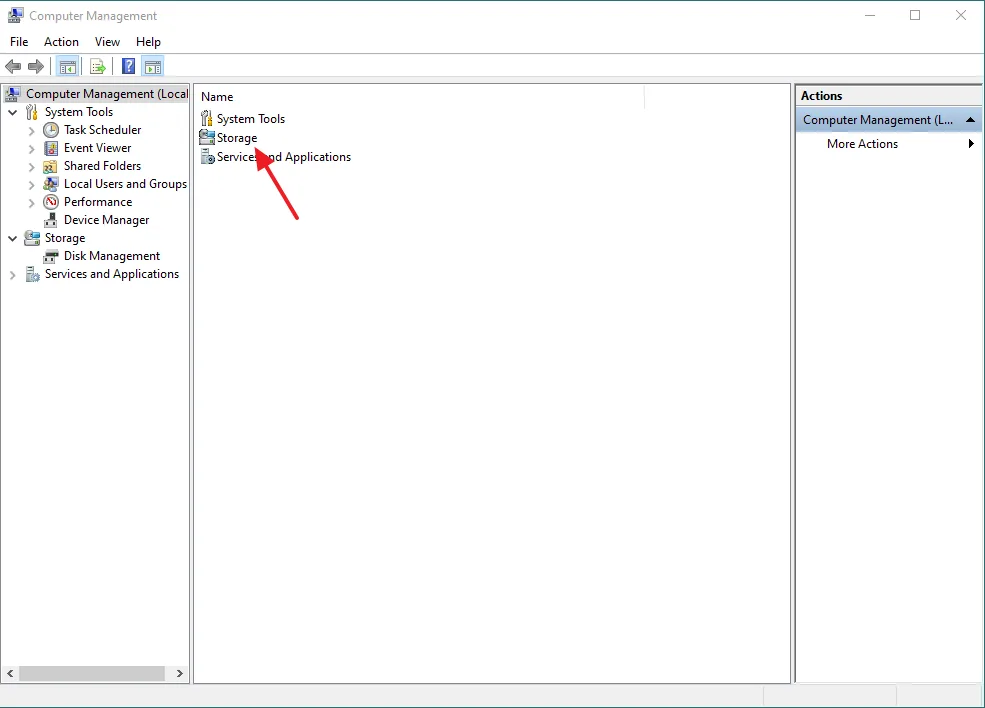
- Click on the Storage.
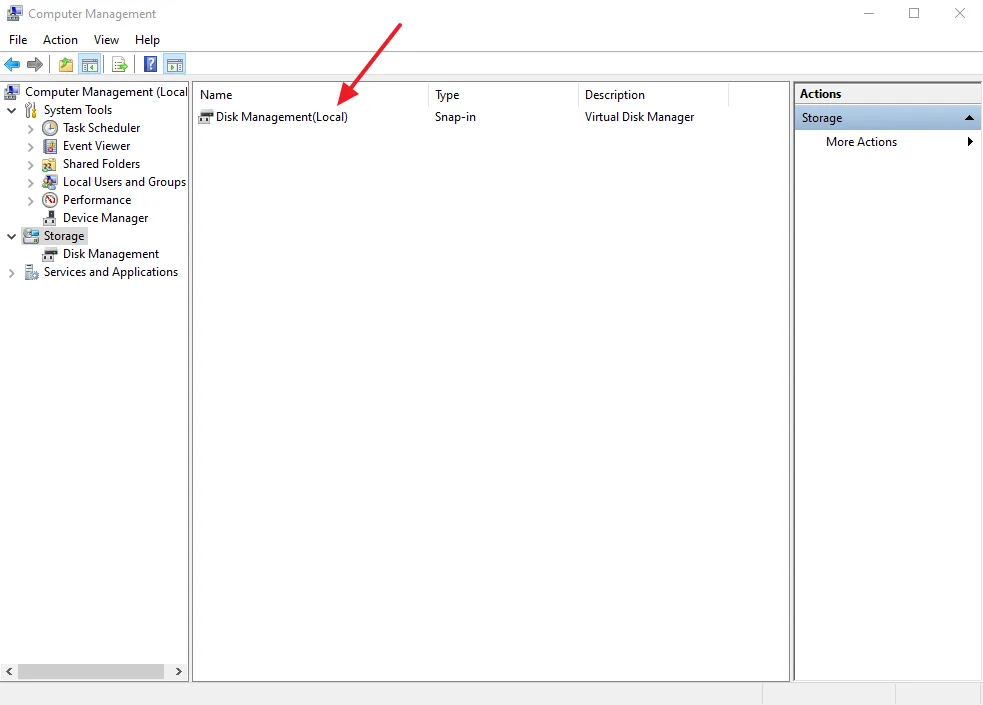
- Click on the Disk Management(Local).
- Select the drive which you want to merge. For example, below I want to merge the partition Basit (I:) with partition Basit_E (D:). I will Delete Basit (I:).
- Right click on that partition.
- Click on the Delete Volume…
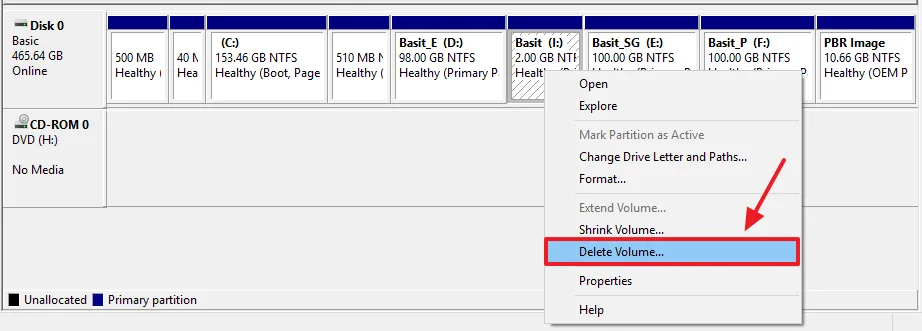
- You can see that 2.00 GB of space has been Unallocated.

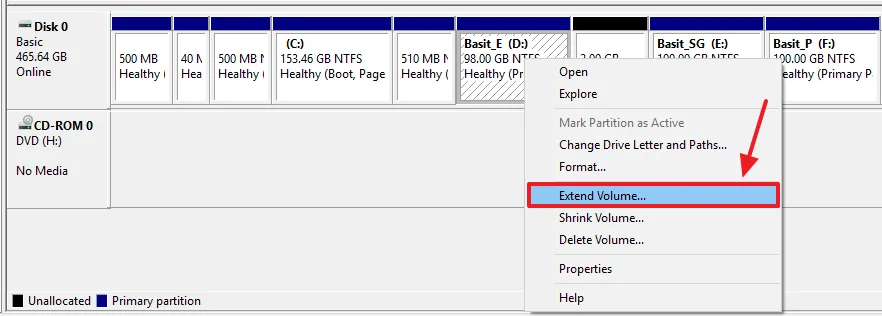
- Now select the partition to which you want to add the unallocated space. Below, I want to add 2.00 GB unallocated space to Basit_E (D:).
- Right click on that partition and click on the Extend Volume.
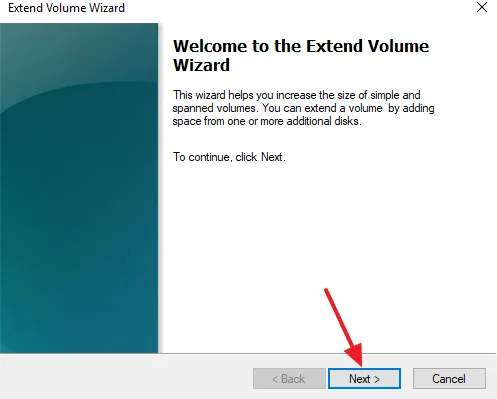
- Click on the Next button.
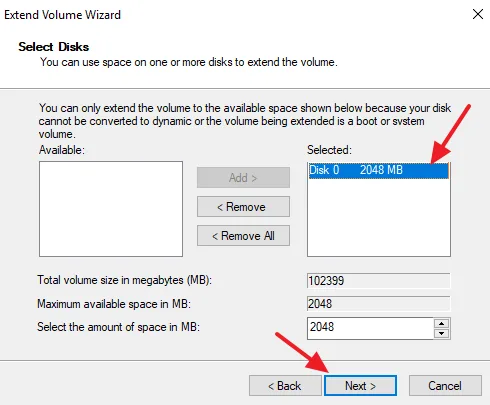
- You can see that the disallocated space has been available to merge.
- Click on the Next button.
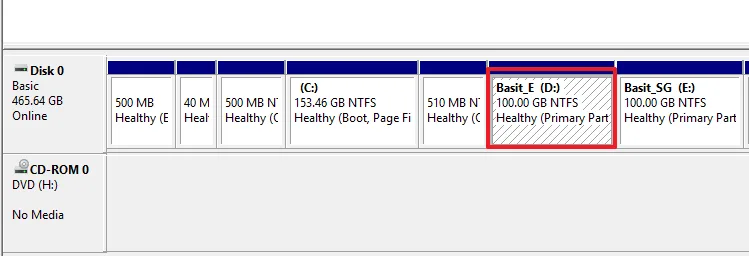
- You can see that the size of Basit_E (D:) has been increased from 98.0 GB to 100.00 GB.
If you like this post then don’t forget to share with other people. Share your feedback in the comments section below.
Also Read
- How To Turn On/Off Windows Defender In Windows 10 | Real Time Protection
- How To Turn-Off Recent Items & Frequent Places From Quick Access In Windows 10
- How To Run Windows 10 In Safe Mode – Troubleshoot | Reset, Restore, Recovery
- How to Run Disk Defragmentation in Windows 10 | Drive Optimizer
- How to Use Text to Speech Feature on Windows 10 | TTS



Leave a Reply