Do you want to know how to shrink a partition in Windows 10? You’re in the right place. In this tutorial, I will guide you step-by-step on how to shrink a partition in Windows 10 using Disk Management.
Disk Partitioning allows you to create different partitions of your hard disk. It becomes very easy to arrange data on your computer when you have at least three or more partitions.
Hard disks of new computers & laptops often come with a single partition. It is not a good practice to place your files and data in the same partition in which your Windows is installed. There are 2 reasons (1) If your Windows gets failed or corrupt you can lose your other files and data (2) It is difficult to arrange and find your files and folders in a single partition.
Disk Management in Windows 10 allows you to shrink the storage of partition and create more partitions from it. Let’s say there is a huge hall and you create rooms by building walls. Hall is your hard disk and rooms are your partitions. Size of the rooms could be different. Some could be large and some could be small.
Create Partition in Windows 10 Using Disk Management
Follow the steps to create partition in Windows 10 using the Disk Management.
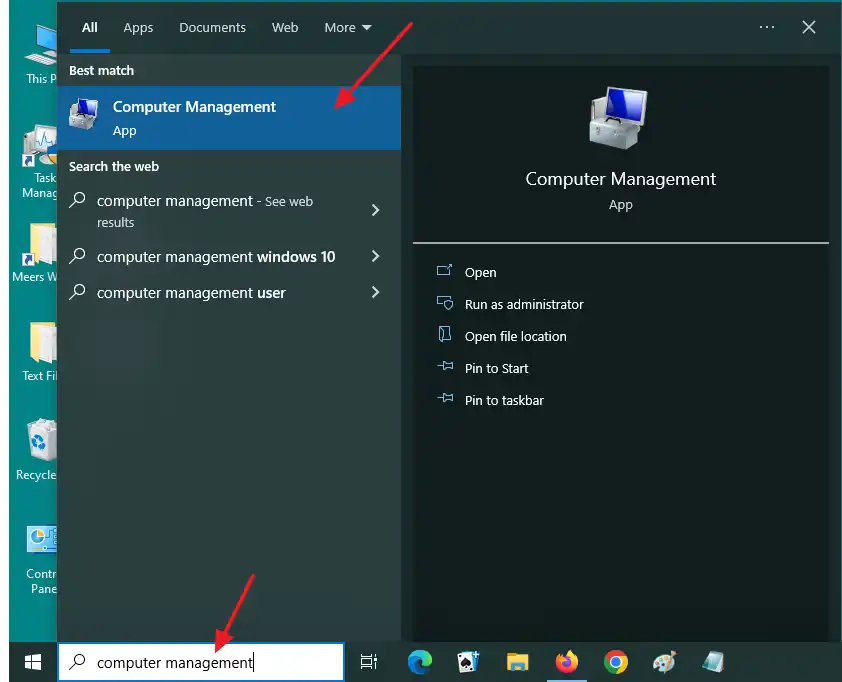
- Click on the Windows Search Bar located at the bottom-left corner of your desktop.
- Type Computer Management.
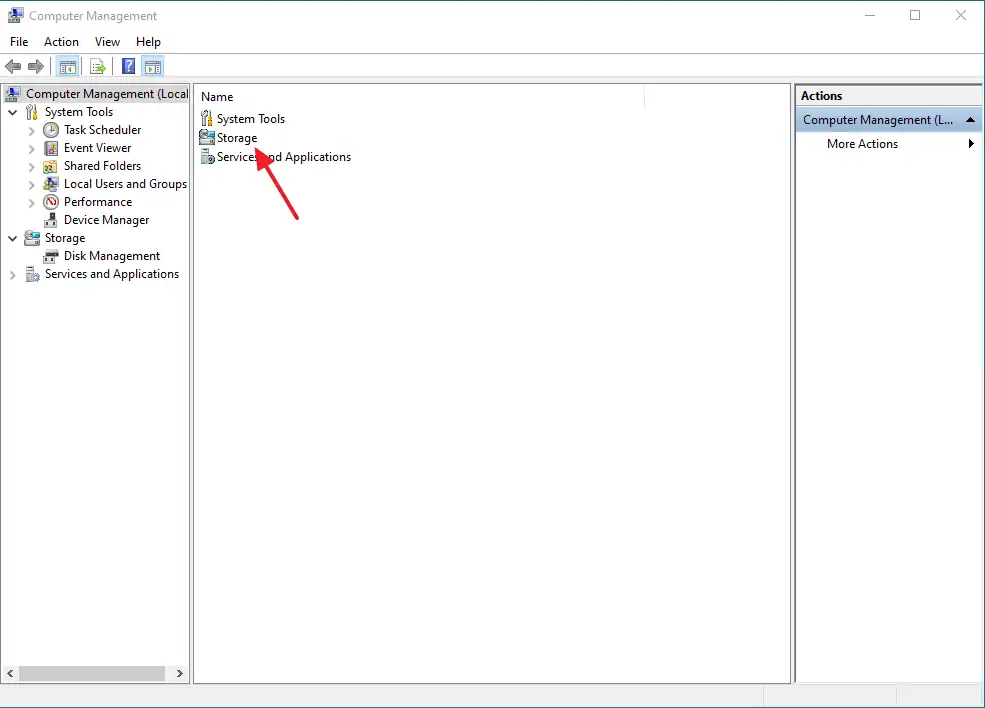
- Click on the Storage.
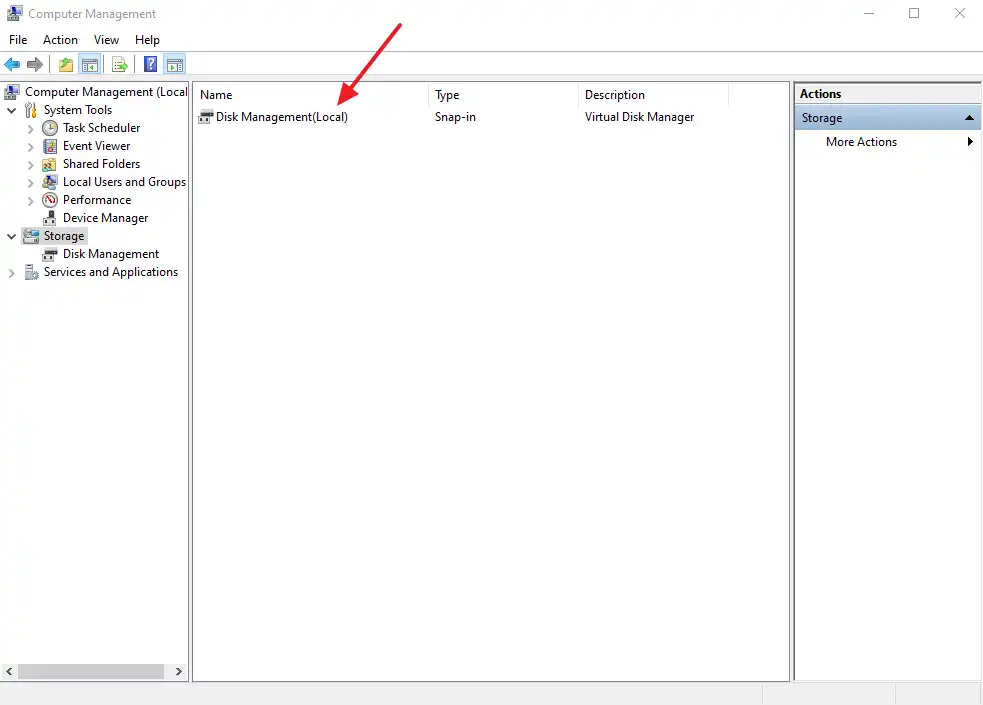
- Click on the Disk Management(Local).
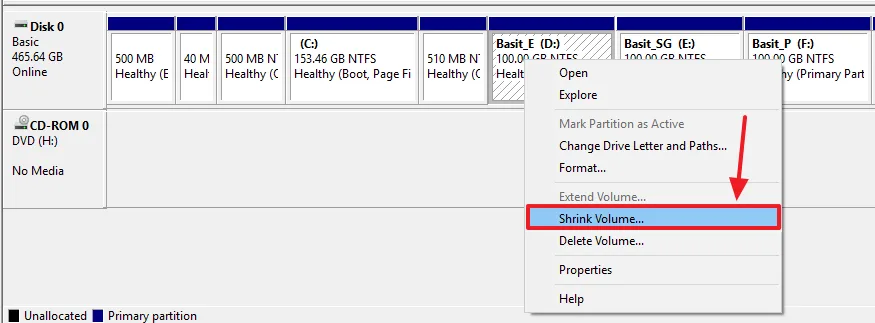
- Select the Drive from which you want to create partition.
- Right click on that partition.
- Click on the Shrink Volume…
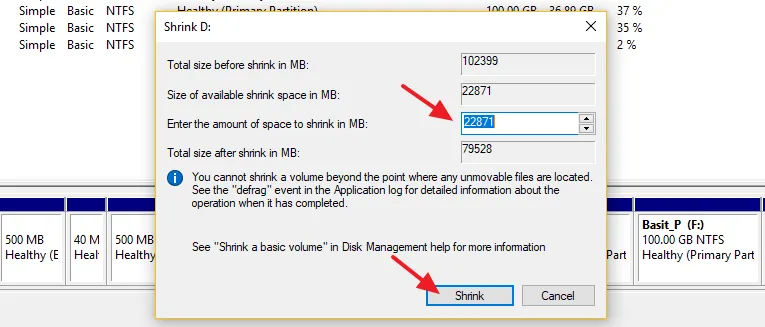
- It will show you the maximum available space for creating new partition.
- Here it is showing me 22871 MB of Space.
- To get space in GB’s, divide the available space by 1024 because 1GB = 1024 MB.
- 22871 / 1024 = 22.3 GB.
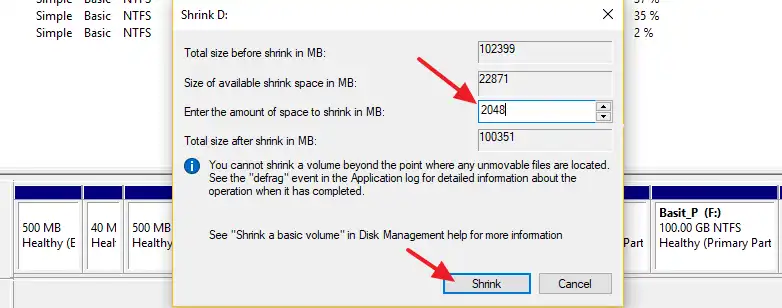
- I want to create a new drive of 2 GB. I multiplied 1024 by 2. It is equal to 2048 MB.
- After you enter the amount of space to shrink in MB click on the Shrink button.
- You can see that it has created 2.00 GB unallocated space from Basit (D:).

- Right-click on the newly created partition.
- Click on the New Simple Volume…

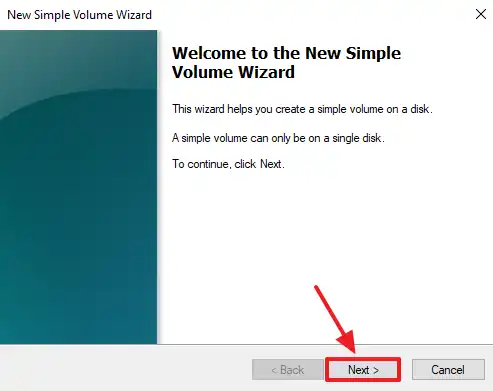
- Click on the Next button.
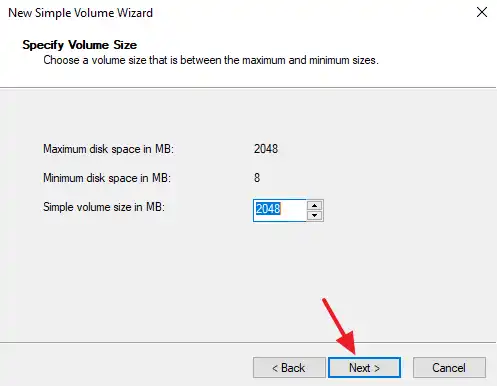
- Click on the Next button.
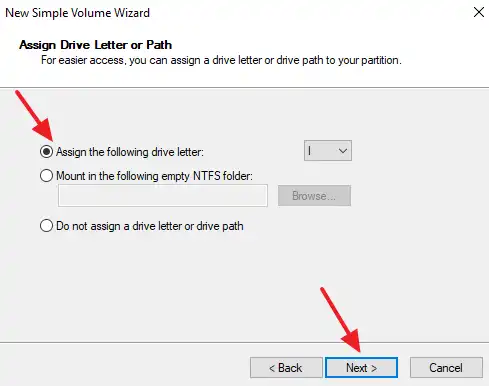
- Select Assign the following drive letter.
- Click on the Next button.
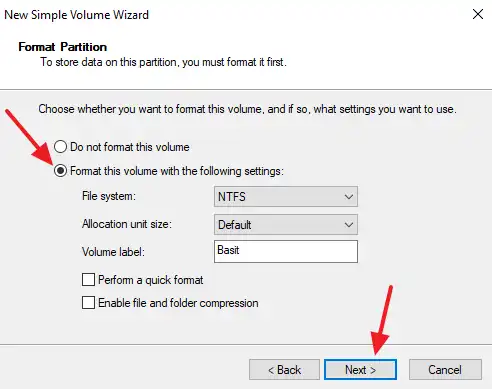
Select Format this volume with the following settings.
- Select NTFS as File System.
- Select Default in Allocation unit size.
- In Volume label enter a name for your partition.
- Click on the Next button.
- Click on the Finish button.
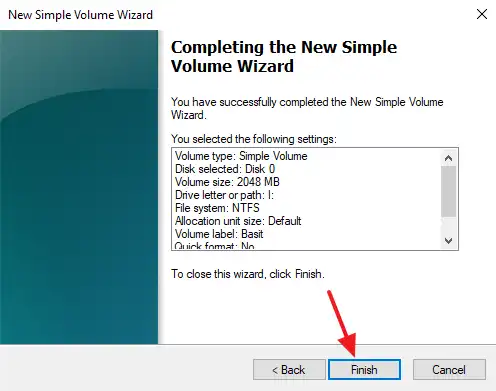
- You can see the newly created partition, Basit (I:) with 2GB of space.

If you like this post then don’t forget to share with the other people. Share your feedback in the comments section below.

Also Read
- How to Merge Hard Disk Partitions in Windows 10
- How To Turn On/Off Windows Defender In Windows 10 | Real Time Protection
- How To Turn-Off Recent Items & Frequent Places From Quick Access In Windows 10
- How To Run Windows 10 In Safe Mode – Troubleshoot | Reset, Restore, Recovery
- How to Run Disk Defragmentation in Windows 10 | Drive Optimizer



Leave a Reply