Do you want to show Last Updated date on your WordPress posts? You’re in the right place.
In this tutorial, I will guide you step-by-step on how to show Last Updated date on your WordPress posts using a simple and light-weight plugin called Posts Modified Date. It does not disturb your page layout, and is compatible with the Block Editor also known as Gutenberg WordPress Editor.
Showing only the Published Date of a post may confuse your visitors about the validity of the post content, particularly if is too old. By seeing the Last Updated date on your posts, visitors may get a positive hint that the content in the post is valid and should be read. The updated content is more appealing to visitors and also builds trust between you and your website visitors.
Following topics will be covered in this post:
- How to Install & Activate Posts Modified Date Plugin
- How to Edit the “Post Updated On” Text & Style
RELATED
- How to Stop Spam Bot Comments in WordPress
- How to Enable Persistent Object Cache on WordPress
- How to Migrate Domain & Hosting to Namecheap
- How to Remove Lazy Loading on Featured Image in WordPress
01. Install & Activate Posts Modified Date Plugin
In this section, I will guide you step-by-step on how to install & activate Posts Modified Date plugin, and show Last Updated date on your WordPress posts.
- Go to Plugins on your WordPress Admin Section from the Sidebar.
- Click on the Add New.
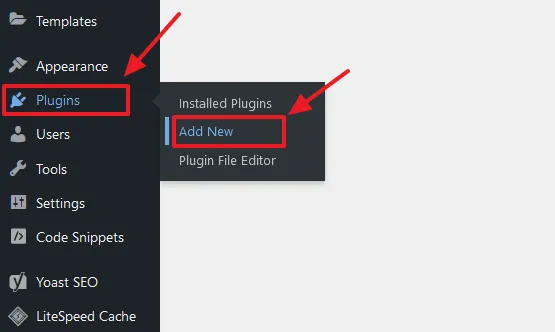
- In the Plugins Search Bar enter Posts Modified Date.

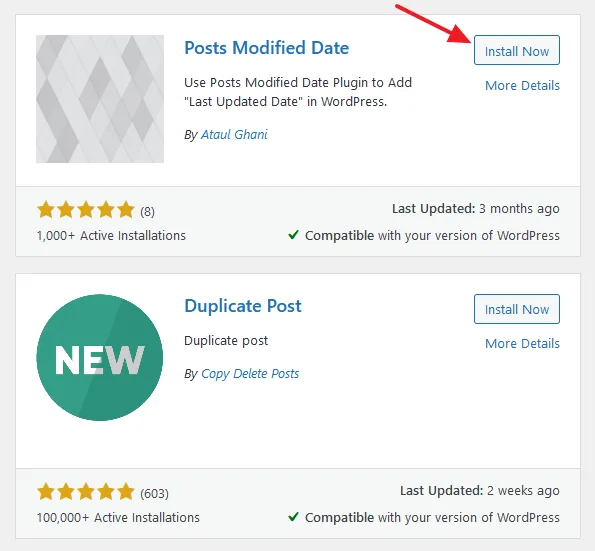
- It will show you lot of plugins in the search results. Go to Posts Modified Date plugin and click on the Install Now button.
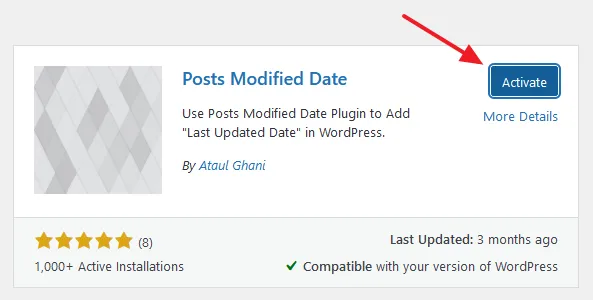
- Click on the Activate button to activate the Posts Modified Date plugin.
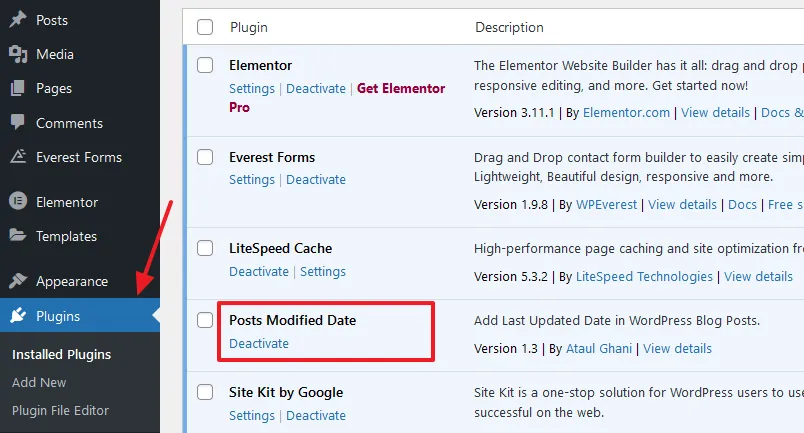
- Go to Plugins (Installed Plugins). You can see the Posts Modified Date plugin. It doesn’t have any settings to configure.
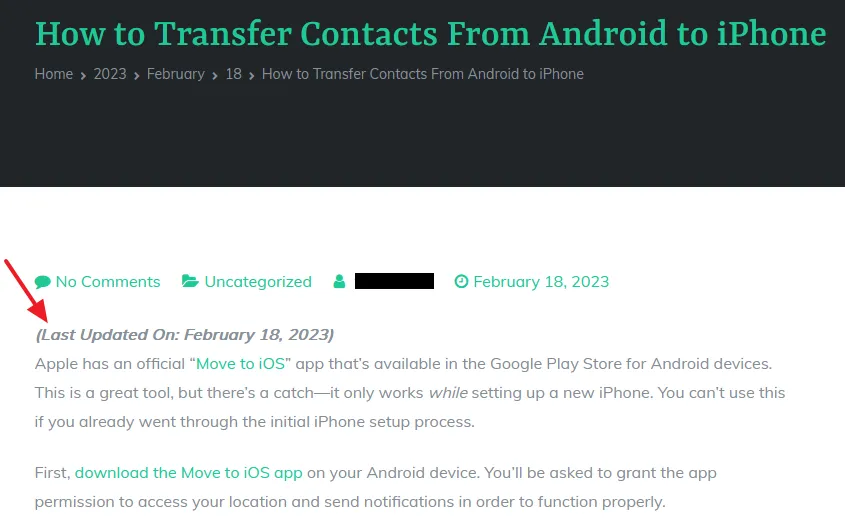
- Open a blog post to check whether the Last Updated date is appearing or not, as I have shown in the next step.
- You can see that the (Last Updated On: Date) is added just above the post content and below the title.
02. How to Edit the “Post Updated On” Text & Style
In this section, I will guide you on how to edit the “Post Updated On” text and style.
- Go to Plugins from the Sidebar.
- Click on the Plugin File Editor.
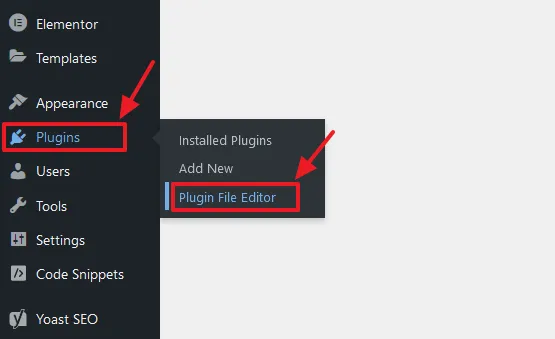
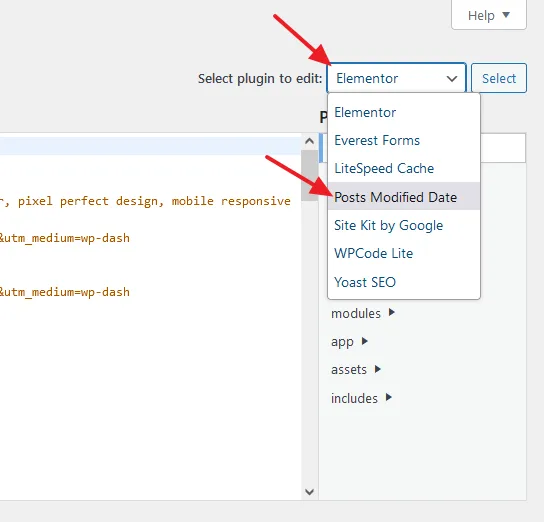
- On Select plugin to edit choose Posts Modified Date.
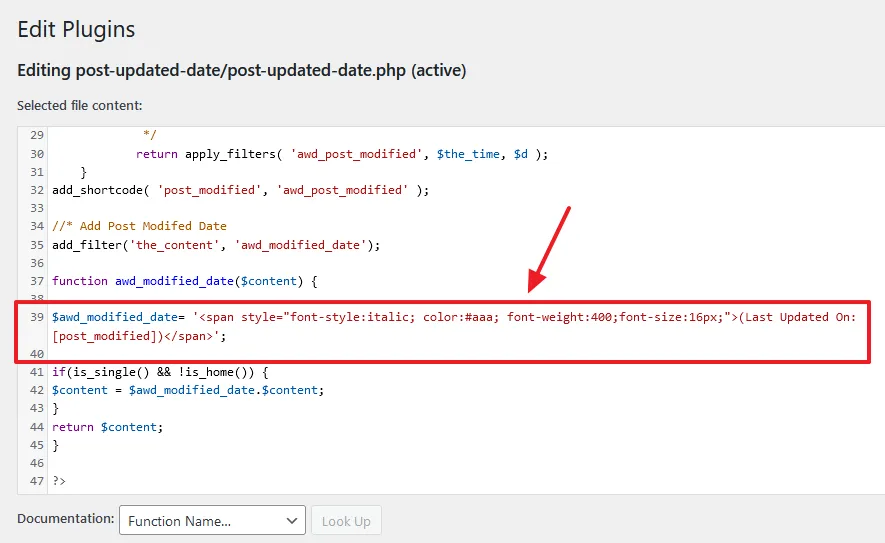
Scroll-down to line:
$awd_modified_date= '<span style="font-style:italic; color:#aaa; font-weight:400;font-size:16px;">(Last Updated On: [post_modified])</span>';You can customize font-style (normal, italic, oblique), color (either use color name like red, or color code with # symbol like #000000), font-weight (bold, normal, 900, 500, 400, 300), font-size, and Last Updated On text.
If you make any changes click on the Update File button located at bottom of the page.
So it was all about showing the Last Updated date on WordPress posts using a simple plugin Posts Modified Date. If you like this post then don’t forget to share with other people. Share your feedback in the comments section below.

Also Read



Leave a Reply