Is your WordPress Site Health status showing you the recommendation, “You should use a persistent object cache“? and you want to fix this issue? You’re in the right place.
In this tutorial, I will guide you step-by-step on How to enable persistent object cache on WordPress and How to install APCu Manager plugin. APCu is a PHP extension used to improve the speed/performance of a website.
APCu Manager offers a persistent object cache backend to WordPress. It is a complete APCu management and analytics reporting tool that enables you to monitor and optimize APCu operations on your WordPress website.
Below is the complete description about using the “Persistent Object Cache” on WordPress Site Health status. It is also providing information about which object caching services does your web host support like here it is suggesting APCu object caching service.
A persistent object cache makes your site’s database more efficient, resulting in faster load times because WordPress can retrieve your site’s content and settings much more quickly. Your hosting provider can tell you if a persistent object cache can be enabled on your site. Your host appears to support the following object caching services: APCu.
Following topics will be covered in this tutorial:
- How to Enable Persistent Object Cache on WordPress
- How to Set Up APCu Manager on WordPress
RELATED
- How to Migrate Hosting & Transfer Domain to Namecheap
- HowTo Pass Core Web Vitals Test for Monetized WordPress Blog
- How to Remove Lazy Loading on Featured Image in WordPress
01. How to Enable Persistent Object Cache on WordPress
The Object Cache on WordPress is enabled via Caching plugins. Here, I am guiding you on how to enable Object Cache on LiteSpeed Cache. If you are using W3 Total Cache, WP Rocket, WP Super Cache, etc, read their documentation to enable Object Cache.
- Go to LiteSpeed Cache from the Sidebar.
- Click Cache.
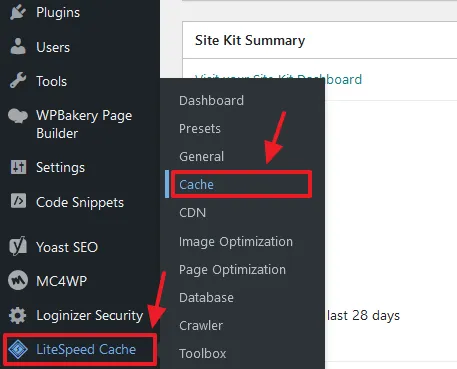
- Open the Object tab.
- Turn on the Object Cache.
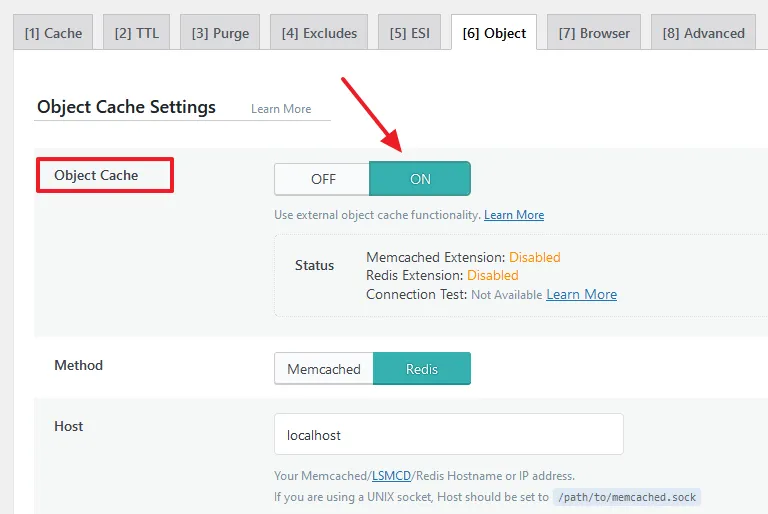
Now you won’t see “Persistent Object Cache” recommendation on your WordPress Site Health status. For confirmation check the Site Health status again.
On the Object Cache Settings, you can also see two object cache extensions i.e. Memcached & Redis. Though you can enable them from your cPanel account, but they don’t work (connect) on Shared Hosting. They only work on VPS Hosting and Dedicated Server Hosting.
These articles may help you to connect & set up Redis Object Cache on WordPress, if it is supported by your web host:

02. How to Set Up APCu Manager on WordPress
In this section, I will guide you step-by-step on how to set up APCu Manger on WordPress.
01. Enable APCu PHP Extension on cPanel
First of all make sure that your APCu PHP extension is enabled on your cPanel account.
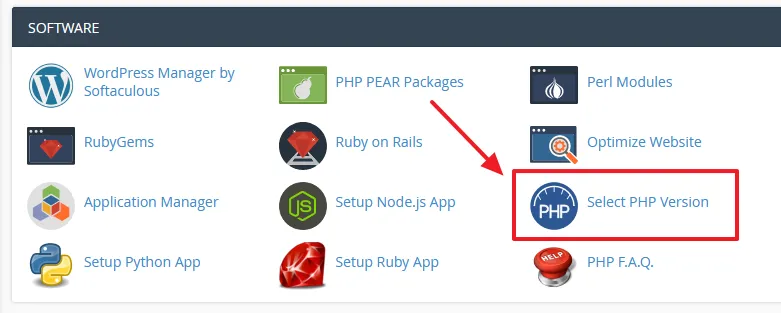
- Login to your cPanel account and go to SOFTWARE section.
- Click the Select PHP Version.
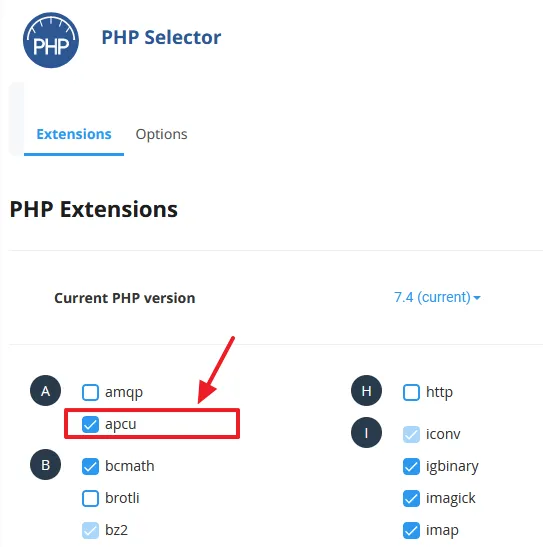
- On the Extensions tab, go to PHP extensions start with A. It will help you to quickly find the APCu PHP extension.
- Tick on the apcu to enable. If it is already enabled, don’t do anything.
02. Install and Set Up APCu Manager Plugin
The APCu PHP extension is enabled, now I will install and set up APCu Manager plugin.
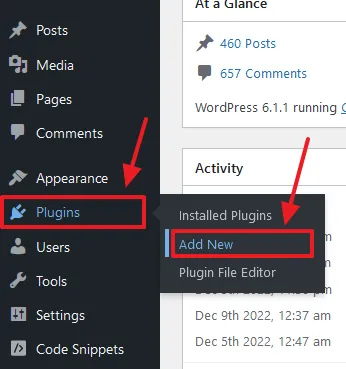
- Go to Plugins from the Sidebar.
- Click Add New.
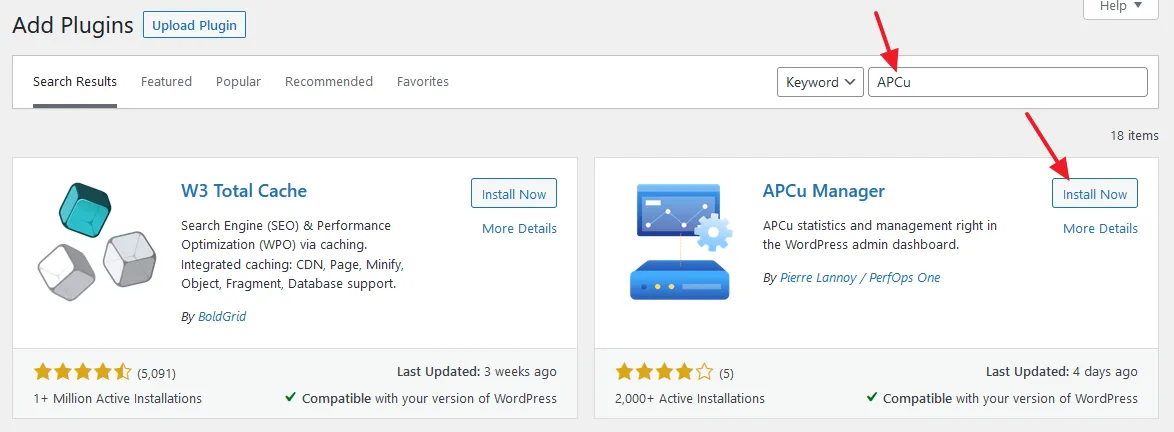
- In the Plugins Search Bar enter APCu Manager. The plugin will be listed on the search results.
- Click the Install Now button.
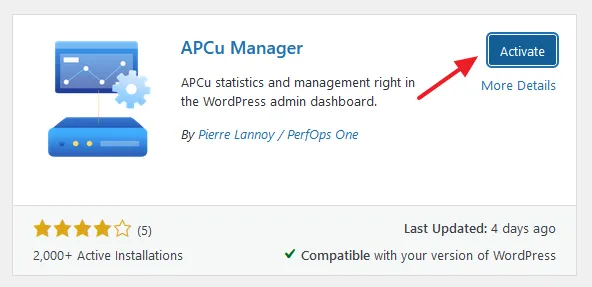
- Click the Activate button.
- The plugin will appear on the sidebar with the name PerfOps One.
- Click on the Control Center to set up APCu Manager settings.

- On the APCu Manager click Settings button.

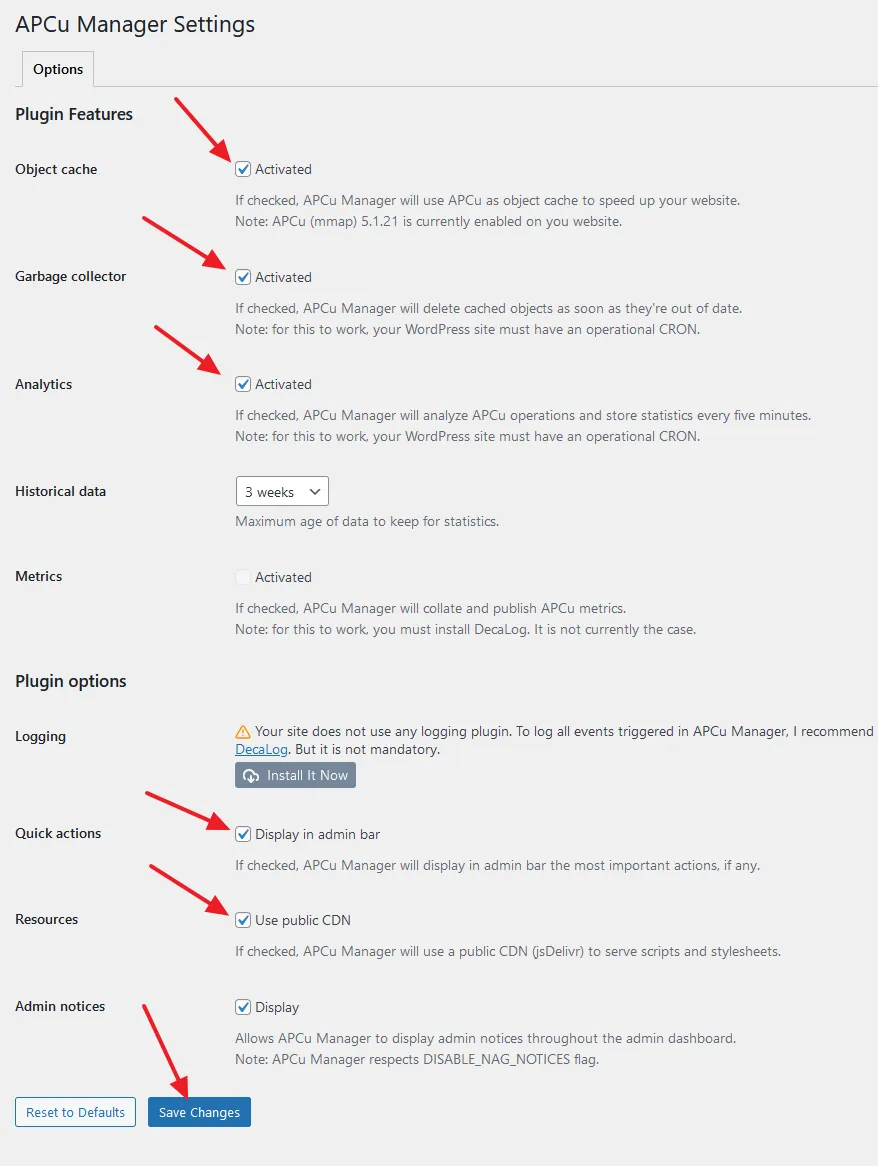
- Tick the Object Cache, Garbage collector, Analytics, Quick Actions, and Resources (Use Public CDN to serve stylesheets and scripts).
- Click the Save Changes.
- It will show you a message, “Plugin settings have been saved. APCu Manager is now the WordPress object cache handler“.

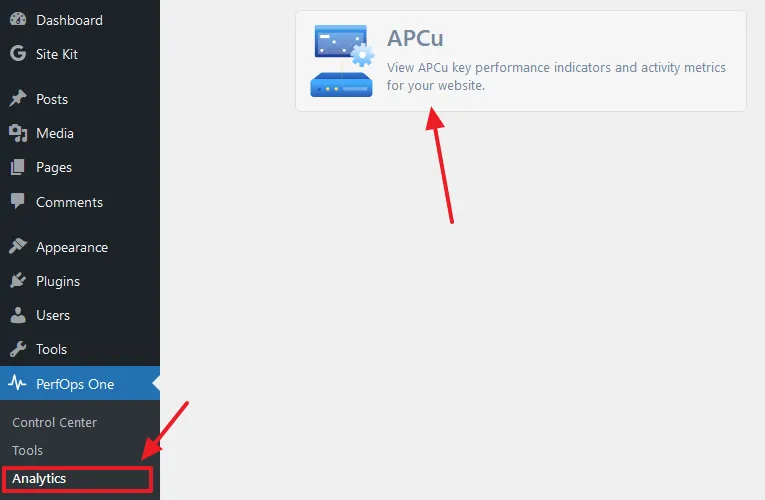
- To view the Analytics of APCu i.e. Key performance indicators and activity metrics for your website, go to PerfOps One and click Analytics.
- Click APCu.
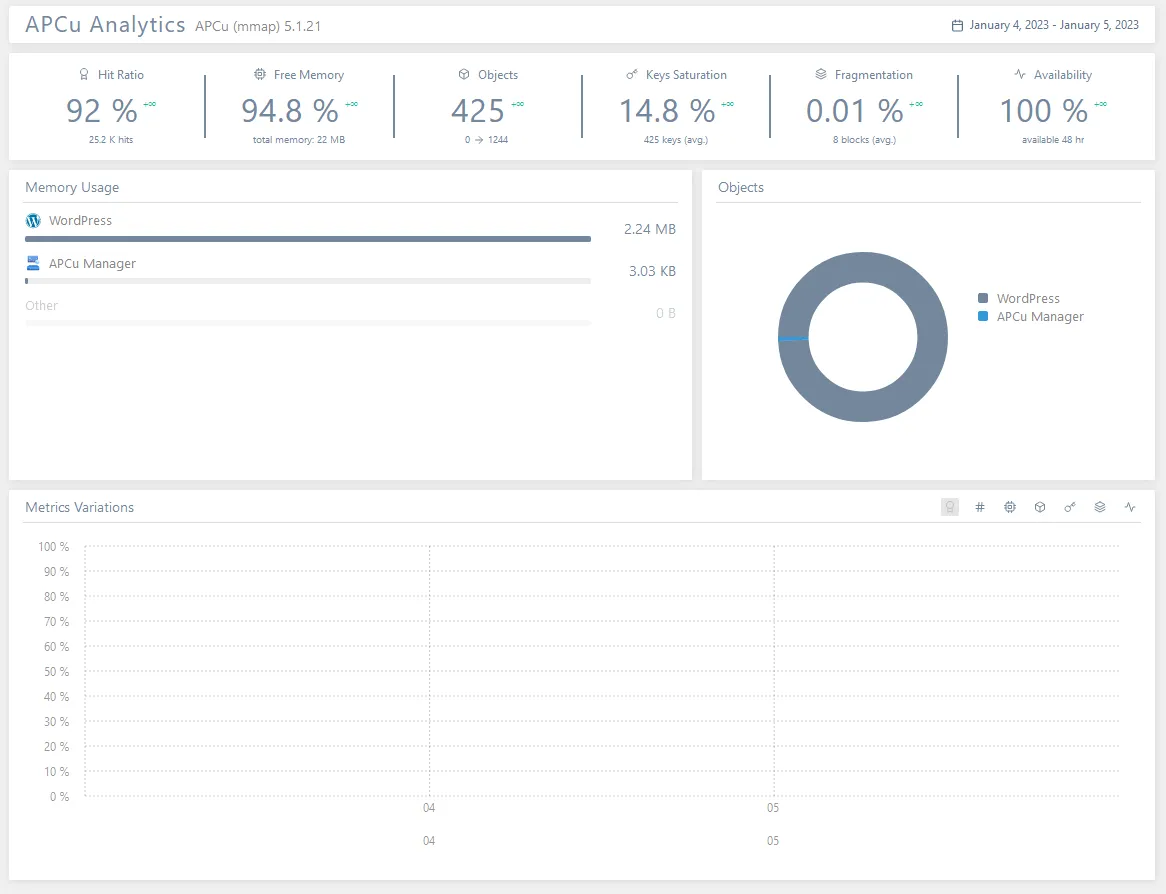
- This is the APCu Analytics page. You can view Hit Ratio, Free Memory, Objects, Keys Saturation, Fragmentation, Availability, Memory Usage, and Metrics Variations.
- A Hit Ratio is a calculation of cache hits. It means a measurement of how many content requests APCu Object Cache is able to deliver successfully, compared to how many requests it receives. The cache hit ratio should be high.
Conclusion
So it was all about enabling persistent object cache and setting up APCu Manager on your WordPress website. Once you’re are done, measure how much impact it has added to the performance of your website.
If you like this post then don’t forget to share with the other people. Share your feedback in the comments section below.
Also Read



Leave a Reply