Do you want to install, activate, set up, and customize the Avantage WordPress theme? You’re in the right place.
In this tutorial, firstly I will guide you step-by-step on installing and activating the Avantage WordPress theme and required plugins, and then, how to customize it, like uploading logo, customize homepage, footer, header, content, and other sections.
Avantage is one of the leading and advanced WordPress themes for business consulting firms, freelance consultants and their clients, marketing consulting, advertising consulting, financial advisors, insurance brokers, investment consultants, accountant services, HR consulting, and many more.
Following topics will be covered in this post:
- Prerequisites
- How to Install & Activate Avantage WordPress Theme
- How to Import Your Desired Demo
- How to Upload the Logo of Your Website
- How to Customize the Menu of Website
- How to Customize Sections from Widgets
- How to Customize Homepage & Other Sections
RELATED
- How to Migrate Hosting & Transfer Domain to Namecheap
- How to Install & Set Up Yoast SEO Configuration
01. Prerequisites
In order to install the Avantage WordPress theme you must have a domain and hosting, and WordPress installed on it.
If you haven’t bought a domain and hosting yet, read this tutorial:
If you have not installed WordPress on your hosting, read this tutorial:
02. How to Install & Activate Avantage WordPress Theme
In this section, I will guide you step-by-step on how to install and activate Avantage WordPress theme.
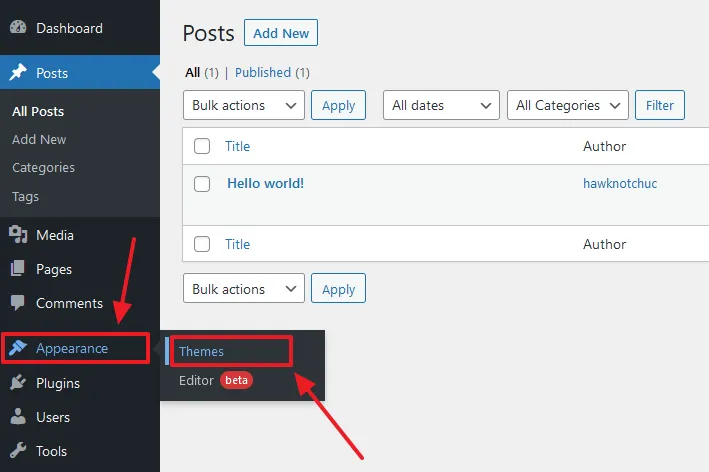
- Go to Appearance from your WordPress sidebar.
- Click the Themes.
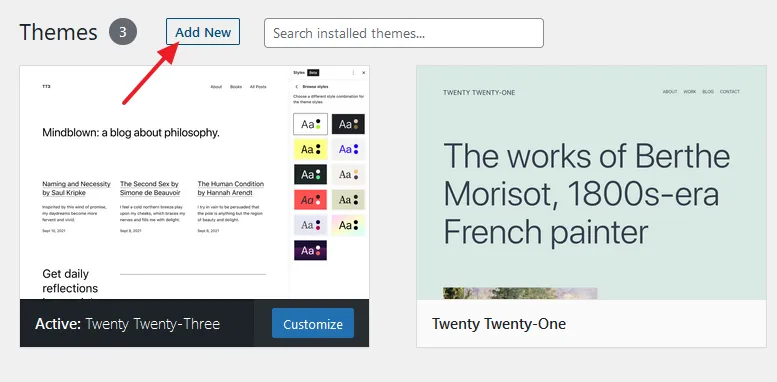
- Click the Add New button.
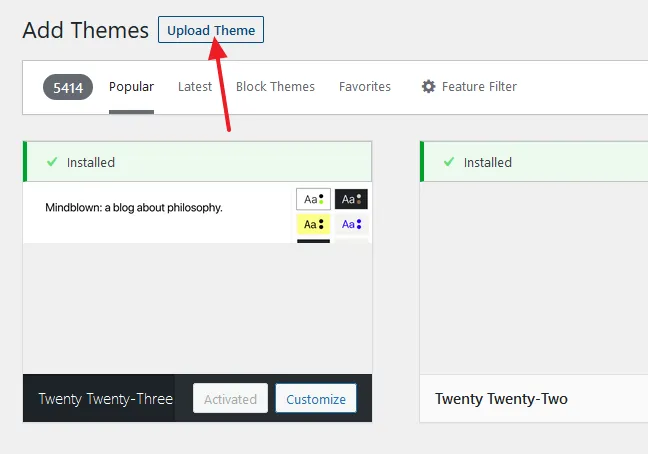
- Click the Upload Theme button.
- Click the Browse… button to browse the path to theme’s zip file on your computer.
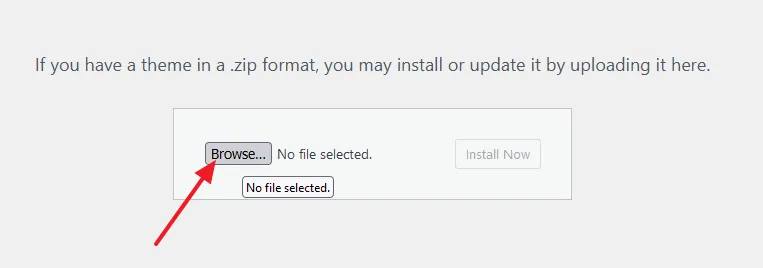
- There are two zip files in the extracted theme folder i.e. avantage.zip and avantage-child.zip. Select the avantage.zip file.
- Click the Open button.
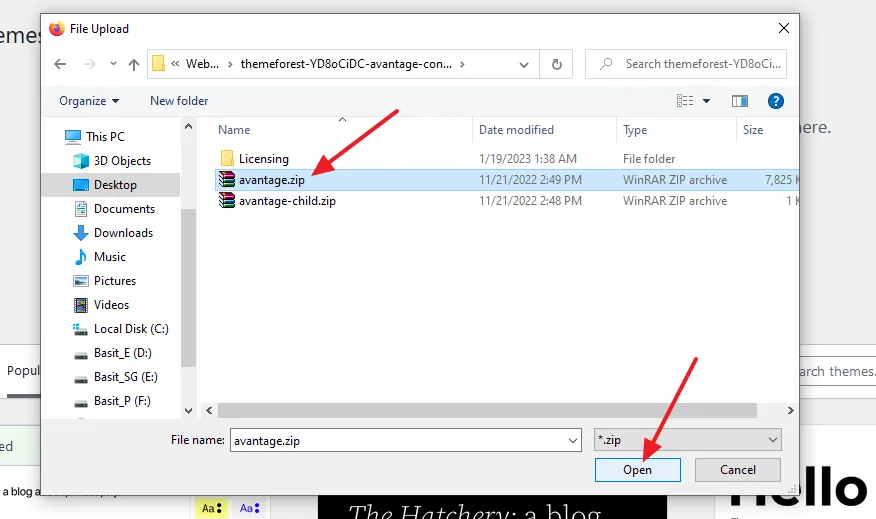
- After your theme is browsed, click the Install Now button.

- Once the theme is installed, you can see a message, “Theme installed successfully“.
- Click the Activate link to activate the Avantage WordPress theme.
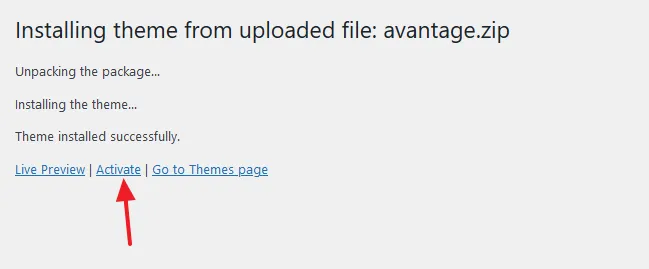
- You can see a message, “New theme activated“.
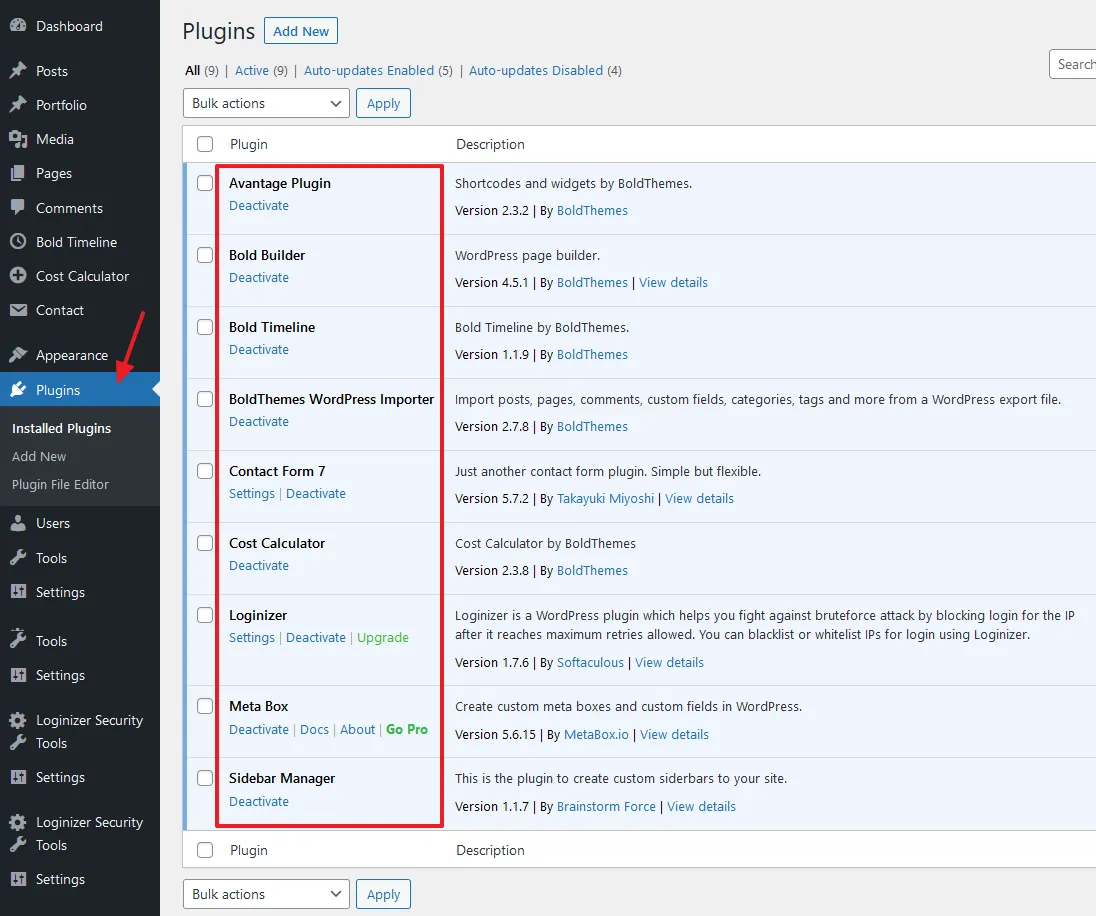
- Now you have to install and activate the required plugins i.e. Avantage, Bold Builder, Bold Timeline, BoldThemes WordPress Imported, Contact Form 7, Cost Calculator, Lightweight Sidebar Manager, and Meta Box.
- Click the Begin installing plugins link.

- Now install all the plugins one-by-one, as I have shown below.
- Click the Install link located below the title of the plugins. Here, I am installing the Bold Builder plugin to guide you how to do.
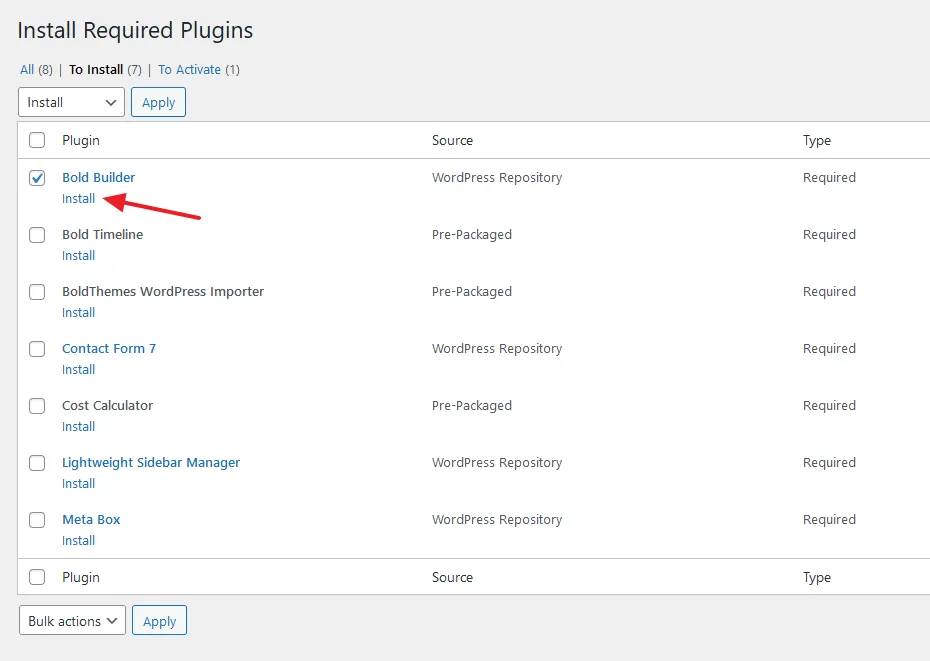
- Once a plugin is installed, click the Return to Required Plugins Installer link to install the rest of the plugins.
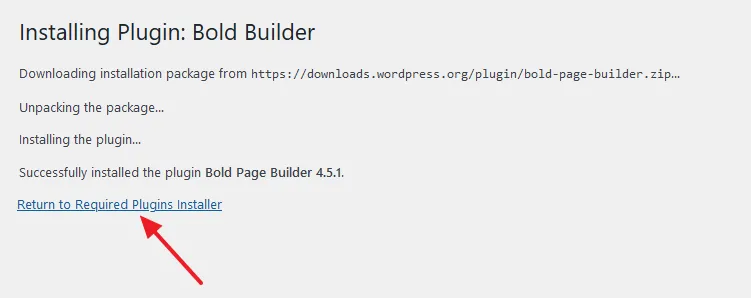
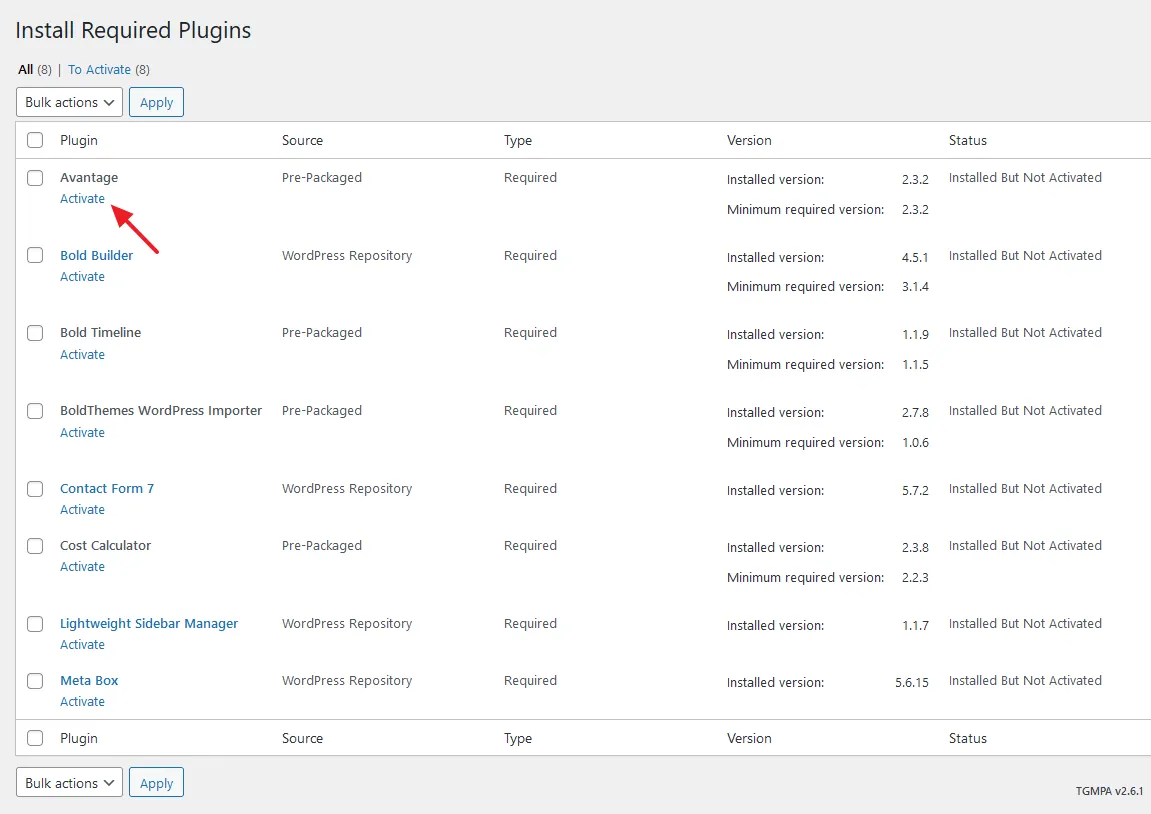
- You can see that all the plugins have been installed. Now click the Activate link of all the plugins one-by-one to activate them, located below the title.
- You can see that all the required plugins of Avantage WordPress theme have been activated. Follow the next section to import your desired Demo.
03. How to Import Your Desired Demo
You have successfully installed and activated the Avantage WordPress theme and its required plugins, now in this section, I will guide you on how to import your desired Demo.
Demo shows everything a theme has to offer for a website. Without demo content it is difficult to analyze, customize and set up a theme on your website. You can replace/remove the demo content such as text, images, logo, favicon, videos, etc, later.
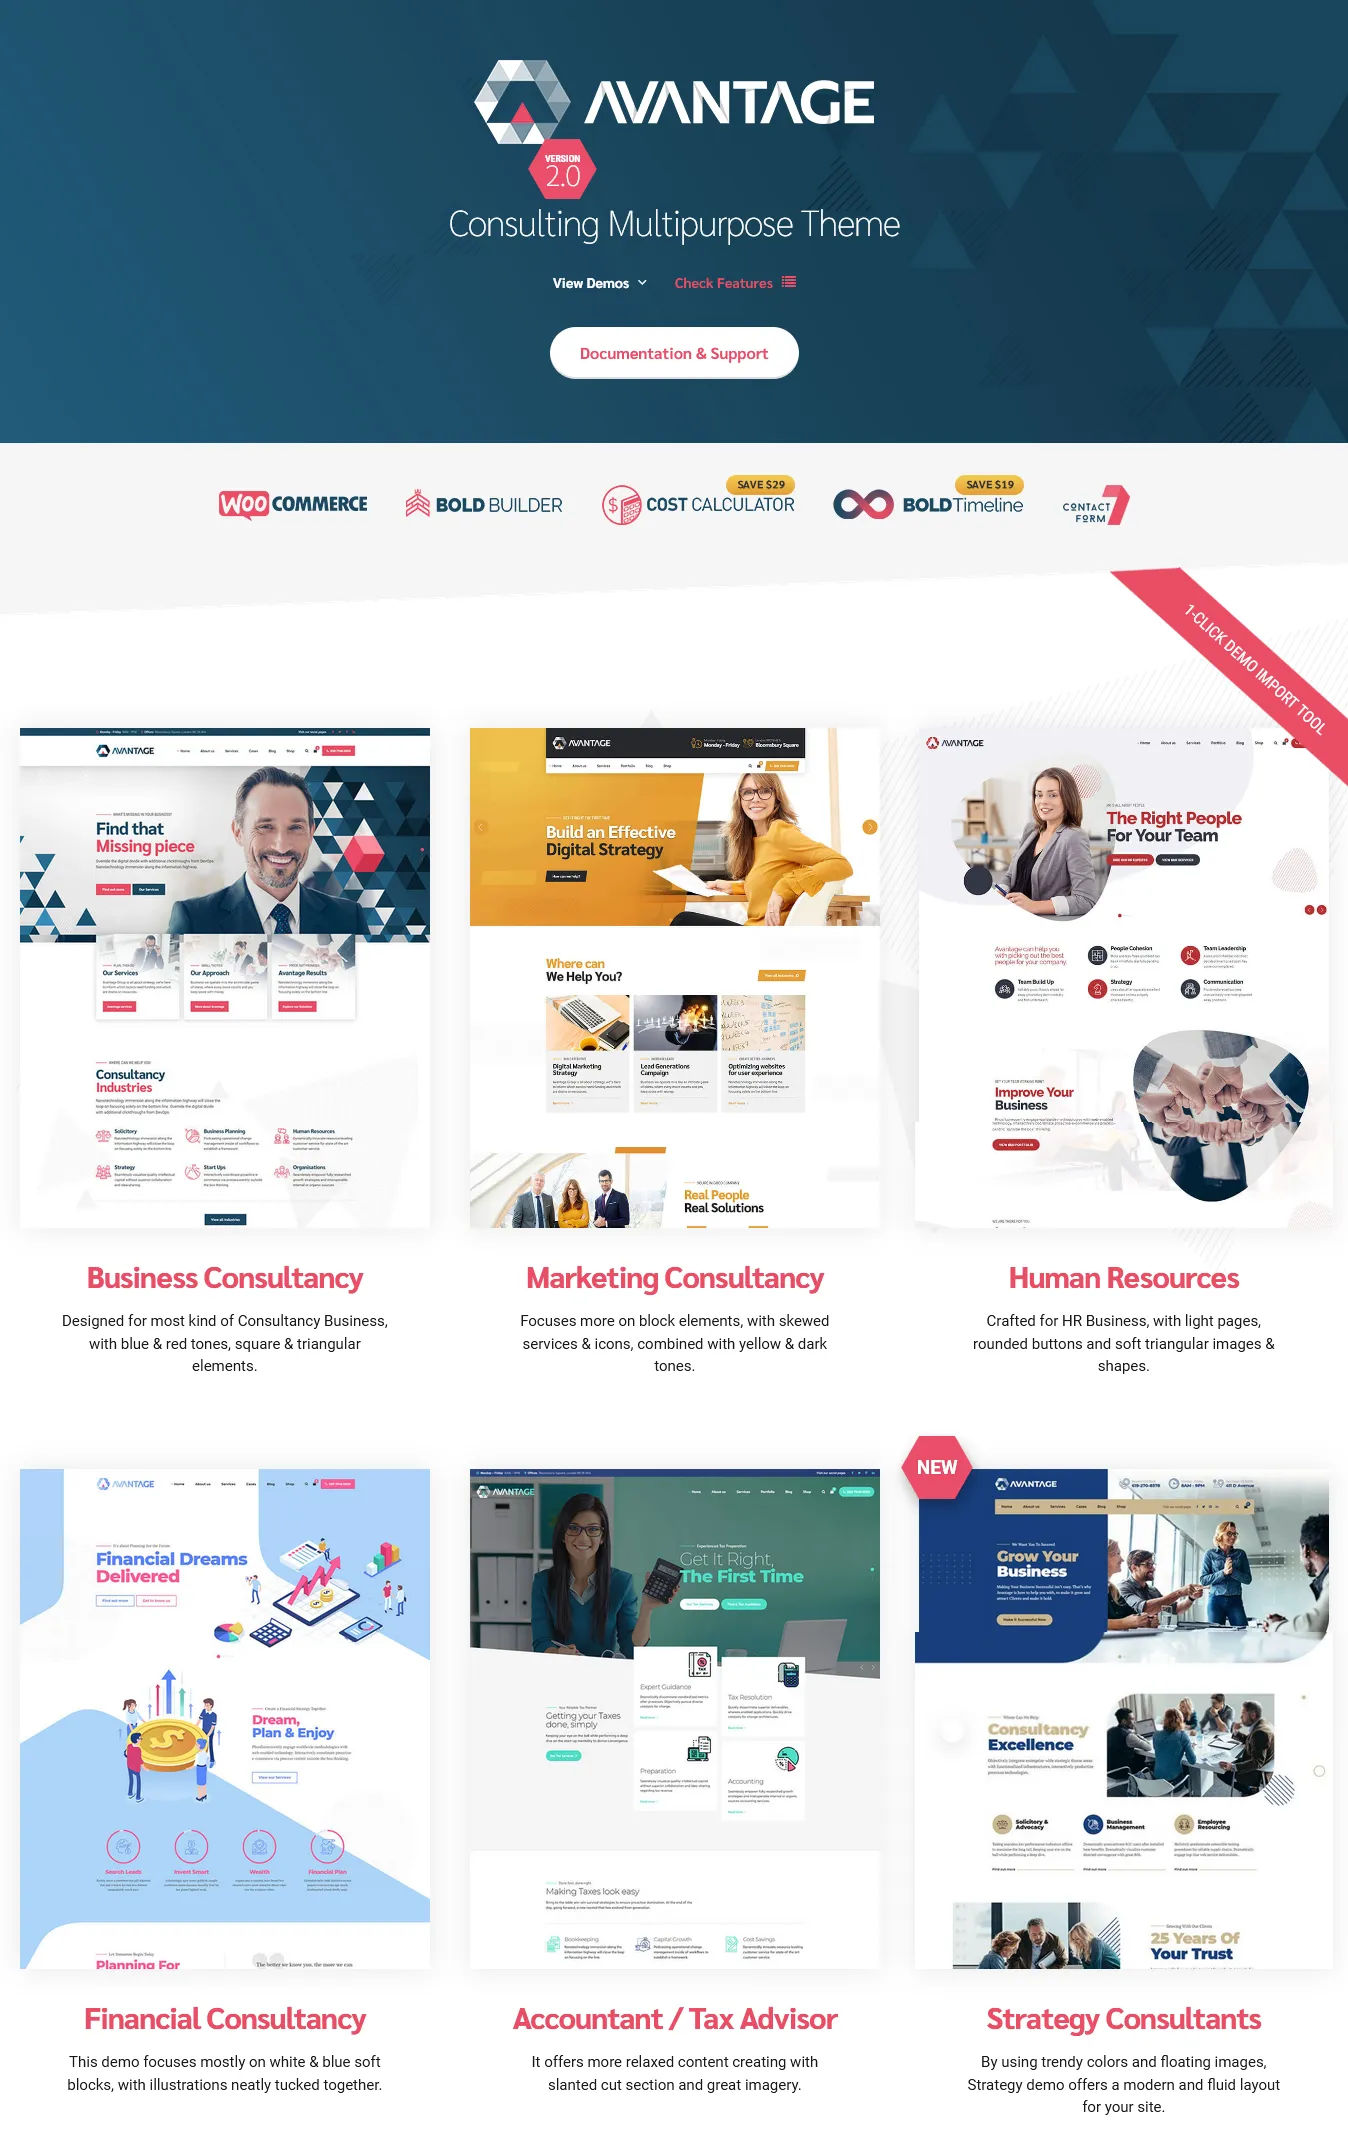
Avantage WordPress theme offers 5+ Demos for different types of websites, as mentioned above. Before you begin the Demo Import, go to Demo Page of Avantage WordPress theme on Themeforest and pick out the Name of your desired Demo.
Here, I will import the Marketing Consultancy Demo of Avantage WordPress theme.
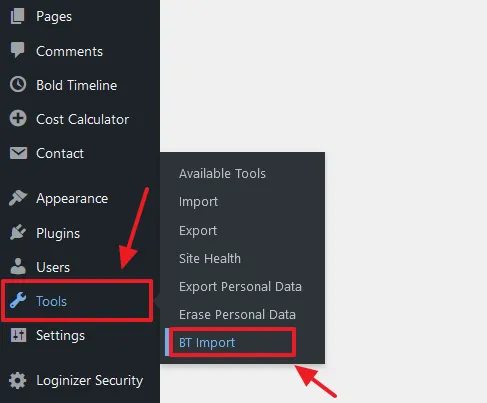
- On your WordPress Dashboard go to Tools from the sidebar.
- Click the BT Import. The BT Import is a plugin that imports the Demos of Avantage WordPress theme to your WordPress site. You have installed & activated this plugin in the Section 2 above.
- It will list down the XML files of all the available Demos of Avantage WordPress theme. Click on the one that you want to import.
- Here, I am importing the DEMO 7, Marketing Consulting.
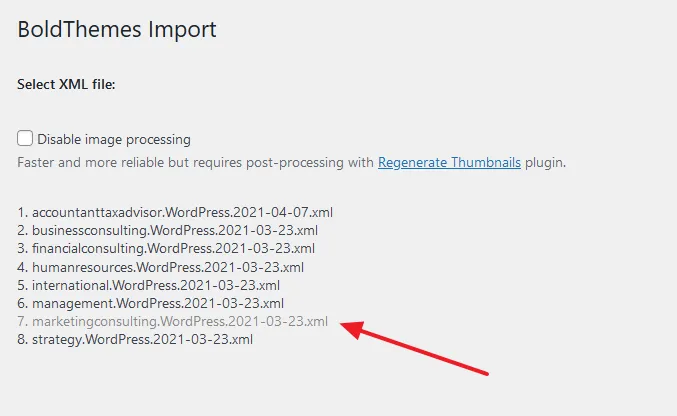
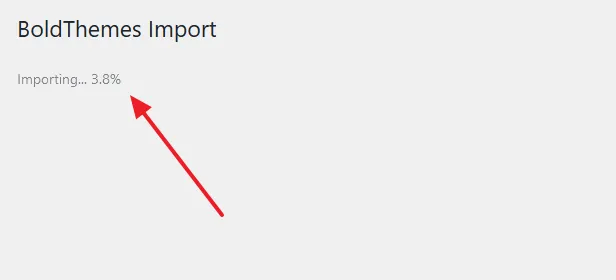
- It may take few minutes to import the DEMO, so be patient till it finishes.
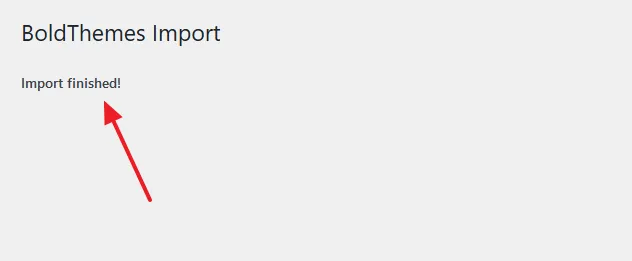
- Once the Demo is completed, you will see a message Import finished!
The Demo also installs and activates the LiteSpeed Cache plugin, which is used to optimize the performance of your website and pass the Core Web Vitals assessment.
- Open your website to see whether the Demo is imported or not. Below, you can see that the Avantage’s demo “Marketing Consulting” is completely imported and fully-functional.

04. How to Upload the Logo of Your Website
In this section, I will guide you on how to change/upload the logo of your website.
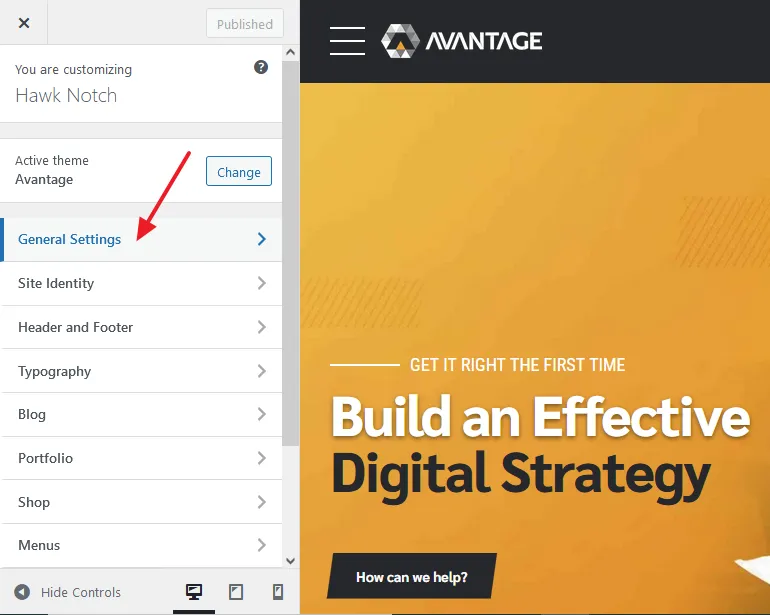
- Go to Appearance from the WordPress sidebar.
- Click the Customize.
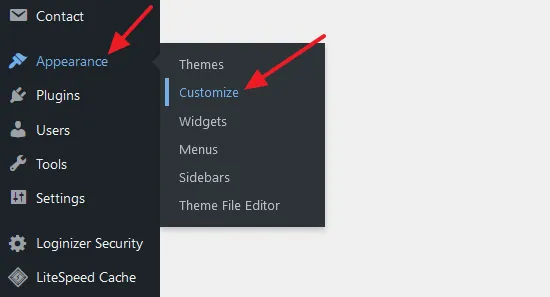
- Click the General Settings tab. You can upload the Favicon from the Site Identity, located below the General Settings.
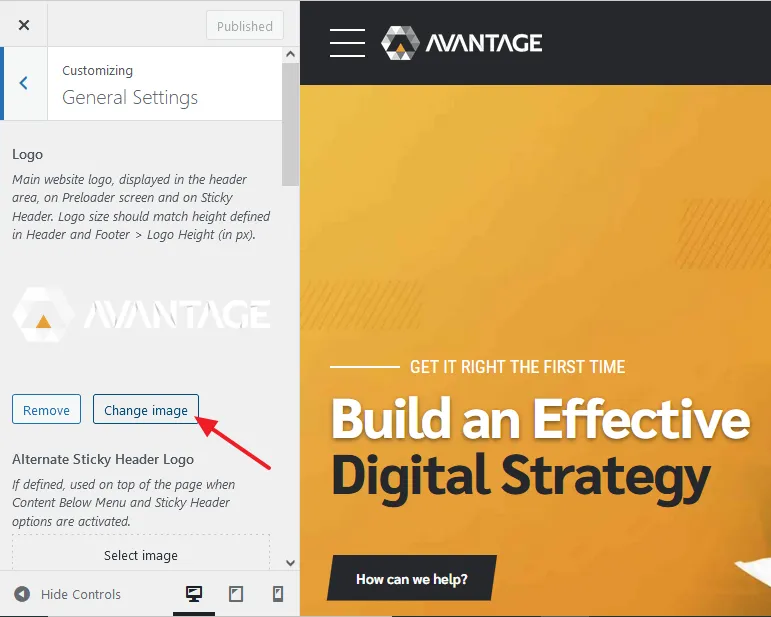
- Click the Change image button to upload the Logo of your website.
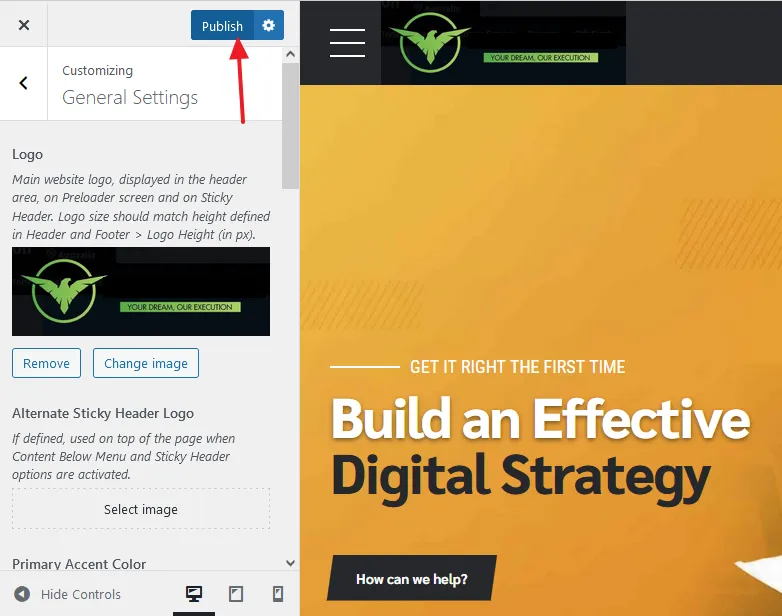
- Once the logo is uploaded, click the Publish button. You can also see the Preview on the right section.
05. How to Customize the Menu of Website
In this section, I will guide you on how you can customize the Menu of Avantage WordPress theme.
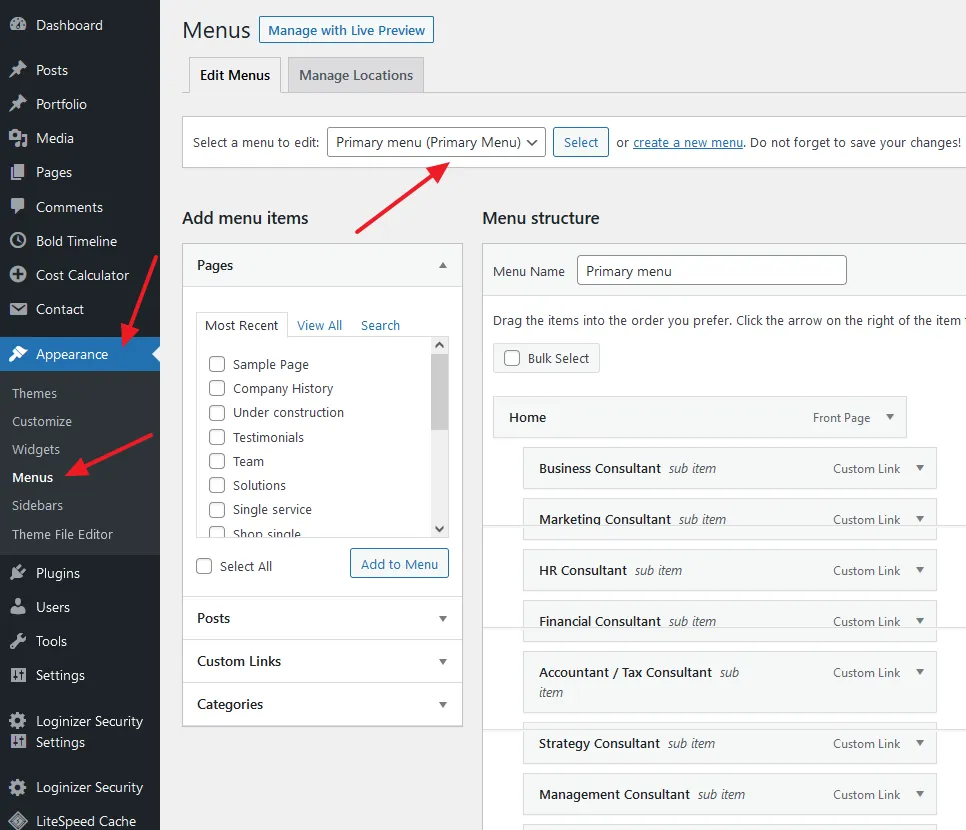
- Go to Appearance from the WordPress Sidebar.
- Click the Menus.
- If you want to edit the main menu of the website select the Primary Menu on Select a menu to edit. Select the Footer Menu if you want to edit the footer menu. After selecting the menu type you can edit/remove/add menu items, links, and text. You can also change the order of the menu items. The menu items can be linked to posts, pages, categories, tags, and custom links.
06. How to Customize Sections from Widgets
Some of the sections of Avantage WordPress theme are customized from the Widgets.
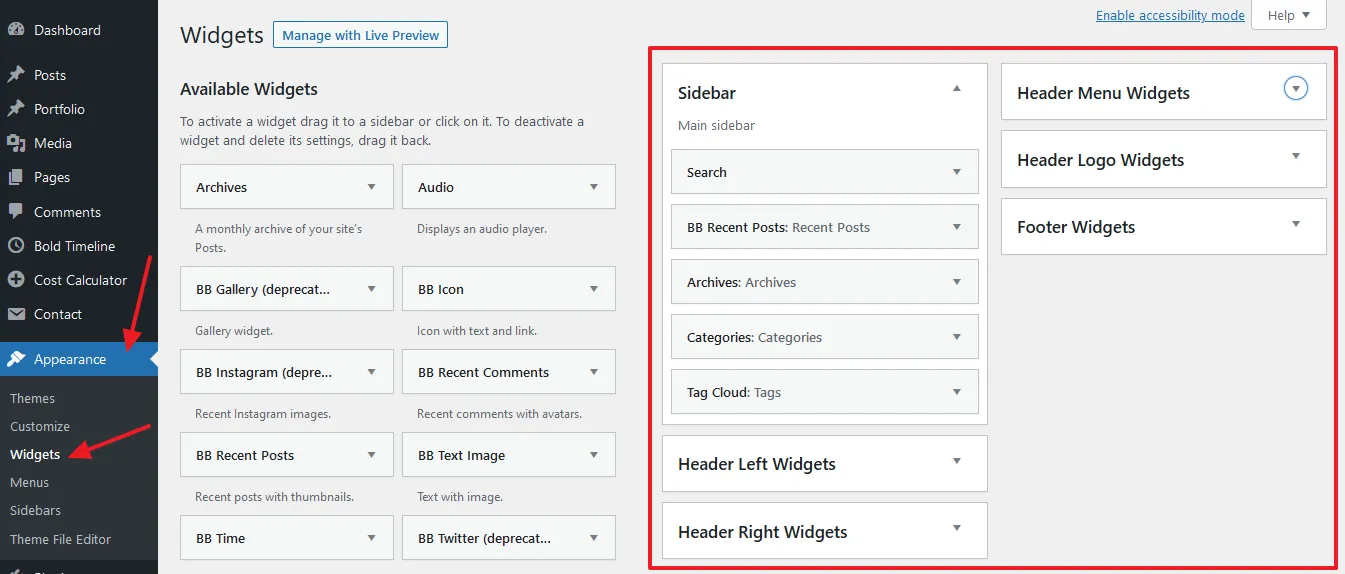
- Go to Appearance from the WordPress sidebar.
- Click the Widgets.
- At the left section you can see the Available Widgets that you can add to your website. Some are builtin WordPress widgets, like Archives, Audio, etc, whereas some are part of the Avantage theme, like BB Gallery, BB Icon, BB Instagram, BB Recent Posts, etc.
- At the right section, you can see those widgets that are already added to your website. Expand the widgets to edit the settings and content.
07. How to Customize Homepage & Other Sections
In this section, I will guide you on how to Customize the Homepage and other sections/pages of Avantage WordPress theme on the Bold Builder. Bold Builder is a popular page builder plugin on which Avantage WordPress theme is created.
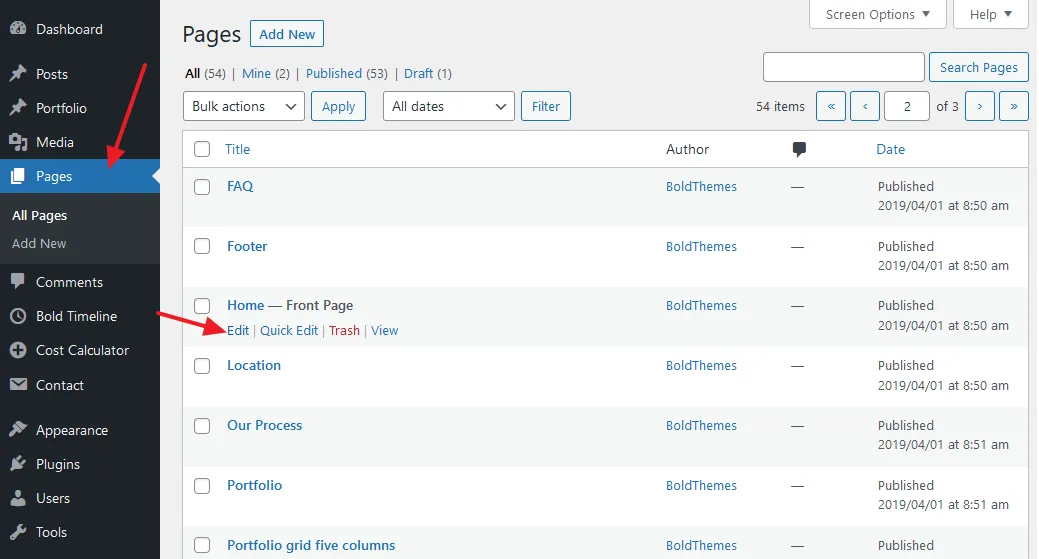
- Go to Pages from the WordPress sidebar.
- Find the Home page and click its Edit link. You can also identify Home page by Front Page label. Here Home page lies in the second page.
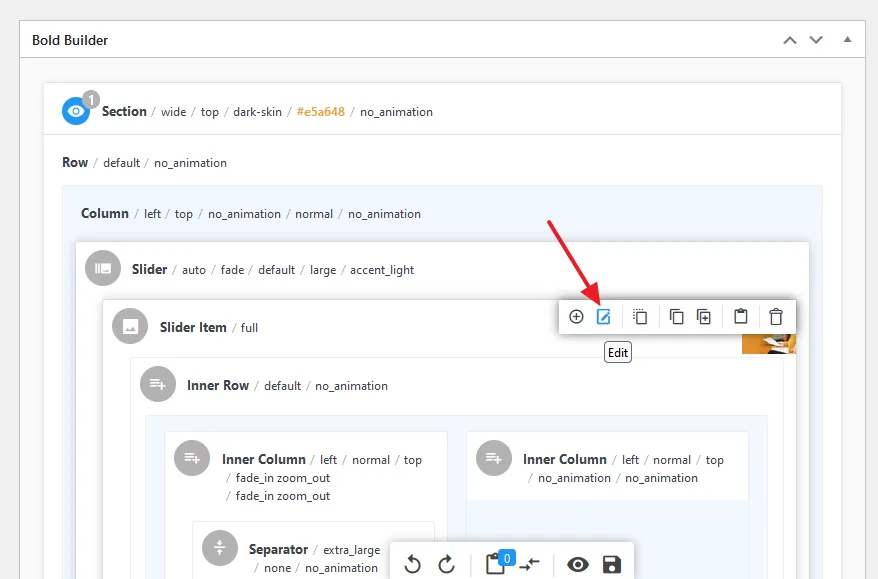
- Hover the mouse over the section/module/widget that you want to edit. A small Toolbar appears with different options, like Edit, Add, Copy, Clone, Remove, and more.
- Click the Edit icon to modify the text, images, links, settings, effects, etc.
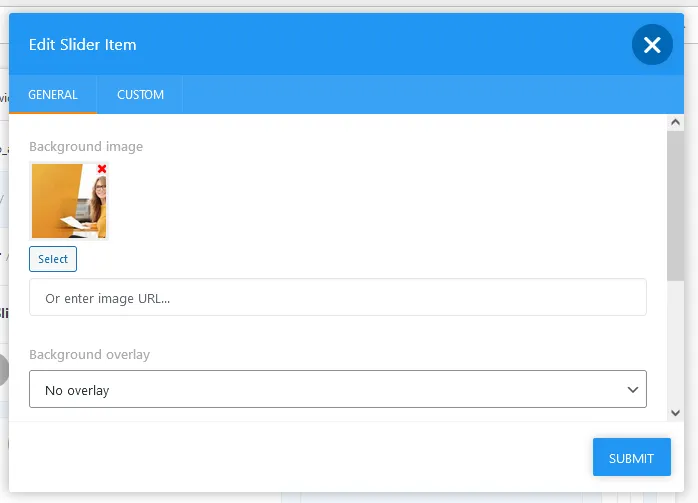
- A popup window will appear where you can add/remove/edit the content or manage settings.
- Click the Submit button after you make changes.
The way you customize the Home page, you can also customize the other sections and pages of Avantage WordPress theme on Bold Builder i.e. Careers, Company History, Contact, Cost Calculator, FAQ, Footer, Location, Our Process, Portfolio, Pricing, Services, Solutions, Team, Testimonials, etc.
If you like this post then don’t forget to share with the other people. Share your feedback in the comments section below.
Also Read


Leave a Reply