Are you fed up with the spam comments on your WordPress blog posts and want to stop them? You’re in the right place.
In this tutorial, I will guide you step-by-step on how to stop spam comments on your WordPress blog posts by integrating your Comments Form with Google reCaptcha.
Though WordPress is the leading and most advanced blogging platform but still, spam comments have been a headache for bloggers and publishers. The Google reCaptcha is a free security service that protects your website from spam comments and brute-force attacks.
The Simple Google reCAPTCHA WordPress plugin allows you to connect your website with the Google reCAPTCHA service. Once your website is verified by Google reCaptcha its protection becomes active on your WordPress comments form.

Follow the steps to integrate your comments form with Google reCAPTCHA in WordPress.
01. Install Simple Google reCAPTCHA
Follow the steps to install simple Google reCaptcha plugin.
- Login to your WordPress Admin Section.
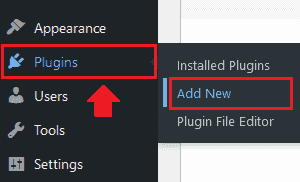
- Go to Plugins from your Sidebar and click on the Add New.
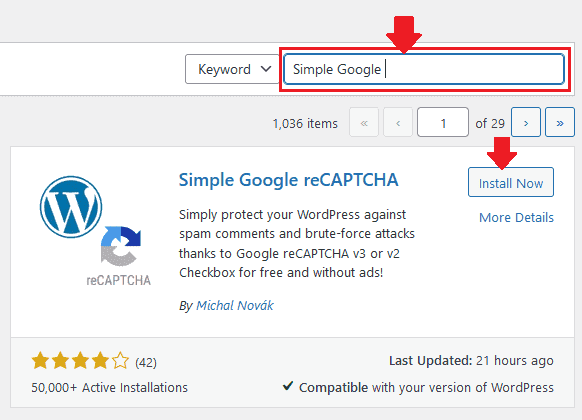
- In the plugins search bar type “Simple Google reCAPTCHA“. It will appear in the search results.
- Click on the Install Now button to install the plugin.
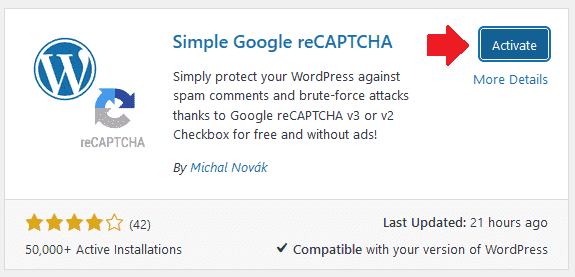
- Click on the “Activate” button to activate the plugin. Once the plugin is activated it will show you its Settings, as shown in the next step.
02. Configure Simple Google reCAPTCHA
In this section, you will learn about how to configure Simple Google reCAPTCHA for your WordPress website.
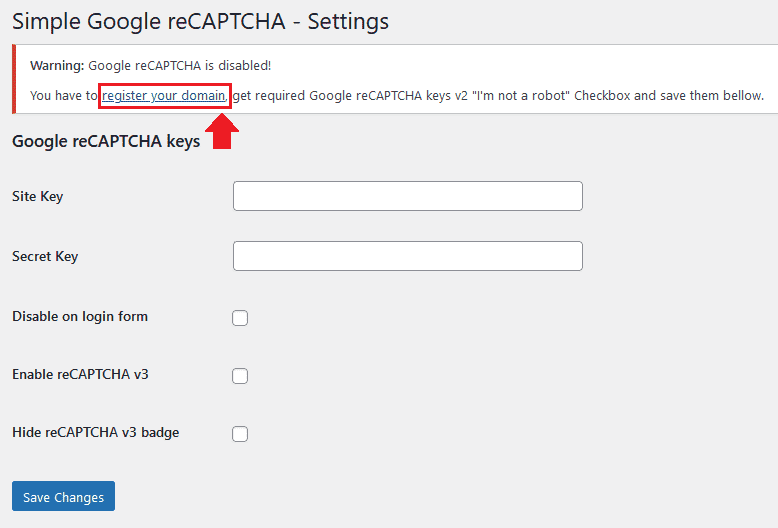
- Once the plugin is activated it will show you its Settings. You will see a warning that tells you “Google reCAPTCHA is disabled“. It means that you have not registered your website with Google reCAPTCHA yet.
- Click on the “register your domain” link to register your website on Google reCAPTCHA.
You’re now registering your website on Google reCAPTCHA.
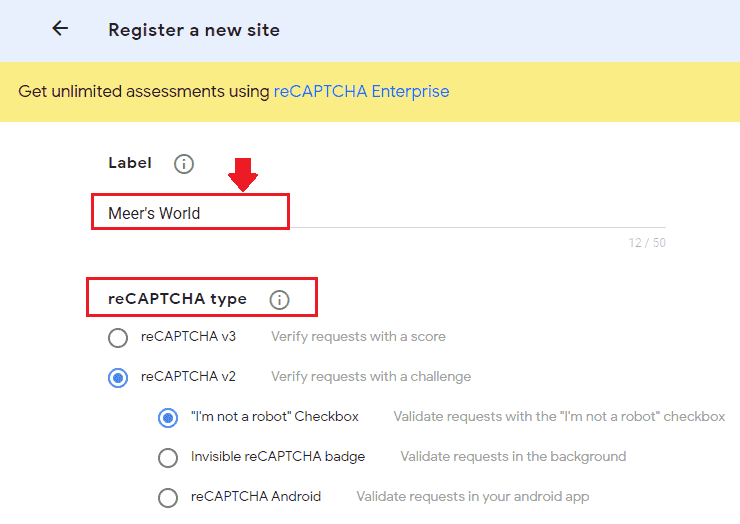
- In the “Label” enter a name like your website name.
- On “reCAPTCHA type” choose your desired version of reCAPTCHA. There are 4 Types of reCAPTCHA i.e. reCAPTCHA v3, reCAPTCHA v2, reCAPTCHA v2, and reCAPTCHA v2 (Android). To know more about them, read Types of reCAPTCHA.
- Here we have chosen reCAPTCHA V2 (“I am not a robot” Checkbox ).
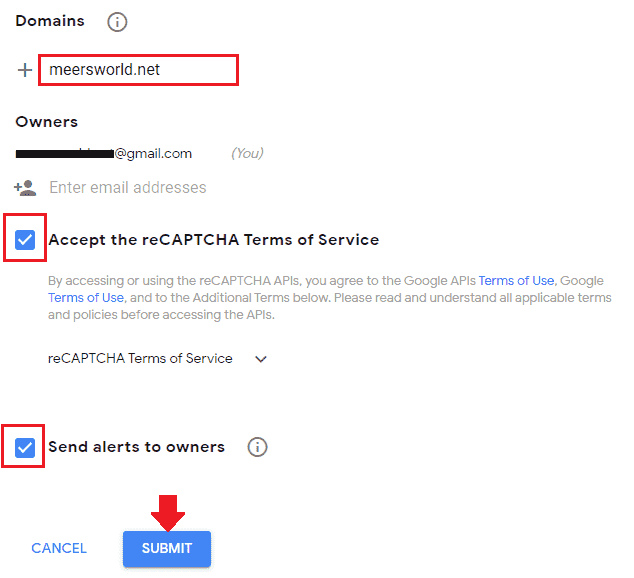
- In ‘Domains‘ enter your domain URL without “www” like example.com, meersworld.net, etc.
- In “Owners” you can add another optional email ID, besides your Gmail ID.
- Tick the “Accept the reCAPTCHA Terms of Service“.
- Tick “Send alerts to owners“.
- Click on the Submit button.
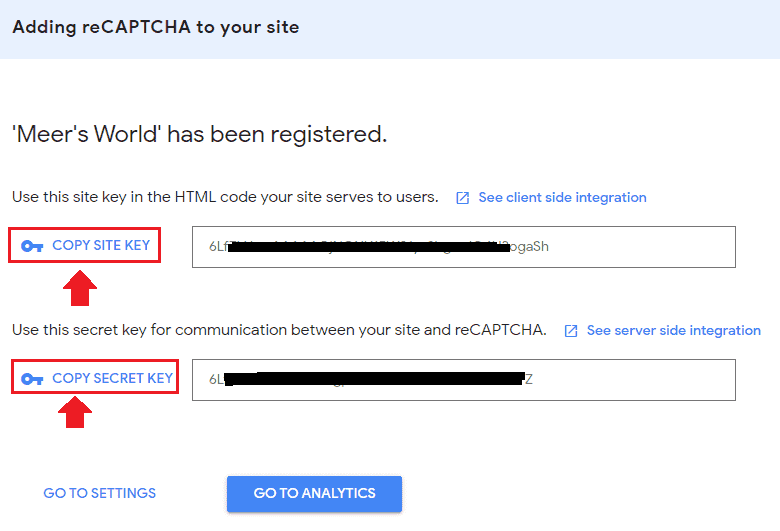
- You will see a message that your site has been registered.
- It will show you two keys (1) SITE KEY (2) SECRET KEY. Now go back to your WordPress admin section and add both these keys in the Simple Google reCAPTCHA plugin Settings, as shown in the next step.
INFORMATION: The “Go To Settings” allows you to edit reCAPTCHA settings whereas on “Go To Analytics” you can view Total verifications, Suspicious requests, Requests passed & failed, Average Score, Sessions completed, and Average Response Time (seconds).
You can access your Google reCAPTCHA Account (Analytics & Settings) with this URL: https://www.google.com/recaptcha/admin/. Make sure you’re logged into your Gmail account.
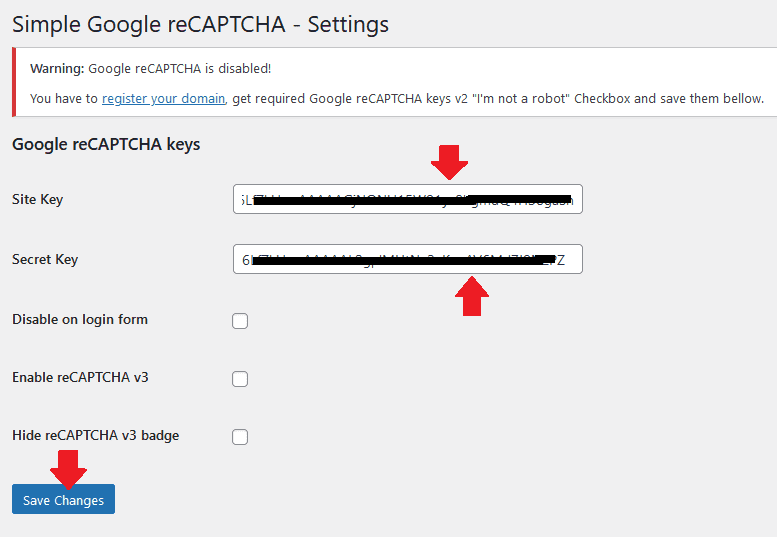
- Paste both the Keys in their respective text fields in Simple Google reCAPTCHA Settings.
- Click on the Save Changes button.
- It will show you a Notice that “Google reCAPTCHA is enabled!“.
- Now open a blog post of your WordPress website/blog to check whether the reCAPTCHA is working or not.
Note: reCAPTCHA does not appear on the browser where you are logged-in to your WordPress admin section. So open your blog posts in some other browser where you’re not logged-in.

- Here you can see that the reCAPTCHA (“I am not a robot” Checkbox) has been successfully integrated with Comments Form.
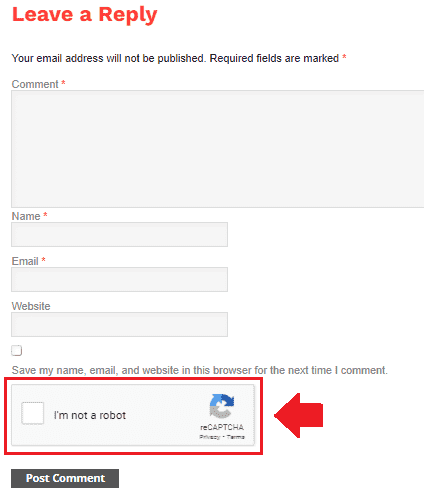
So it was all about integrating Google reCAPTCHA with your WordPress website to protect your blog posts/articles from posting spam comments by spam bots. If you like this post then don’t forget to share with other people. Share your feedback in the comments section below.
Find more content on WordPress.
Also Read




Leave a Reply