Most of the times this error “This site can’t be reached www.example.com’s server IP address could not be found. DNS_PROBE_FINISHED_NXDOMAIN” comes when you change your website nameservers or DNS settings for any reason, like to redirect your naked domain (example.com) to www (www.example.com).
After changing the DNS settings of a website when you browse to test the changes you might get the above error. You will also notice that all other websites will open except yours or specific website.
Most of the website owners or bloggers when they see this error get panic by thinking that, “Oh, what happened. My website is down, now what should I do?” You don’t need to get panic because this error is only on your computer browsers.
If you want to test that this error is only at your side, you can turn on the VPN like “Browsec VPN or VPNCity“, and browse that website.
You must have an idea about DNS (Domain Name System). It translates your website domain names to IP addresses. It was difficult for the humans to remember the IP addresses of websites, so user-friendly domain names are used for browsing websites like Google.com, meersworld.net, etc. An IP address is used to uniquely identify the computers on internet.
The solution to this error is by setting the Google Public DNS IP addresses as your DNS servers in your TCP/IPv4 Properties. Public DNS is a name resolver. The benefit of using Google Public DNS is that it speeds up your browsing experience and improves security.
In this tutorial, I will guide you step-by-step on how to resolve this error on Windows 10. You can follow these steps to resolve the error in older versions of Windows like Windows 7, Windows 8, etc.
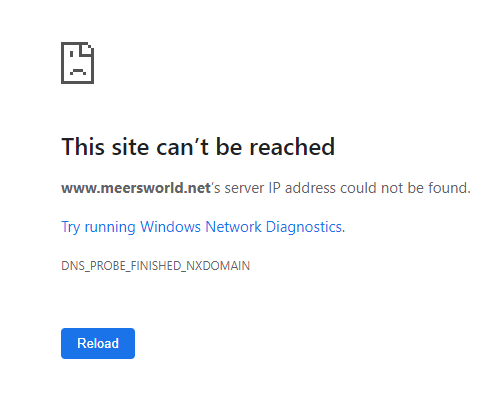
- On Google Chrome you will get: “This site can’t be reached www.example.com’s server IP address could not be found. DNS_PROBE_FINISHED_NXDOMAIN“.
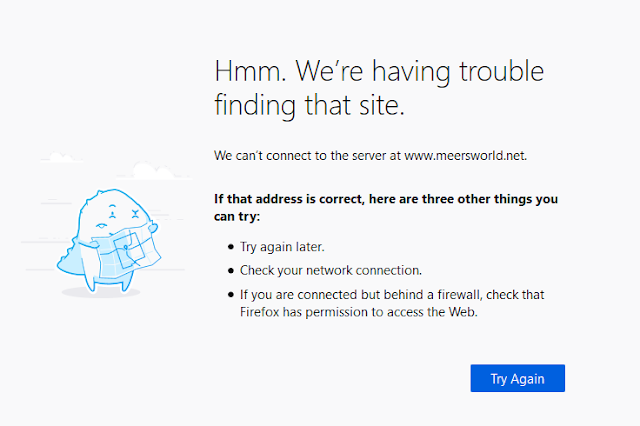
- On Mozilla Firefox you will get, This site can’t be reached www.example.com’s server IP address could not be found. DNS_PROBE_FINISHED_NXDOMAIN
Follow the Steps to Fix the Error
Follow the steps to fix, “This site can’t be reached www.example.com’s server IP address could not be found. DNS_PROBE_FINISHED_NXDOMAIN“ on Chrome and “This site can’t be reached www.example.com’s server IP address could not be found. DNS_PROBE_FINISHED_NXDOMAIN“ on Firefox.
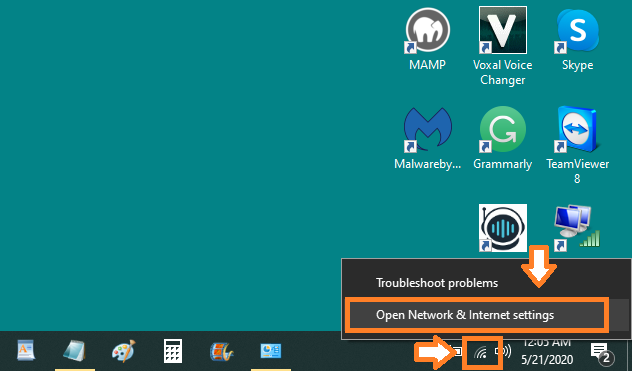
- Right-click on the “Internet Access” icon located at right-bottom corner of your Windows desktop.
- Click on the Open Network & Internet settings.
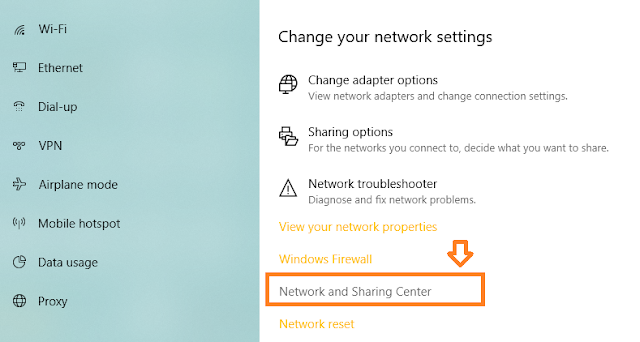
- Scroll down to “Change your network settings” section.
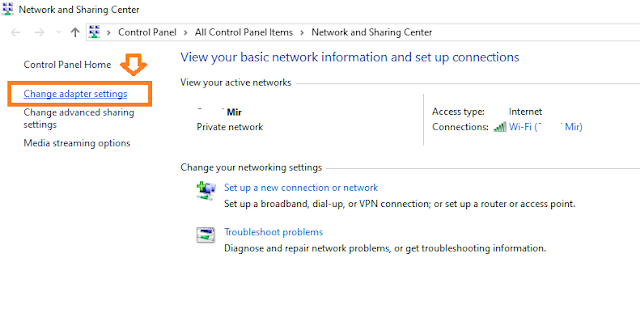
- Click on the “Network and Sharing Center“.
- Click on the “Change adapter settings“.
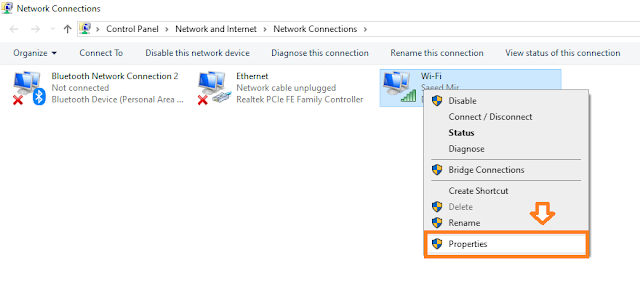
- If you are connected via Wi-Fi then right-click on “Wi-Fi” icon or if you are connected via LAN connection, right-click on “Ethernet” icon.
- Click on the Properties.
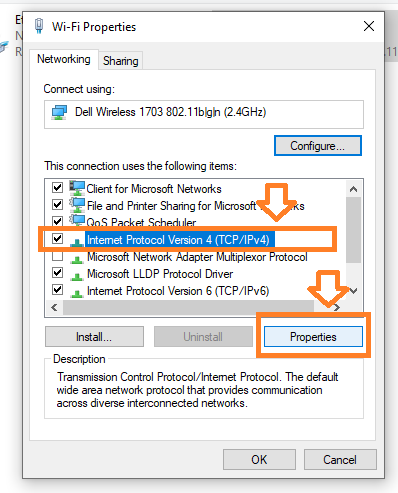
- Click on the “Internet Protocol Version 4 (TCP/IPv4)“.
- Click on the “Properties“.
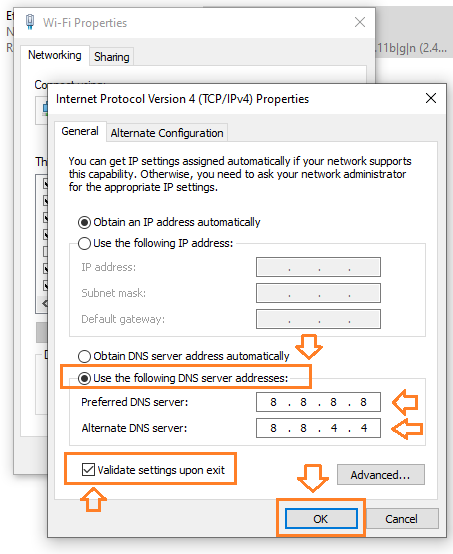
- Select “Use the following DNS server addresses“. These are the Google Public DNS IP addresses.
- In the “Preferred DNS server:” Enter 8 8 8 8.
- In the “Alternate DNS server:” Enter 8 8 4 4.
- Tick on the “Validate settings upon exit“.
- Click on the OK button.
- Click on the Close button.
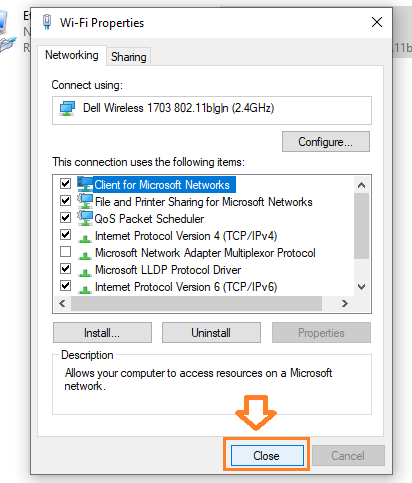
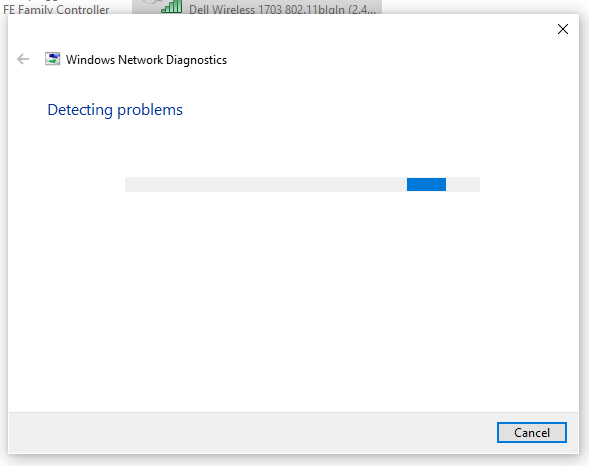
- Windows Network Diagnostics will run to detect problems. Wait for sometime.
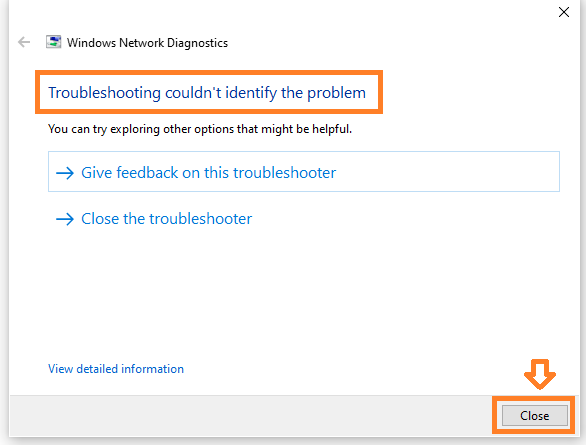
- You may get a message “Troubleshooting couldn’t identify the problem“, but actually the problems is resolved.
- Click on the Close button.
- Browse that website again. It will be browsed successfully.
If you like this post then don’t forget to share with other people. Share your feedback in the comments section below.

Also Read
- How To Fix Chrome Error On Android “Aw, Snap! Something Went Wrong While Displaying This Webpage”
- How To Stop Google Chrome Ads Popping-Up At Bottom-Right Of Desktop | Disable Notifications In Chrome
- How To Clear History, Cookies, Cache In Chrome, Firefox, Opera And Microsoft Edge
- How To Turn-Off Recent Items & Frequent Places From Quick Access In Windows 10


Leave a Reply