Are you fed up with the annoying Google Chrome Ads popping up at the bottom-right corner of your desktop? You’re in the right place. In this tutorial, I will guide you step-by-step on how to stop those annoying Chrome pop-up ads and notifications permanently.
Google Chrome is the most widely used internet browser, and this is one of the reasons that most of the websites and apps target Google Chrome to show their products & services in the form of pop-up ads and notifications using cookies, spams, and third-party apps.
These pop-up ads and notifications not only disturb you but also affects your privacy and performance of browser and computer. A good anti-malware, anti-virus or registry cleaner program prevents your computer from such URLs and websites automatically.
Windows 10 also provides you the feature “Reputation-based Protection” which protects your computer from malicious or potentially unwanted apps, files, and websites.
Read this tutorial to enable Reputation-based protection” on Windows 10:
Following topics will be covered in this post:
- How to Block Pop-ups and Redirects On Chrome
- How to Block Notifications On Chrome
Most of the times pop-ups appear at bottom-right of your desktop. For example, there is a website https://r.mntz.life that stores cookies in your browser, and then, in short intervals you get pop-up notifications. You can also see the website name in the pop-up ad.
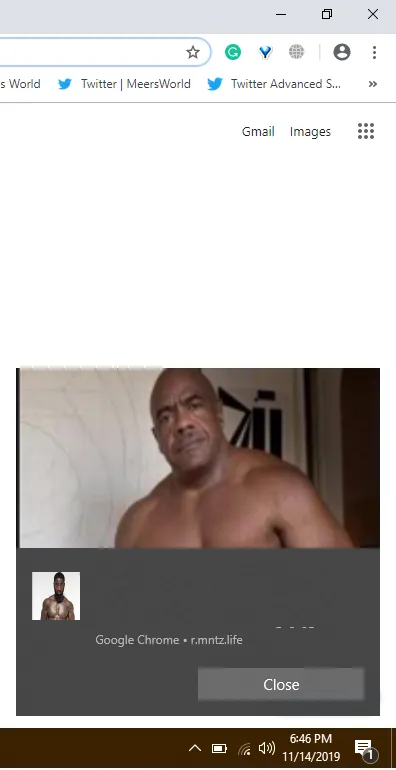
01. Block Pop-ups and Redirects on Chrome
Follow the steps to block the Pop-ups and Redirects on Google Chrome.
- Click on the Customize and Control Google Chrome icon, located at the top-right corner.
- Click on the Settings.
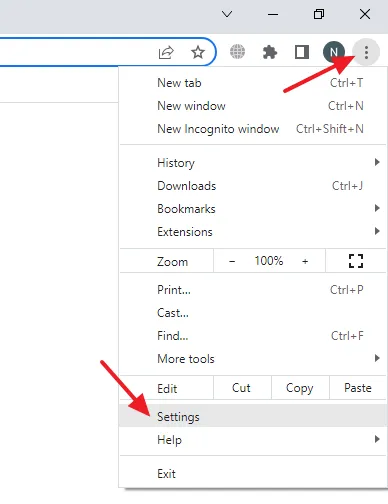
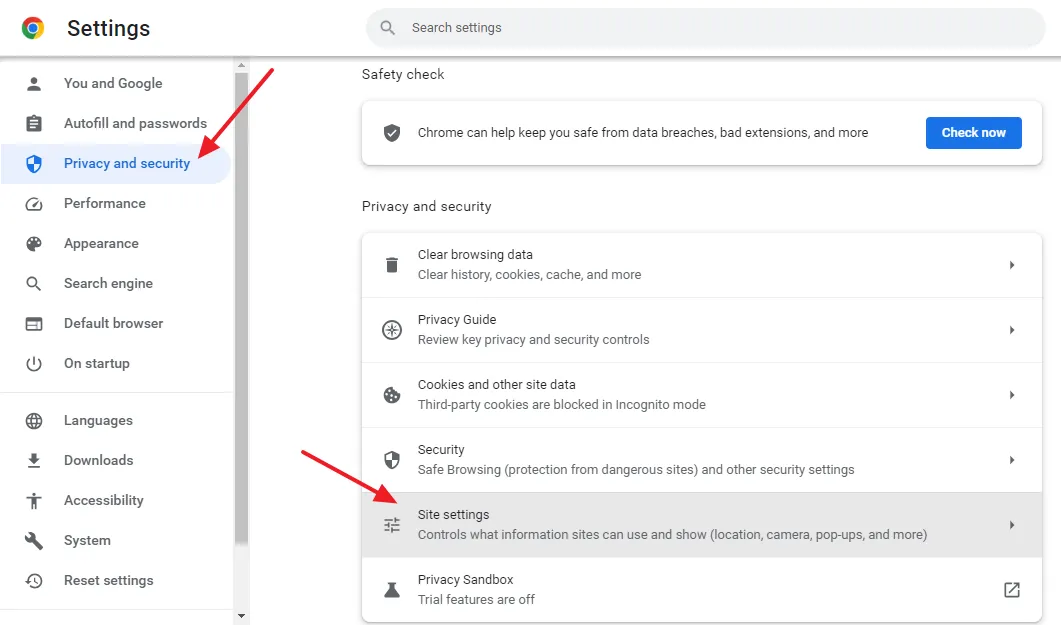
- Click on the Privacy and security from the sidebar.
- Under the Privacy and security section click on the Site Settings.
- Scroll-down to Content section and click on the Pop-ups and redirects.
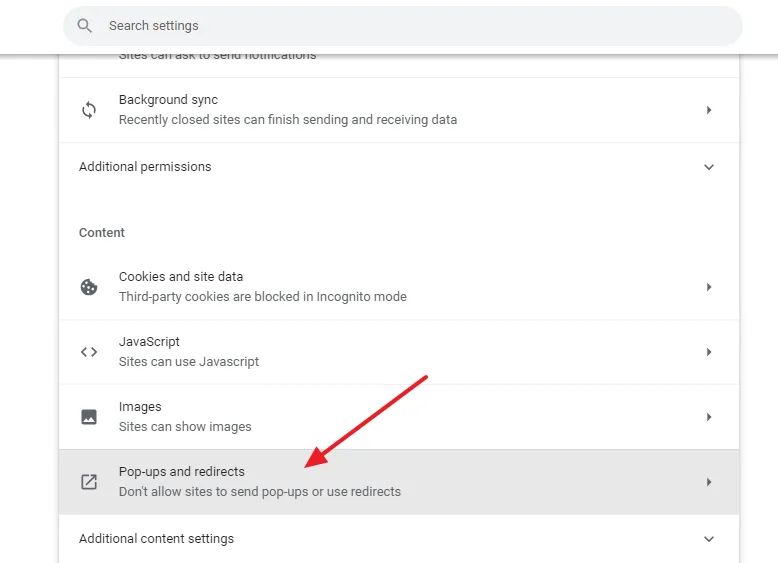
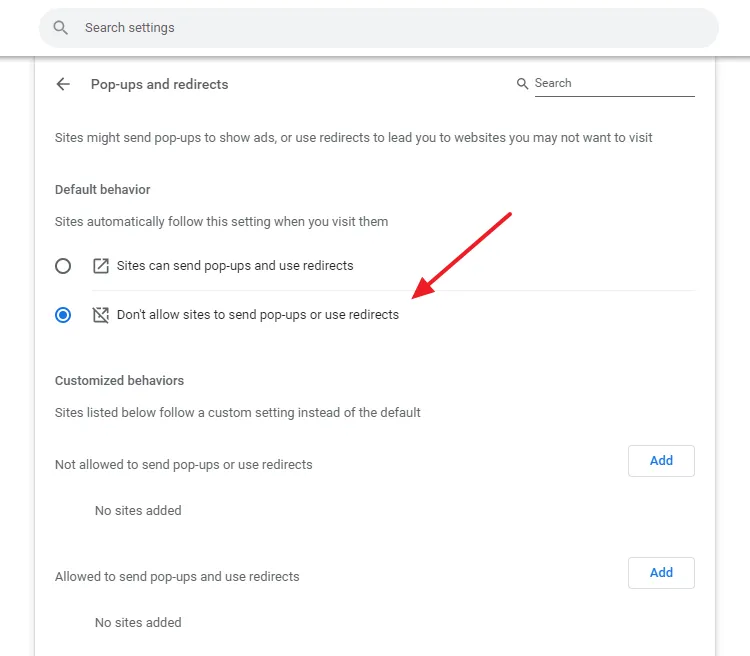
- Select the Don’t allow sites to send pop-ups or use redirects located under the Default behavior. On Customized behavior options you can manually specify the sites that you want to allow or disallow to send pop-ups and redirects.
02. Block Notifications on Google Chrome
Follow the steps to block the Notifications on Google Chrome.
- Click on the Customize and Control Google Chrome icon, located at the top-right corner, as I have shown in the above section.
- Click on the Settings.
- Click on the Privacy and security from the sidebar.
- Click on the Site Settings.
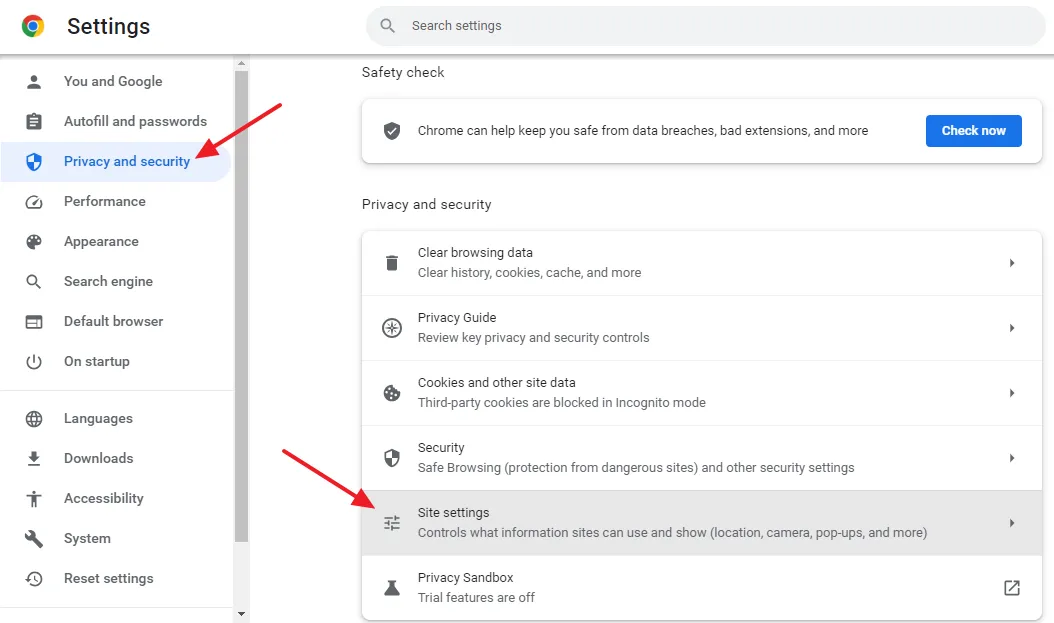
- Scroll-down to Permissions section and click on the Notifications.
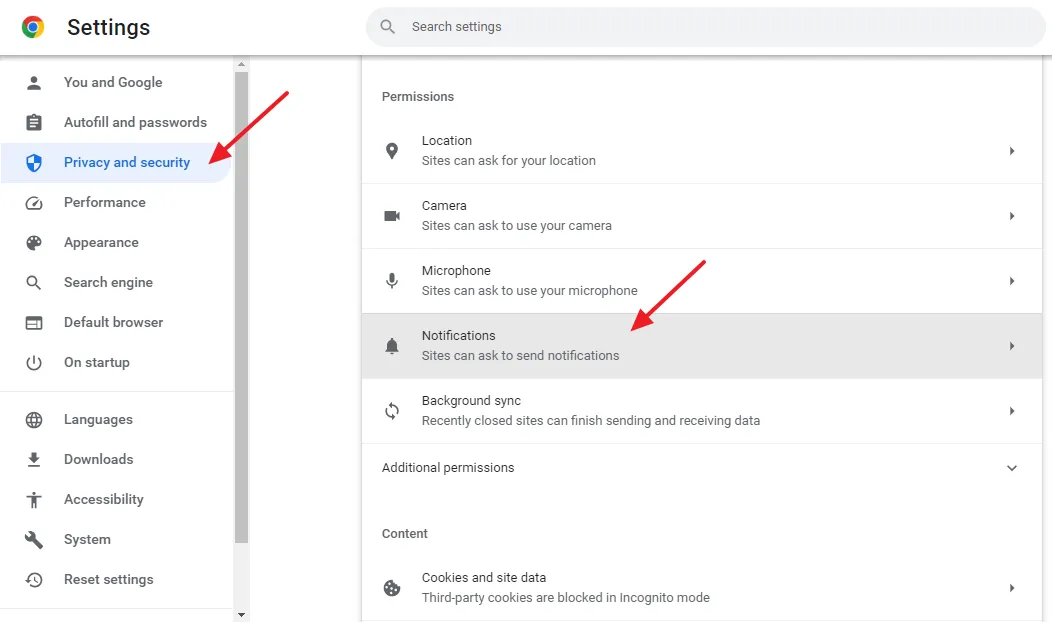
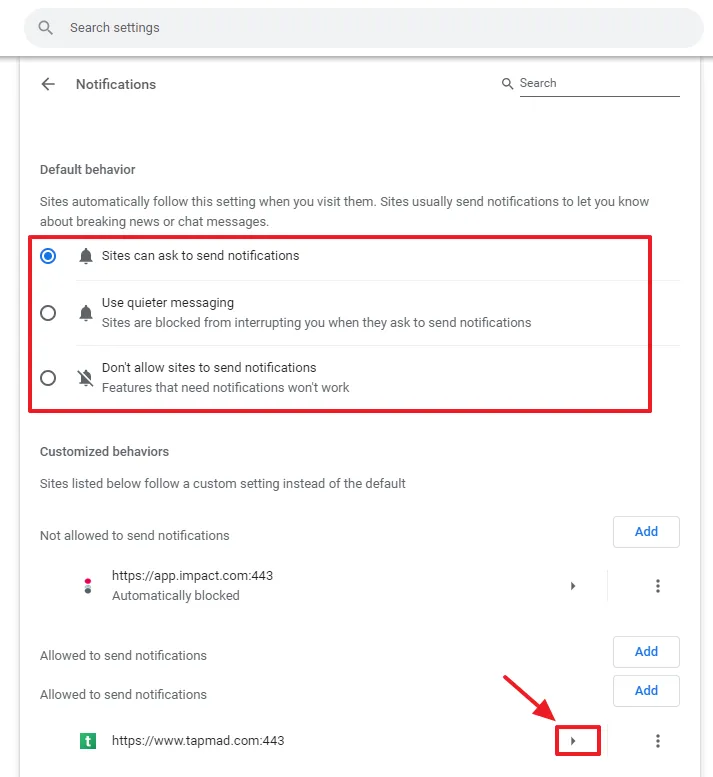
- There are three Default behavior options. Select Don’t allow sites to send notifications.
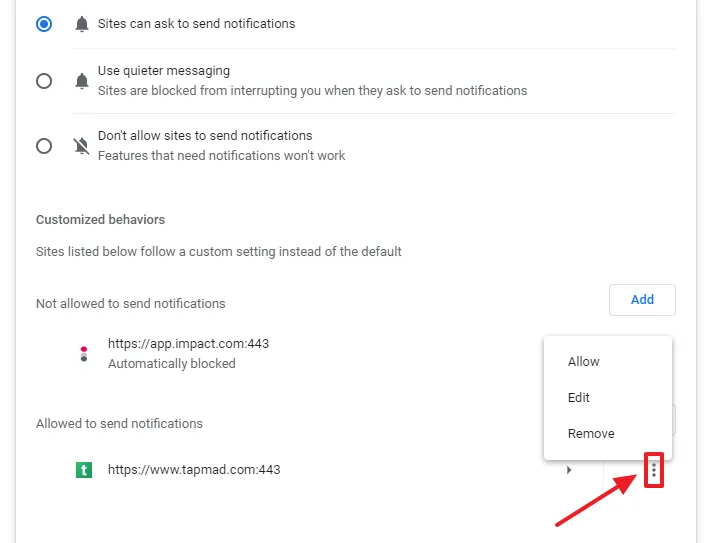
- Under the Customize behaviors you can customize the Notifications settings of Allowed and Disallowed websites.
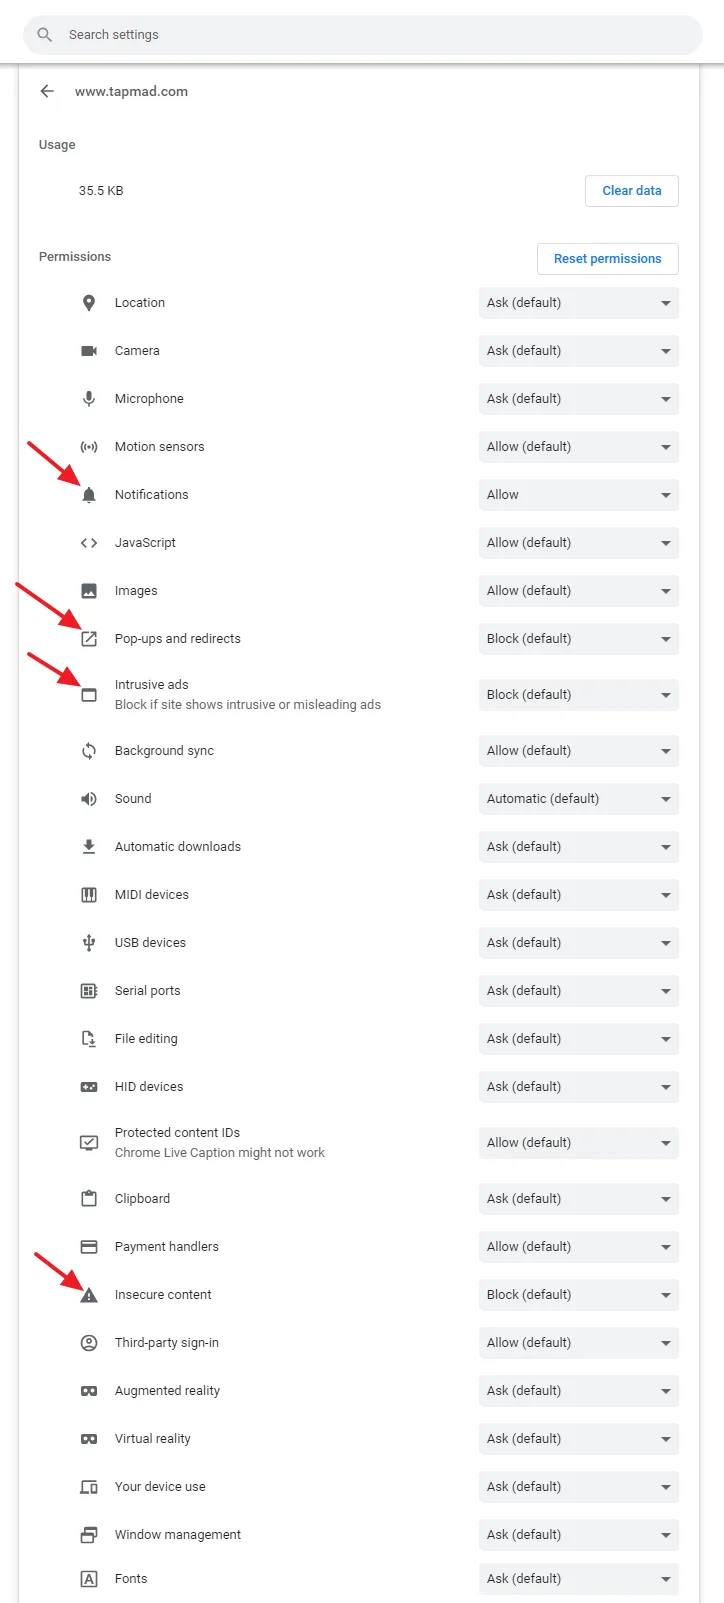
- Click on the Play icon of a site to customize its settings.
- You can see the plenty of options to customize the Notification permissions for a site like Notifications, Pop-ups and redirects, Intrusive ads, Insecure content, and more.
- Go back to Customized behaviors and click on the More actions icon of an allowed or a disallowed site. It shows you three options i.e. Allow, Edit, and Remove.
If you like this post then don’t forget to share with other people. Share your feedback in the comments section below.

Also Read



Leave a Reply