Do you want to know how to buy Google Storage for Gmail, Google Drive & Google Photos? You’re in the right place. In this tutorial, I will guide you step-by-step on how to buy Google Storage for Gmail and other apps.
Millions of people use free Google apps like Google Drive, Gmail & Google Photos, but how many of them know that there is a storage limit of 15GB. If your data size exceeds this limit you need to buy more storage.
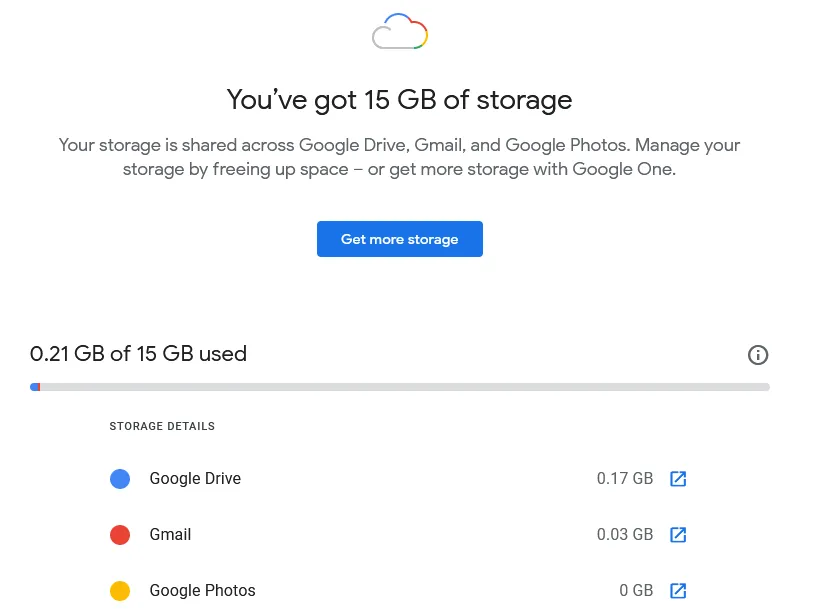
The storage that Google provides you is not only for Google Drive, it is shared across Google Drive, Gmail, and Google Photos.
You can buy 100GB to 2TB storage on Google One. The Google One is a membership plan developed by Google for expanded storage which also includes extra benefits to help you get more out of Google.
How to Buy Google Storage Space on Google One
Follow the steps to buy Google storage space on Google One.
- Sign-in to your Gmail Account.
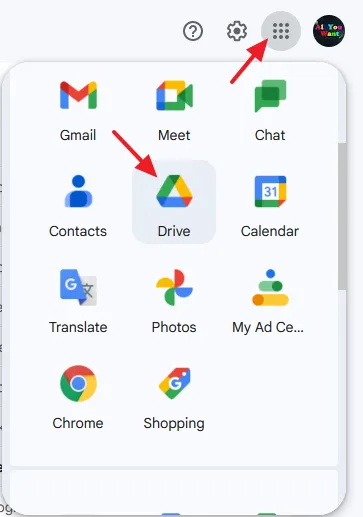
- Click on the Google apps icon located at top-right corner.
- Click on the Drive icon.
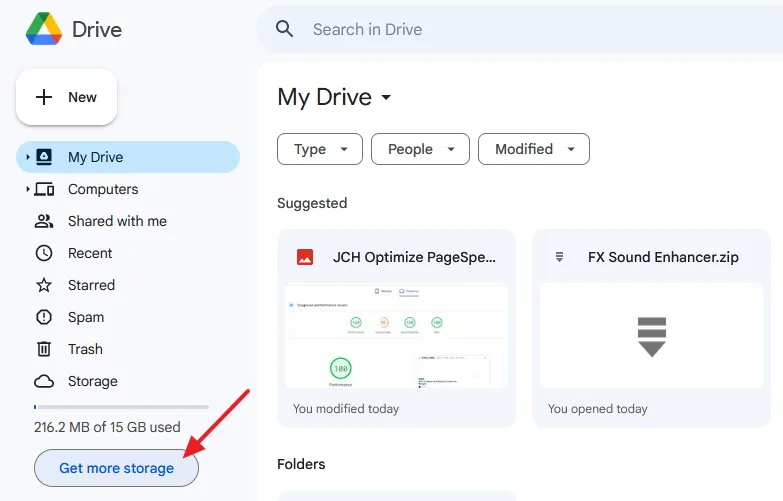
- You are in the Google Drive now. Click on the Get more storage button located at the bottom of the sidebar.
- At top of the page you can see the storage usage by each Google app i.e. Google Drive, Gmail, and Google Photos.
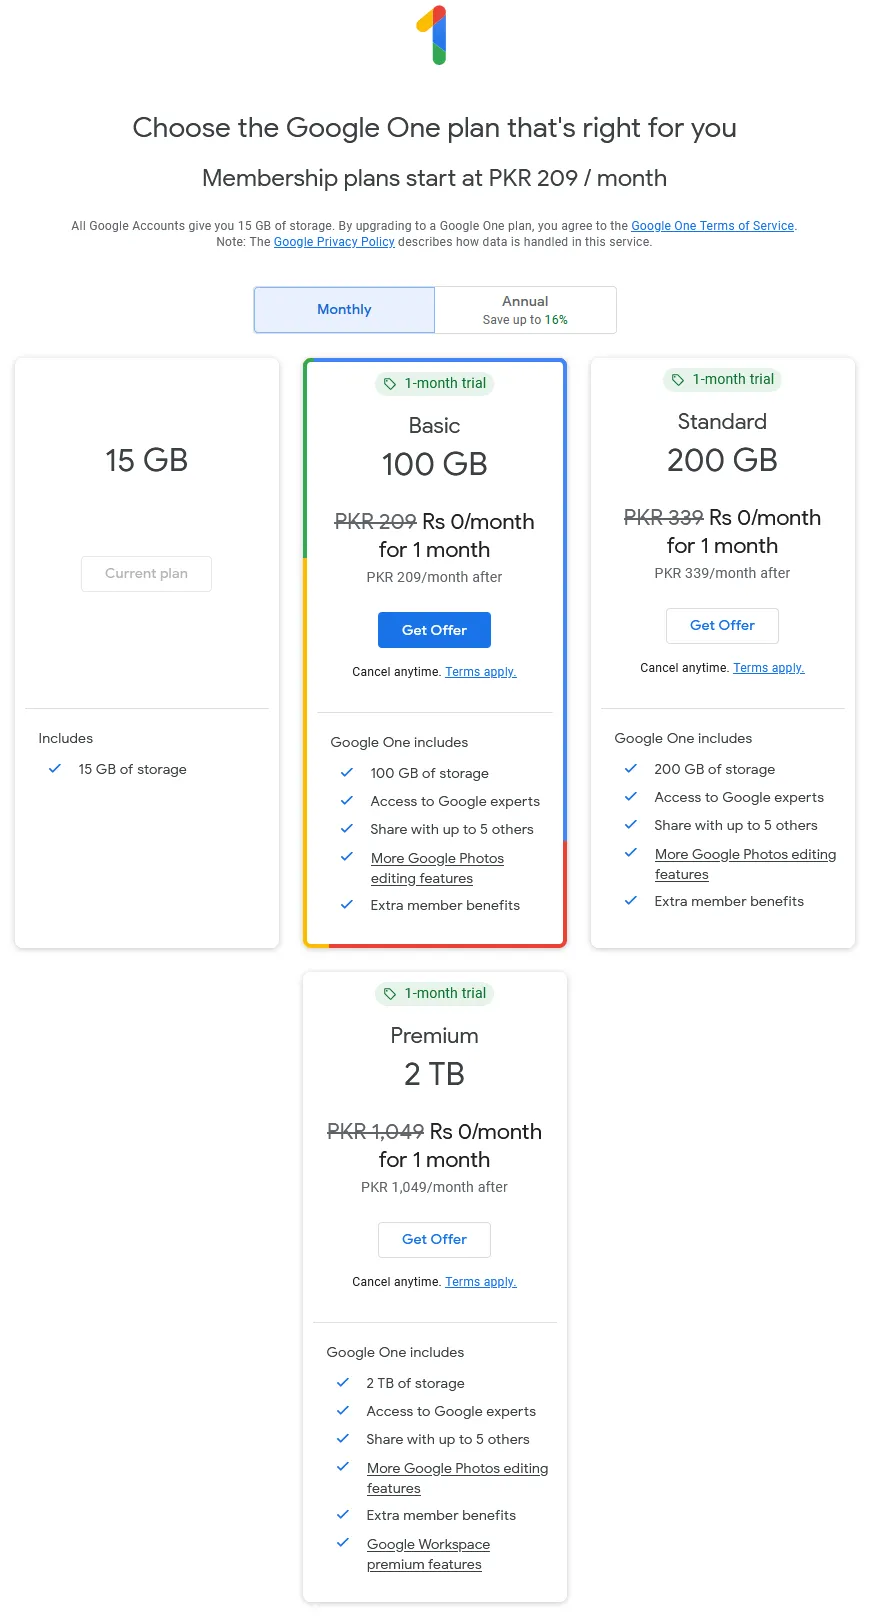
- Scroll down or click on the Get more storage button to see Google storage plans.
- There are 4 storage plans. The First Plan is free whereas other three plans Basic, Standard, and Premium are paid.
- The Basic Plan offers 100 GB storage, Standard Plan offers 200 GB storage, and the Premium Plan offers 2 TB storage.
- Click on the Get Offer button of your desired storage plan.
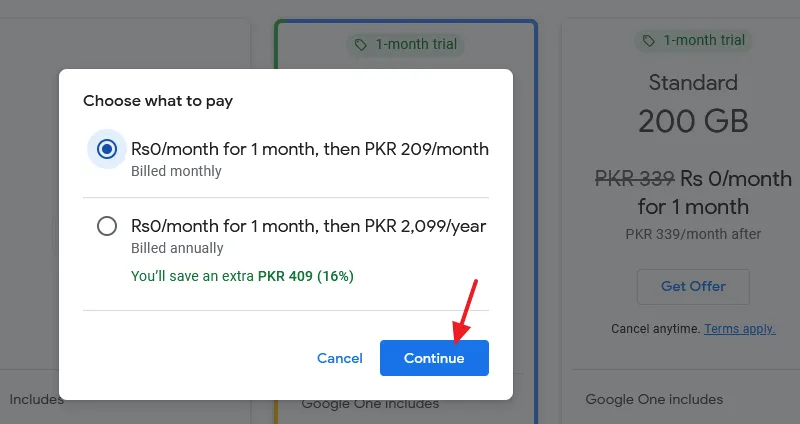
- Choose the Billing Cycle i.e. monthly or annually. Annually billing offers you discount as well.
- Click on the Continue button.
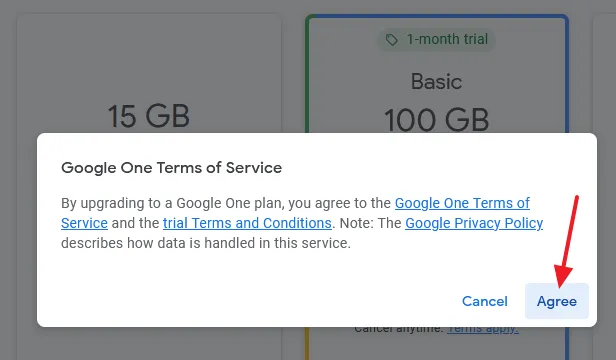
- Click on the Agree button to accept the Google One Terms of Service.
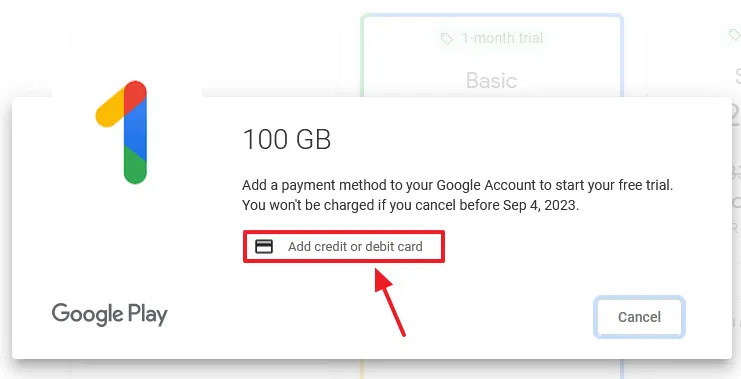
- Click on the Add credit or debit card link.
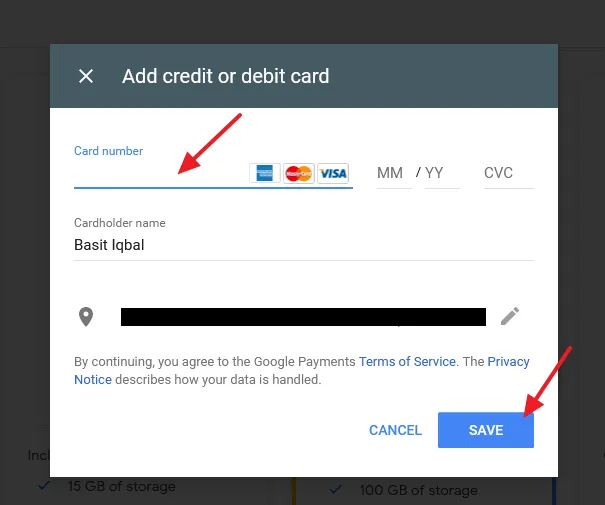
- Enter you Card number. It could be either Credit or Debit.
- Enter the Cardholder name.
- Enter the Billing Address.
- Click on the SAVE button.
After the transaction is verified and completed the storage will be added to your account. If you like this post then don’t forget to share with other people. Share your feedback in the comments section below.
Also Read
- How To Upload File & Share File Link In Google Drive – Step By Step
- How To Setup Gmail In MS Outlook 2010 Step-By-Step | Configure Gmail For Outlook
- How To Configure Gmail On Outlook 2007 | Enable POP On Gmail
- How To Fix Laptop Makes Loud Terrible Noise | Silence Your Laptop Fan
- How To Turn-Off Recent Items & Frequent Places From Quick Access In Windows 10




Leave a Reply