Do you want to setup Gmail on MS Outlook 2010? You’re in the right place. In this tutorial, I will guide you step-by-step on how to setup Gmail on MS Outlook 2010.
Microsoft Office Outlook is a powerful application for managing your emails. With Outlook you can read your received emails even when there is no internet. You can configure more than one email accounts on Outlook and easily manage them as well by creating folders and sub-folders.
Gmail is the world’s most popular and widely used free email service. It allows you to setup and configure your Gmail account on Outlook and other third-party email clients.
POP VS IMAP
Gmail supports two mail servers POP and IMAP, that helps you to setup your Gmail on MS Outlook. The IMAP is preferred when you want to access your mail from multiple devices like from your computer, smartphone, iPad, tablet, etc.
POP is preferred when you access your mail from only one device like from your computer or your smartphone. Generally POP is considered better and more secure than IMAP, so it is better to use POP.
Step 1: Enable POP3 On Gmail Account
Before you setup Gmail on Outlook you must enable POP on your Gmail account.
- Sign-in to your Gmail account.
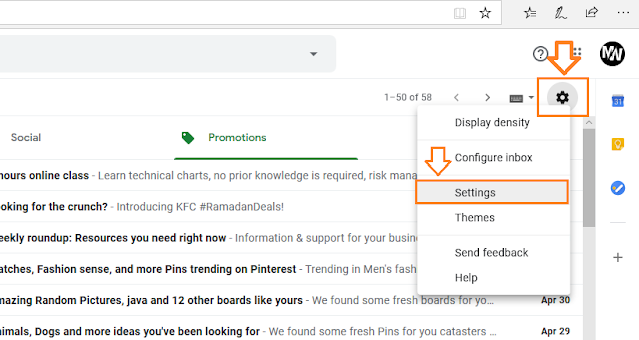
- Click on the Settings, located at top-right corner.
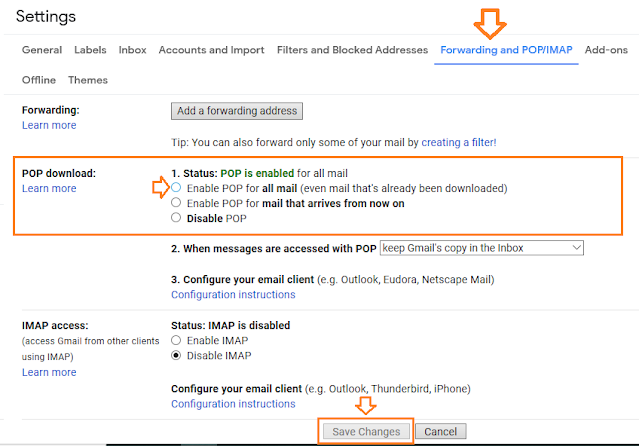
- Click on the “Forwarding and POP/IMAP” tab.
- On “POP download:” section click on the first option “Enable POP for all mail“.
- You can see the status in green color, “POP is enabled for all mail”.
- Click on the “Save Changes” button.
Step 2: Setup Gmail On Outlook
There are two options to setup Gmail on Outlook:
- Email Account
- Manually configure server settings or additional server types
Option 1 is simple and straightforward whereas Option 2 requires some variables to configure. Go for Option 2 only if Option 1 does not work.
01. Email Account
Follow the steps to setup Gmail on Outlook using Email Account option.
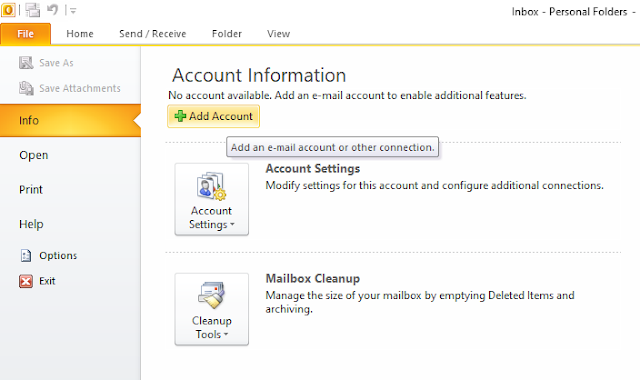
- Click on the File, located at the top-left corner.
- Click on the Info tab.
- Click on the +Add Account button.
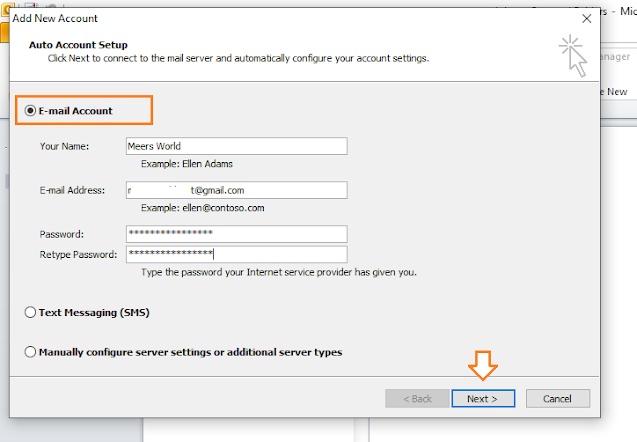
- Choose E-mail Account.
- Enter Your Name.
- Enter your E-mail Address (Gmail).
- Enter your Gmail Password.
- Click on the Next button.
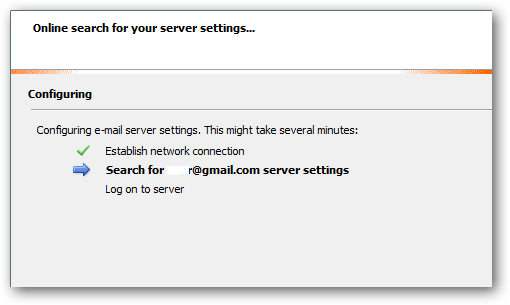
- You can see “Configuring e-mail server settings”. It will take some seconds or minutes.
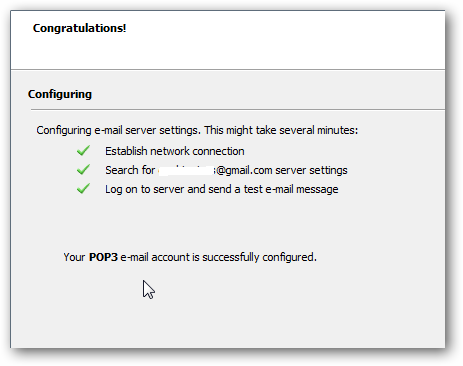
- If it founds no error then your Gmail will be successfully setup on Outlook. You can see the message, “Your POP3 e-mail account is successfully configured“.
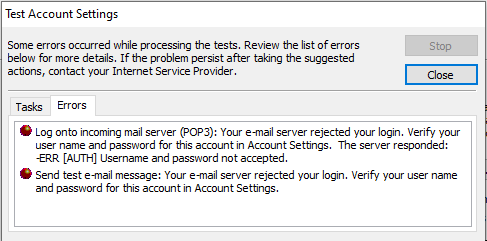
In case if you get this error “Your E-mail Server Rejected Your Login” or If Outlook Prompts your Username & Password again and again then read this tutorial to get rid of these errors.
02. Manually Configure Server Settings Or Additional Server Types
Follow the steps to setup Gmail on MS Outlook 2010 using the option, “Manually Configure Server Settings or Additional Server Types”.
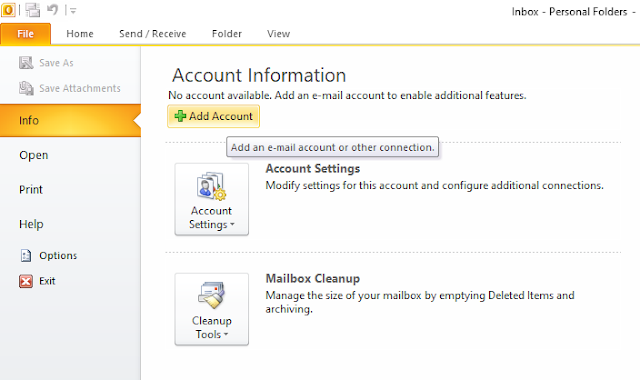
- Click on the File tab, located at top-left corner.
- Click on the Info tab.
- Click on the Add Account button.
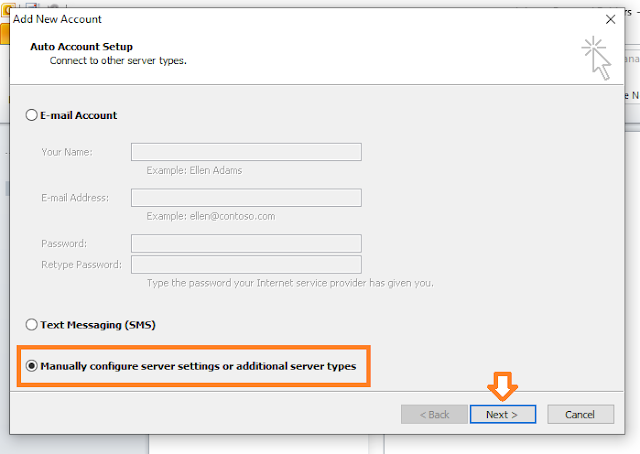
- Choose “Manually configure server settings or additional server types”.
- Click on the Next button.
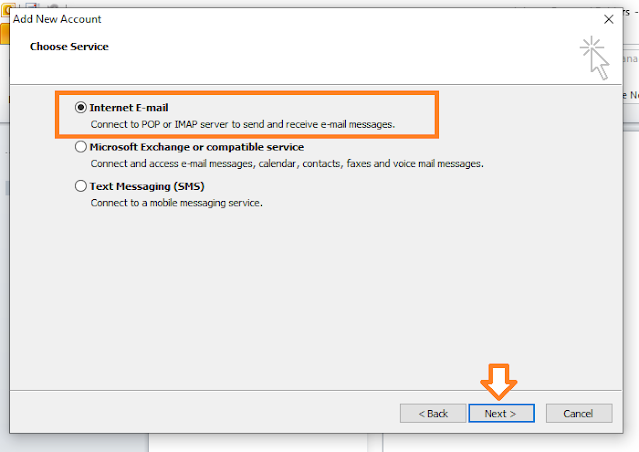
- Choose “Internet E-mail“.
- Click on the Next button.
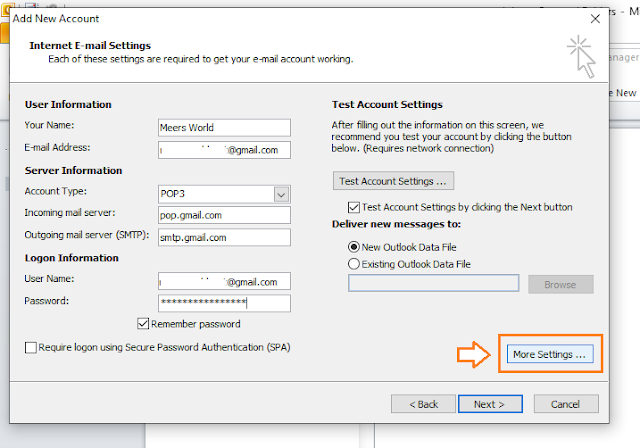
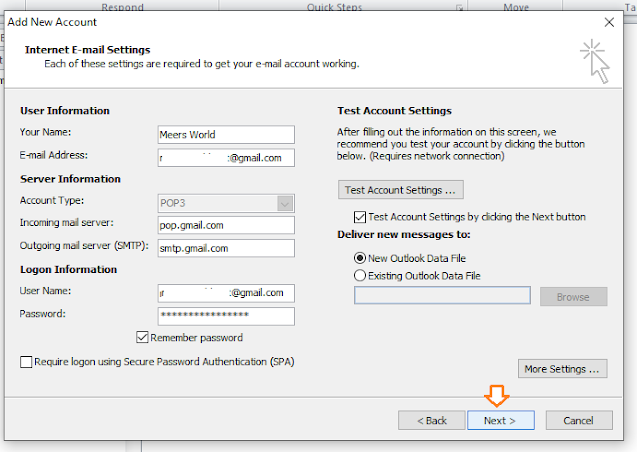
- Enter Your Name.
- Enter your E-mail Address that you want to setup.
- In “Account Type” choose POP3.
- In “Incoming mail server” type pop.gmail.com.
- In “Outgoing mail server (SMTP)” type smtp.gmail.com.
- In “User Name” enter your Gmail Address.
- Enter the Password of your Gmail Address.
- Tick the “Remember password“.
- Click on the “More Settings“.
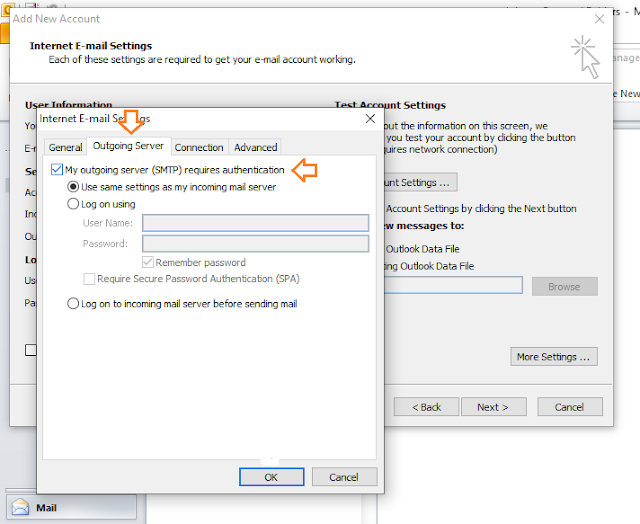
- Click on the “Outgoing Sever” tab.
- Tick “My outgoing server (SMTP) requires authentication“.
- Choose “Use same settings as my incoming mail server“.
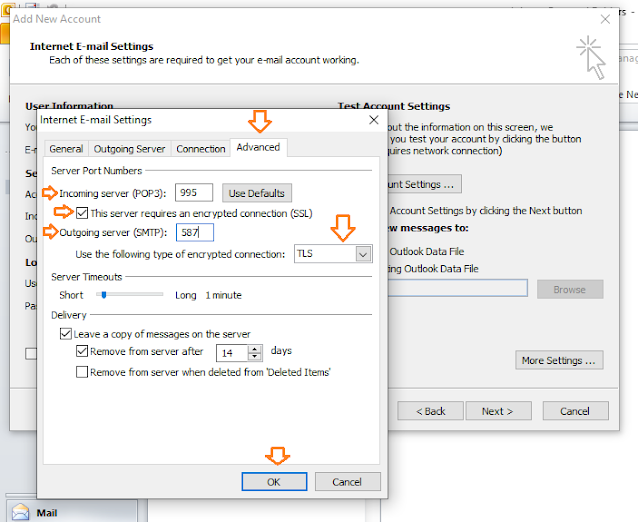
- Click on the “Advanced” tab.
- In “Incoming server (POP3)” enter 995.
- Tick “This server requires an encrypted connection (SSL)“.
- In “Outgoing server (SMTP)” enter 587.
- In “Use the following type of encrypted connection” choose TLS.
- Click on the OK button.
- Now click on the “Next” button.
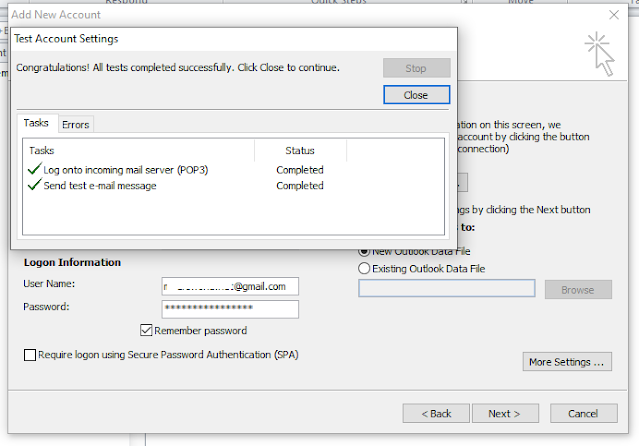
- If it is configured you will get the congratulations message, “Congratulations! All tests completed successfully. Click Close to continue.”. A test e-mail will also be sent to to your email address.
- Click on the Finish button.
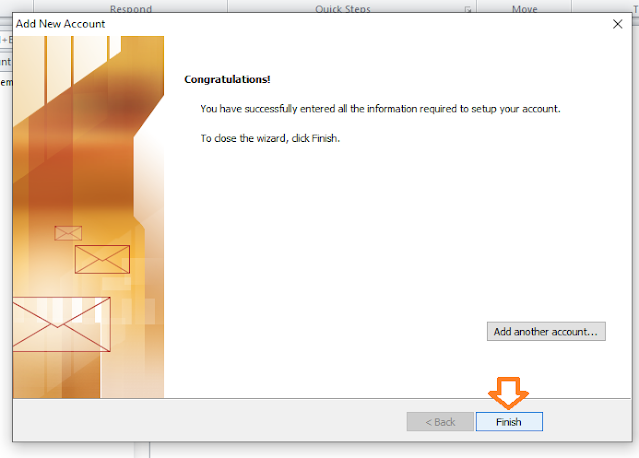
That’s it. You have successfully configured Gmail on Outlook 2010.
If you like this post then don’t forget to share with other people. Share your feedback in the comments section below.
Also Read
- How To Configure Gmail On Outlook 2007 | Enable POP On Gmail
- How To Create A Gmail Account – Step By Step | Change Gmail Profile Picture
- How To Fix Laptop Makes Loud Terrible Noise | Silence Your Laptop Fan
- How To Turn-Off Recent Items & Frequent Places From Quick Access In Windows 10
- How to Use Microsoft Office Free & Its Best Alternatives



Leave a Reply