Do you want to setup custom domain email in MS Outlook 2021, Outlook 2019, Outlook 2016 or Microsoft 365 in Windows? You’re in the right place.
In this tutorial, I will guide you step-by-step on how to setup your custom domain email in MS Outlook 2021 using the POP3 protocol in Windows.
The procedure for setting up custom-domain email using POP3 in MS Outlook 2021, Outlook 2019, Microsoft 365, and Outlook 2016 is same.
Custom domain email is an email address that is created by linking it to a domain. For example, the “info@example.com” is a custom domain email. In this example info is the username and example.com is the domain. The custom domain is also called private email and business email.
POP3 is the most popular client-server protocol used to receive emails from remote servers to a local email client like MS Outlook, Mailbird, Thunderbird, ProtonMail, Spike, etc.
RELATED
- How To Create Email Account In Namecheap cPanel | Access Webmail
- How To Setup Gmail In MS 365, Outlook 2021 & Outlook 2019
- Solved: The Server You’re Connected to is Using a Security Certificate
Setup Custom Domain Email In MS Outlook
Follow the steps to setup/configure your custom domain email in MS Outlook using POP3 protocol.
- Open your MS Outlook.
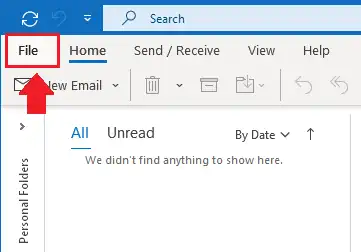
- Click File, located at your top-left corner.
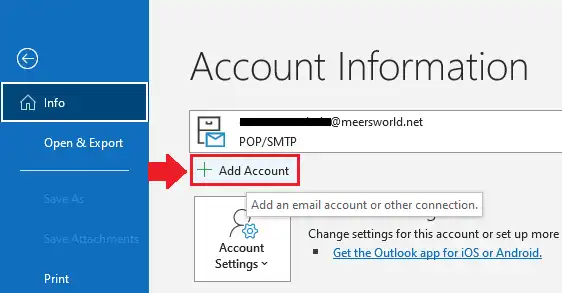
- Click the + Add Account.
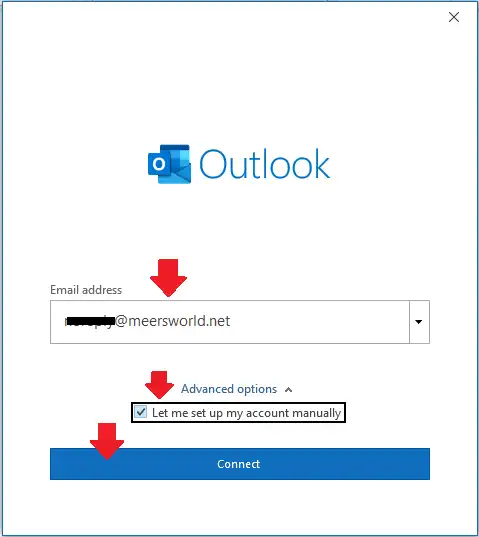
- Enter your Email address.
- Expand the Advanced options and click Let me set up my account manually.
- Click Connect.
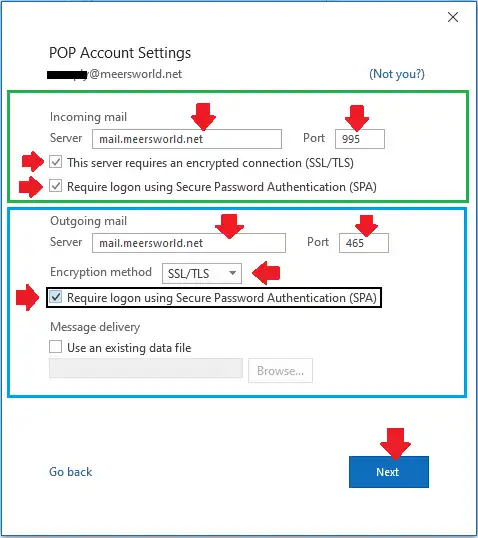
Here you have to configure POP Account Settings. The section highlighted with green rectangle is Incomming Mail Settings, whereas the section highlighted with blue rectangle is Outgoing Mail Settings.
Income Mail Settings:
- In Incomming mail Server enter “mail.your_domain_name”. Since our domain is meersworld.net so here we have written “mail.meersworld.net”.
- In Port enter “995”.
- Tick “This server requires an encrypted connection (SSL/TLS)“.
- Tick “Require logon using Secure Password Authentication (SPA)“.
Outgoing Mail Settings
- In Outgoing mail Server enter “mail.your_domain_name” same as you entered above.
- In Port enter 465.
- In Encryption method choose “SSL/TLS”.
- Tick Require logon using Secure Password Authentication (SPA).
- Click Next.
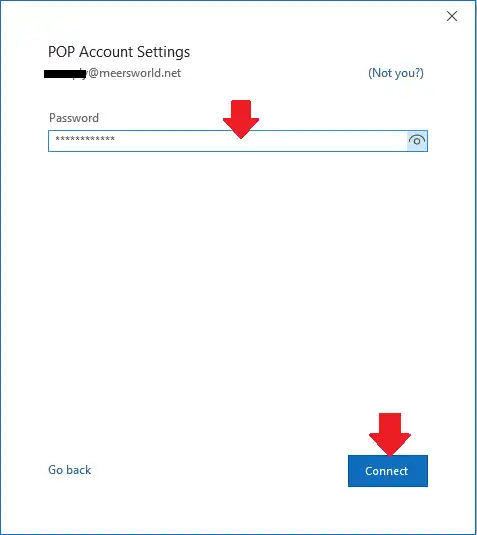
- Enter your email account Password.
- Click Connect.
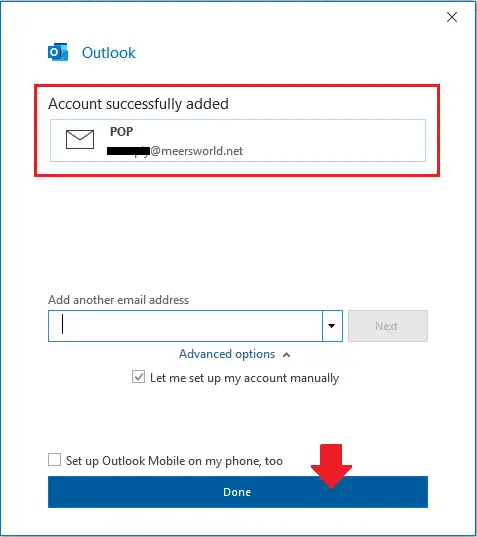
- You can see that the custom domain email has been setup successfully in MS Outlook.
- Click Done.
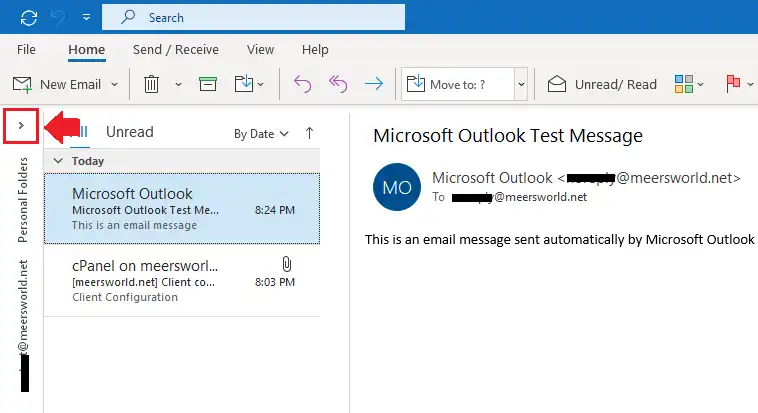
- Click the Arrow to expand the Folder Pane to access your email account folders.
- Microsoft Outlook will also send a Test Email to verify the settings.
If you like this post then don’t forget to share with other people. Share your feedback in the comments section below.

Also Read
- How To Create & Add Signature In Outlook – Windows 10
- Download Best iPhone Data Eraser Tool To Remove Data Permanently
- Download Best iOS, iPadOS, tvOS Repair Tool For Windows & Mac
- How To Set Up RSS Feed in MS Outlook
- How to Take Backup of Emails on MS Outlook in PST File
- How to Import Emails on MS Outlook From a PST File



Leave a Reply