Have you bought domain and web hosting on Namecheap and no idea whatsoever to create an email account? Don’t worry! You’re in the right place.
In this tutorial, I will guide you step-by-step on how to create your email account on Namecheap cPanel and How to access Namecheap Webmail.
An email created by linking it to your domain such as “info@johnsmith.com” is also called business email or private email. In “info@johnsmith.com” the “johnsmith.com” is a domain that has been linked to username “info”.
How many email accounts you can create depends on the hosting package that you have purchased. The “Stellar” Shared Hosting Package is the most cheapest Namecheap package that allows you to create 30 email accounts. If you require more you can request them to increase the quantity.
The other Shared Hosting packages i.e. “Stellar Plus” and “Stellar Business” allow you to create unlimited email accounts. In general you create 2 to 5 business email accounts, but if you have a large company having plenty of employees then you need large number of email accounts.
If you haven’t already purchased Namecheap domain and hosting, read this:
How to Create Email Account on Namecheap cPanel
Follow the steps to create email accounts on Namecheap Hosting:
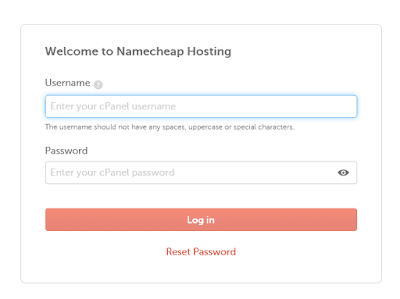
- Login to your Namecheap cPanel account. When you purchase web hosting, the Namecheap Team provides your cPanel Login details in an email with the title, like, “Your Hosting Account Details For Your_Domain”.
- Enter your Username and Password.
- Click on the Login button.
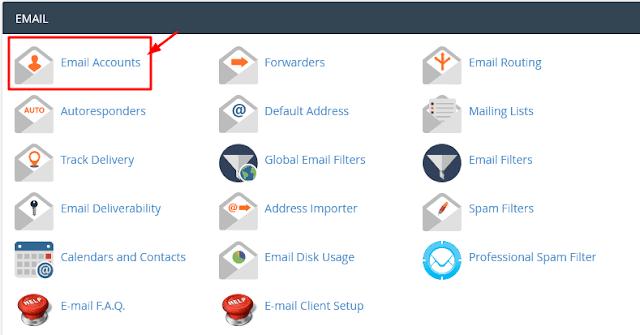
- Scroll down to EMAIL section.
- Click on the Email Accounts.
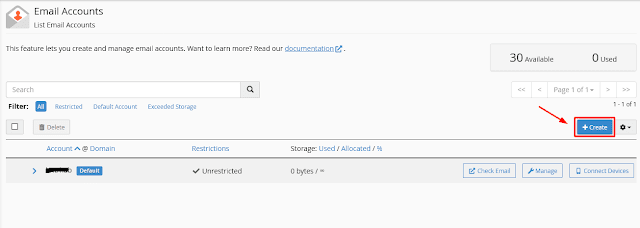
- There will already be a default email account, leave it as it is. You can also see that there are 30 emails Available and 0 Used. The default email is not counted.
- To create a new email account click on the “+Create” button.
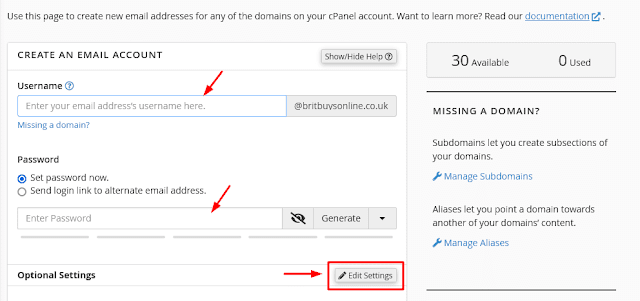
- Enter the Username. It will be linked to your domain. If you want to create for yourself enter your Name. Let’s say John Smith owns a domain “www.johnsmith.com”, his email can be like this “john@johnsmith.com” or “johnsmith@johnsmith.com”. Other emails related to his website can be “info@johnsmith.com”, “hr@johnsmith.com”, etc.
- Enter a secure Password for your email account. You can use Generate button to create a secure password, but don’t forget to copy somewhere in your computer.
- There are “Optional Settings” as well. Click on the “Edit Settings” to explore Optional Settings.
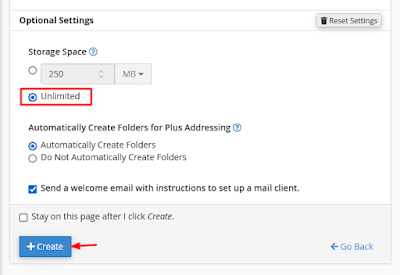
- You can choose storage limit for your email account. You have two options (1) Fixed Space (2) Unlimited Space. It is up to you that which option you choose, but don’t forget to delete your unnecessary emails from time-to-time.
- Choose the first option “Automatically Create Folders” for Plus Addressing. The Plus Addressing assist you to organize your incoming mails.
- Click on the “+Create” to finish.
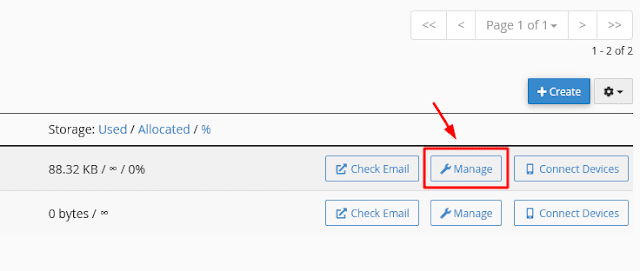
- Here you can see that your new email account has been created. The “Check Email” option allows you to open your email account from the cPanel.
- You can open your webmail directly through the URL “www.webmail.example.com”. Replace “example.com” with your domain URL, like “www.webmail.johnsmith.com”. Enter your email address and password there.

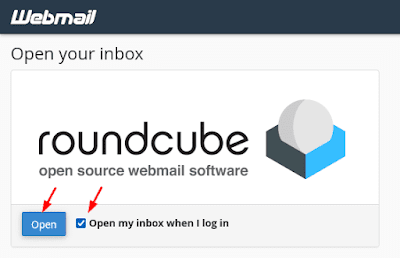
- Click on the Open button. Tick on the checkbox to avoid the “roundcube”next time.
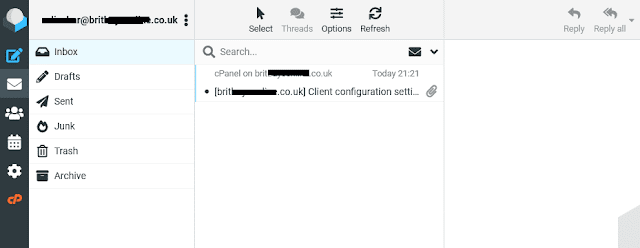
- This is how your email account looks like. It is similar to Gmail, Hotmail, etc.
- Normally it is not a good practice to login again and again to your webmail directly, instead people link their email accounts to email clients such as Microsoft Office Outlook, Mailbird, etc. You can send and receive all your emails through them.
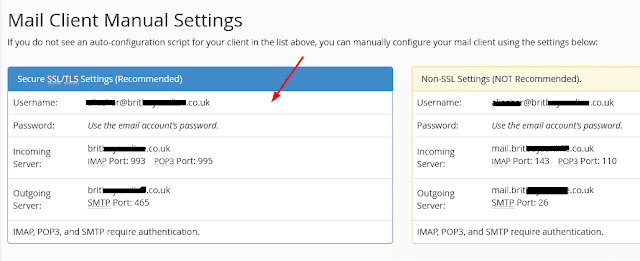
- Namecheap cPanel provides you the Client Configuration Settings to connect your email account to email clients. When you create a new email account the cPanel mails you the Client Configuration Settings.
- I have also shown in one of the below steps to how to get Client Configuration Settings.
- The “Manage” option allows you to do two things (1) Edit/Modify Settings (2) Delete An Email Account.
- You can modify your existing Password. Simply enter a new password and update settings.
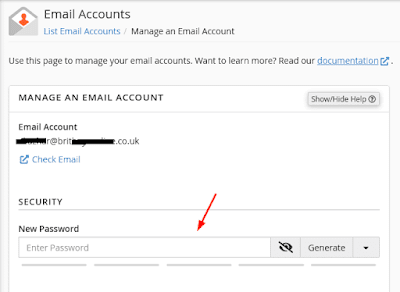
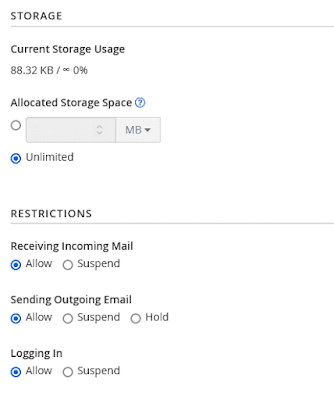
- You can modify and change your storage space and options.
- The Restriction Options allow you to control the incoming emails, outgoing emails and logging in. These options are very useful when you create multiple emails for people with different roles. It helps you to maintain privacy and security.
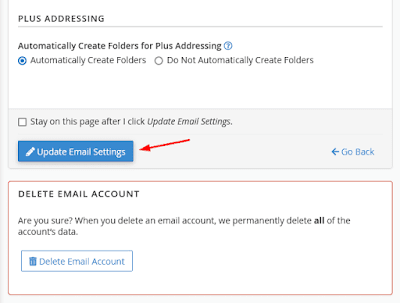
- You can also change your PLUS ADDRESSING options.
- To delete an email account click on the “Delete Email Account“.
- Once you are done, click on the “Update Email Settings“.
- The “Connect Devices” option provides you the email client configuration settings, as I had mentioned above.
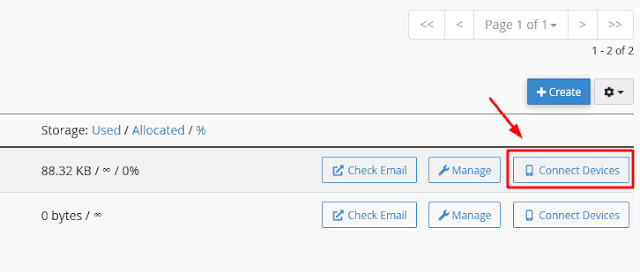
Use these settings to link your email account to email clients such as Microsoft Outlook, Mailbird, etc.
I have created a separate tutorial that guides you on how to setup your cPanel email account on MS Outlook.
- How To Setup cPanel Email Account In MS Outlook 2016
- How To Setup Custom Domain Email In Outlook 2021, 365, 2019
So it was all about creating email accounts on the Namecheap cPanel. If you like this post then don’t forget to share with other people. Share your feedback in the comments section below.

Also Read


Leave a Reply