Are you looking for installing a WordPress theme from a zip file? You are in the right place. In this tutorial, I will guide you step-by-step on how to install & activate a WordPress theme downloaded from the Themeforest.net.
The Themeforest.net is world’s largest theme marketplace that contains thousands of themes for any type of niche and platform. You can buy themes starting from $2.
Once you purchase a theme from the Themeforest.net it provides you a link to download the theme in a zip file. The zip files contains Theme folder, Licensing folder, Demo Content folder, Documentation folder and some other folders.
Often WordPress themes downloaded from the Themeforest are larger than 2MB. By default most of the web hosting providers set maximum upload filesize of 2MB, as a result when you try to install a WordPress theme greater than 2MB you get the error, “The uploaded file exceeds the upload_maximum_filesize directive in php.ini”.
If you get this error or want to check how much maximum upload filesize has been set by your web hosting provider than read this tutorial:
Following topics will be covered in this post:
- How To Choose Theme File
- How To Install WordPress Theme & Activate
RELATED
There are two more themes that I had purchased from Themeforest i.e. JNews and Avantage. I have created two separate tutorials for them. You can also get installation help from these tutorials:
- How to Install & Activate Avantage WordPress Theme
- How to Install, Activate, & Customize JNews WordPress Theme
01. How To Choose Theme File
I have purchased a WordPress theme “RyanCV – Resume CV vCard Theme” from Themeforest.net. As I have mentioned above that the zipped themes downloaded from the Themeforest.net contain different folders. The Theme folder contains two zip files from which you have to choose one. Here I will guide you on how to choose the right zip file.
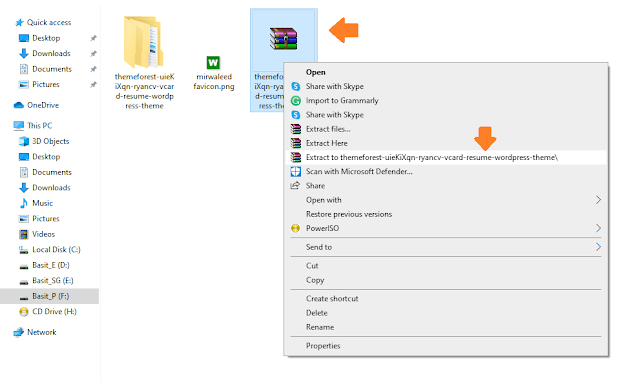
- Right-click on your theme’s zip file.
- Click on “Extract to…..“.
- Open the extracted folder.
- You can see here that there are lot of folders like Demo Content, Demo Content(Elementor), Documentation, Licensing & Theme. First of all open the Documentation folder and then document.html file. It contain all the details regarding your theme installation like How to Install the Theme, Which folder or zip file contains the theme, etc.
- For Ryan CV your concerned folder is the Theme folder. Remember that the folder names and structure varies from theme to theme. For some themes, instead of “Theme” the name of the folder could be theme’s name itself. That’s why read the documentation of the theme first to clear any ambiguity.
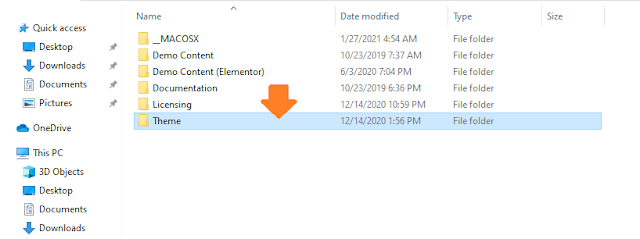
- Here you can see two zip files “ryancv.zip” and “ryancv-child“. The “ryancv.zip” contains the theme. Ignore any file or folder with the word “-child” in their name. You can notice that the “ryancv.zip” file has a large size.
- Now follow the next steps to upload, install and activate the WordPress theme.

02. Install & Activate WordPress Theme
In this section, I will guide you on how to install and activate the WordPress theme purchased from Themeforest.
- Login to your WordPress Admin Section.
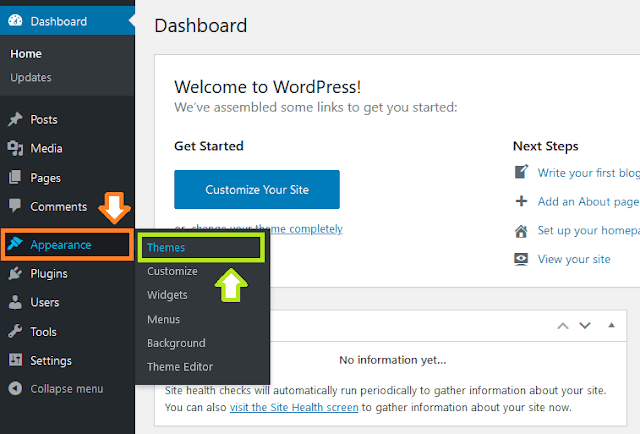
- Click on the Appearance.
- Click on the Themes.
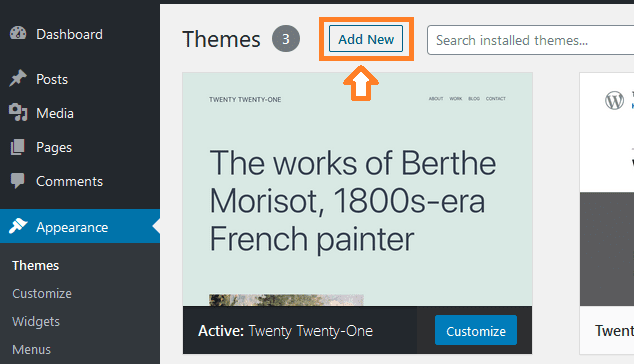
- Click on the Add New button.
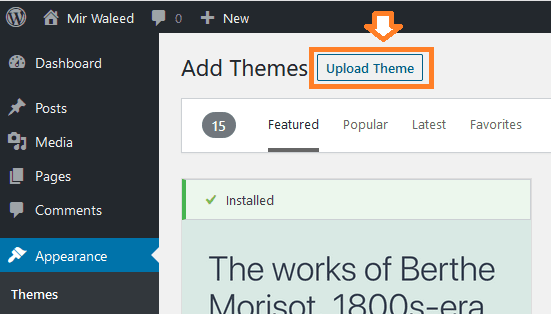
- Click on the “Upload Theme” button.
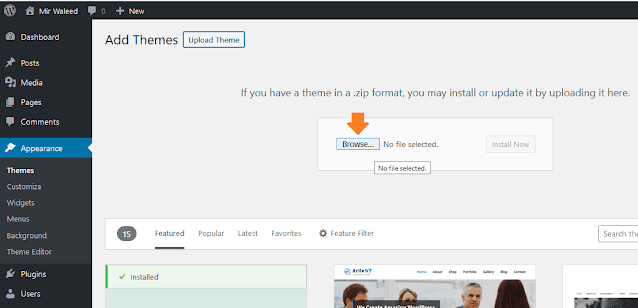
- Click “Browse….” button to select your theme file.
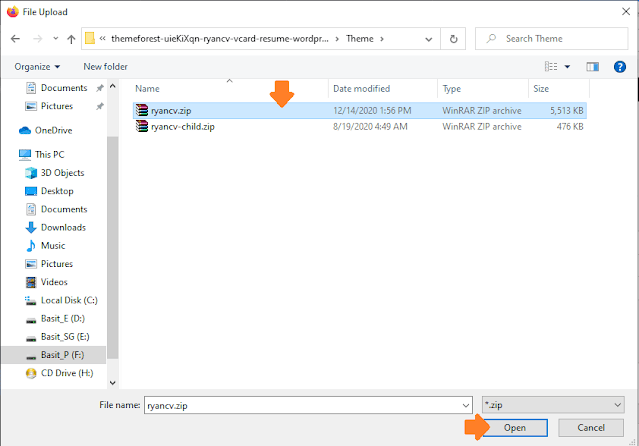
- Choose the zipped theme file, as I have guided above that which zip file you have to choose.
- Click on the “Open” button.
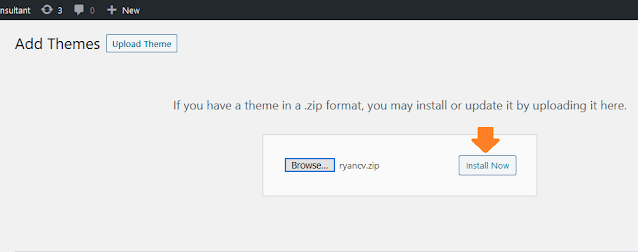
- Click on the Install Now button.
- It will take some time to install your theme, so be patient.
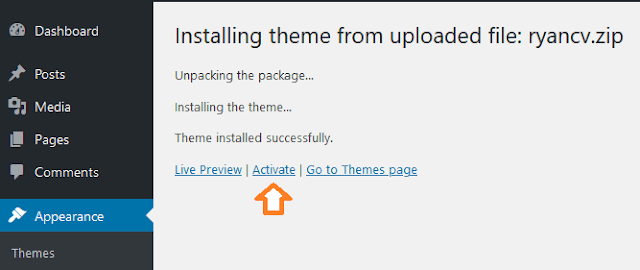
- Once it installs your theme it will show you a message, “Theme installed successfully“.
- Now in order to activate the theme click on the “Activate” link.
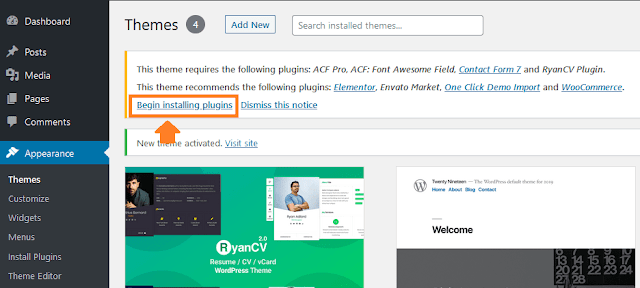
- You can see that the RyanCV theme has been installed. It is also showing you the message, “New theme activated“.
- Click on the “Begin Installing plugins” link to install theme plugins. Remember that plugins are the core components of WordPress themes.
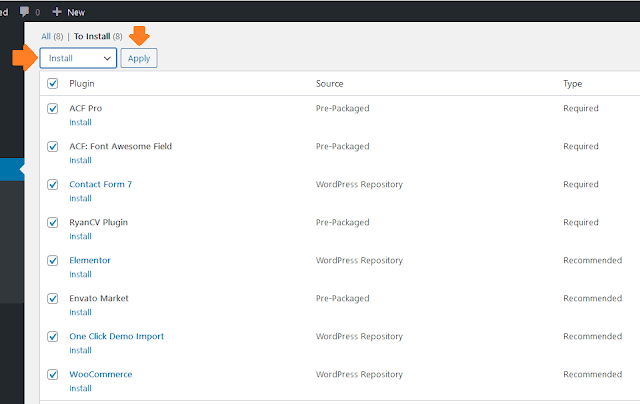
- Choose “Install” from the dropdown list.
- Click on the Apply button.
- Now the plugin installation process will start. It will take some time, so be patient.
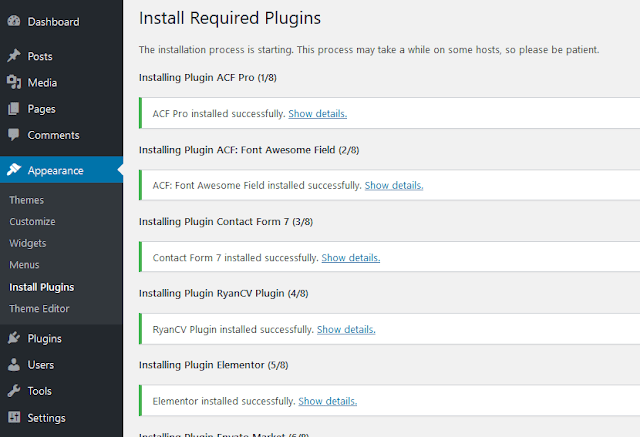
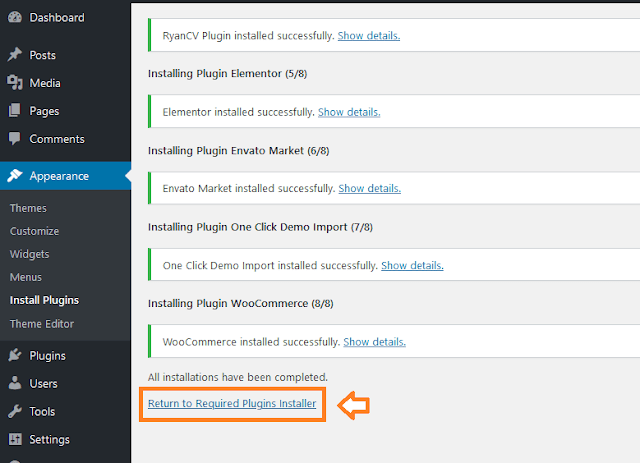
- Once all the plugins are installed successfully you see a message at the bottom, “All installations have been completed“.
- Click on the link “Return To Required Plugins Installer“.
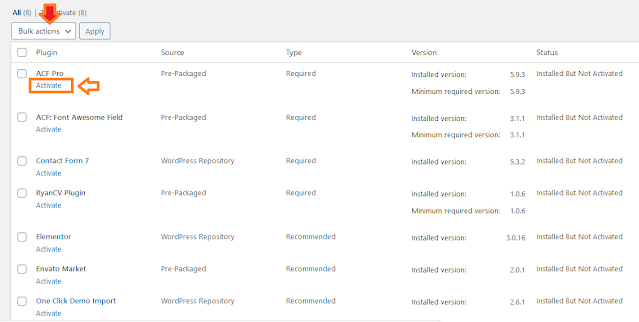
- Choose the “Bulk actions” from the dropdown list and click on the Apply button.
- Now you have to activate those installed plugins one by one. Once you activate one plugin move to the next plugin and click on the Activate.
- You can install/delete & activate/deactivate plugins from “Plugins” section.
- Here your WordPress Theme Installation Process Completes.
- If you have a new website and want to import the demo content to preview your website, follow the below steps.
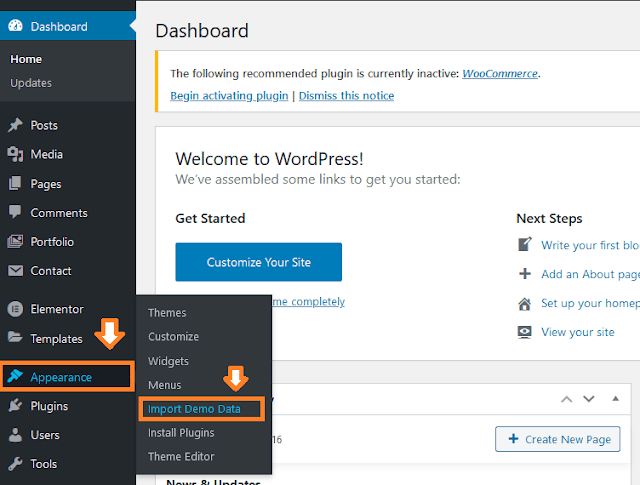
- Click on the “Appearance“.
- Click on the “Import Demo Data“.
- Click on the “Import” button of a theme design that you want for you website. Before import you can preview the design as well.
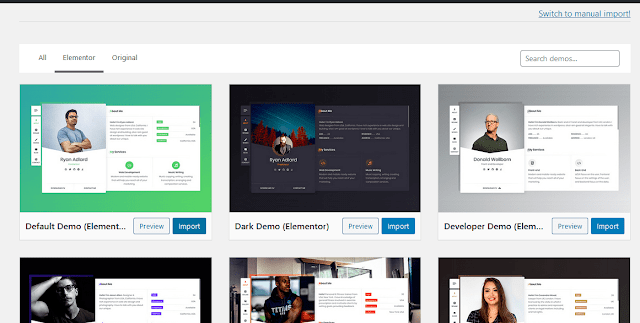
- It will take some time to import data, so be patient.
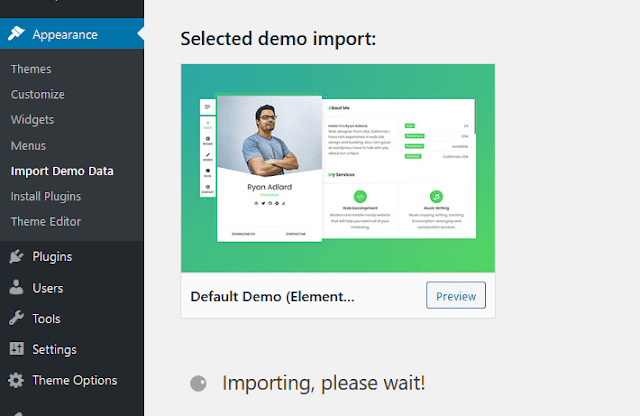
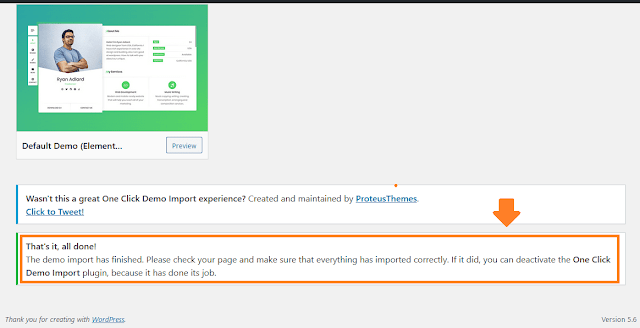
- Once the import process is completed you will get a message that demo import has been finished. You can also deactivate and delete “One Click Demo Import” plugin from your Plugins section.
So it was all about Themeforest WordPress theme installation & activation, hope it would have helped you. If you like this post then don’t forget to share with other people. Share your feedback in the comments section below.
Also Read



Leave a Reply