In general when you don’t own a domain and web hosting you use public email services such as Gmail, Yahoo, Outllook(Hotmail) etc, by creating free email accounts on them, but when you own a domain or web hosting you can create email accounts with your domain address such as “john@johnsmith.com”, “info@johnsmith.com”, “hr@johnsmith.com”, etc.
An email linked with a domain address is called business email or private email. There are many benefits for creating emails on private email server such as security, privacy, ownership, etc.
From professional perspectives the domain address in email builds a trust, like you are officially representing a business/company or you are an employee of a company. So that’s why majority of professionals who own a business use business email.
In this post I will cover following topics:
- How To Create Email Account with Domain Name on cPanel
- How To Create Business Email Without Web Hosting
RELATED
- How to Buy Domain and Hosting on Namecheap | For Beginners
- How to Migrate Hosting and Domain to Namecheap
01. How To Create Email Account with Domain Name On cPanel
In this section, I will guide you on how to create an email account with your domain name on cPanel.
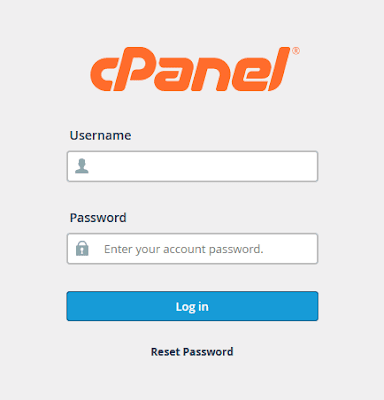
- Login to your cPanel account via the URL provided to you by your web hosting provider.
- Enter your Username & Password.
- Click on the Login button to access your cPanel.
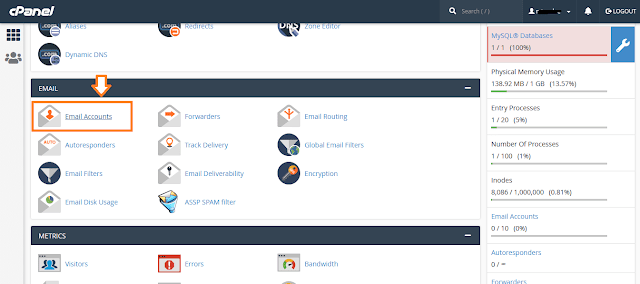
- Go to EMAIL section and click on Email Accounts link.
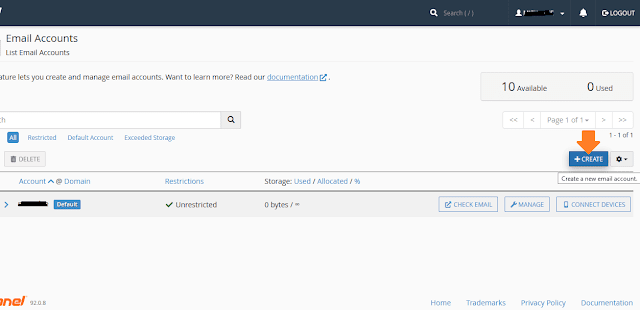
- There will be a one default email account which is automatically created, normally used to login to your website’s admin section.
- There is also a limit for creating email accounts. In a basic Shared Hosting plan you can create up to 10 or 20 business email accounts. If you have a large business and hundreds of employees you can request your web hosting provider to update the package or increase the number of email accounts.
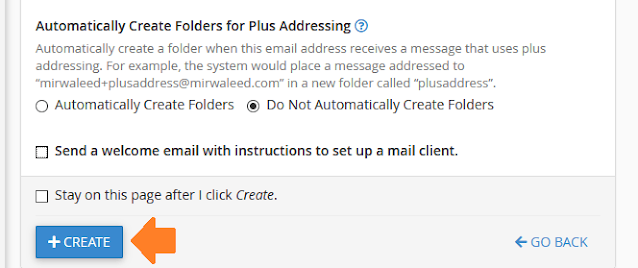
- Click the on the +CREATE button to create an email account.
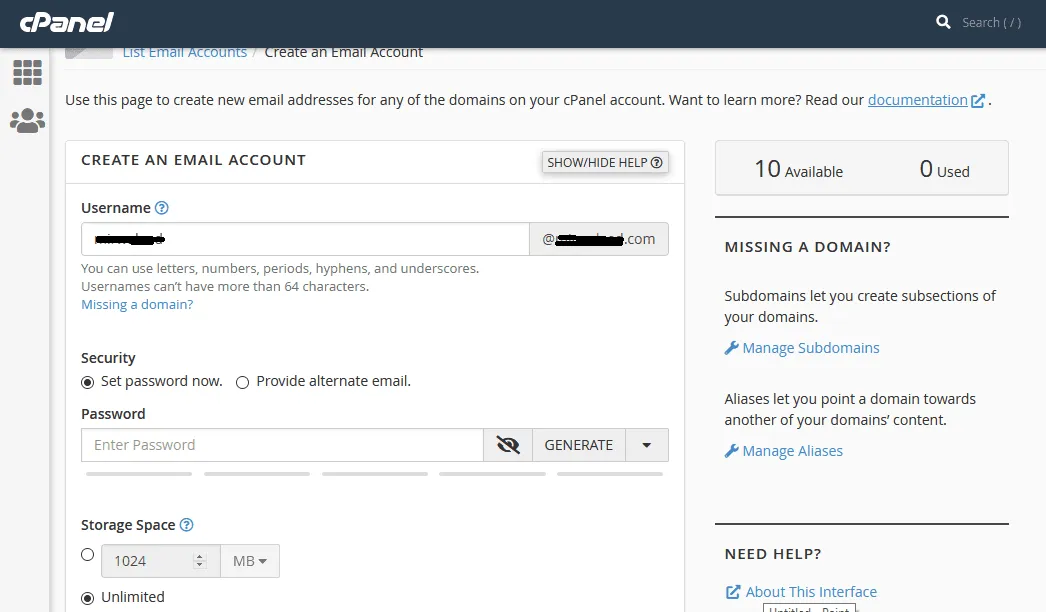
- In the Username enter the name of a person, designation, etc, like if you are creating for yourself it will be your name like “john” or “john smith”.
- Always remember that email should not be complicated, should be easily spelled, typed and recalled. Some people tend to have complicated and long names. You can shorten them by different ways like You can use only first name, You can use short spelling for your name, You can use the “.” symbol to separate the name, etc.
- In the “Security” section choose the “Set password now” and enter a secure password that you can remember.
- In the “Storage Space” choose the size required for your emails. You have two options here i.e. Fixed size and Unlimited Size. You can change the size anytime depending on your requirements. 1024MB is equal to 1GB.
- Click on the “+CREATE” button.
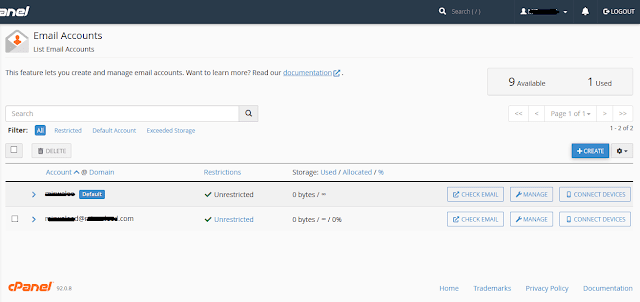
- You can see that I have successfully created a new business email account.
- You will see three options in front of your email account i.e. CHECK EMAIL, MANAGE, & CONNECT DEVICES.
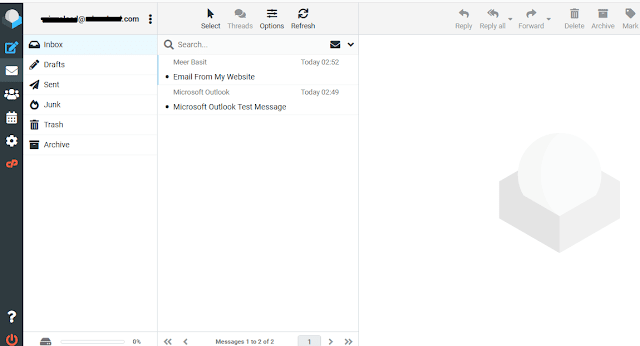
- The CHECK MAIL option is the link to your webmail’s mailbox where you can Open/Compose/Delete/Manage mails, as you will see in the next step. You can also open your mailbox by your webmail URL such as “https://www.webmail.abc.com”. The “abc.com” will be replaced with your domain.
- The MANAGE option is for Editing your email like Password, Storage Size, etc.
- The CONNECT DEVICES option shows you the configuration to setup Mail Clients such as MS Outllook, Mail,bird etc. The benefit of using mail clients is that you don’t have to login to your webmail interface again-and-again to check emails instead you will directly send/receive emails on your email client.
- This is how your webmail mailbox looks like similar to Gmail and Yahoo.
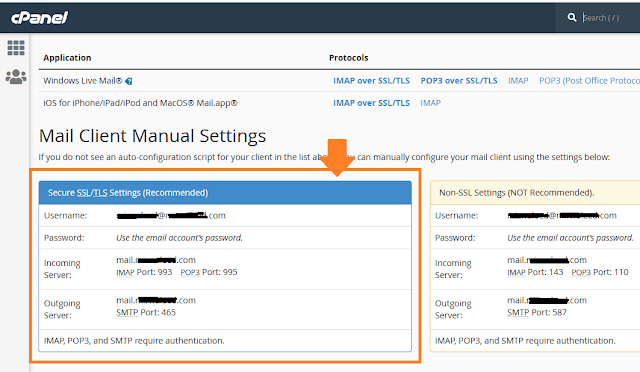
- This page displays you the Mail Client Manual Settings. You get this information when you click on the CONNECT DEVICES as I have shown above. Using these settings you can setup your email on mail clients such as Microsoft Outlook, Mailbird, etc.
- Recommended settings are “Secure SSL/TLS Settings”.
- For “Incomming Server” use POP3 protocol and POP3 PORT. The POP3 & IMAP protocols are used for receiving emails.
- The SMTP(Simple Mail Transfer Protocol) is used for sending emails. We use it for “Outgoing Server”.
Related: How To Setup Custom Domain Email In Outlook 2021, 365, 2019
02. Create Business Email Without Web Hosting
You must have heard of web hosting where you upload your website and create business email, but what if when you want to create business email without buying web hosting? Don’t worry there is email hosting, an exclusive hosting for creating business email.
In the email hosting you don’t have to buy web hosting you are only required to buy a domain and email hosting. Your email will be linked to your domain like “mirbasit@abc.com”. You can manually choose email storage and number of mailboxes depending on your requirements.
A top email hosting requires mainly three things i.e storage, security, & flexibility. When it comes to best email hosting who else can be better than Namecheap that provides exclusive cloud-based business/private email hosting services around the world.
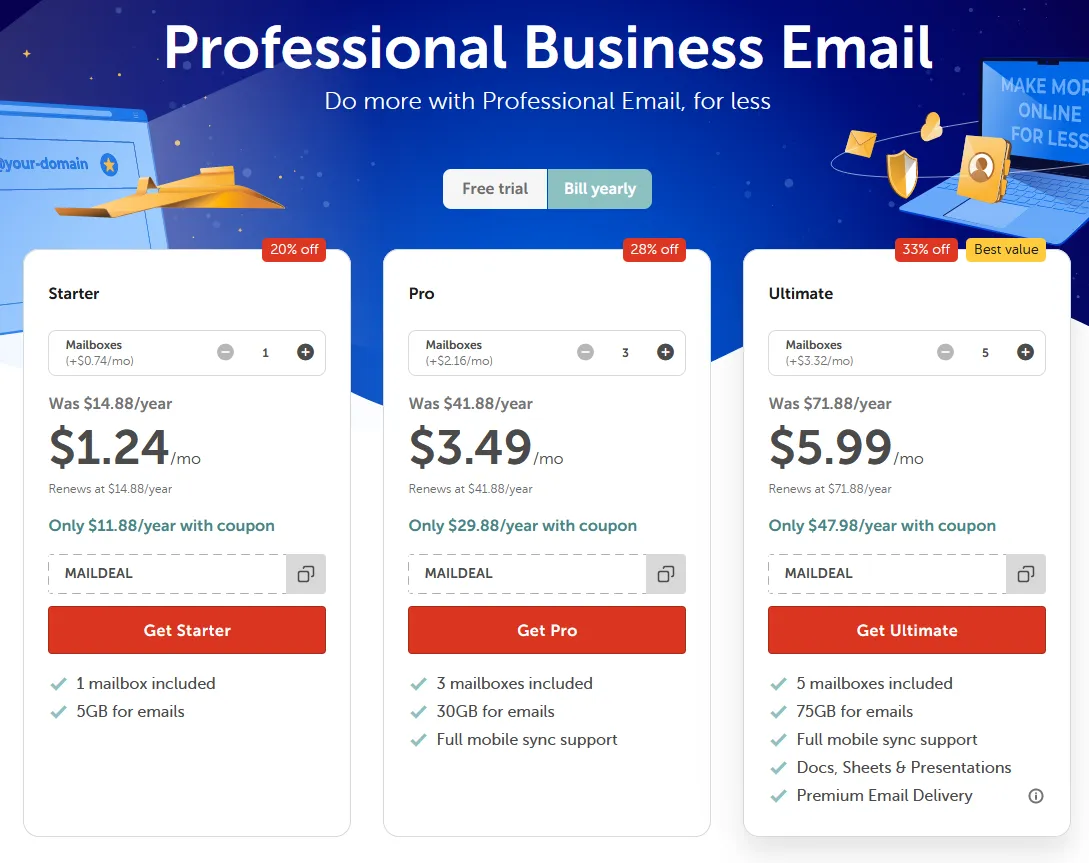
Namecheap offers 3 Business Email Hosting Plans i.e. Starter (5GB Space), Pro (30 GB), and Ultimate (75GB Space ). Below are the common features that are available in each plan:
- Custom Domain-based email
- Extra Security with Two-Factor Authentication (2FA)
- Unified Inbox
- It works across many devices such as tablets, desktops, and notebooks
- Anti-spam protection
- POP3/IMAP/Webmail access
- HTML signatures
- Two-month free trial
In order to get email hosting and domain, and to find the latest pricing and discounts go to Namecheap Email Hosting.
- Choose your desired email hosting plan. I am selecting Get Starter plan here.
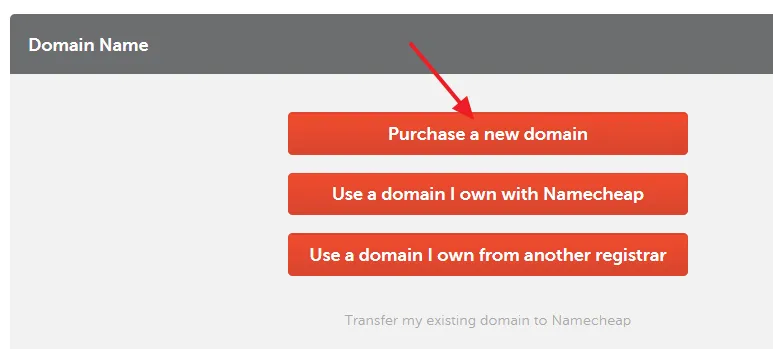
- You have three options here (1) Purchase a new domain (2) Use a domain I own with Namecheap (3) Use a domain I own from another registrar.
- I am selecting Purchase a new domain.
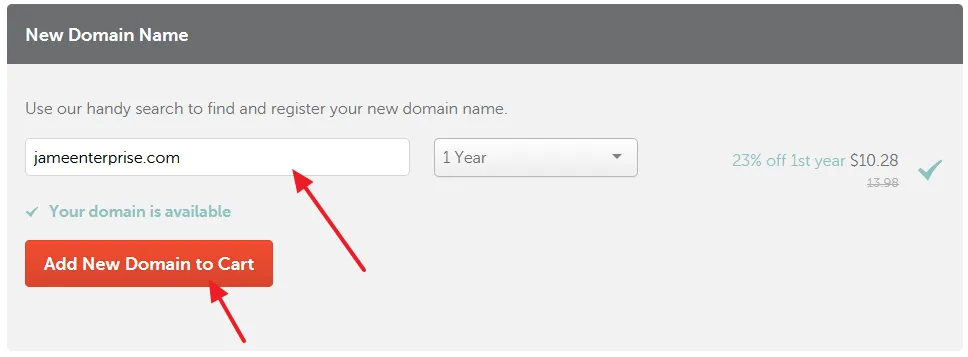
- Enter your domain name with extension and click on the Add New Domain to Cart button.
- It will calculate your order. Click on the Continue button.
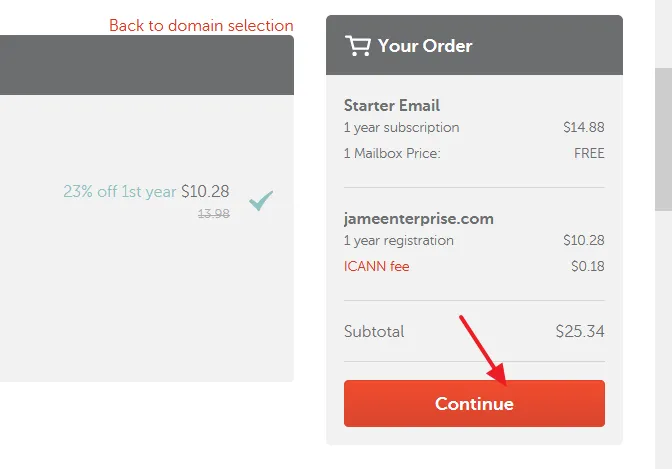
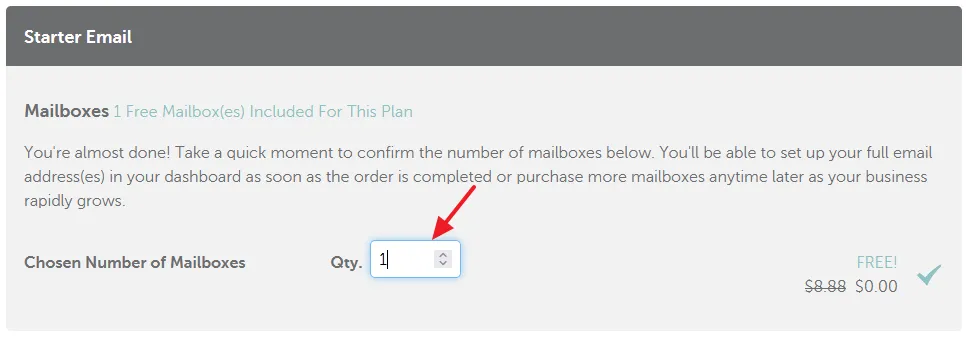
- Choose the quantity of Number of Mailboxes. If you increase the Mailboxes the cost will also be increased.
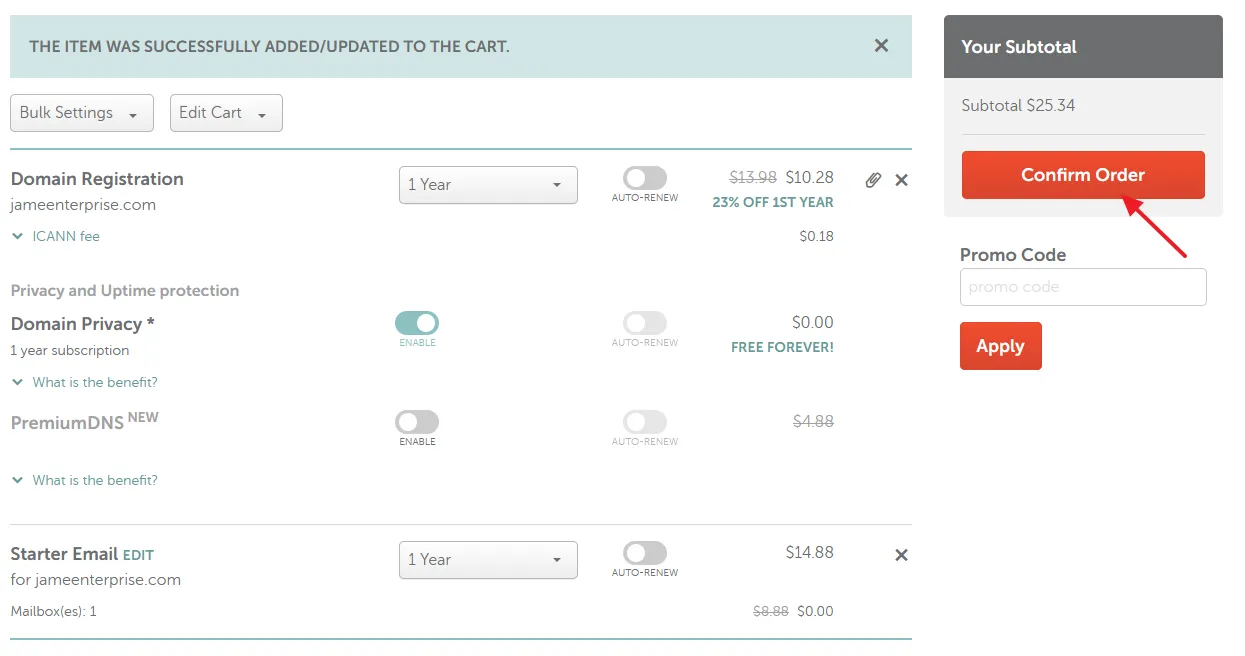
- Click on the Confirm Order button.
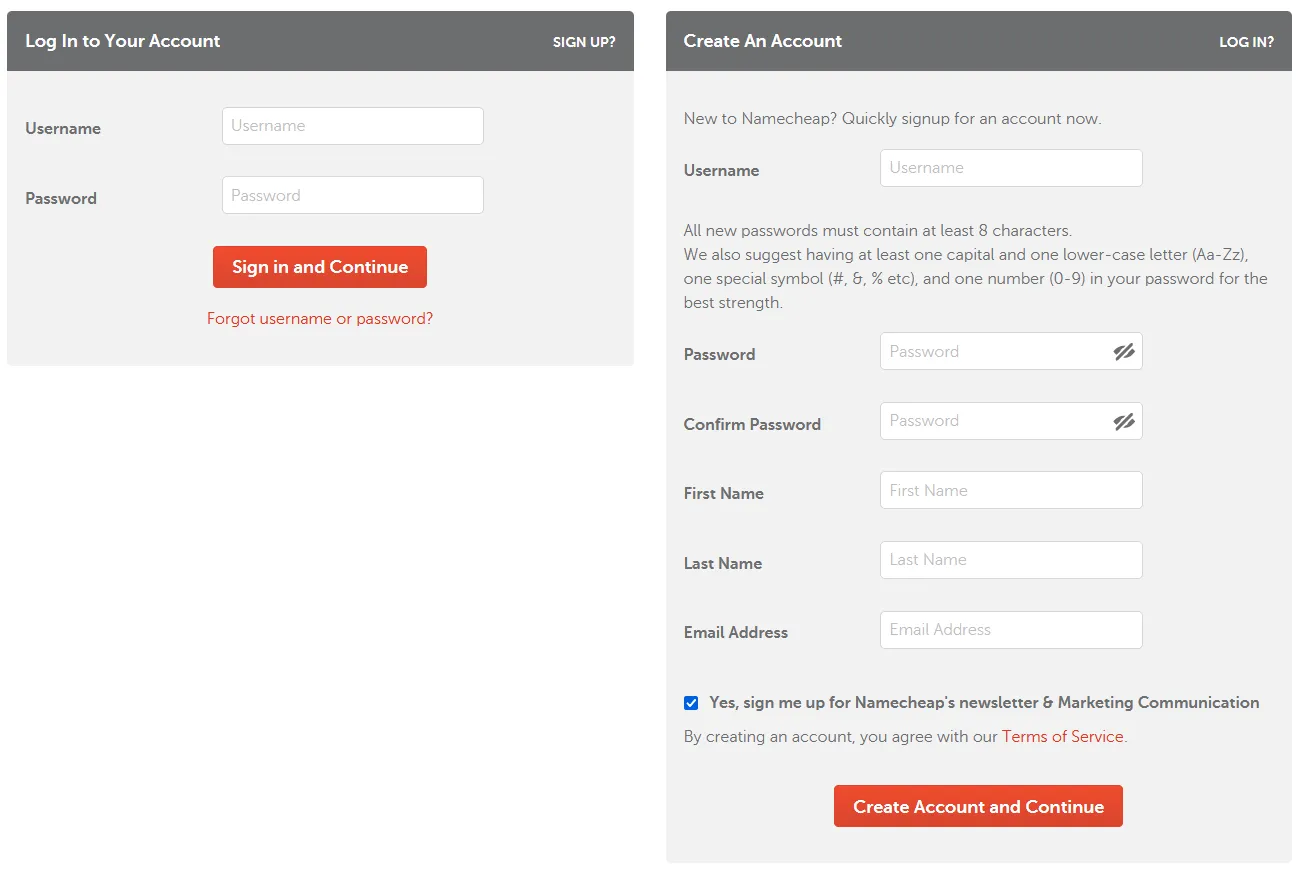
- Create a Namecheap account and pay the bill of your domain and email hosting. After the payment Namecheap will send you email(s) which contain your credentials and links to access your domain and email hosting.
If you like this post then don’t forget to share with other people. Share your feedback in the comments section below.
Also Read


Leave a Reply