When you enable Author Profile on Blogger it is displayed at bottom of every post which includes a thumbnail & bio. Some bloggers want to customize the author image because they think that the default size is too small. So this tutorial is for all those who want to customize their author thumbnail on Blogger.
If you haven’t already enabled the Author Profile below posts then first read this: How to Enable Author Profile on Blogger. If you have already enabled then follow the steps to increase or customize the size of author’s image.
Note: You can also jump to the Step 4 directly by skipping the first 3 Steps.
Step 1:
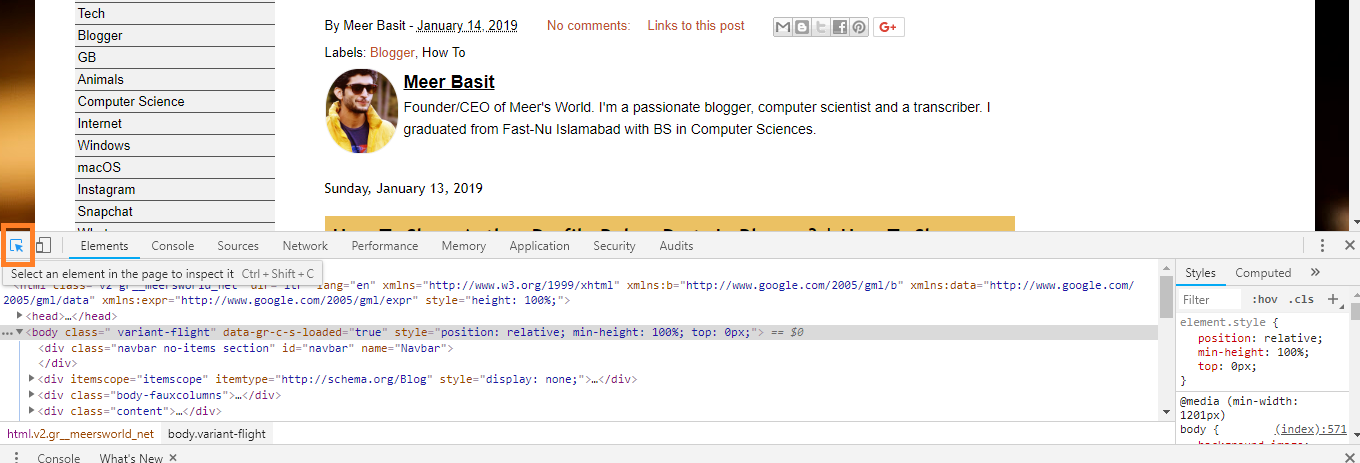
Press F12 to open Developer Tools on your browser. The purpose of using Developers Tools here is to identify the Classes and Ids associated with the Author Thumbnail. For your information Class start with DOT(.) & Id start with (#) in CSS.
The Left side shows the HTML code where as the right side code is your style code.
- Press F12 to open the Developer Tools.
- Click the Arrow at your bottom left.
Step 2:
- Click on your Thumbnail Image.
- Once you will click on the thumbnail you can see the HTML code and style code.

Step 3:
- You can see that there is a class .auhtor-profile img, for which you have to insert the code.
- Write { width: 72px; }
- You can set width of your own choice.
- If you want to make your thumbnail round add this code { border-radius: 50%; }
- Now it is time to save these changes permanently, as I have guided in the next section.

Step 4:
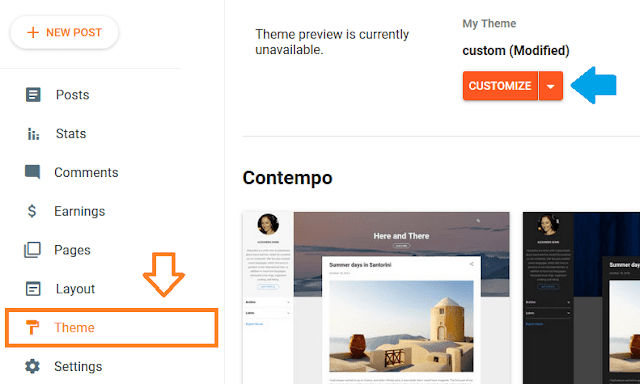
- Click the Theme from the Sidebar.
- Click the Customize button.
Step 5:
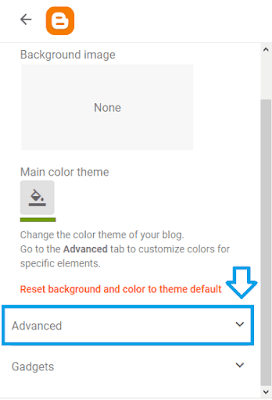
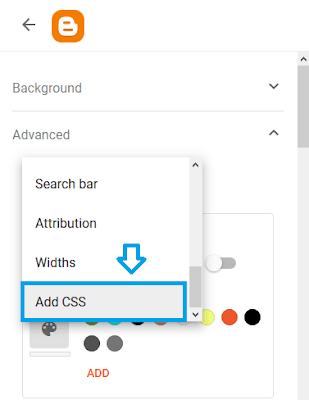
- Click the Advanced tab.
- Click the Body tab.
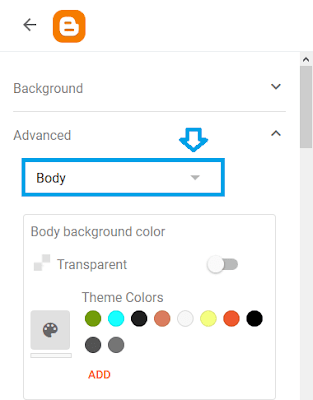
- Click the Add CSS.
Step 6:
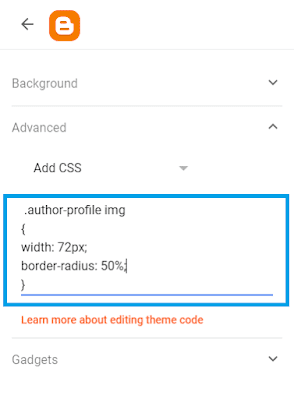
- Below is the code that you have to Paste in the Add CSS textarea. You can increase and decrease the width of author thumbnail. If you don’t want your thumbnail round, remove the second line.
.author-profile img
{
width: 72px;
border-radius: 50%;
}
- Get access to all the Blogger Tutorials.
- If you like this post then don’t forget to share with other people. Share your feedback in the comments section below.
Also Read
- How To Redirect Blogspot To Custom Domain | Set Up A Third Party URL
- Beginner’s Guide To Migrate Blogger Blog To WordPress
- What is Post Using Email in Blogger & How to Set Up?
- How to Set Up Blogger Settings | A to Z
- How to Pick a Right Blogger Template?
- Introduction to Theme Customize Settings in Blogger
- How To Add Read More Link in Posts On Blogger



Leave a Reply