Do you want to protect your Contact Form 7 from spam emails and other unwanted form submissions by spam bots? You’re in the right place. I will guide you step-by-step on how to integrate reCAPTCHA in Contact Form 7.
The spam emails have always been an issue in WordPress particularly when a contact form is installed on your WordPress website. To deal with spam emails and unwanted form submissions Contact Form 7 is integrated with the reCAPTCHA.
reCAPTCHA is a free service from Google that helps protect websites from spam and other unwanted activities. The latest version of reCAPTCHA is v3. It works in the background so visitors don’t need to read “blurred text in an image”, “Tick similar pattern pictures”, and tick the “I’m not a robot” checkbox.
If reCAPTCHA does not use “checks and images” how it decides which one is spam and which one is not?
reCAPTCHA provides a score that tells how suspicious an interaction is, and then Contact Form 7 compares that score with a certain threshold. If the score is less than the threshold, the form submission will be regarded as spam. The default value of the threshold is 0.50, you can change this value if required.
If you haven’t already installed and configured Contact Form 7 in your WordPress site, Read this Tutorial: How To Add Contact Form In Contact Us Page In WordPress.
Integrate reCAPTCHA v3 in Contact Form 7
Follow the steps to integrate reCAPTCHA v3 in Contact Form 7:
- Login to your Gmail account since reCAPTCHA is a Google service.
- Once you’re logged-in to your Gmail account, visit Google reCAPTCHA page.
- In the “Label” enter some random name, it could be your website name.
- In “reCAPTCHA type” choose reCAPTCHA v3.
- In the “Domains” enter your domain name without “https://www” like “example.com”.
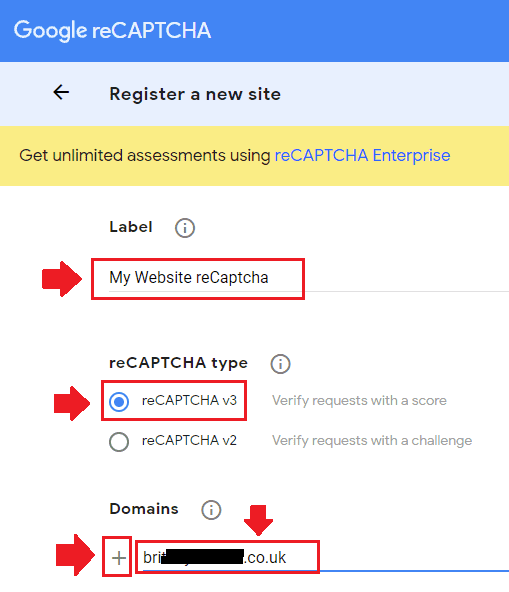
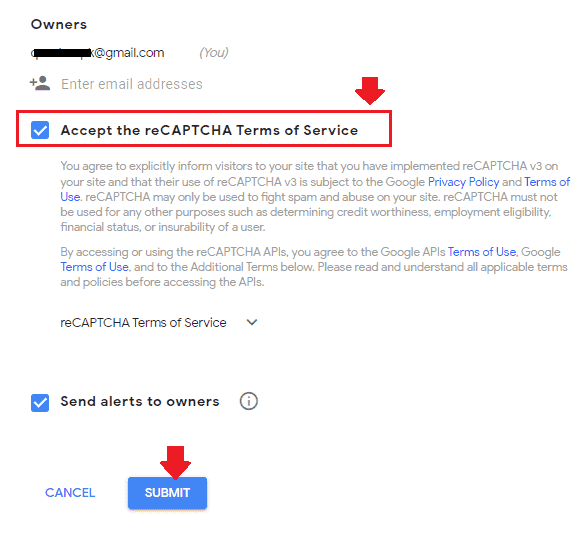
- In “Owners” it automatically adds your Gmail ID through which you are logged in.
- Tick “Accept the reCAPTCHA Terms of Service”.
- Click on the “Submit” button.
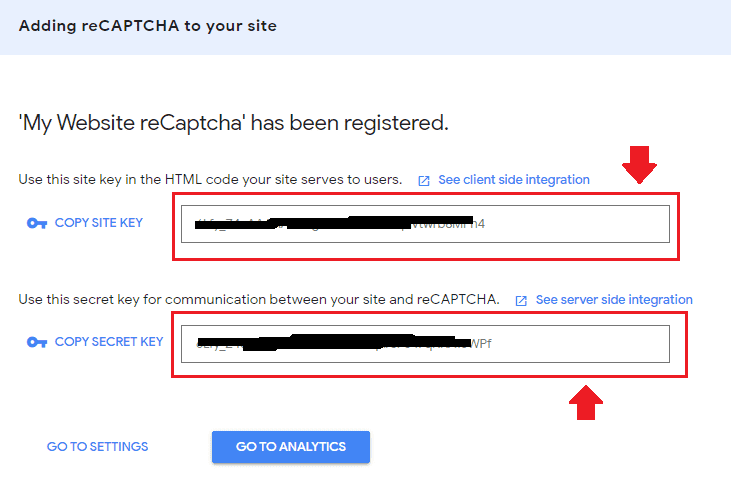
- Now it will return you two keys that you have to integrate in your Contact Form 7, as I have shown in the next steps.
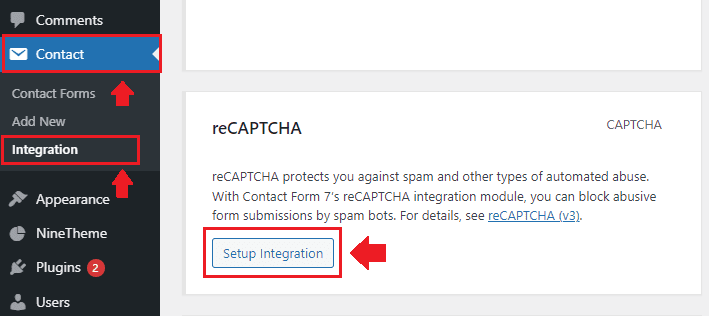
- Go to “Contact” from your sidebar and click on the “Integration“.
- Click on the “Setup Integration“.
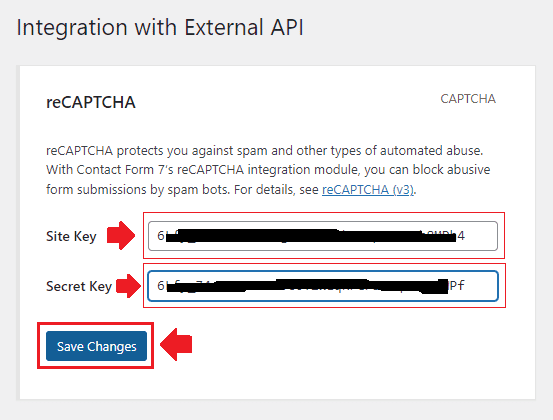
- Now Copy the Site Key and Secret Key that you received in the reCAPTCHA page and Paste here.
- Once you Paste, click on the “Save Changes” button.
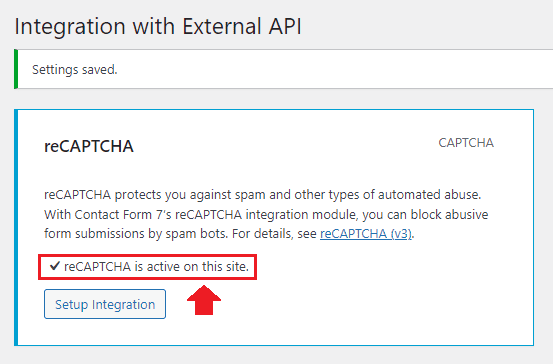
- Once the reCAPTCHA is successfully integrated with your Contact Form 7 you will see “reCAPTCHA is active on this site” message.
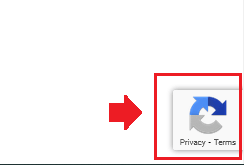
Now your website pages will have reCAPTCHA badge at bottom right-corner. It tells that this website is powered by reCAPTCHA and it is working correctly. Do remember that reCAPTCHA v3 doesn’t need a CAPTCHA widget “I’m not a robot” checkbox or “Pick similar images”, etc, it is a new way to stop bots.
So it was all about integrating reCAPTCHA in Contact Form 7. Now your Contact Form 7 is protected from spams and unwanted form submissions. You can remove this feature by visiting the Google reCAPTCHA page.
If you like this post then don’t forget to share with other people. Share your feedback in the comments section below.

Also Read




Leave a Reply