Do you want to sell your eBooks on Amazon Kindle from Pakistan, but don’t know how to start with it? You’re in the right place. In this tutorial, I will guide you step-by-step on how to create a free Amazon Kindle Account from Pakistan and how to fulfill all the requirements.
Kindle is an e-reader device that allows you to read, browse, download, access, and buy books, digital media, magazines, etc.
Amazon Kindle Direct Publishing is a platform that allows you to create an account and self-publish your eBooks and paperbacks for free and make a passive income online.
There are no charges or fee on Amazon Kindle Direct Publishing account, instead Amazon takes a certain percentage of share from the price of your sold eBooks and pays you a Royalty of 70% or 35%. Amazon pays up to 70% Royalty on Kindle Books priced between $2.99 USD to $9.99 USD and 35% Royalty on Kindle books priced more or less than $2.99 USD to $9.99 USD.
In order to receive Kindle payments in Pakistan you must have a Payoneer account. Your Payoneer’s Receiving Account details will be used in the Kindle Account Creation process. Go through the Section 3 below to learn more about Payoneer.
Following topics will be covered in this post:
- Who Can Publish eBooks On Kindle?
- Book Categories On Amazon Kindle
- How To Receive Amazon Kindle Payment In Pakistan
- How To Fill Tax Information If You Don’t Have US TIN
- How To Create Amazon Kindle Account From Pakistan
- How To Publish Your eBook On Amazon Kindle
01. Who Can Publish eBooks On Kindle?
It is not mandatory for you to be a writer in order to publish a book on Amazon Kindle. If you can’t write a book you can find someone who you know, to write a book for you or you can hire a professional freelance book writer from Fiverr or other marketplace to write a book on one of the categories, listed in the Section 2 below.
In order to Write Bestselling Kindle Books, Automate Your Publishing Business On Amazon Kindle, Build Passive Income & Monetize E-Books, go through this book:
02. Book Categories On Amazon Kindle?
Below are some categories on Amazon Kindle under which you can publish eBooks:
- Arts & Photography, Biographies & Memoirs
- Business & Money, Children’s eBooks
- Comics, Manga & Graphic Novels, Computers & Technology
- Cookbooks, Food, Crafts, Hobbies & Home
- Education & Teaching, Engineering & Transportation
- Foreign Languages, Health, Fitness & Dieting
- History, Humor & Entertainment, Law
- Literature & Fiction, Medical eBooks
- Mystery, Thriller & Suspense, Nonfiction
- Parenting & Relationships, Politics & Social Sciences
- Religion & Spirituality, Romance
- Science & Math, Science Fiction & Fantasy
- Self-Help, Sports & Outdoors, Travel, and more..
| Helium 10 Special Discount! 30% Off the First 12 Months. Get 20% OFF Your First 6 Months and 10% OFF Every Month for Life. Visit Our Helium 10 Page To Avail the Offers Using The Coupons MEERSWORLD20 and MEERSWORLD10. |
| Helium 10 Mega Discount! 58% Discount On Annual Plans for Customers in Pakistan, India, and Turkey (1) Platinum Annual (2) Diamond Annual. The discount coupons are included in our links. |

03. How To Receive Amazon Kindle Payment In Pakistan
You can receive your Amazon Kindle payment in Pakistan via Payoneer account. Amazon sends Kindle payment to your Payoneer account from where you can withdraw money to your local bank account in Pakistan.
Before you signup for Amazon Kindle you must have a Payoneer Account ready. If you haven’t created Payoneer Account yet, follow this tutorial:
How To Get Receiving Account Details In Payoneer
In order to learn how to get your Receiving account details in Payoneer follow these steps. This information will be required in the Section 6, “Tell Us About Your Bank”.
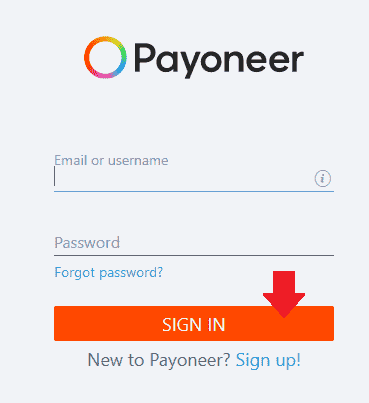
- Go to the Login Page of Payoneer.
- Enter your credentials i.e. Email and Password.
- Click the “SIGN IN“.
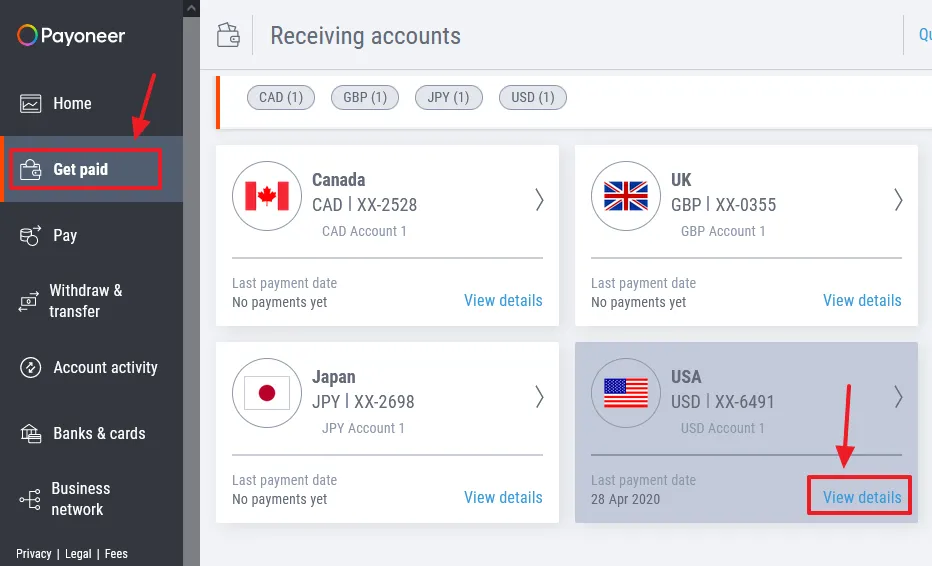
- Click the “Get paid“.
- Go to USA Receiving Account and click the View details link.
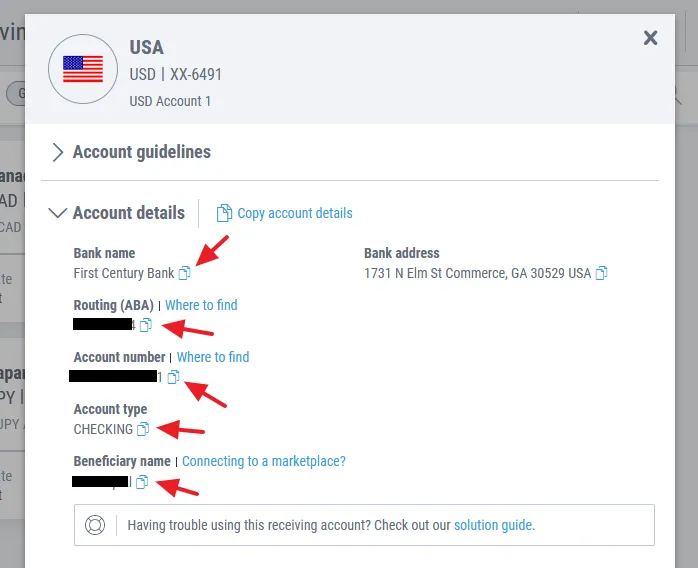
- You can see the Account details for USA Receiving Account.
- The information highlighted with arrows is your required information that you have to provide in “Tell Us About Your Bank” section.
- The “Copy Icon” copies the information.
04. How To Fill Tax Information If You Don’t Have a US TIN
When you fill Tax information in the Kindle account creation process (Section 5, below) it asks you to provide the Tax Identity Information. In United States the Tax Identification Number is called TIN. A TIN is simply a 9-digit SSN(Social Security Number or EIN(Employer Identification Number) assigned to US citizens..
Since you are from Pakistan so you can’t provide US TIN, instead you have to provide either your NTN(National Tax Number) or your CNIC(Computerized National Identity Card) Number. They are alternate to TIN or SSN.
Luckily Pakistan is one of those countries whose citizens are exempted from paying US withholding taxes, thanks to Income Tax Treaty. When you provide your NTN or CNIC, you actually claim the Tax Treaty benefits.
05. How To Create Amazon Kindle Account From Pakistan
In this section, I will guide you step-by-step on how to create Amazon Kindle Account from Pakistan.
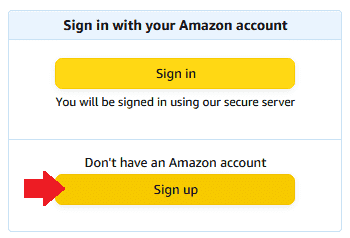
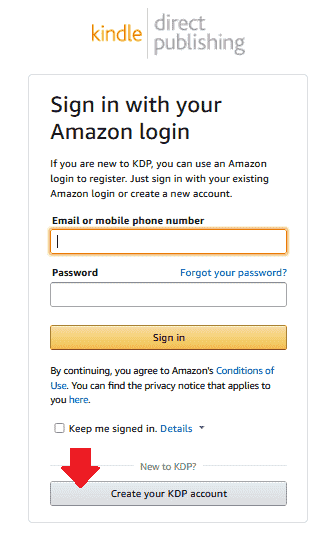
- Go to Amazon Kindle Direct Publishing page.
- Click the “Sign up“.
- Enter your “Email ID“.
- Enter a secure Password.
- Click on the “Create your KDP account” button.
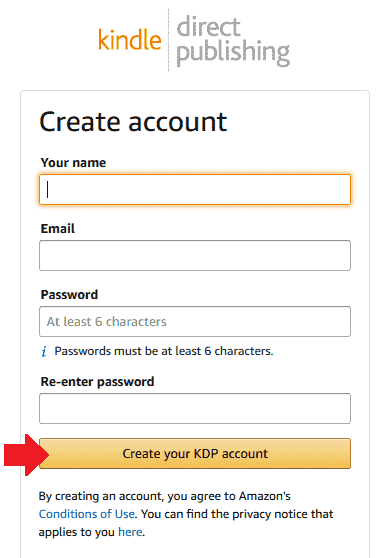
- Enter your Name.
- Enter your Email & Password again.
- Click on the “Create your KDP account” button.
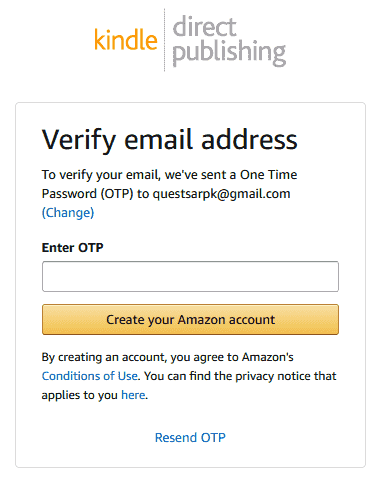
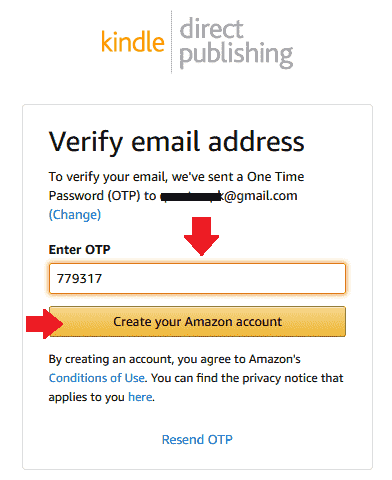
- To verify your email address it will send you an OTP(One Time Password) to your email account.
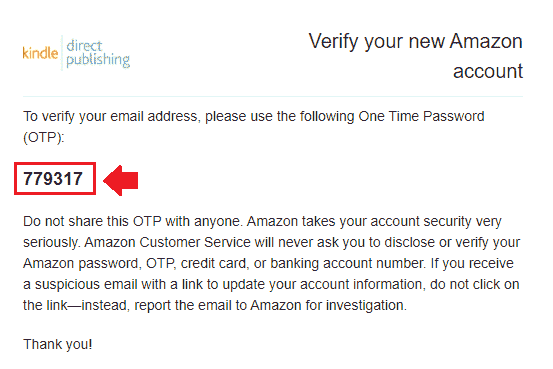
- Sign-In to your email account and copy the OTP code, as shown in the next step.
- Copy the OTP code from your email account.
- Enter the OTP code.
- Click on the “Create Your Amazon account” button.
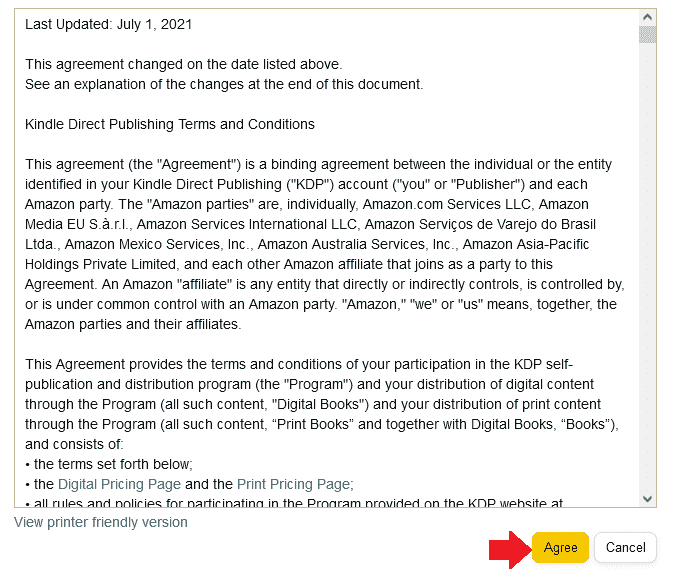
- To accept the Agreement click “Agree” button located at bottom.
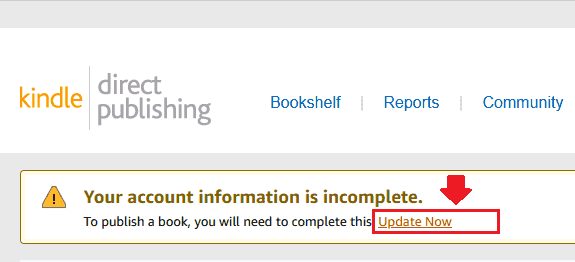
- Though the Kindle Direct Publishing Account is created, but it is not completed yet.
- In the Notification Box, click “Update Now” link to complete the account information.
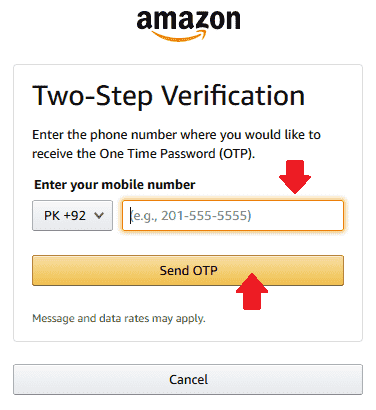
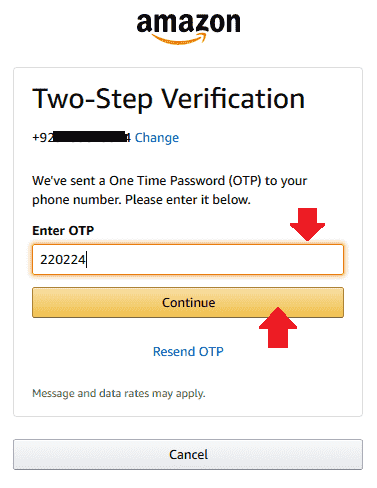
- Now it is time to verify your Mobile Number.
- Choose Pakistan’s Phone Code i.e. +92 and enter Mobile Number without zero(0) like 3139678345.
- Click the “Send OTP“. You will receive an OTP code on your Mobile Phone.
- Enter the OTP code that you have received on your Mobile Phone.
- Click the “Continue” button.
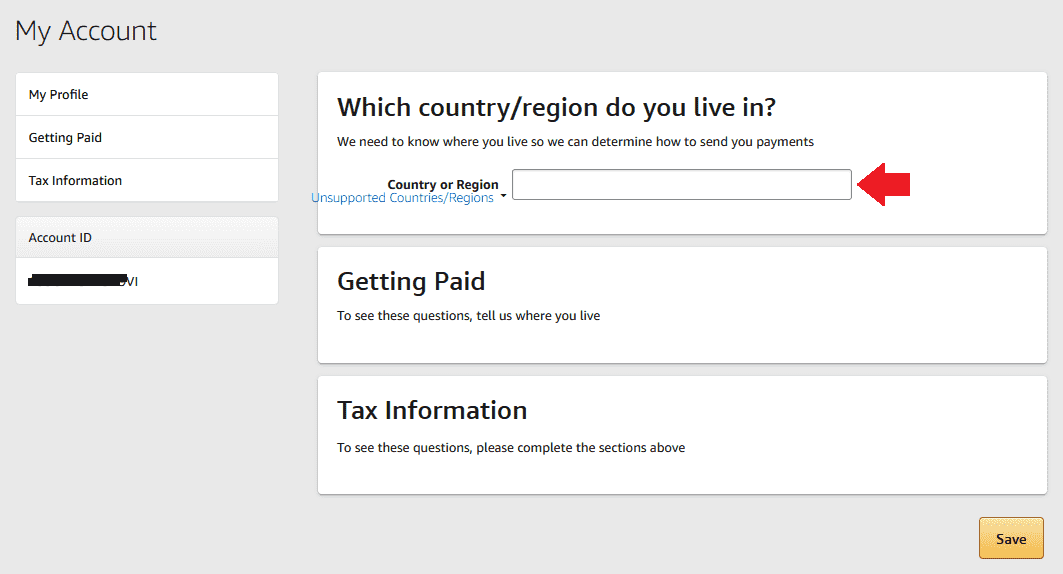
- In “Country or Region” type and choose “Pakistan“.
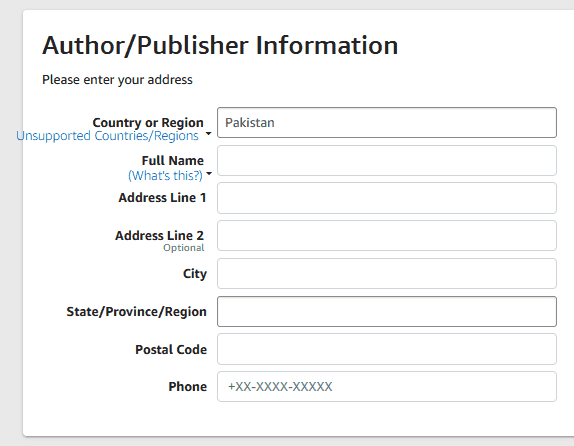
- Once you choose “Pakistan” it will expand a form to fill personal information, as shown in the next step.
- Enter your Full Name.
- Enter your Address in the Address Line 1.
- Enter your City.
- Enter your Province Name.
- Enter the Postal Code of your City.
- Enter the Mobile Number again in the format mentioned, like +92-3134-76477.
Once you fill “Author/Publisher Information” it will move you to the “Get Paid” section automatically where it will ask you to provide information about your bank, like Bank Name, Account Number, etc, as shown in the next step.
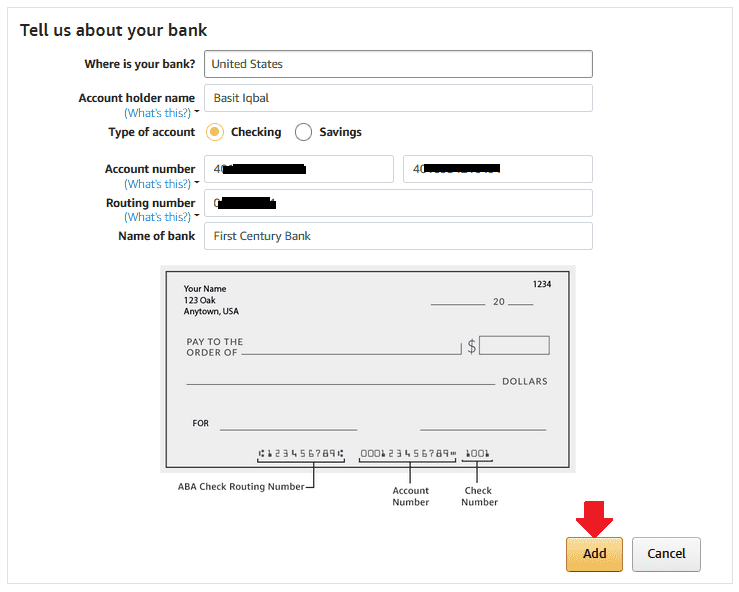
Tell Us About Your Bank
- In “Where is your bank?” choose “United States“. Because your Payoneer Receiving Account is virtually located in the United States.
Now Go to Section 3 above and follow the steps under the subheading “How To Get Receiving Account Details In Payoneer“. Once you get the details from Payoneer Receiving Account, fill this form.
You have to simply Copy information from Payoneer account and Paste here.
- The Account holder name in your Payoneer Receiving Account is “Beneficiary Name“.
- In Type of account choose “Checking“.
- The Account number in your Payoneer Receiving Account is also “Account number“.
- The Routing number in your Payoneer Receiving Account is “Routing ( ABA )”.
- The Name of bank in your Payoneer Receiving Account is “Bank name”.
- Once you fill the information click “Add” button.
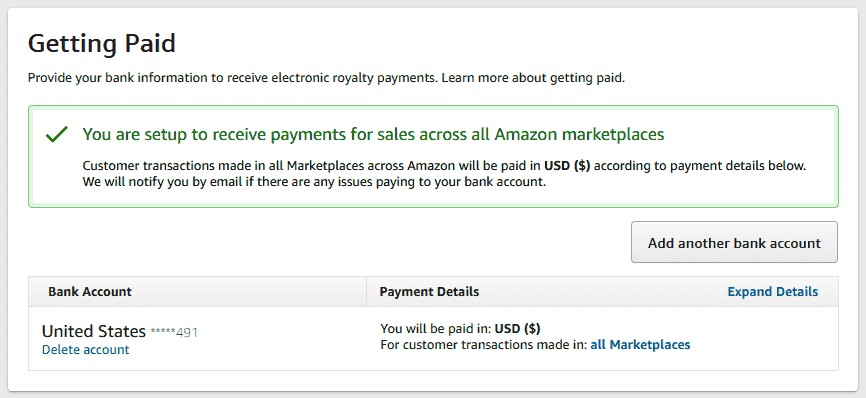
- If your Payment settings are configured successfully it will show a message that “You are setup to receive payments for sales across all Amazon marketplaces“.
Now you will be moved to Tax Information section which is the last step of Amazon Kindle Account Creation Process.
Tax Information
- Click the “Complete Tax Information” button.

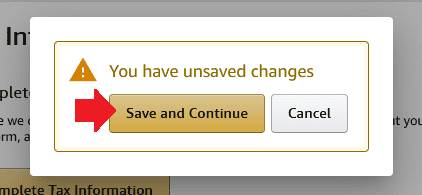
- Click the “Save and Continue” button to save your unsaved settings and continue.
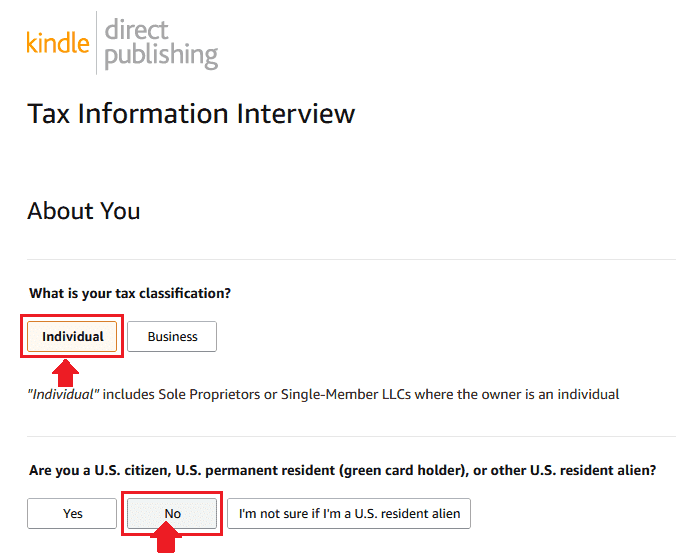
- In “What is your tax classification?” Choose “Individual“.
- In “Are you a U.S. citizen, U.S. permanent resident(green card holder), or other U.S. resident alien?” Choose “No“.
- In “Are you acting as intermediary agent, or other person receiving payment on behalf of another person or as a flow through entity?” Choose “No“.

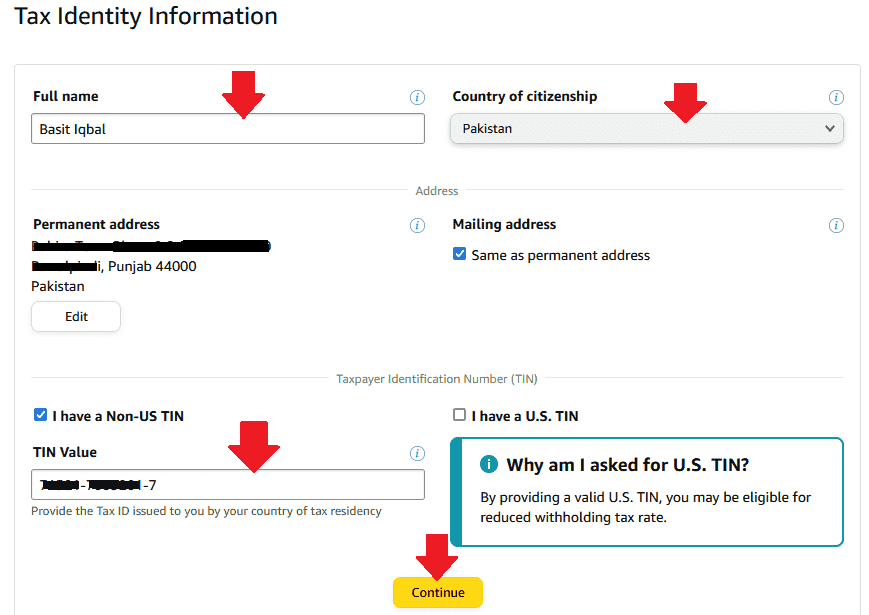
- In “Full name” enter your name written in CNIC.
- In “Country of citizenship” choose “Pakistan”.
- Tick “I have a Non-US Tin” and Enter your CNIC Number or NTN Number in “TIN Value”.
- Click the “Continue” button.
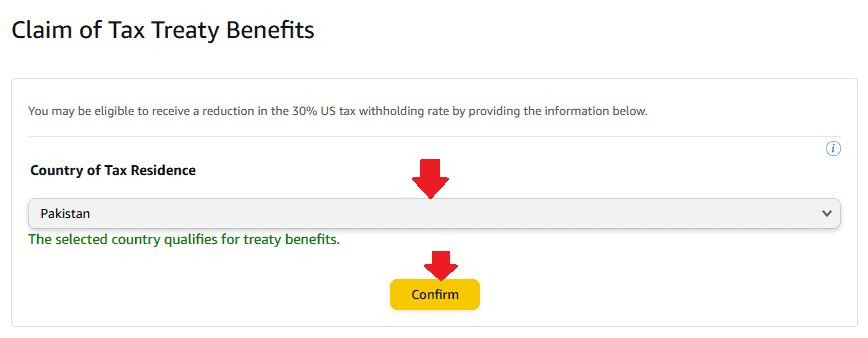
- Pakistan will already be selected in the “Country of Tax Residence“. If it is not selected already, choose “Pakistan” from the dropdown list. You will also see a message “The selected country qualifies for treaty benefits“. It means that you are exempted from paying US taxes.
- Click “Confirm” button.
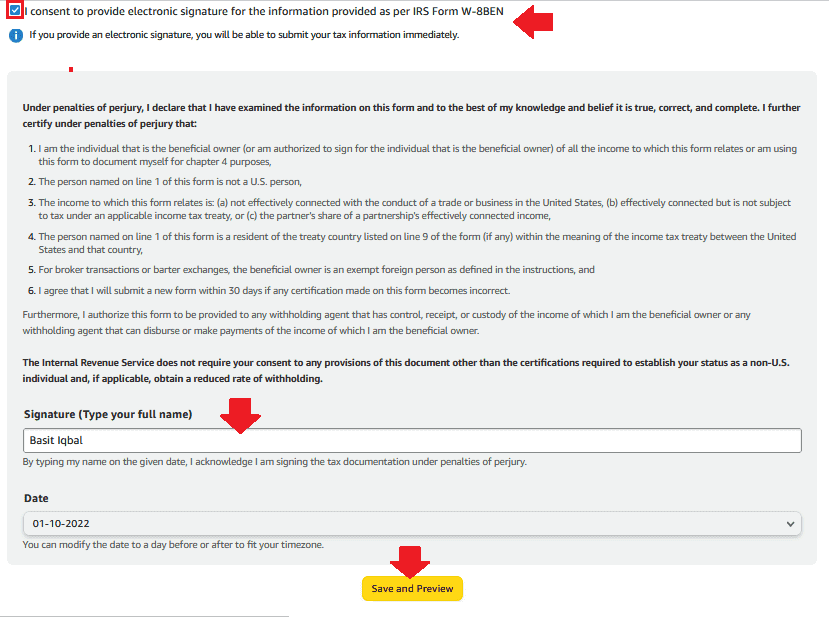
Here you will be asked to sign the W-8BEN form. Form W-8BEN is required to submit by foreign persons i.e. investors, freelancers, affiliate marketers, etc, who receive certain types of income/payments from United States.
- Tick “I consent to provide electronic signature for the information provided as per IRS Form W-8BEN“.
- In “Signature (Type your full name)” enter your Full Name. Your name will be used as electronic signature.
- Click “Save and Preview” button.
- This is how your W-8BEN Form looks like. All your information will be filled automatically.
- Scroll down to bottom of the page and Submit the form, as shown in the next step.
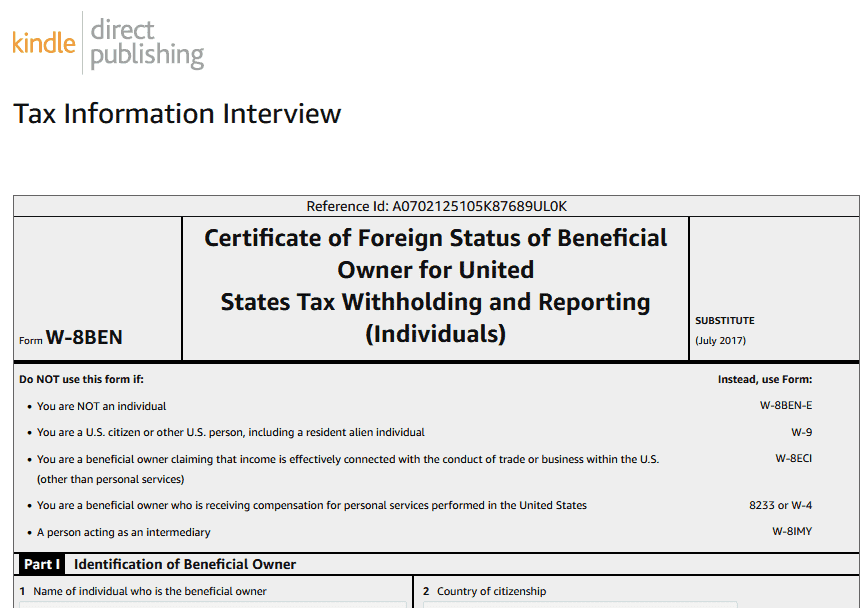
- Click the “Submit Form” button.

- Here you can see that the Tax Information has been successfully Validated.
- Click the “Exit Interview” button.
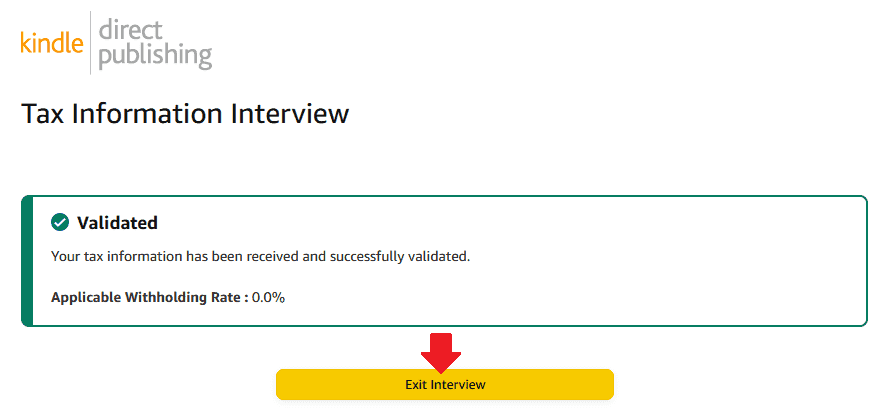
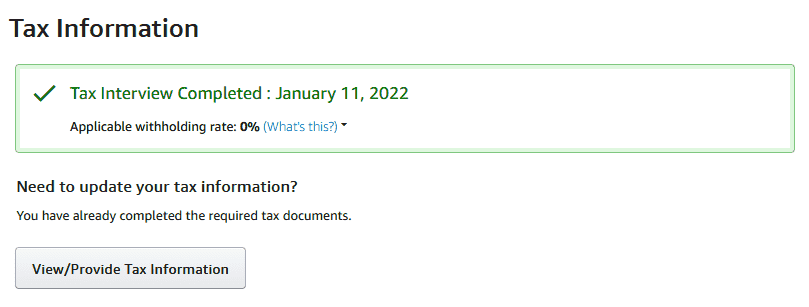
- After Validating your Tax Information it will tell you that your Tax Interview Completed. Now you have completed all the settings of your Amazon Kindle Direct Publishing Account.
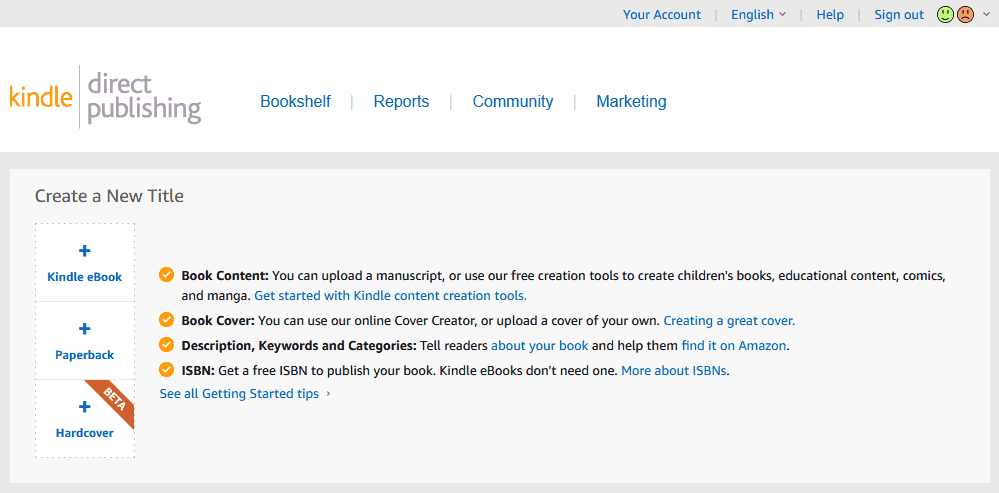
This is how your Amazon Kindle Dashboard looks like:
- On top there is a “Your Account” link. You can edit your Amazon Kindle Account information.
- There are 4 Main Menus (1) Bookshelf (2) Reports (3) Community (4) Marketing.
- In Bookshelf section you can create your new Kindle books. You can also view your published Kindle books.
- In Reports section you can view Sales Dashboard, Payments, Pre-orders, Promotions, Ad Campaigns, etc.
- In Community section you can find help and suggestions from accomplished Authors and Writers.
- In Marketing section you can find Marketing Resources, like KDP Select, Amazon Ads, Author Central, A+ Content, Run a Price Promotion, etc.
06. How To Publish Your eBook On Amazon Kindle
I have created a separate tutorial to guide you on How to publish your eBook on Amazon Kindle Direct Publishing account.
Final Thoughts
So it was all about creating an Amazon Kindle Direct Publishing Account from Pakistan. Amazon Kindle is a great platform for selling your eBooks to millions of readers worldwide, and make passive income online from Pakistan, so don’t miss this super opportunity.
If you like this post then don’t forget to share with other people. Share your feedback in the comments section below.
Also Read
- How To Earn Money From Amazon In Pakistan
- How To Create Amazon Seller Account From Pakistan
- How To Earn Money From Amazon Associates/Affiliate
- How to Apply for Amazon Music Affiliate Program
- How To Create Daraz Seller Center Account | 4 Types
- How to Create Amazon Seller Account in Saudi Arabia KSA
- Helium 10 Review: Best Amazon Seller Tool


Leave a Reply