Do you want to create a link to jump to specific part of a page on Blogger? You’re in the right place.
The Jump link is created to directly access the topic or content without scrolling the page. You can use Jump Links on Blogger pages to (1) Link the Table of Contents to its chapters/topics with their corresponding sections/topics (2) Refer/direct your readers to read a topic or piece of a content within the page from a specific position.
Following topics will be covered in this post:
- How to Create HTML ID Attribute for HTML Tags
- How to Create a Jump Link on Blogger
RELATED
01. How to Create HTML ID Attribute for HTML Tag
The HTML ID attribute is used to specify a unique ID for an HTML element/tag. Before you create a Jump Link you must create an HTML ID for the section where your link will jump to.
In the following steps, I have guided you on how to create an HTML ID attribute for H2 heading “Finding a New Style” on the Blogger Post Editor. Similarly you can add HTML ID for any HTML tag like <div>, <span>, etc.
- Click the Edit (Pencil) icon located at top-left corner.
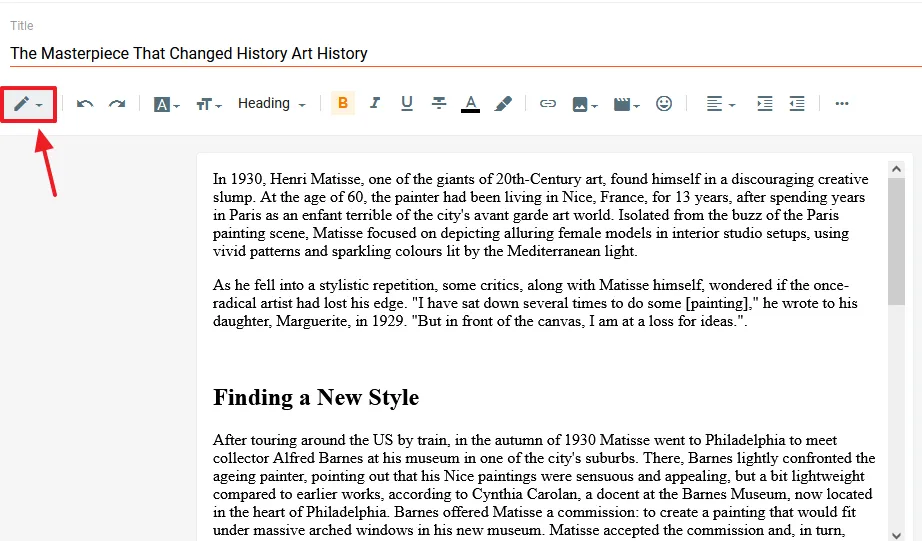
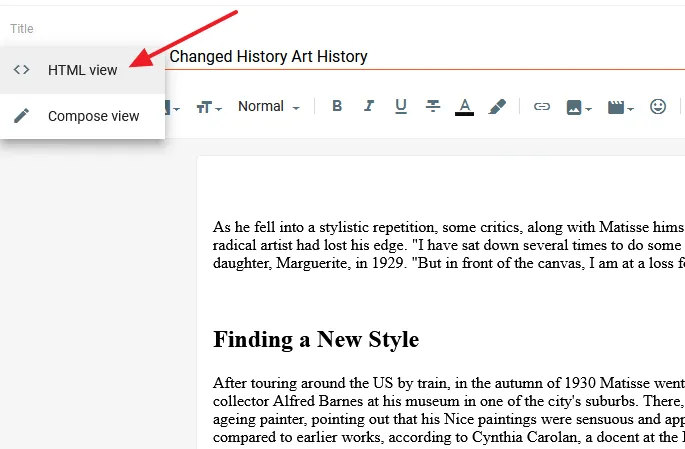
- There are two Views of Blogger Editor i.e. HTML view and Compose View. The Compose view is the default view of Blogger Post Editor where you compose/edit posts and pages.
- Click the HTML view to open the HTML view/code of your page/post.
- Add the HTML ID attribute to your desired HTML tag. Here I have added the HTML ID attribute “find-style” in heading <h2>. You can name anything to HTML ID attribute. It is better to add a relevant name.
- Update the post after adding your HTML ID attribute.
<h2 class="Default" id="find-style" style="text-align: left;">Finding a New Style</h2>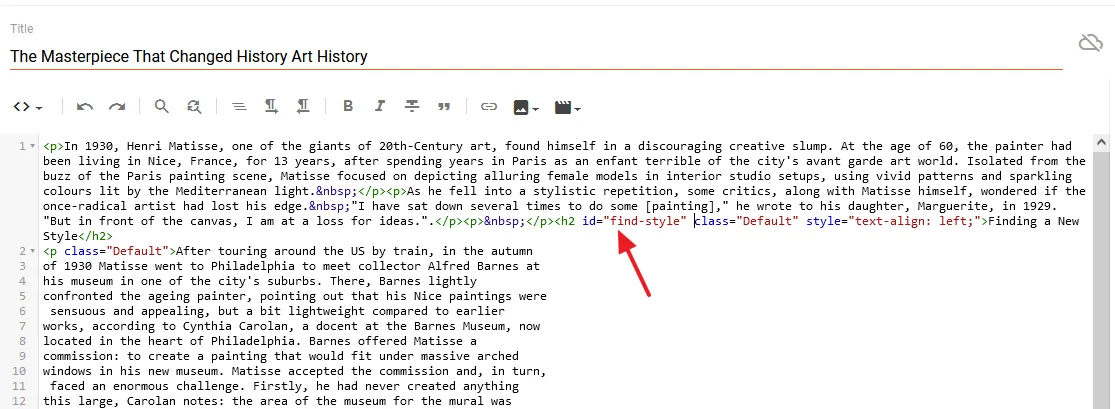
02. How to Create a Jump Link on Blogger
In the above section, I have guided you on creating an HTML ID attribute, now in this section, I will guide you on how to create a Jump Link using the HTML ID attribute.
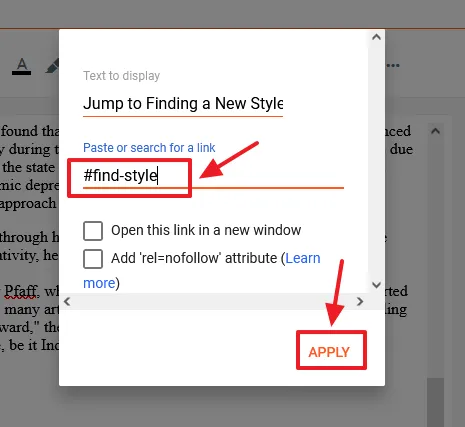
- Select the text that you want to make a Jump Link.
- Click “Insert or Edit Link” icon from the Blogger HTML Toolbar.
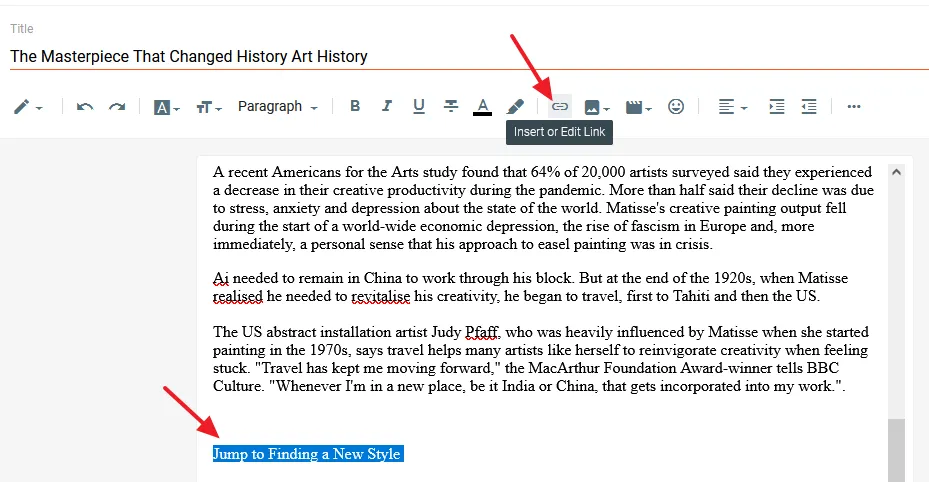
- On “Paste or search for a link” enter the HTML ID attribute by adding the “#” symbol before it, like this #find-style.
- Don’t tick the checkbox that says, “Open this link in a new window“.
- Click APPLY.
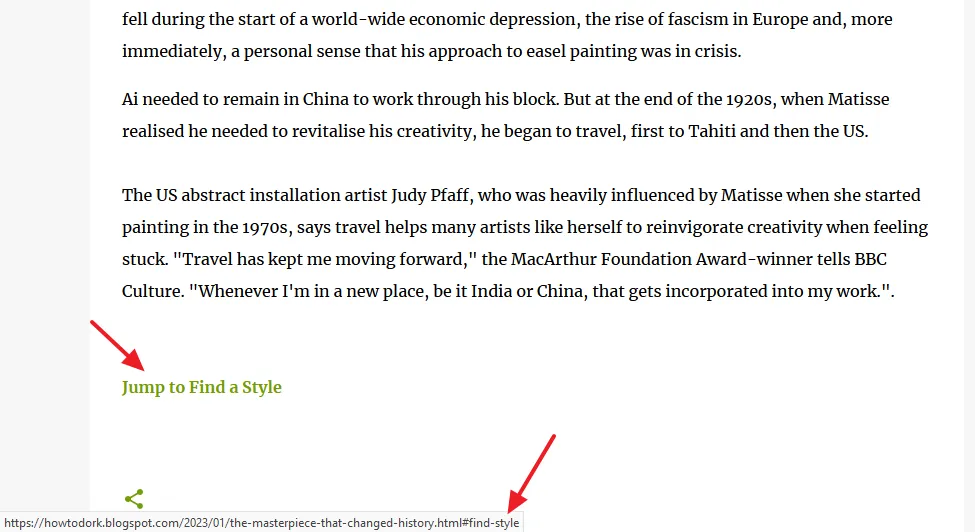
Now Update/Publish your post and test your link whether you can jump to specific part of your page or not.
If you like this post then don’t forget to share with other people. Share your feedback in the comments section below.




Leave a Reply