Do you want to install EasyPHP Devserver on Windows? You’re in the right place.
In this tutorial, I will guide you step-by-step on how to download EasyPHP Devserver to your computer, how to install & run EasyPHP Devserver on Windows, how to show hidden databases on phpMyAdmin, and how to run a site on EasyPHP Devserver.
EasyPHP Devserver is a light-weight and easy-to-use open-source web development platform to build and run dynamic PHP-powered websites, locally on your computer.
Following topics will be covered in this post:
- How to Download and Install EasyPHP Devserver on Windows
- How to Run EasyPHP Devserver on Windows
- How to Show Hidden Databases on phpMyAdmin
- How to Run a Site on EasyPHP Devserver
01. How to Download & Install EasyPHP Devserver
In this section, I will guide you on how to download and install EasyPHP Devserver on Windows.
- Go to EasyPHP Devserver Download Page.
- Click on the Devserver 17.0 button, located below the label for Windows 7/8/10. It will download the EasyPHP Devserver to your computer.
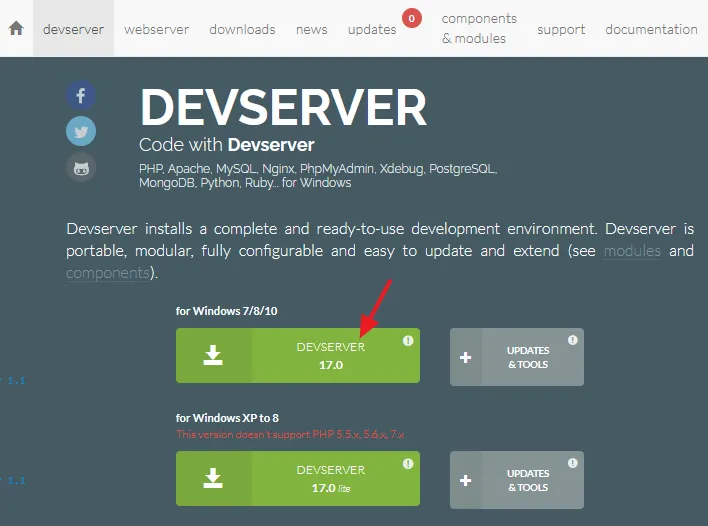
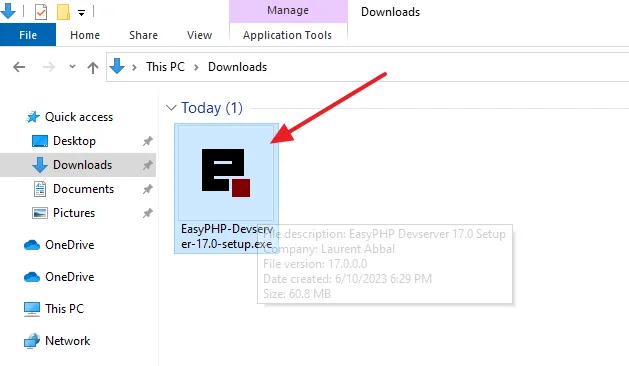
- Go to your Downloads folder and click on the EasyPHP Devserver setup (.exe file) to begin the installation.
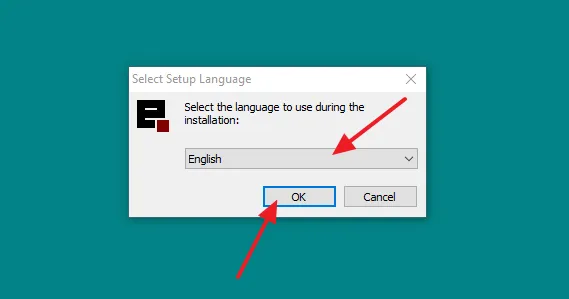
- Select your Language.
- Click on the OK button.
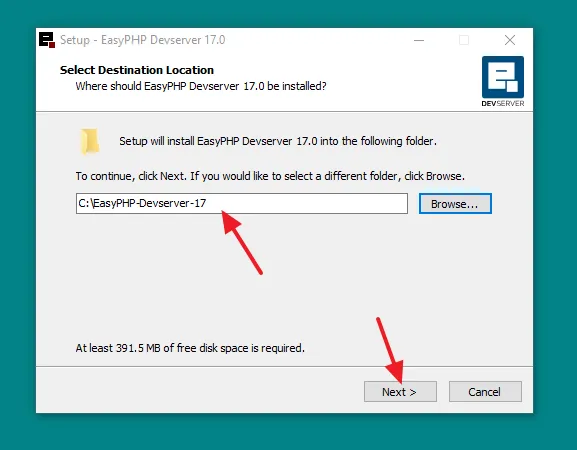
- Browse the path on your computer where EasyPHP Devserver will be installed. By default it suggests “C:/Program files (x86)/EasyPHP-Devserver-17”, but it is better to install EasyPHP Devserver on the root (top-level) directory, like C:\EasyPHP-Devserver-17.
- Click on the Next button.
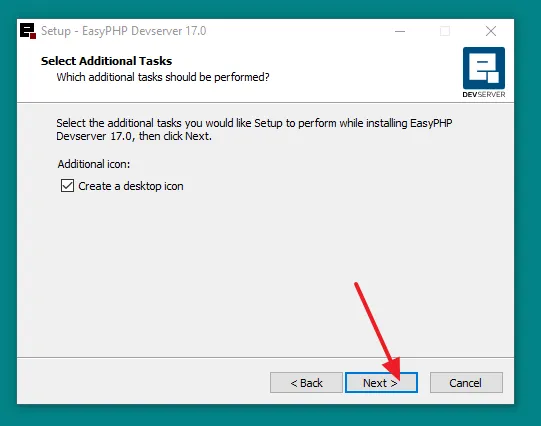
- Tick on the Create a desktop icon.
- Click on the Next button.
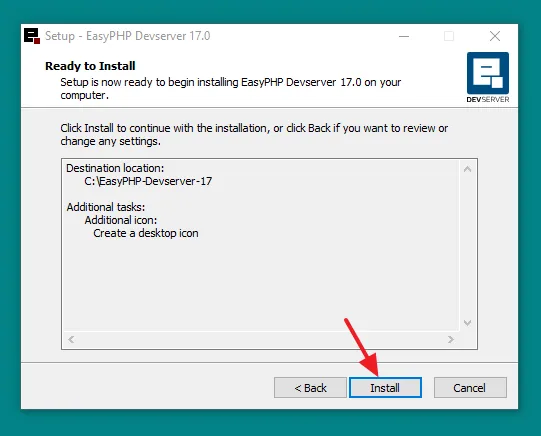
- Setup is now ready to begin installing EasyPHP Devserver on your computer.
- Click on the Install button.
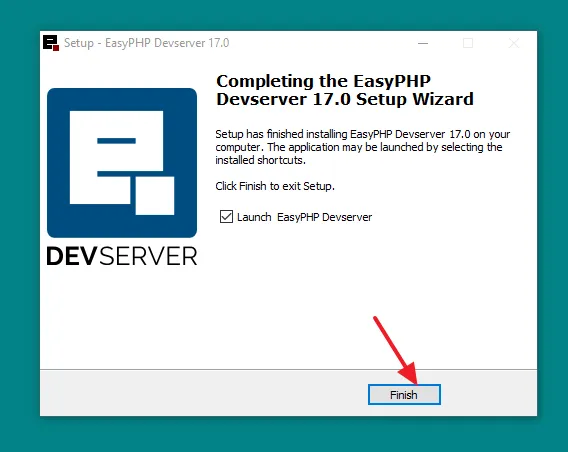
- Setup has finished installing EasyPHP Devserver 17.0 on your computer.
- Click on the Finish button.
02. How to Run EasyPHP Devserver on Windows
In this section, I will guide you on how to run EasyPHP Devserver on Windows.
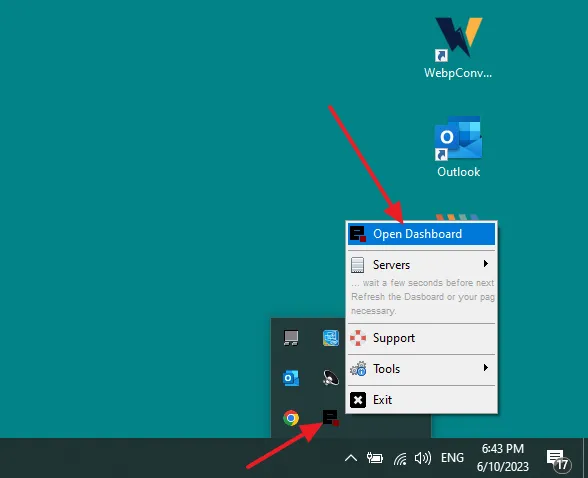
- On your Desktop, click on the Show hidden icons icon (upward arrow), located at the right side of Taskbar.
- First click on the EasyPHP Devserver icon and then click on the Open Dashboard. The dashboard opens on your browser.
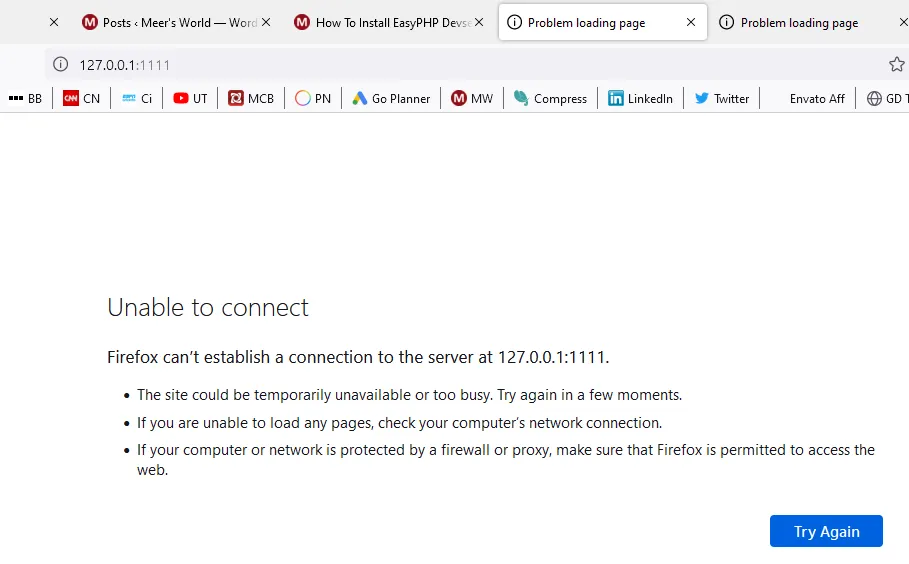
- The browser might show you this error message, “Unable to connect. An error occurred during a connection to 127.0.0.1.1111“.
- To get rid of this error, restart your computer and again open the EasyPHP Devserver Dashboard, as I have shown in the above step.
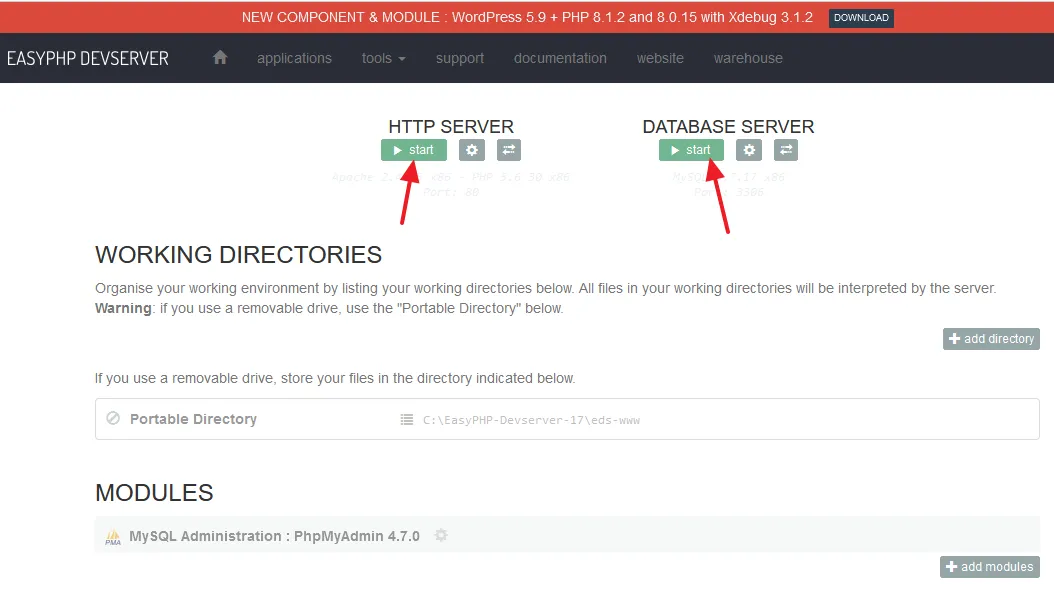
- This is the Dashboard of EasyPHP Devserver from where you can start and stop HTTP Server and Database Server. The HTTP SERVER includes Apache module and PHP, whereas Database Server includes MySQL (phpMyAdmin).
- First click on the Start button of HTTP SERVER and then DATABASE SERVER.
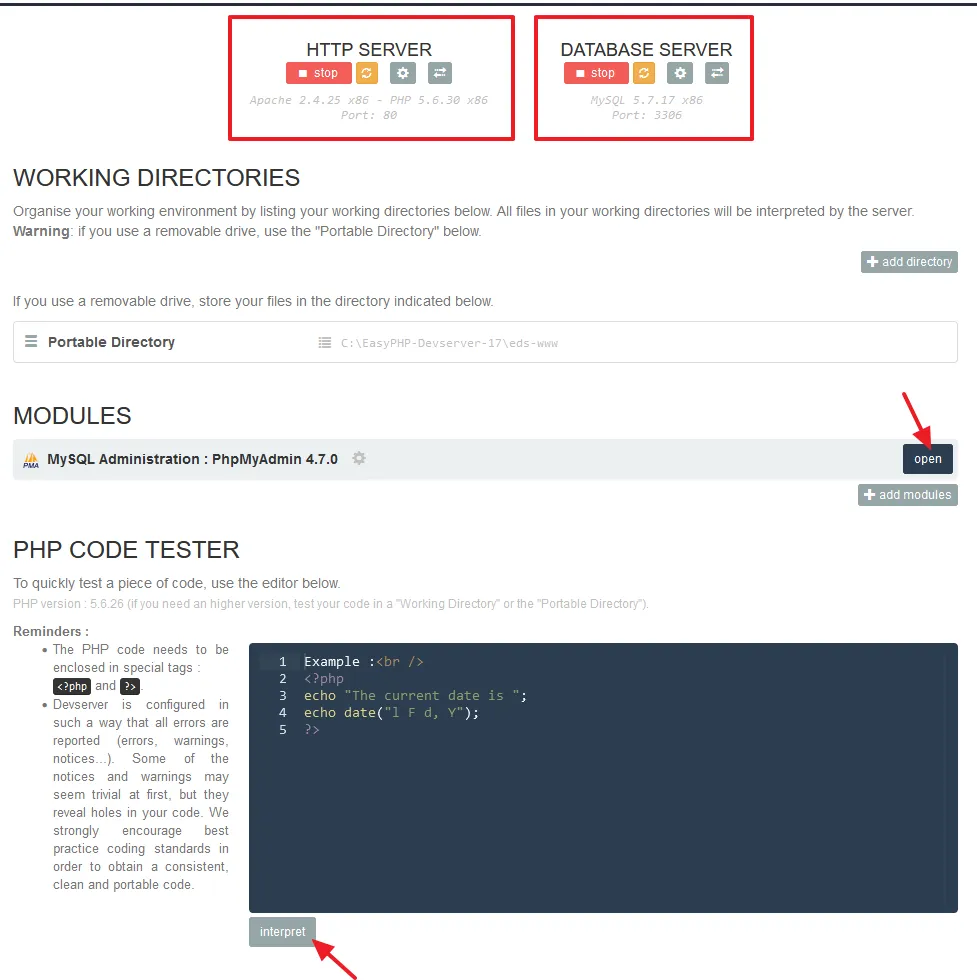
- You can see that both HTTP SERVER and DATABASE SERVER are started. The WORKING DIRECTORIES shows the sites/projects/files placed in the eds-www directory. The eds-www is a directory (web root) on EasyPHP Devserver where the data of those sites/projects are stored which are to be run on localhost.
- You can open phpMyAdmin directly from the Dashboard, located under the Modules section.
- To test a PHP code, click on the Interpret button located under the PHP Code Tester section.
03. How to Show Hidden Databases on phpMyAdmin
When you open phpMyAdmin on EasyPHP Devserver you won’t see the list of databases because they are hidden. In this section, I will guide you on how to show the list of hidden databases on phpMyAdmin.
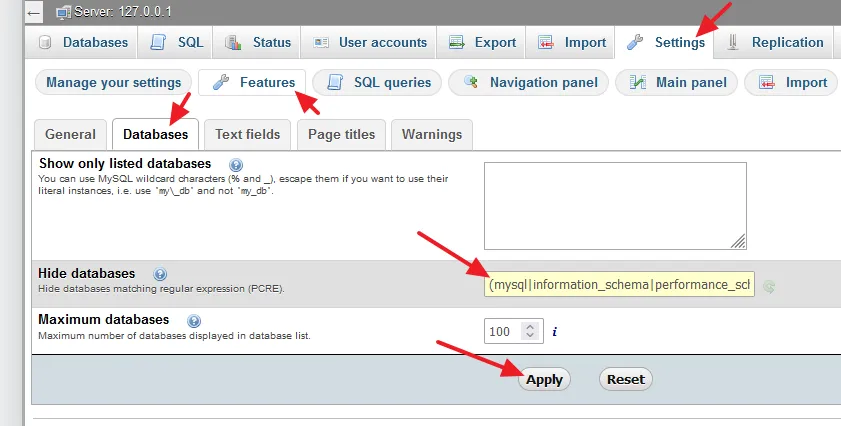
- Open phpMyAdmin from the EasyPHP Devserver Dashboard. You can directly open phpMyAdmin like this: http://localhost/phpMyAdmin.
- Go to Settings.
- Click on the Databases tab.
- Go to Hide databases section and delete the code (mysql | information_schema | performance_scl….) in the text field.
- Click on the Apply button.
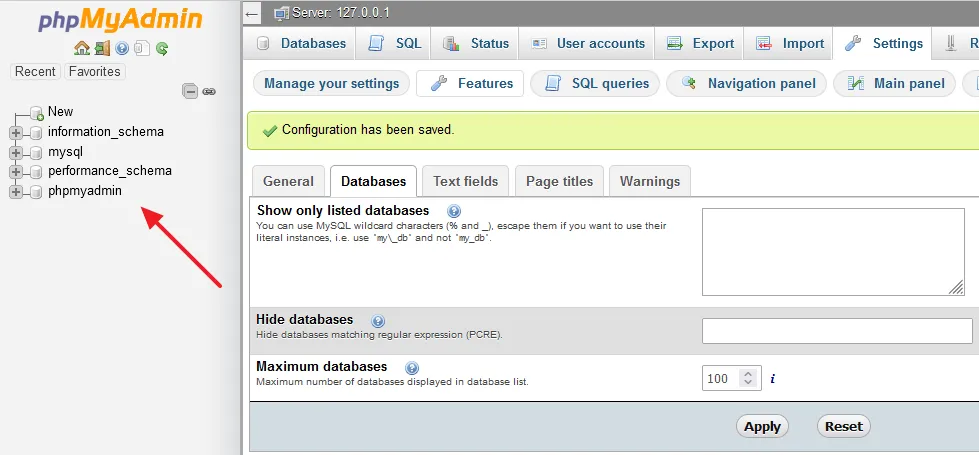
- You can see that all the Databases are listed in the sidebar.
04. How to Run a Site on EasyPHP Devserver
In this section, I will guide you on how you can run a site or project on EasyPHP Devserver.
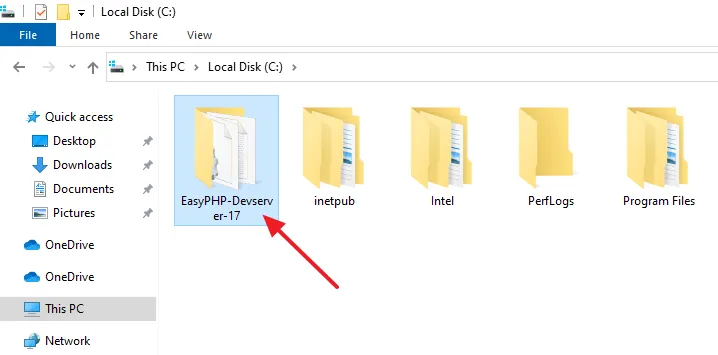
- Go to your C Drive and open the EasyPHP-Devserver-17 folder.
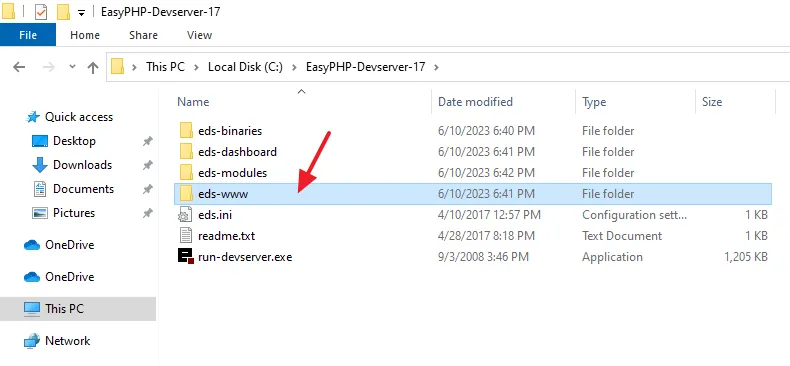
- Open the eds-www directory.
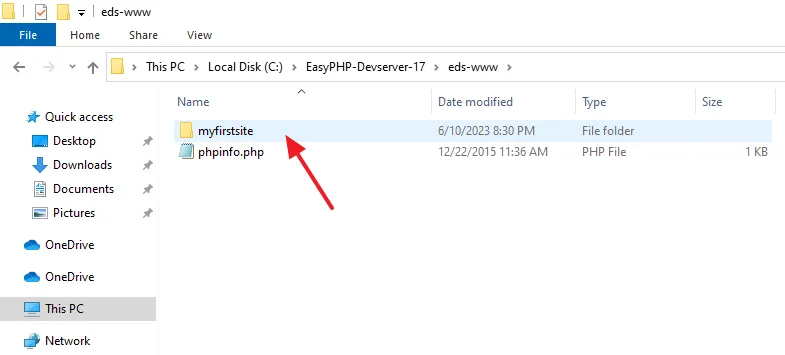
- Create a new folder in the eds-www directory. Here I have named it myfirstsite.
If you want to install WordPress or some other PHP-powered CMS, paste the extracted folder in the eds-www directory and browse on localhost to run the installer, like this: http://localhost/wordpress.
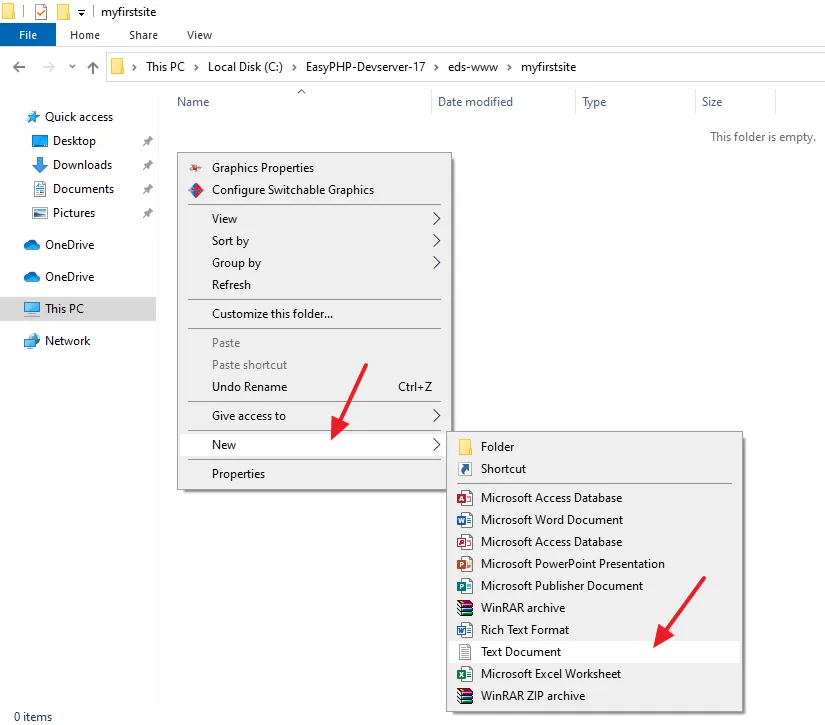
- Open the newly created folder and right-click on the white space.
- Go to New and click on the Text Document.
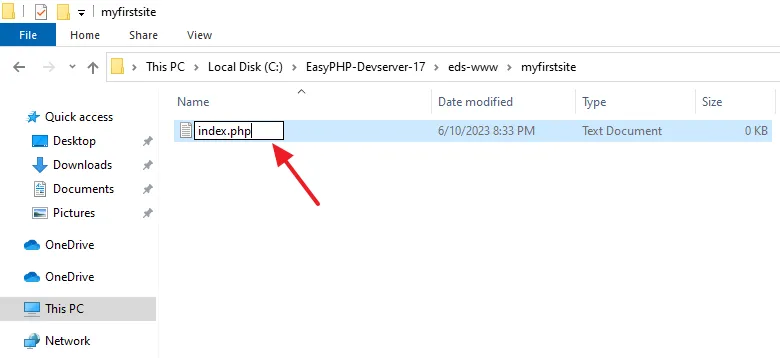
- Rename the text document to index and change its extension .txt to .php.
- Open the index.php file on Notepad and paste the below code and save it.
<!DOCTYPE html>
<html>
<body>

<h1>My First Project on EasyPHP</h1>

<?php
echo "Thanks Meer's World for guiding me to install EasyPHP on Windows!!";
?>

</body>
</html> 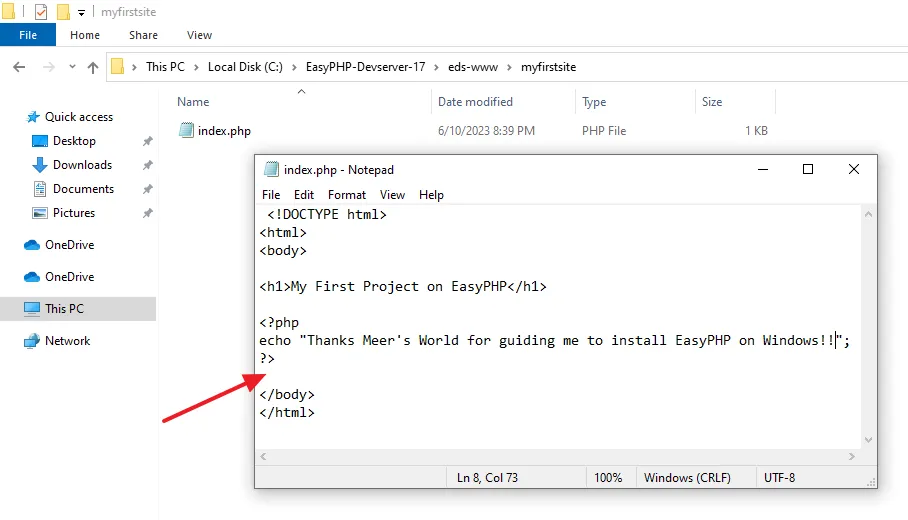
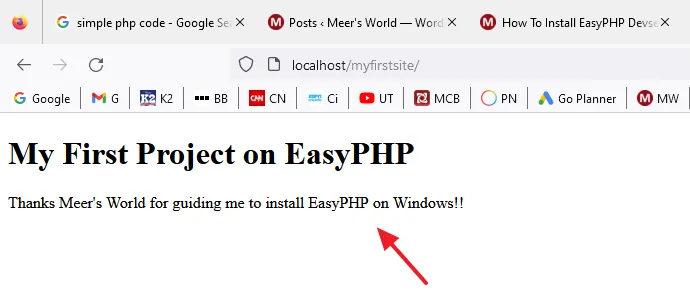
- Now browse your site on localhost like this: http://localhost/site_name, for example, http://localhost/myfirstsite. You can see that the PHP code has been executed successfully without any error on EasyPHP Devserver (localhost).
If you like this post don’t forget to share with other people. Share your feedback in the comments section below.

Also Read



Leave a Reply