Are you using the new and feature-rich Advanced WordPress Block Editor, but struggling to insert Line Break (<br>) or White Space after blocks such as “<ul>”, “<li>”, “Image”, etc? You’re in the right place.
In this tutorial, I will guide you step-by-step on how to insert Line Breaks or White Spaces in the new WordPress Block Editor using the “Spacer” block.
Line Break separates one piece of line or content with the other which leads to better page-experience for website visitors. People tend to stay on those pages which provide good page experience that ultimately improves the page rankings in search engines.
On the Classic WordPress Editor the Line Break(<br>) and Non-Breaking Space( ) would create white spaces anywhere, but they do not work in the new WordPress Block Editor, instead you can use the block called “Spacer”.
On the WordPress Block Editor when you press “Enter” it only inserts the space between Paragraphs(<p></p>), but when you want to insert white space on other places “Enter” or “Shift” + “Enter” does not work, so in that case means where “Enter” does not work you can use the “Spacer” block.
The “Spacer” also provides you the feature to adjust the height of White Space. You can set a height of your choice.
RELATED
How to Insert Line Break on WordPress Block Editor
Follow the steps to insert “Spacer” in the WordPress Block Editor:
- Move your cursor to the end of the text after which you want to insert white space. If you want to insert “Spacer” below an image select the image and hover over it, you will see the Add Block(+) icon there.

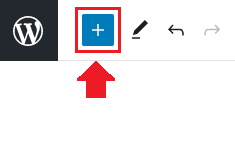
- Click on the “+” icon located at the top-left corner of WordPress Editor.
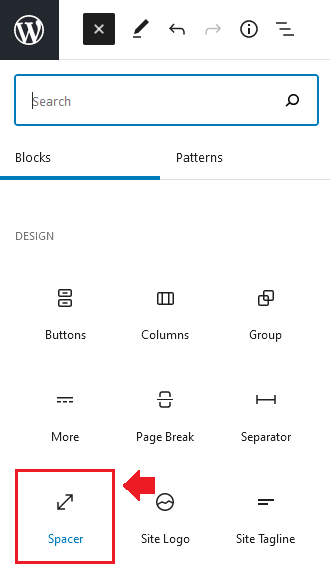
- Under the “Design” section click on the “Spacer” icon. You can find it from Search Bar as well.
- Here you can see that the “Spacer” has been inserted, I have set its height of 18px. You can increase and decrease its height. To edit or delete the “Spacer” click on the white space where you had inserted. The “Spacer” hides when you click somewhere else in the Editor.

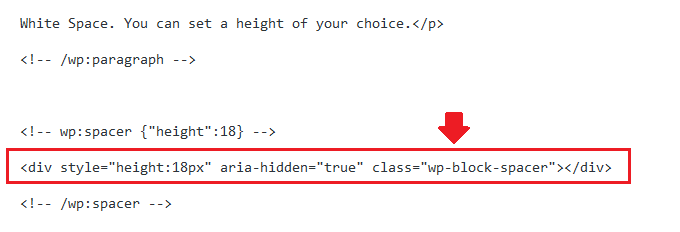
- This is the HTML code of the “Spacer”, showing this just for the information purpose.
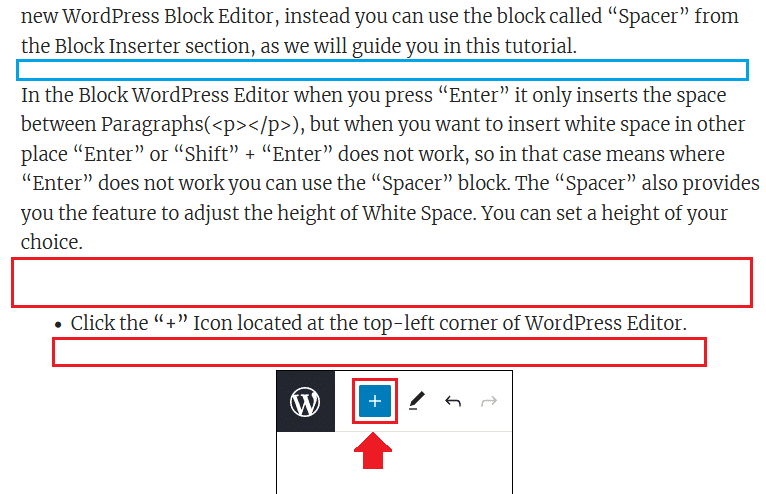
- Here is the output. The white space shown in the blue area is the normal space between paragraphs which is created when you press the “Enter”. The white spaces shown in the red areas are the spaces created by the “Spacer”.
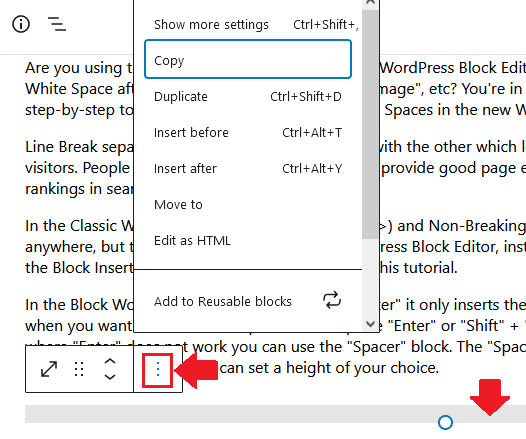
- You can Copy and Duplicate the “Spacer” as well. Select the Spacer and click the “Options” icon.
So it was all about inserting white spaces in the WordPress Block Editor using the “Spacer” block. If you like this post then don’t forget to share with other people. Share your feedback in the comments section below.

Also Read
- How To View Google Analytics In WordPress Dashboard | Site Kit By Google
- How to Fix Your Sitemap Appears to be an HTML Page | GSC
- Rest API did not Behave Correctly | Fix WordPress Block Editor
- Fixed: Updating failed. The response is not a valid JSON response
- How to Fix AdSense Ads Break Page Layout on Block Theme




Leave a Reply