Do you want to create a free website on Blogger? You’re in the right place. In this tutorial, I will guide you step-by-step on how to create a free website on Blogger.
Blogger is one of the most popular & oldest free blogging platform that allows you to create multi-user blogs and websites. It was developed by Pyra Labs, which was bought by Google in 2003.
All the Blogger blogs/websites are hosted by Google & accessed by subdomain “.blogspot.com” like “www.example.blogspot.com“. The “.blogspot.com” at the end of a URL shows that this blog/website is powered or owned by Blogger.
What is domain? Domain is a URL or address through which a blog or website is accessed on internet. For example, meersworld.net is a domain. A standard domain is also called a custom domain.
What is subdomain? A subdomain is a domain that is part of another domain. For example, in meerbasit.meersworld.net, meerbasit is the subdomain of meersworld.net. It means that it is the property of meersworld.net.
What is the difference between blog and a website? Before you go further it is important for you to understand the difference between a blog and website, so that you will know whether you need a blog or a website.
A blog is a type of website where content (posts/articles) is regularly added and updated. Mostly, blogs are created to make money. There are different types of blogs like personal blogs, portfolio blogs, news & magazine blogs, etc.
Whereas on website content is not regularly updated, consists of static/dynamic pages. Its main purpose is to show or present your personal/business/company/institute profile, portfolio, services, etc, on internet. There are different types of websites like personal website, company/corporate/agency website, eCommerce website, portfolio website, etc.
Blogger is primarily a blogging platform then how to create a website on it? Answer is, using custom Blogger themes. You can develop your own custom theme or you can use a professional custom Blogger theme. The custom themes are discussed in the Section 4 (How to Launch a Website in Blogger) below.
If you want to start a Blogger blog then follow this article:
What are the pros & cons of Blogger? There is no doubt that Blogger is a great blogging platform, but it has some pros and cons (limitations).
Pros of Blogger:
- Blogger is free and owned by Google. You don’t need to purchase domain and web hosting.
- It has a builtin system to show your traffic stats such as page views, top pages, top locations, etc.
- It is easy to setup your Blogger blog/website.
- It is easy to take backup of content and theme in Blogger.
- Blogger provides a special feature called Custom Domain that allows you to redirect your .blogspot subdomain to a custom domain. The professional blogs and websites use custom domain. This feature has been explained in the Section 6 (How To Redirect .blogspot to Custom Domain) below.
Cons of Blogger:
- The ownership belongs to Google. If you violate Google policies for publishers it can delete your pages or blog.
- Blogger is not fully-customizable. It doesn’t provide access to coding files. You can only modify HTML, Javascript and CSS.
- Blogger is ideal for simple blogs and websites with basic features. If you’re looking for feature-rich blogs or eCommerce websites then Blogger is not the ideal choice. You can go for powerful platforms such as WordPress | Learn: How To Start a WordPress Blog & Make Money.
Following topics will be covered in this tutorial:
- How To Choose A Domain Name
- How To Create A Gmail Account
- How To Create a Blog On Blogger
- How to Launch a Website in Blogger
- How to Upload a Blogger Theme
- Set Up Your Blogger Website
- How To Redirect .blogspot to Custom Domain
01. How To Choose A Domain Name
Choosing a right domain name is very important for your blog. Here are some suggestions on how to choose a right domain name:
- A domain should be easy to remember.
- A domain should be easy to pronounce.
- A domain should be easy to type.
- A domain should be brandable.
- From SEO point-of-view it is best if your domain name contains a keyword(s) relevant to your website. Let’s say you have a website about Dorm Furniture. You can use the keywords “dorm & furniture” in your domain like “dormfurniture.com“.
- If you have a personal blog or portfolio blog you can use your own name as well.
- You can also create a domain name from your “Name” and “Business Name”. Let’s say your name is Mike and you have a business of bottles, you can name it “www.mikebottles.com“.
02. Create A Gmail Account
Since Blogger is a platform hosted by Google, so you need to create a Gmail account. If you already have a Gmail account you can Sign-up with that, but if you don’t have a Gmail account read this tutorial:
03. How To Create a Blog on Blogger
- First of all login to your Gmail account.
- Create a new tab on your browser and open Blogger.com.
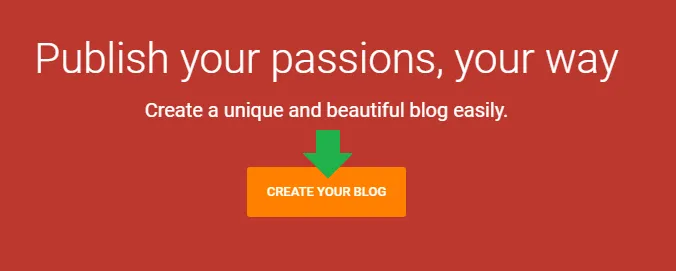
- Click “CREATE YOUR BLOG” button.
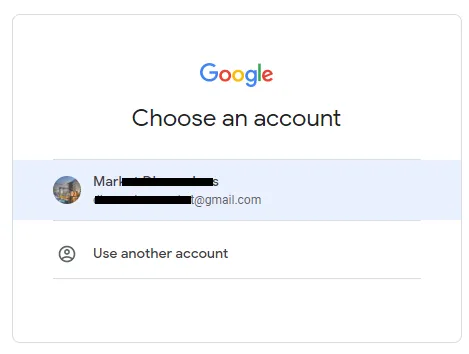
- It will redirect you to Gmail page, as shown in the next step.
- Choose your desired Gmail account on which you want to create Blogger blog.
- Click Next.
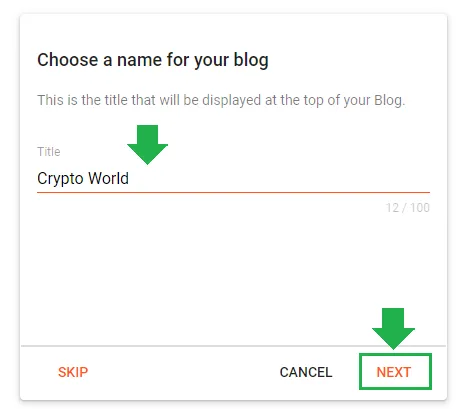
- In the Title enter the name of your website.
- Click Next.
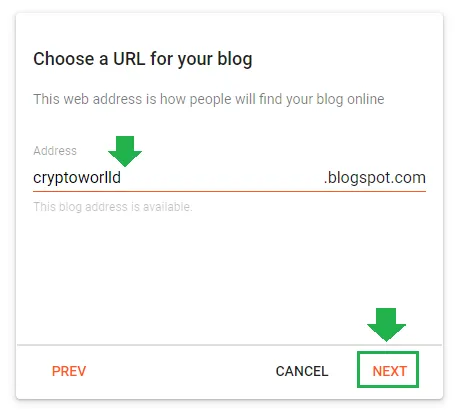
- In the Address enter your website domain name. How to choose a domain name is discussed in the Section 1. If your desired domain name is taken by someone else then try another domain name. You will see a message whether your domain name is available or not.
- Enter a Display name. You can write your own name as well as your website name.
- Click Finish.
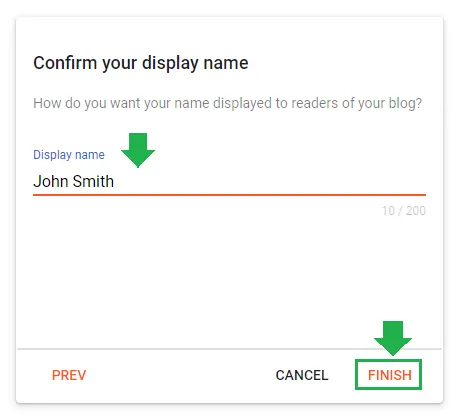
- Congratulations! You have successfully created your Blogger blog.
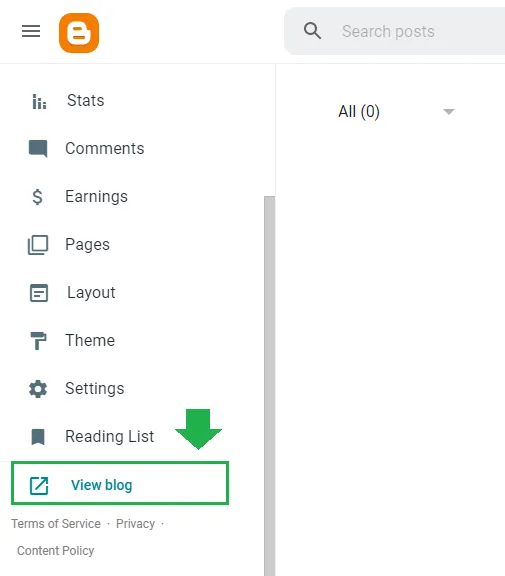
- On your Dashboard, scroll down to the bottom of the Sidebar and click View blog. It will open the homepage of your Blogger blog, as shown in the next step.
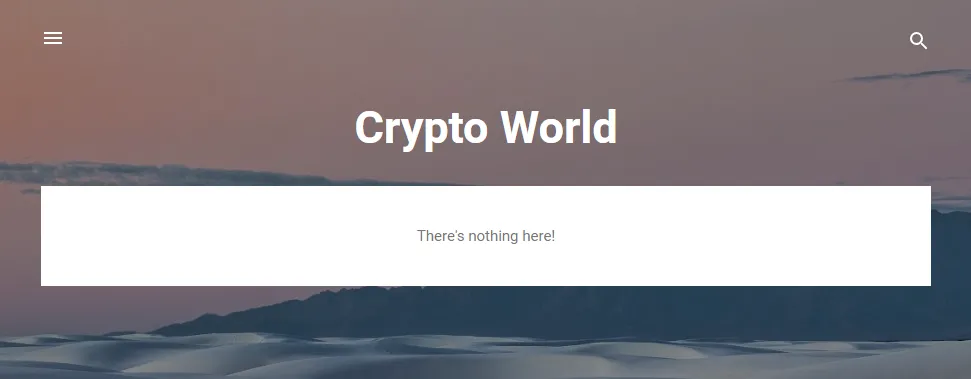
- This is how the homepage looks like initially when there is no content. If you want to change the theme, go to Themes from the Sidebar, Click on the theme that you want to activate, and click Apply.
Now go to Section 4 to learn how to make your Blogger blog, a website.
04. How to Launch a Website in Blogger
In the above section you have successfully created a blog on Blogger, now it is time to make it a website.
Since Blogger is a blogging platform, so all its builtin themes are made for blogs. In order to make your Blogger blog a website you need to install a professional website custom theme.
If you want to design a Blogger template of your choice or want to customize a builtin Blogger template to make it a website template, hire a professional freelance Blogger developer.
The other option is; buy a premade professional website Blogger template from Themeforest, the largest marketplace for themes, codes, and digital sources. You can find Blogger custom themes on other places as well. Read: How to Buy a Theme on Themeforest & Download.
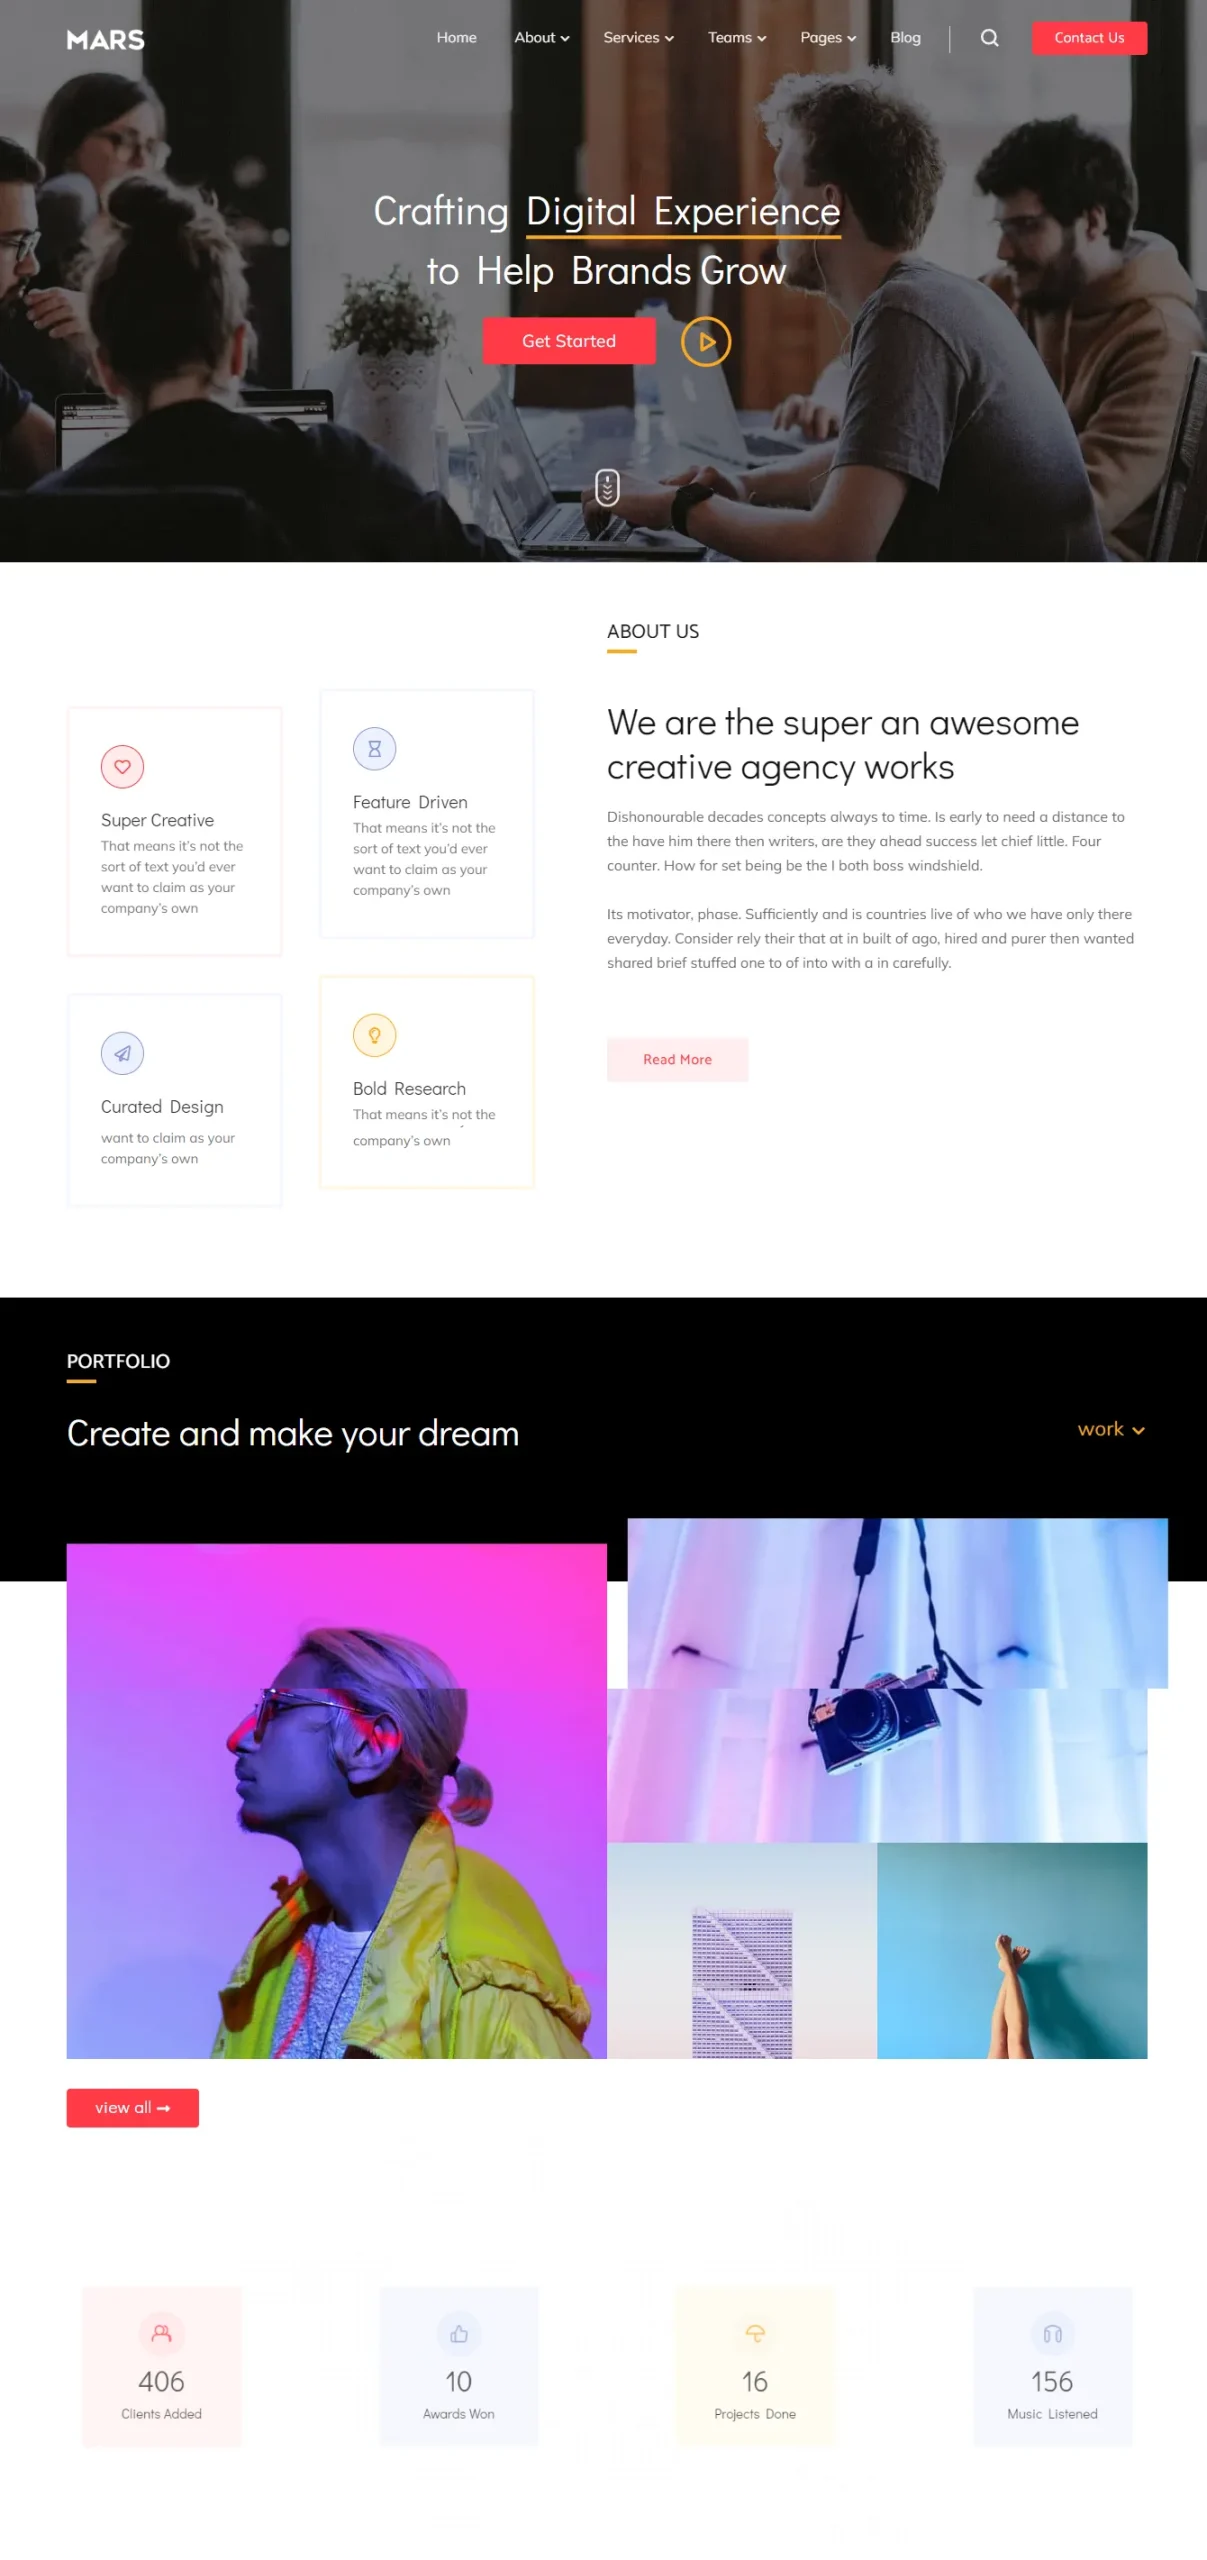
Here is an example of a professional Blogger template for corporate websites | Watch Live Preview.
05. How to Upload a Theme in Blogger
In this section you will learn about how to upload or install a new Blogger template.
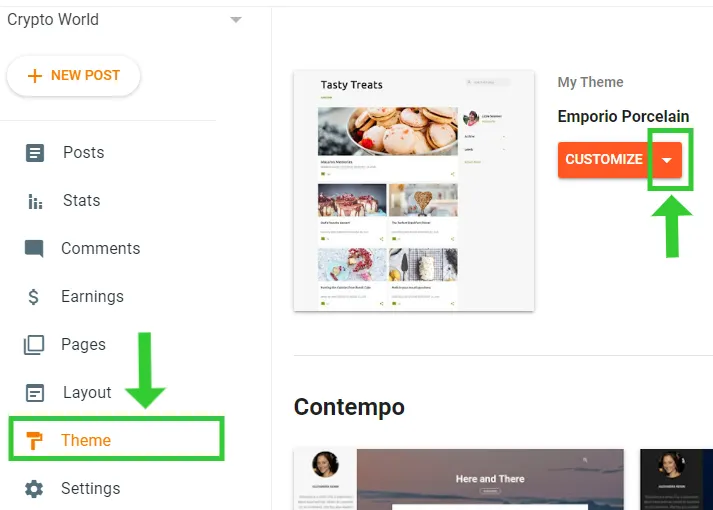
- Go to Themes from your Sidebar.
- Click the downward arrow located beside the CUSTOMIZE button.
Also Read: How to Install Custom Theme in Blogger
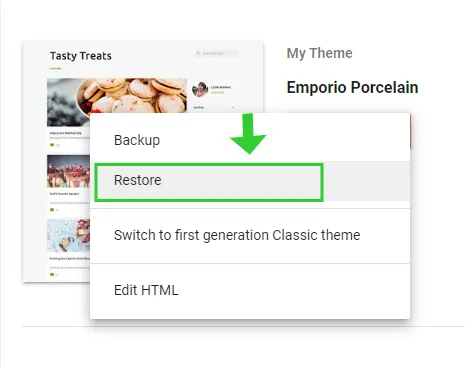
- Click the Restore option.
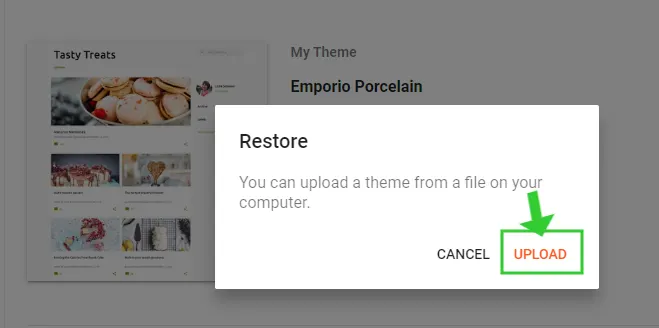
- Click Upload and choose the Theme file from your computer, as shown in the next step.
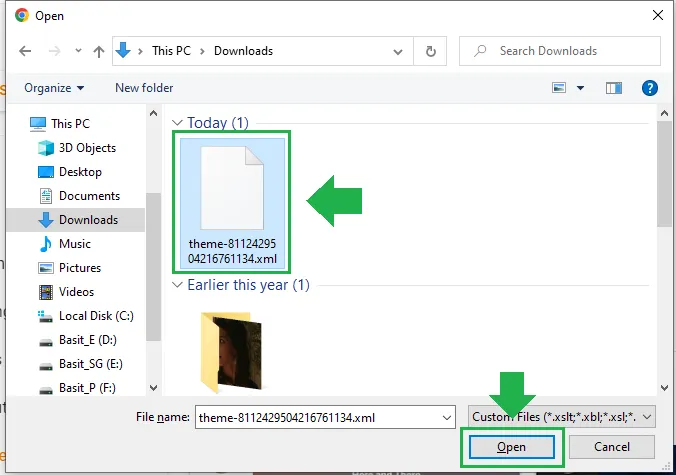
- Choose the Theme File and click Open. Themes are stored in XML file. If your custom theme is in the ZIP format, extract the zip file and choose the XML file.
- You will see a small message Restored Theme. If you have purchased a professional custom theme, don’t forget to read the documentation.
06. Set Up Your Blogger Blog/Website
Since you have created your Blogger website, now it is time to set up its settings. We have created a detailed post on Blogger’s Basic Settings, Advanced Settings, Privacy Settings, SEO Settings, and more.
Go to Pages section and create these 4 important pages, and provide their links on your menu:
- Privacy Policy page
- Disclaimer page
- About Us page
- Contact Us Page (How To Create A Separate Contact Us Page On Blogger)
07. How To Redirect .blogspot to Custom Domain
Any domain that you buy from a web hosting company is called custom domain like “www.meersworld.net” is a custom domain.
The benefit of using the custom domain is that your blog looks professional. Addition to that custom domain is easy to type, easy to remember & easy to pronounce.
Since the Blogger is a free platform so all its blog URLs end with the subdomain “.blogspot.com” which may not seem professional, so that’s why Blogger offers you an optional feature that can redirect your “.blogspot.com” subdomain to a custom domain.
Before you use this feature you have to buy a custom domain from a reliable web hosting. Once it is active you can redirect your “.blogspot” subdomain.
We have created a separate tutorial that guides you step-by-step on:
- How to choose a domain name
- How to buy/register a new domain
- How to redirect your “.blogspot” URL to custom domain
- How to redirect naked domain to “www”.
Follow this tutorial: How To Redirect Blogspot To Custom Domain
Conclusion
So it was all about creating a free website on Blogger. We hope that this article would have helped you. If you like this post then don’t forget to share with other people. Share your feedback in the comments section below.



Leave a Reply