Are you looking for showing clock widget on Blogger or WordPress website? You are in the right place. In this tutorial, I will guide you step-by-step on how to use the third-party code to show clock widget/gadget on Blogger & WordPress.
Though WordPress & Blogger do not provide the option to add clock widget, but you can use the third-party services like ClockLink that provides free HTML 5 & World clocks to display Time, Date and Clock on your blog/website.
Following topics will be covered in this tutorial:
- How to Get Clock Widget Code on ClockLink
- How to Add Clock Gadget on Blogger
- How to Add Clock Widget on WordPress
01. How to Get Clock Widget Code on ClockLink
In this section, I will guide you on how to get clock widget code on ClockLink website that you will add on your Blogger or WordPress website.
- Go to ClockLink official page.
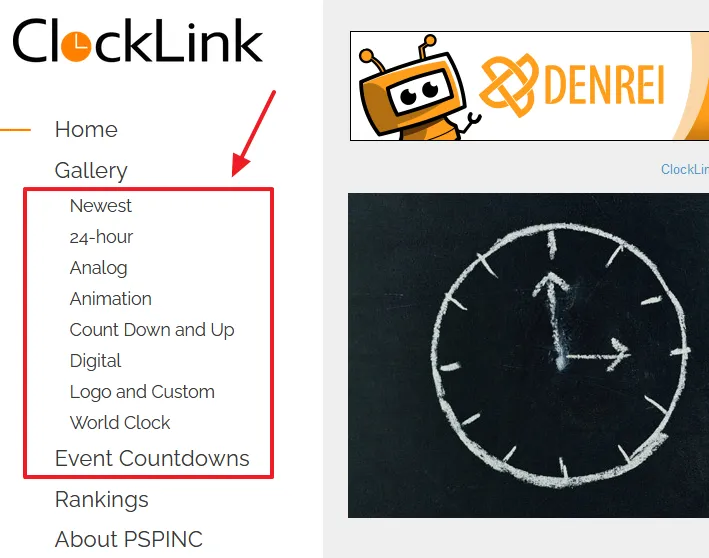
- There will be list of clock categories at your left side i.e. Newest, 24-hour, Analog, Animation, Count Down and Up, Digital, Logo & Custom, World Clock, and Event Countdowns.
- Click the category of your choice.
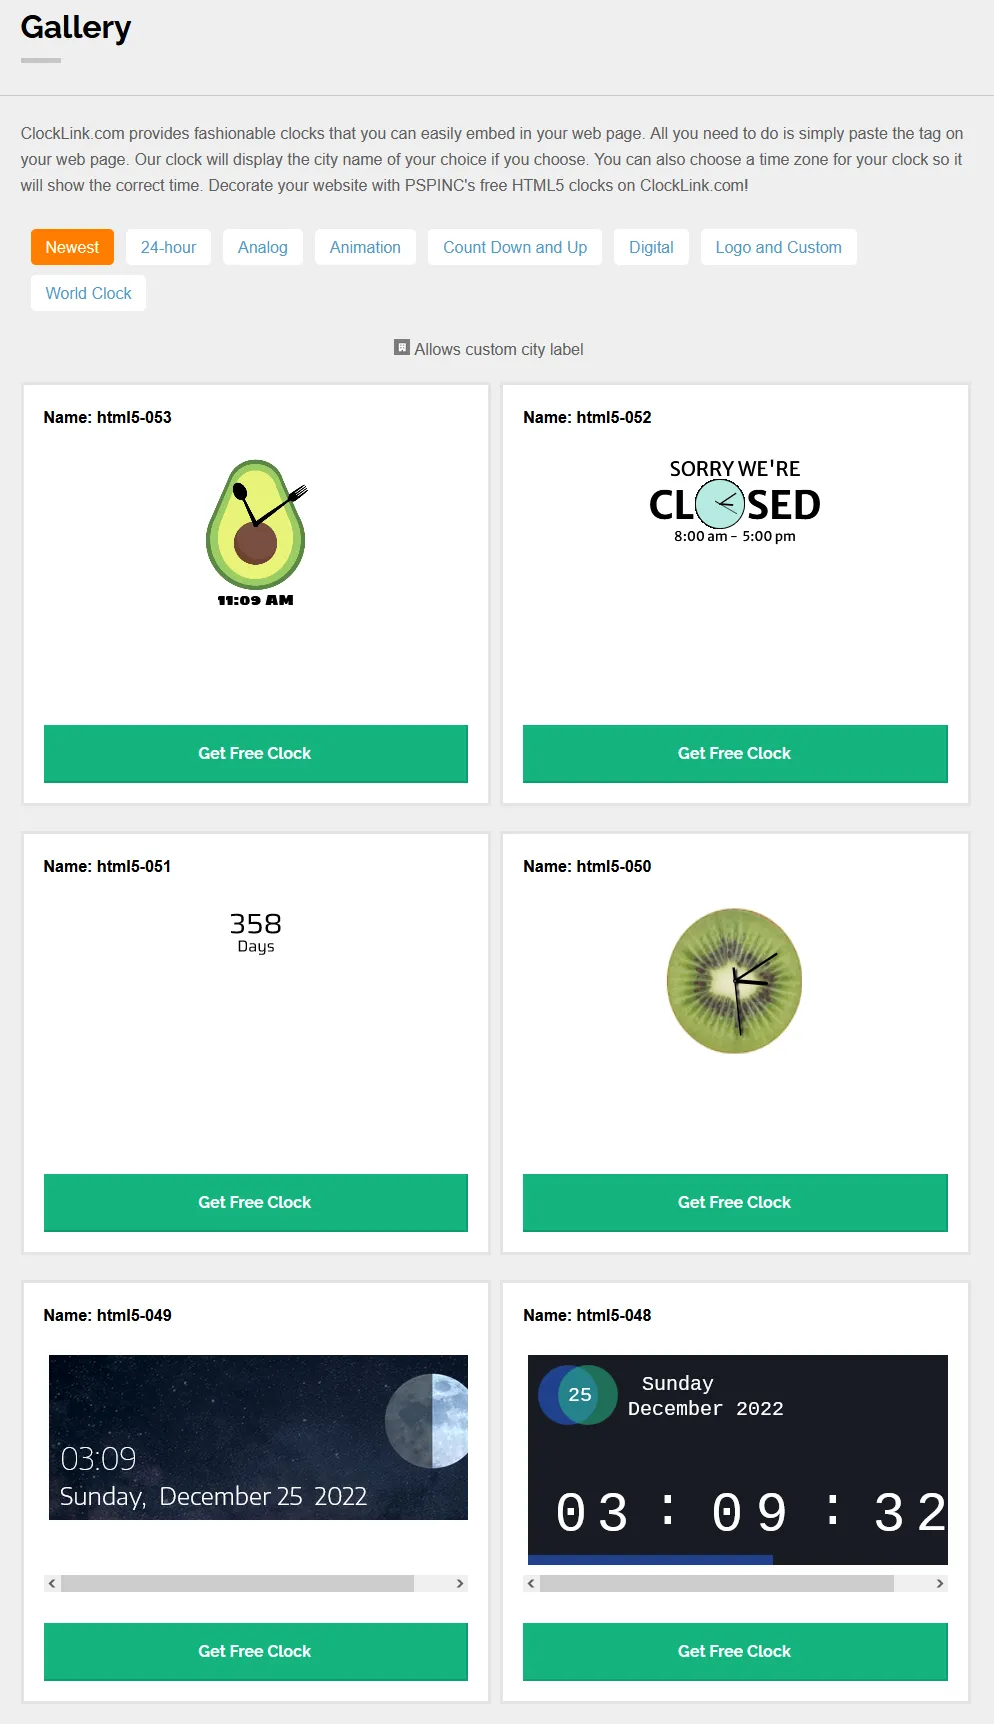
- Click the Get Free Clock button of your desired clock to get its code.
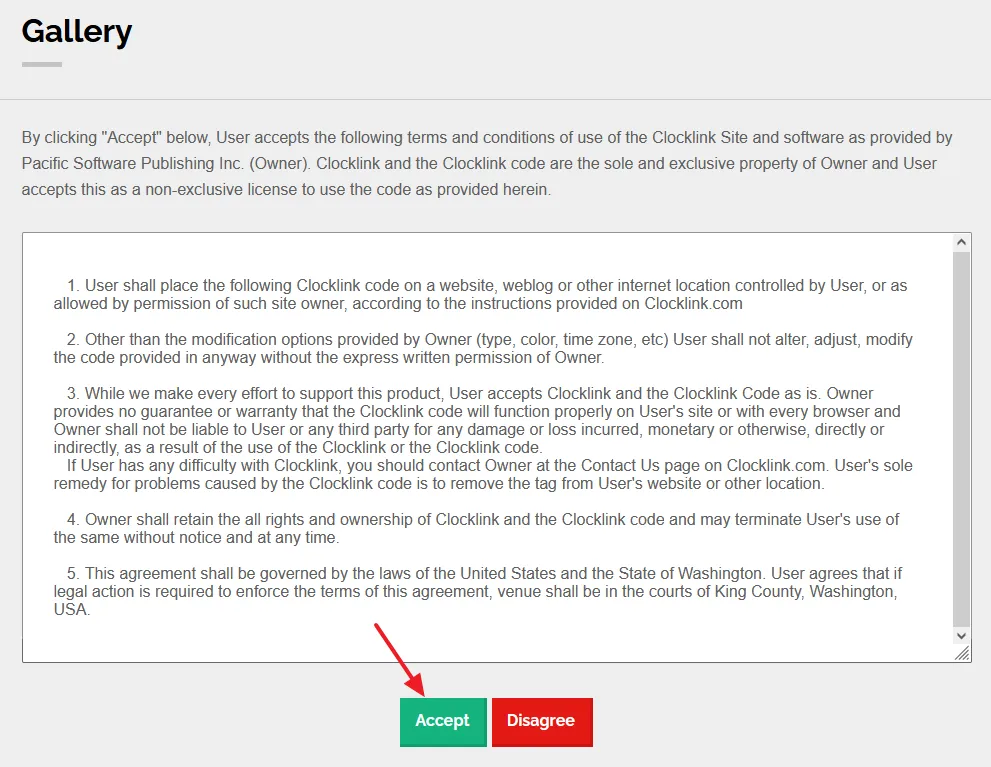
- Click the Accept button to accept the ClockLink’s Terms & Conditions.
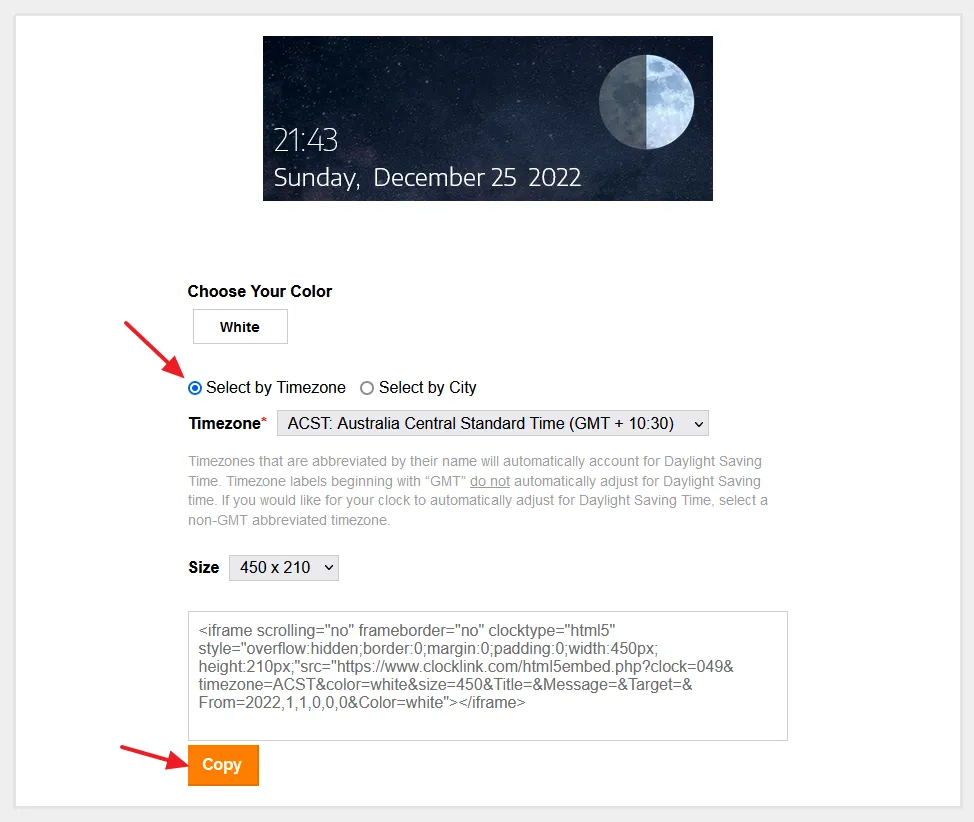
- Select your Timezone and Size.
- Click the Copy button to copy the code of the clock widget.
02. How to Add Clock Gadget on Blogger
In this section, I will guide you on how to add clock gadget on Blogger.
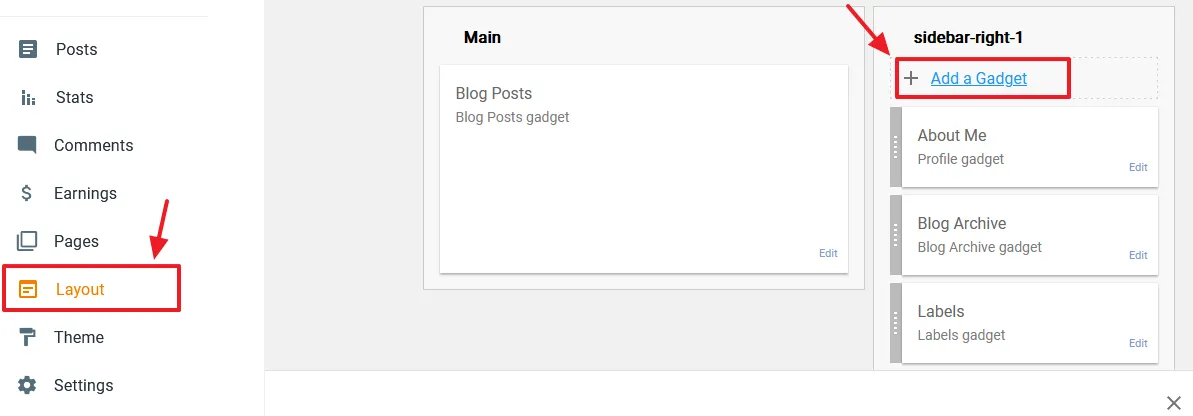
- Click the Layout from the Sidebar.
- Go to the section of Blogger Layout where you want to add the gadget. Normally it is added on the Sidebar or Header. You can also add the clock code in the HTML code of your theme.
- Click the Add a Gadget link.
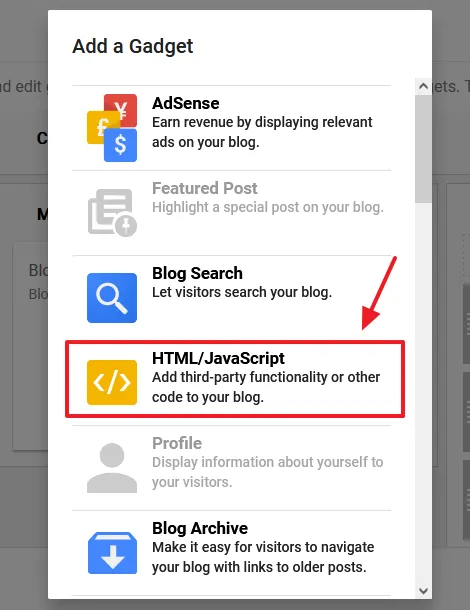
- Click on the HTML/JavaScript gadget.
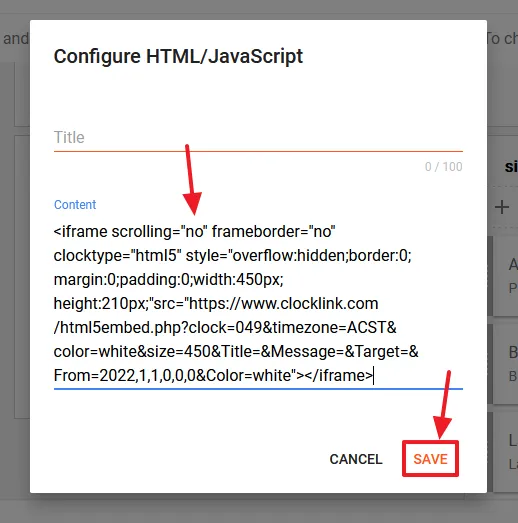
- Paste the Clock widget code in the Content textarea.
- Click the SAVE.
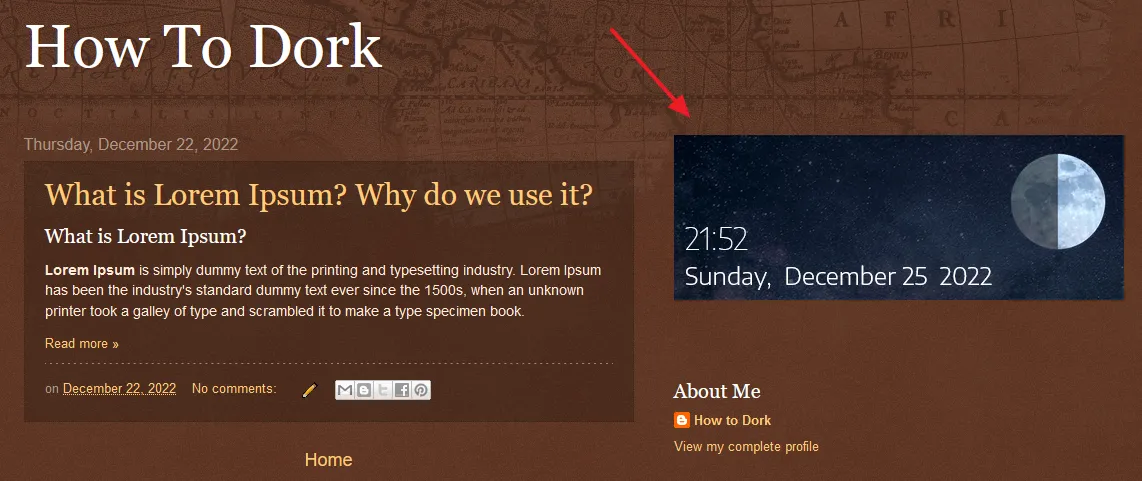
- You can see that the Clock gadget is appearing on the top of sidebar.
03. How to Add Clock Widget on WordPress
In this section, I will guide you on how to add clock widget on WordPress website/blog.
- Login to your WordPress Admin section.
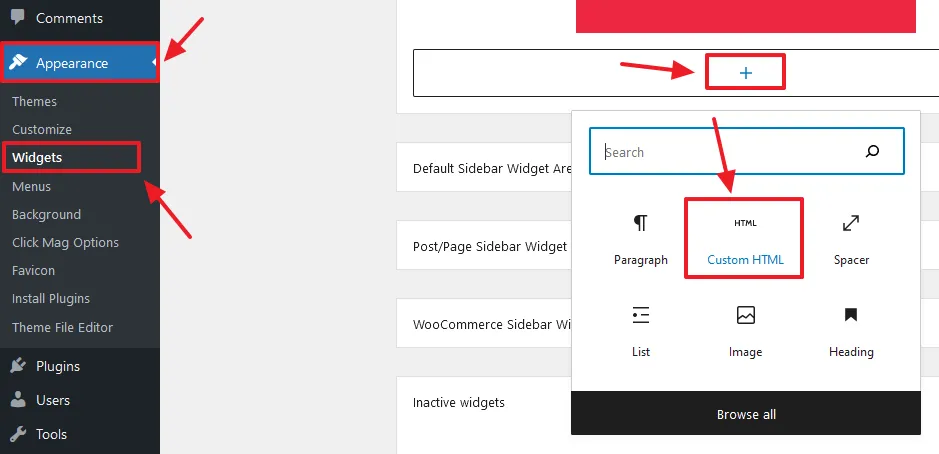
- Go to Appearance from the sidebar, and click the Widgets.
- Click the + icon of your desired section where you want to show the clock widget.
- Search for the Custom HTML in the search box and click the Custom HTML block.
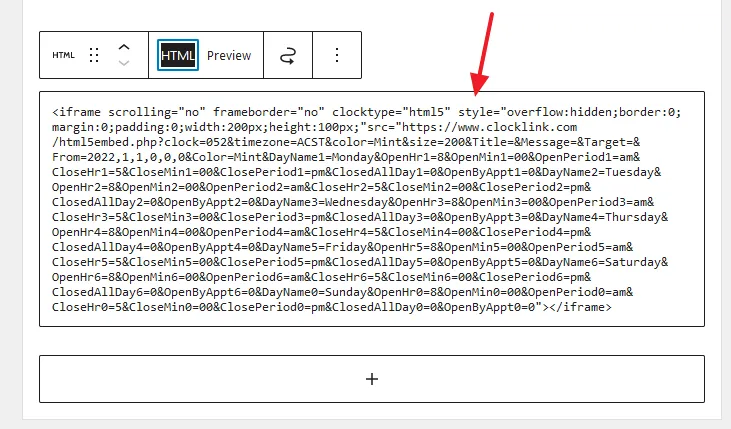
- Paste the Clock widget code that you have copied in the Custom HTML’s code area.
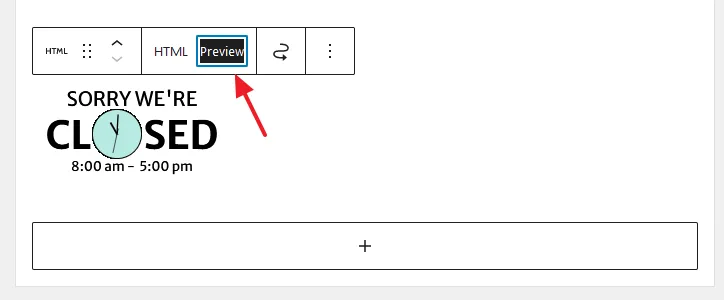
- Click the Preview option to see how the clock widget looks like.
- Click the Update button to save the changes. Open your website to see the clock widget live.
- Get access to all our Blogger Tutorials.
- If you like this post then don’t forget to share with other people. Share your feedback in the comments sections below.




Leave a Reply